


These homemade Halloween cake pops are one of my favorite treats to make when October comes around. They have a soft vanilla cake center, a sweet candy coating, and plenty of room for creativity when it comes to decorating. They're always fun to put together and require only 11 ingredients without decorations.
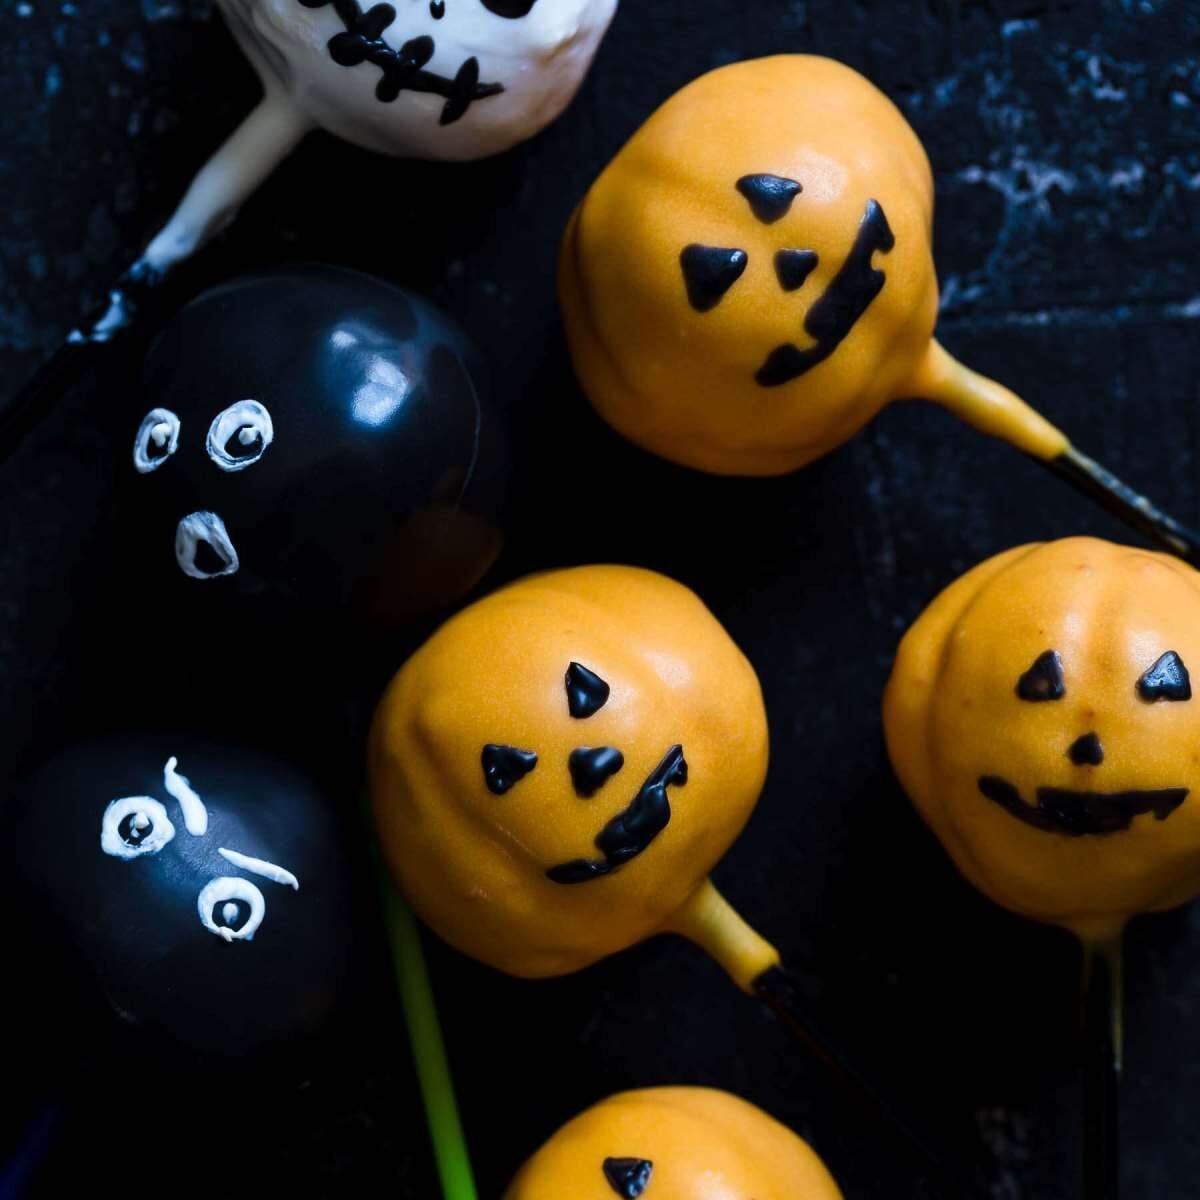
I also love that these Halloween-themed cake pops are easy to adjust for any party or gathering. There are so many Halloween cake pops ideas you can try, and the decorating makes up half of the fun. If you're looking for another spooky dessert, why not try Death-By-Chocolate Halloween Cake? Now for the recipe with step by step instructions, as promised!
Jump to:
Video Tutorial
What Makes These Homemade Halloween Cake Pops Easy?
One of my favorite things about these homemade cake pops is that you can make them as simple or as detailed as you want. A few colorful candy melts and sprinkles can make them festive, but you can also make fun Halloween characters like ghosts and monsters if you're feeling creative.
These Halloween cake pops are easy enough for beginners, and they still look amazing on a dessert table.
Why You’ll Love It
- Spooky cake pops: The decorating is easy to make it look Halloween-themed, and you only need 11 main ingredients.
- Perfect Texture: You get soft vanilla cake on the inside with a crisp candy coating on the outside.
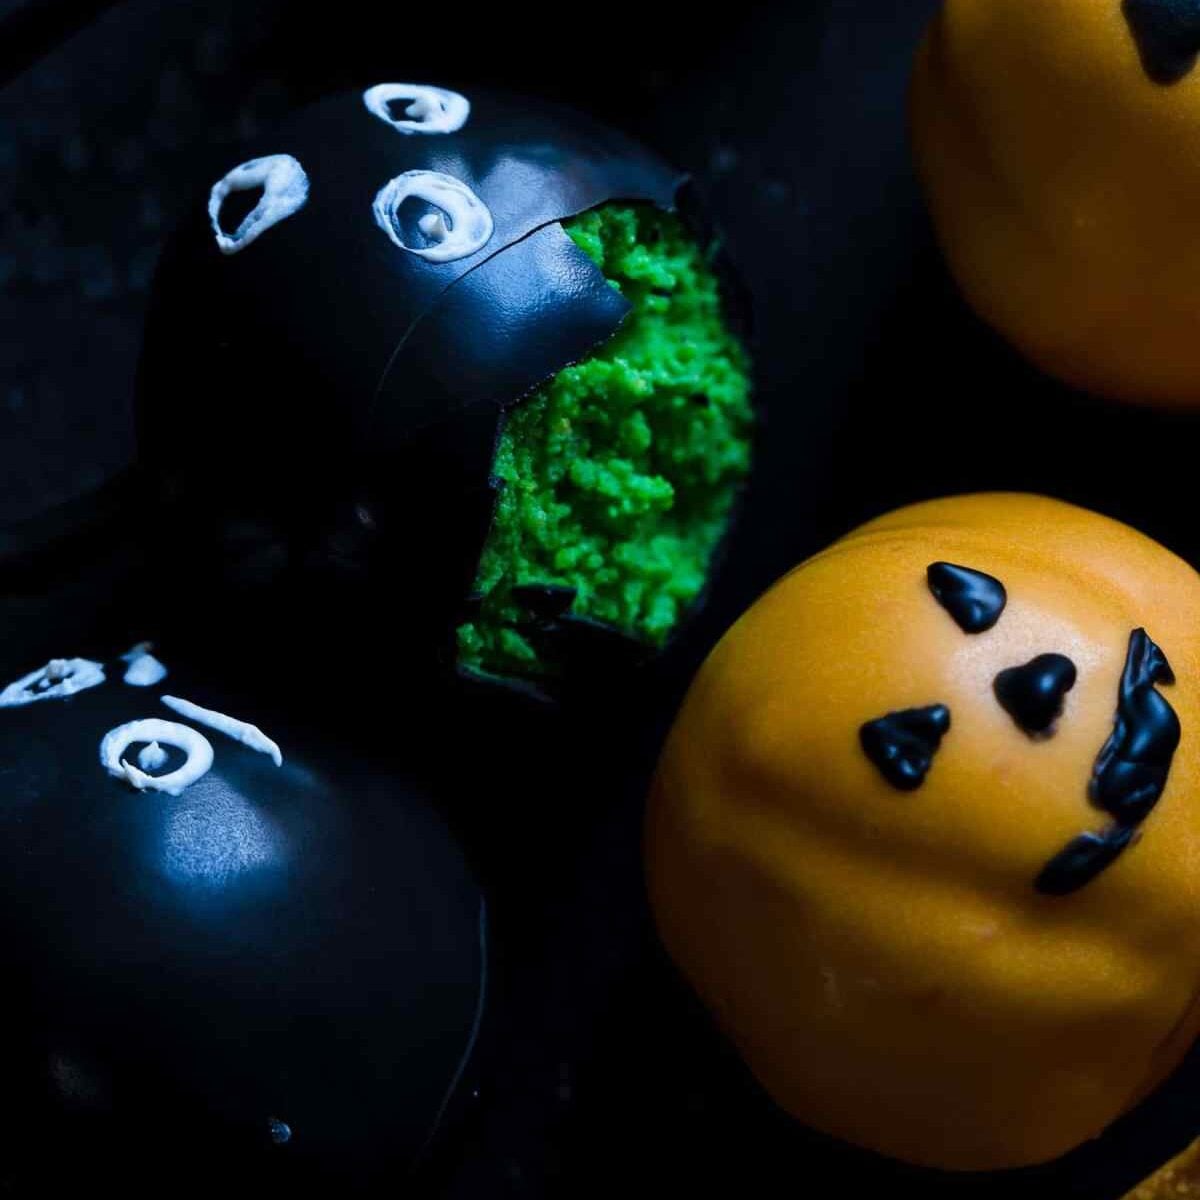
- Customizable: There are so many various Halloween cake pops ideas to match your party theme. You can use white chocolate for ghosts, or mummies, and orange candy to make Jack o lanterns.
- Great for parties: They're easy to serve and don't require plates or forks for the kiddies.
- Make-ahead friendly: You can make them in advance and store them until you want to serve them.
Ingredients
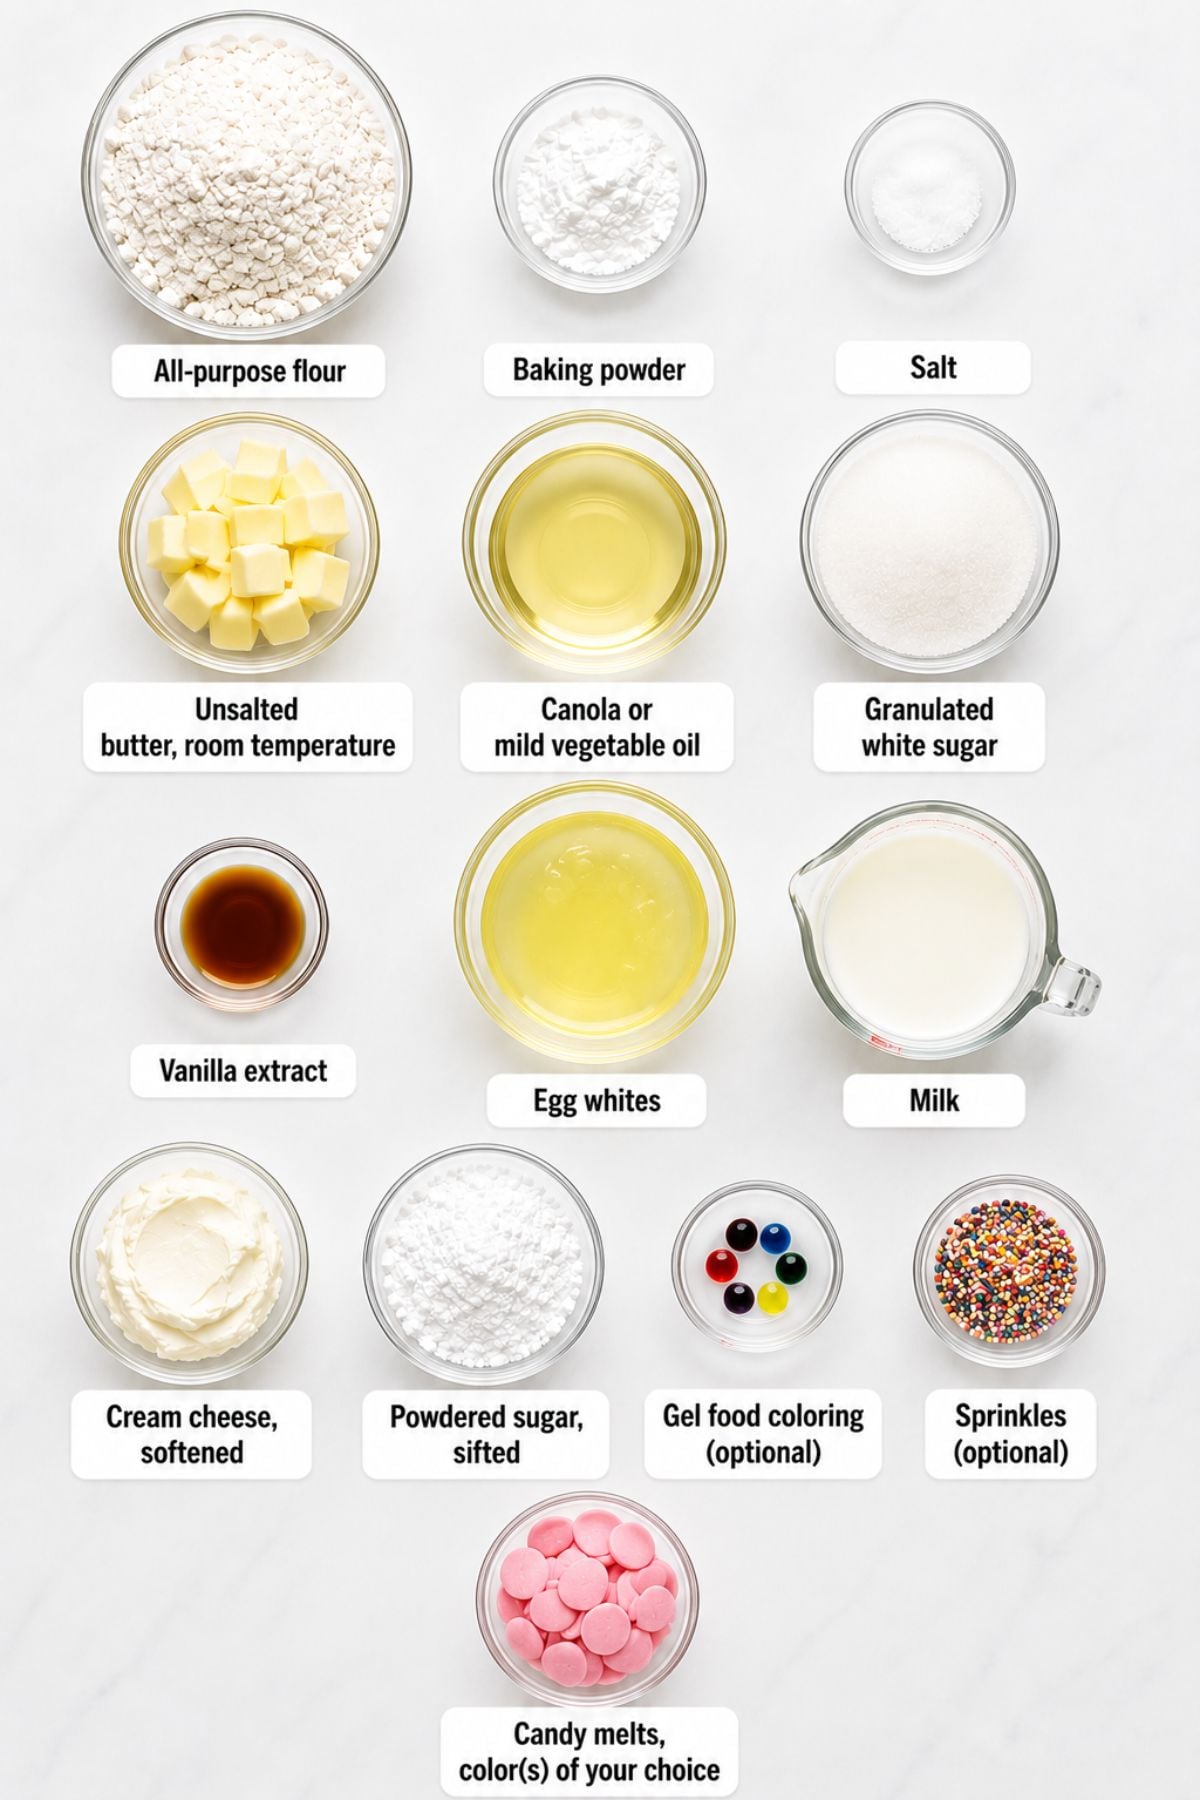
- All-purpose flour: This is what gives the cake structure and keeps it soft and tender.
- Egg whites: Used to make a lighter-colored cake that works well with Halloween decorations.
- Cream cheese: This adds richness and is what actually binds the cake crumbs together for these treats.
- Candy melts: This is how you get the colorful outer shell for the perfect Halloween treat.
- Gel food coloring: This is used to make the bright Halloween colors, and it doesn’t change the texture.
How to Make Homemade Halloween Cake Pops
1. Preheat your oven to 350°F (175°C). Line a 9x13-inch baking pan with parchment paper.
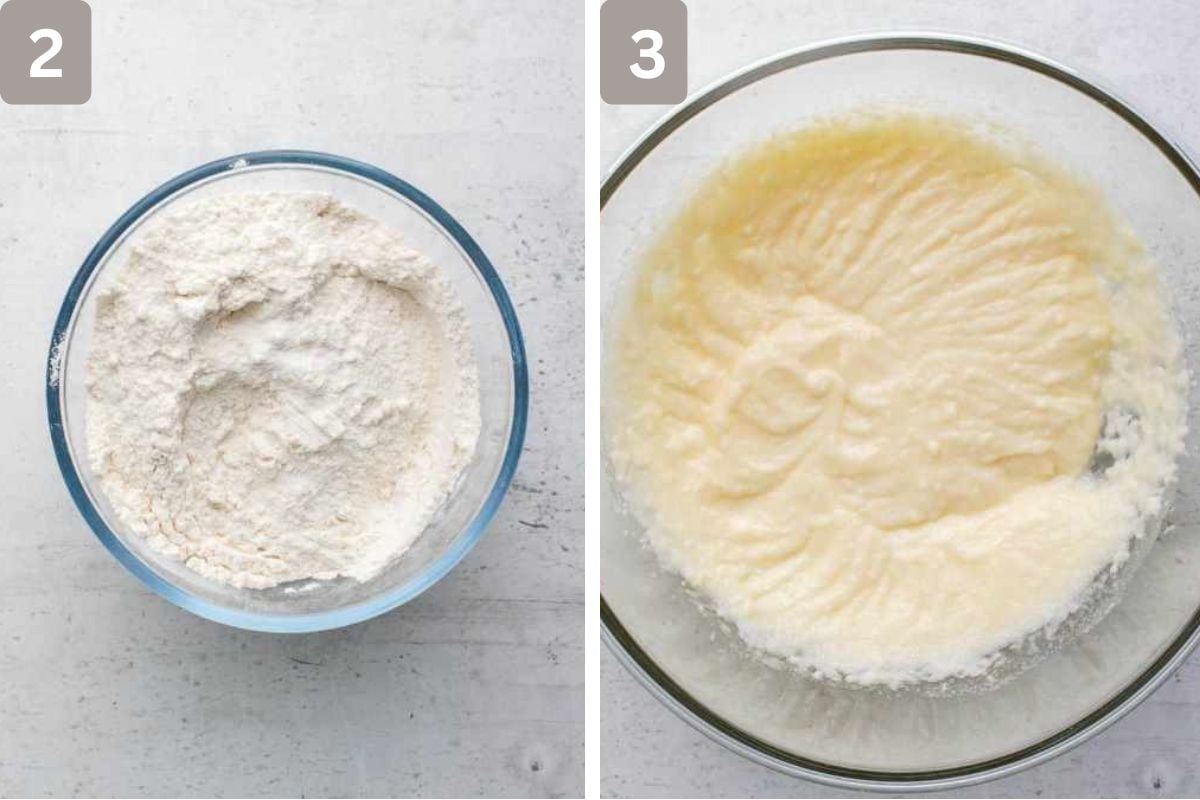
2. Stir together the flour, baking powder, and salt in a medium bowl and set it aside.
3. In a large mixing bowl with a stand or a handheld mixer fitted with a whisk or paddle attachment, beat butter, oil, and sugar until creamy for about 2-3 minutes. Add the vanilla and egg whites and mix until fully incorporated.
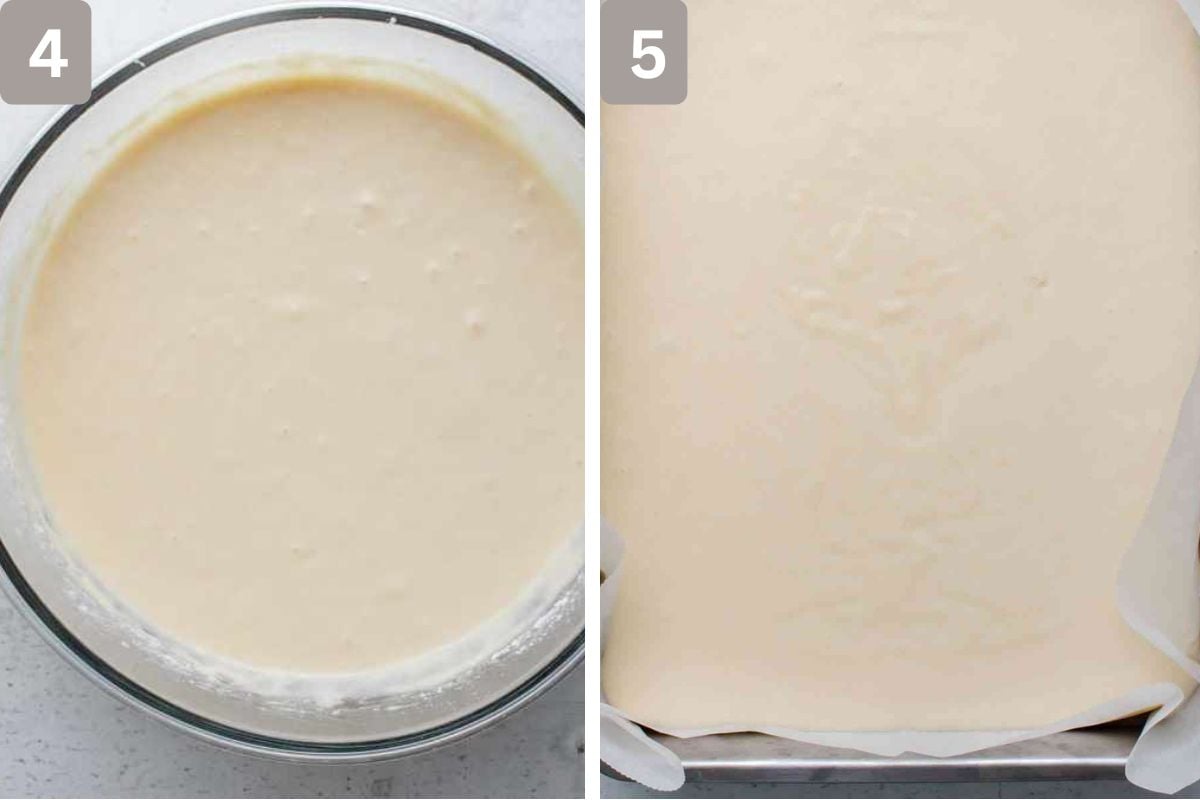
4. Alternately add the dry ingredients and milk, beginning and ending with the dry ingredients. Mix just until combined.
5. Transfer the cake mix to the prepared baking pan. Bake for 38-42 minutes or until a toothpick inserted into the center comes out clean. Don't overbake or the cake will be dry. Allow the cake to cool completely.
6. In a large mixing bowl, beat the butter and cream cheese at medium-high speed for around 2-3 minutes or until they’re smooth, creamy, combined, and lump-free.
7. Add the powdered sugar and vanilla and beat until creamy.
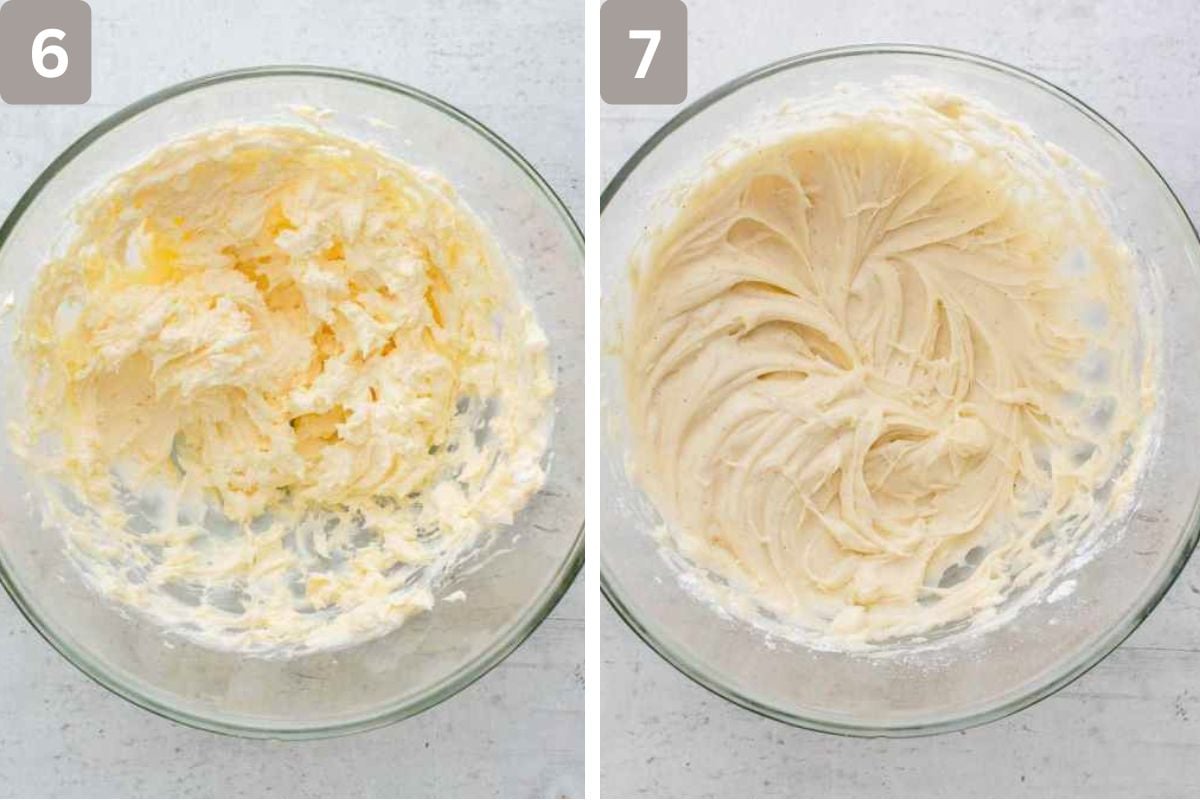
8. Using your fingers, crumble the cooled cake into fine crumbs in a large bowl.
9. Add the frosting to the crumbled cake and mix until combined.
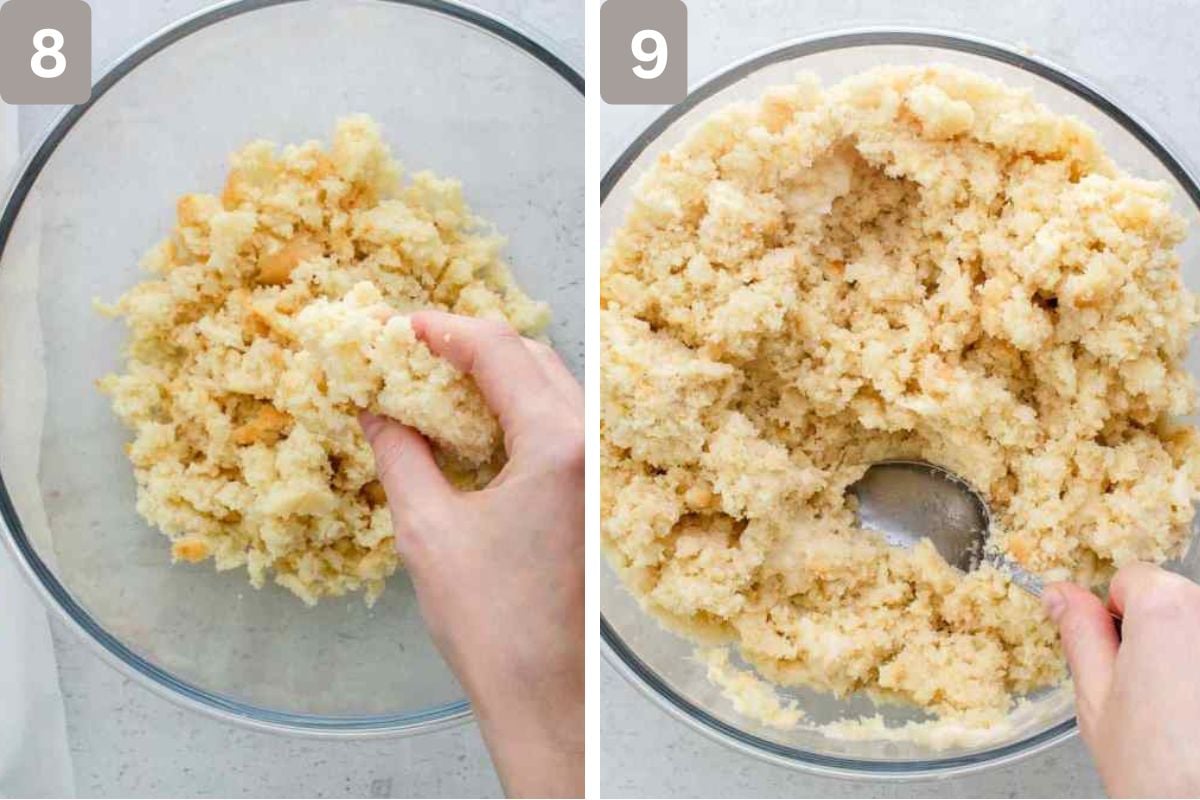
10. Divide the mixture into small bowls and color if desired. In my experience, gel food coloring works best for this recipe. Skip this step if you are not going to color the cake.
11. Roll the mixture into balls using about 1 heaping tablespoon or 2 level tablespoons per cake pop.
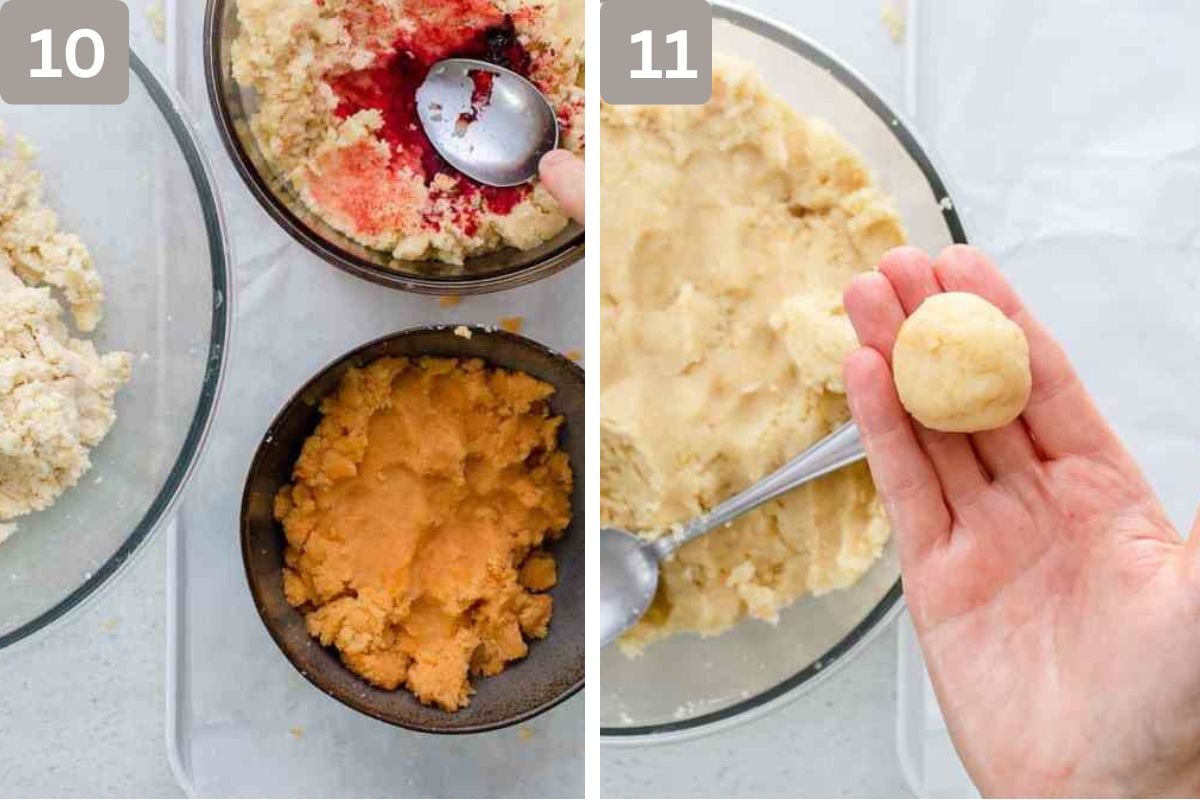
12. This recipe should make about 40 cake pops. Place them on a parchment-lined cookie sheet or tray and refrigerate for 2 hours.
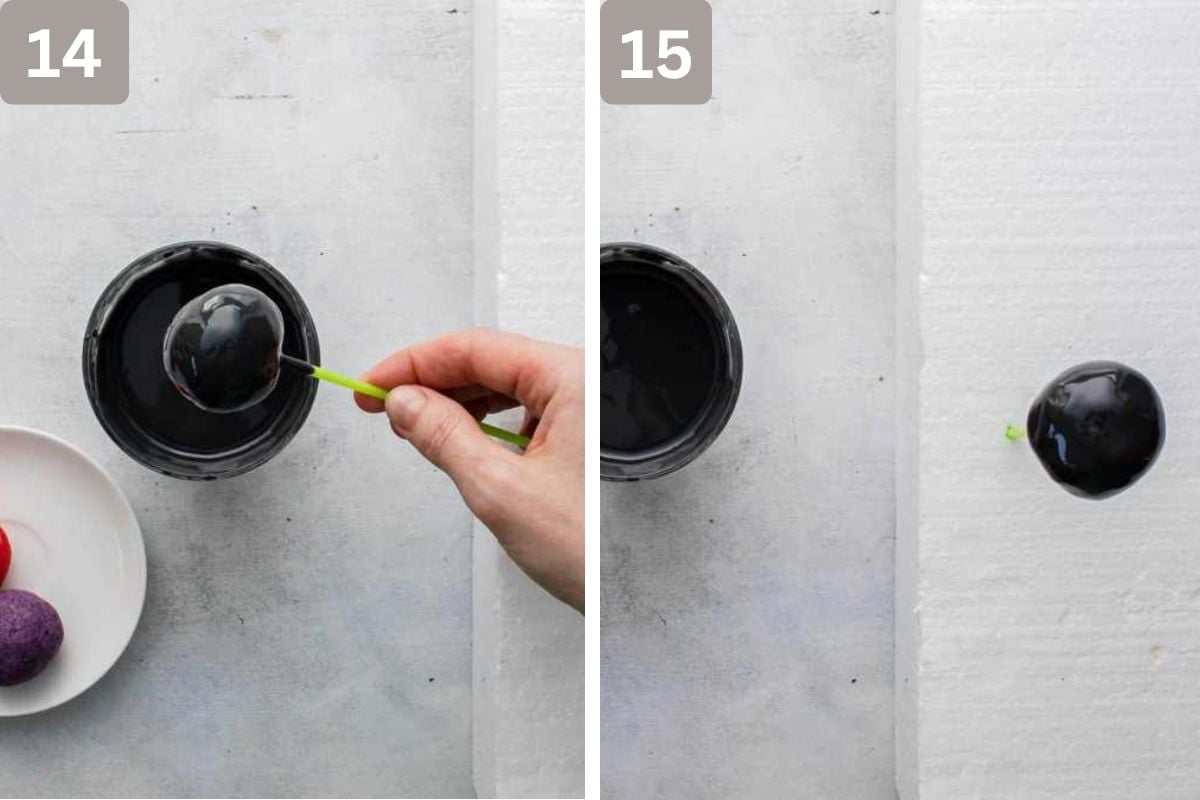
13. Remove 3 cake pops at a time from the fridge. Gently re-roll to smooth them if necessary. Melt the candy melts in a microwave-safe bowl. Dip the tip of the lollipop stick into the melted coating and insert it halfway into a cake ball.
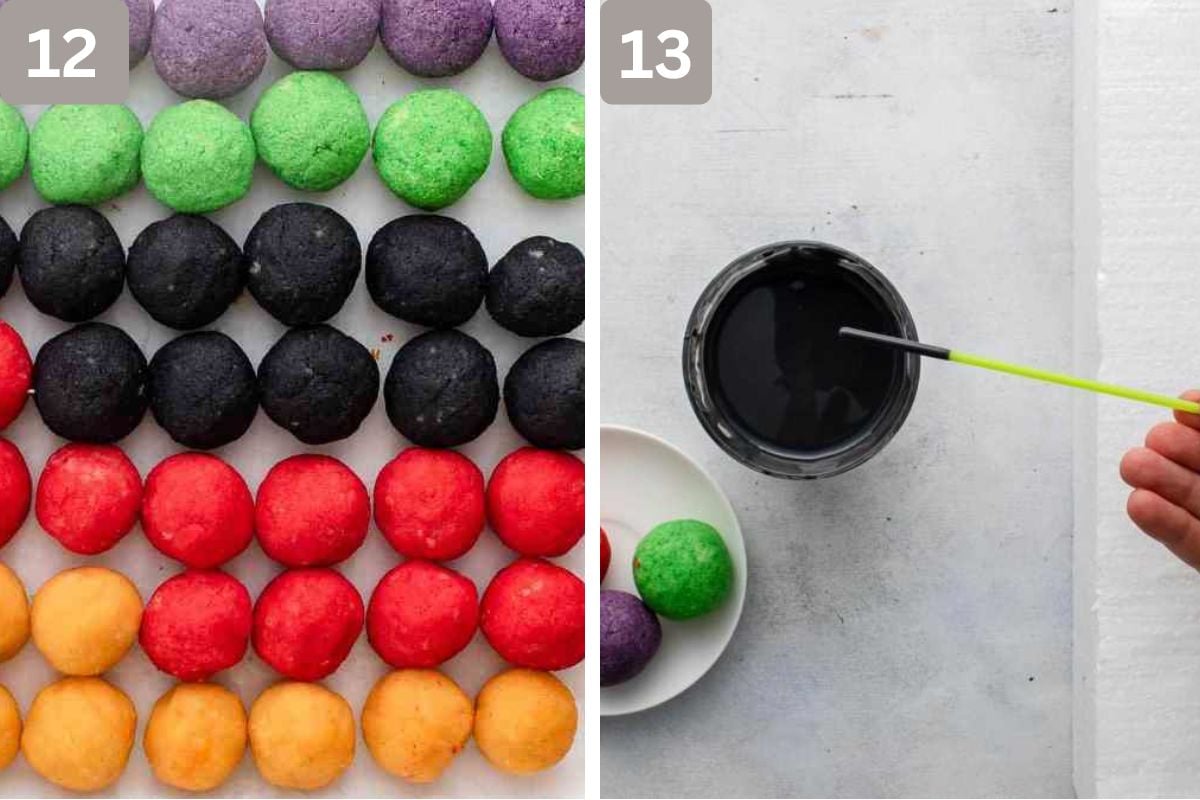
14. Dip each cake pop into the melted coating until fully covered. Let the excess coating drizzle off and decorate with sprinkles if you like.
15. Place them upright by sticking the sticks into a block of styrofoam or placing them in glasses (be careful that they don't touch each other). Allow the coating to set in the fridge for at least 1 hour before serving.
Recipe Tips
- Refrigerate your cake pops after rolling. Don't skip out on putting the pops into the fridge once rolled. It's an important step! Otherwise, your cake pops won’t stick together and can even crumble apart.
- Just use egg whites for the best coloring results.
- Take it easy on the food coloring. Never add more food coloring than recommended to the batter or coating.
- You may add 1 teaspoon of coconut oil to the icing if you want it to be super smooth.
What Can You Serve With This?
- Hot chocolate
- Apple cider
- Halloween cookies
- Chocolate bark
- Candy corn
- Vanilla milkshakes
- Pumpkin spice lattes
FAQs
The most common reason why these cake balls might fall apart is that they were either too small or too big for their sticks. You want them to be either 1 heaping tablespoon or 2 level tablespoons of the dough mixture.
Your cake pops might end up mushy if they have too much frosting mixed with the baked cake mixture. Make sure to follow the directions and ingredient recommendations as accurately as you can to prevent this from happening.
No. Melted chocolate chips won’t set correctly, and you’ll sadly end up with a disaster. As such, I highly recommend sticking to candy melts or chocolate coating.


Recipe

Homemade Halloween Cake Pops
Ingredients
Cake
- 3 cups + 2 tbsp all-purpose flour, spooned and leveled
- 2 ½ teaspoon baking powder
- ¾ teaspoon salt
- ½ cup unsalted butter, room temperature
- ½ cup canola or mild vegetable oil
- 1 ½ cups granulated white sugar
- 2 teaspoon vanilla extract
- 6 large egg whites
- 1 ½ cups milk
Frosting
- ½ cup unsalted butter, room temperature
- ½ cup cream cheese, softened
- 1 cup powdered sugar, sifted
- 1 teaspoon vanilla extract (or 1 vanilla bean)
Decoration
- gel food coloring (optional)
- sprinkles (optional)
- 2 cups candy melts, color(s) of your choice
Instructions
Cake
- Preheat oven to 350°F / 175°C. Line the bottom and the sides of a 9x13 inch / 23x33cm baking pan with parchment paper. Set aside.
- In a medium bowl combine flour, baking powder, and salt and stir to combine. Set aside.
- In a large mixing bowl with a stand or a handheld mixer fitted with a whisk or paddle attachment, beat butter, oil, and sugar until creamy for about 2-3 minutes.
- Add vanilla and egg whites and mix until fully incorporated about 2 minutes.
- Alternately add dry ingredients and milk, beginning and ending with dry ingredients. Stir just until combined.
- Transfer batter to the prepared baking pan and bake for 38-42 minutes or until a toothpick in the center comes out clean. Don't overbake or the cake will be dry. Let cool to room temperature.
Frosting
- In a large mixing bowl with a stand or a handheld mixer fitted with a whisk or paddle attachment, beat butter and cream cheese on medium-high speed until smooth, creamy, combined, and no lumps remain about 2-3 minutes.
- Add powdered sugar and vanilla and beat on medium speed until the sugar is dissolved and the frosting is creamy about 2-3 minutes.
Assembling
- Crumble the cooled cake with your fingers into fine crumbs into a large bowl. Add cream cheese frosting and combine. I use my hands to combine but you can do this with a spoon or with an electric mixer as well.
- Uncolored: Spoon about 1 heaping or 2 leveled tablespoon of the cake mixture and roll into a ball. Place on a parchment paper layered sheet. Repeat until you run out of cake mixture (you should end up with about 40 cake pops).
- Colored: If you want to them then divide the cake mixture into different bowls and dye to your preference and according to the package. I find gel food coloring works best. Then spoon about 1 heaping or 2 leveled tablespoon of the cake mixture and roll into a ball. Place on a parchment paper layered sheet. Repeat until you run out of cake mixture.
- Refrigerate for 2 hours.
Decoration
- Melt the coating in a deep heatproof bowl or cup in the microwave or double boiler. A 2-cup pyrex cup works best for dunking.
- Remove 3 cake pops at the time from the fridge and gently re-roll to smooth them if necessary.
- Dip one end of a lollipop stick into the coating (about 1 inch / 2.5 cm). Then insert the dipped stick into the center of one cake pop about halfway through and dip it into the melted coating until fully covered. Let excess coating drop off and decorate with sprinkles if desired. Place upright into glasses or a styrofoam block and let dry. Repeat with remaining cake pops and work in batches. Store in the fridge for at least 1 hour.
- Draw faces or patterns with a brush and melted candy melts on top of the dried coating if desired.
- Store in the fridge up to 4 days or freeze for up to 6 weeks.
Notes
Cooking Time and Temperature
Bake at 350°F (175°C) for 38-42 minutes or until a toothpick inserted into the center comes out clean.Taste & Texture
These homemade Halloween cake pops are soft, moist, and sweet on the inside with a crisp candy shell on the outside. The vanilla cake stays tender while the coating adds a satisfying crunch.Storage, Freezing & Reheating
- Refrigerator: Store in the fridge for up to 4 days.
- Freezer: Freeze for up to 6 weeks in a freezer-safe container.
- Best Served: Chilled or slightly cooled from the refrigerator.
Serving Recommendations
I love serving these Halloween-themed cake pops alongside other spooky desserts and warm drinks. They're especially fun on a Halloween dessert table because guests can grab one and keep mingling without needing a plate.Recipe Variations and Substitutions
- Candy melts: Use any colors that fit your Halloween theme.
- Cream cheese: Mascarpone can be used for a slightly different flavor.
- Gel food coloring: Liquid food coloring can work, but gel coloring gives stronger colors.
- Sprinkles: Use Halloween-themed sprinkles, edible glitter, or candy eyes.
- Vanilla cake: You can use chocolate cake if you prefer a richer flavor.
Proper Storage Tips
- Keep refrigerated until ready to serve.
- Store in an airtight container.
- Separate layers with parchment paper.
- Avoid leaving them at room temperature for long periods.
Pro Tips
- Don't skip the chilling time after rolling the cake balls.
- Use egg whites if you want brighter Halloween colors.
- Dip the stick into melted coating before inserting it into the cake ball.
- Work in small batches while decorating.
- Let the coating fully set before adding detailed decorations.
Video
You can find the video in the post above. If you don't see a video, please check your browser settings.
Leave a Reply