
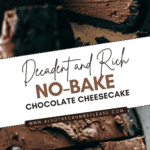
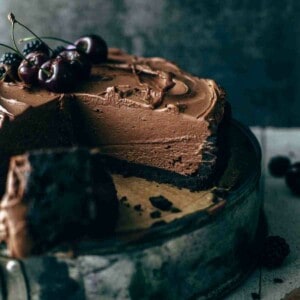
I've got the perfect answer to your chocolate cravings. This no-bake chocolate cheesecake is a rich and creamy dessert I specifically created for those moments when you want to give in to indulgence but don’t necessarily have the time and energy to spend hours in the kitchen. Have you tried my other cheesecake recipes yet?
Jump to:
Why You Will Love This No-Bake Chocolate Cheesecake Recipe
- So Much Chocolate Flavor: From the chocolate crust to the chocolate cheesecake filling this cheesecake is rich and creamy.
- Light Texture: No-bake cheesecakes are a bit lighter in texture than baked cheesecakes making it the perfect lighter dessert after a big meal or in the summer.
- Easy Chocolate Dessert Recipe: This sweet chocolaty treat only requires a few ingredients and little prep time to make. And you don't even have to turn on the oven!
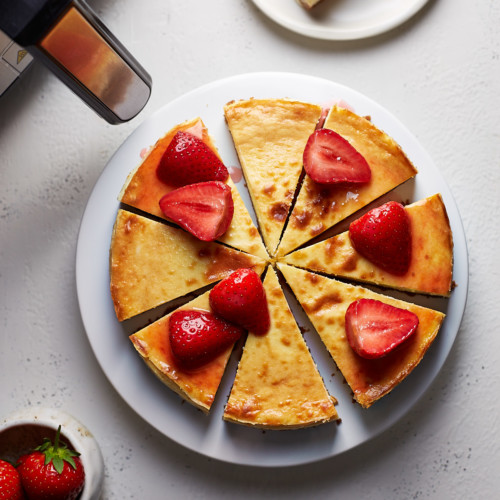
By the way, this isn’t the only no-bake cheesecake recipe I have for you. I also recommend trying out these no-bake strawberry cheesecake and no-bake blueberry cheesecake recipes.
Ingredients
- Oreo cookies: We will be using the filling too so make sure to grab a package of the whole cookies. You can also use chocolate wafer crumbs or chocolate cookie crumbs with little difference but I I have found that nothing beats the creamy chocolate goodness of an Oreo cookie crust so that’s what I use.
- Unsweetened cocoa powder: Added to the crust for more intense chocolate flavor and also used to flavor the chocolate cheesecake filling.
- Unsalted butter: I use unsalted butter for this recipe as salted butter can impact the overall flavor of your chocolate cheesecake.
- Cream cheese: This ingredient provides the structure, flavor, and creamy texture for our no-bake cheesecake. For the best flavor, use full fat cream cheese, since the fat content is what makes it really creamy.
- Granulated white sugar: For sweetening this chocolate cheesecake.
- Vanilla extract: Enhances the flavors by adding warmth and aroma.
- Semi-sweet chocolate bars: I highly recommend choosing quality chocolate bars from a brand you’ve already tasted and preferred. My absolute personal favorites are Ghirardelli, Guittard, and Lindt. The sweet spot is 50% cacao as those lower than 45% are a bit too sweet, while those over 60% are too bitter.
- Heavy whipping cream: Makes the cheesecake filling light and fluffy in texture while adding rich flavors.
Variations
- Dark Chocolate No-Bake Cheesecake: If you prefer dark chocolate I recommend using no more than 60% bittersweet as it will increase in its dark bittersweet flavor. The bitterness may be a bit too intense for some people.
- Add a Chocolate Ganache: For more intense chocolate flavor you can add a chocolate ganache. Drizzle this shiny and delectable glaze over the top of your cheesecake.
Step by Step Video Tutorial
How to Make No-Bake Chocolate Cheesecake
Making the Chocolate Crumb Crust
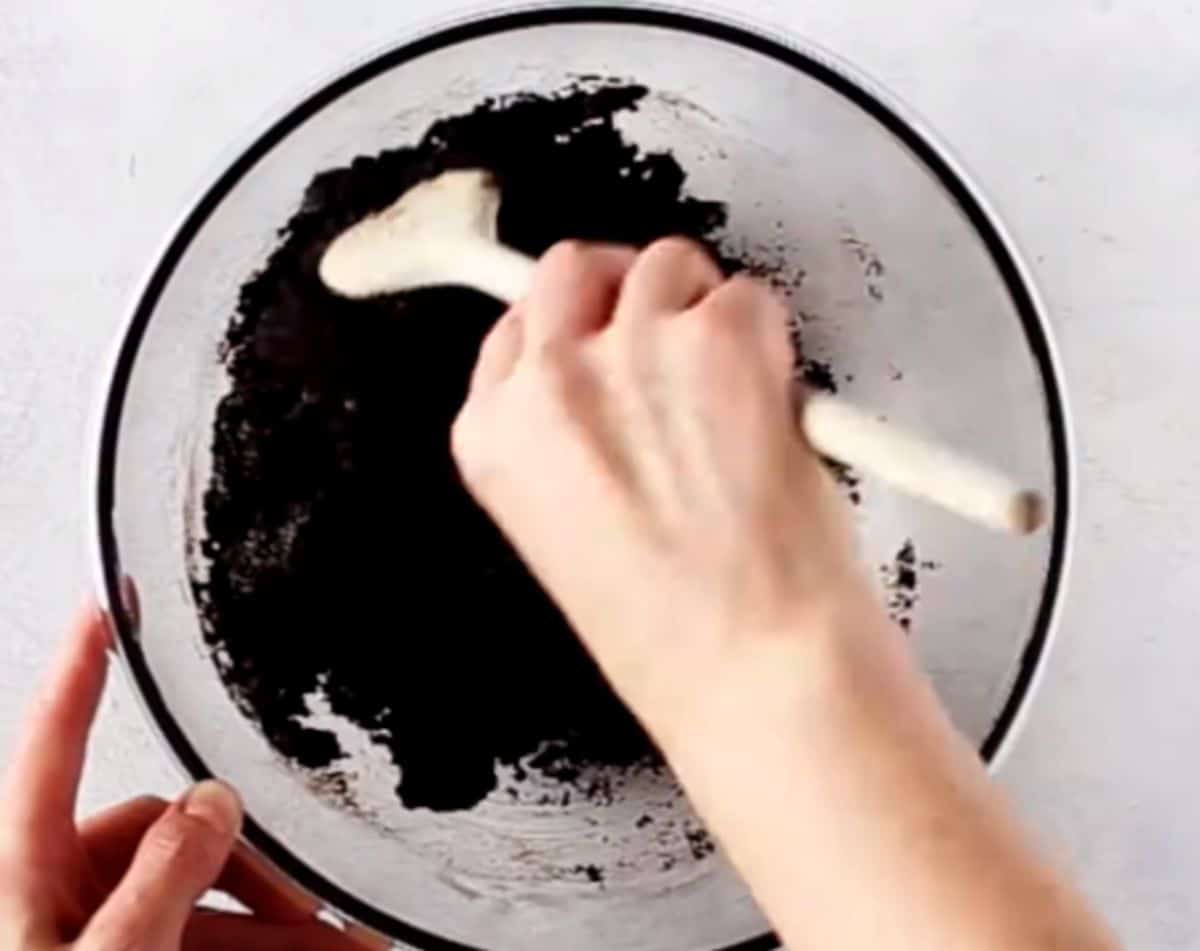
Step 1: Place the Oreo cookies into a food processor and finely grind them into crumbs. If you don't have a food processor you can place them in a Ziploc bag and beat them with a rolling pin until crushed.
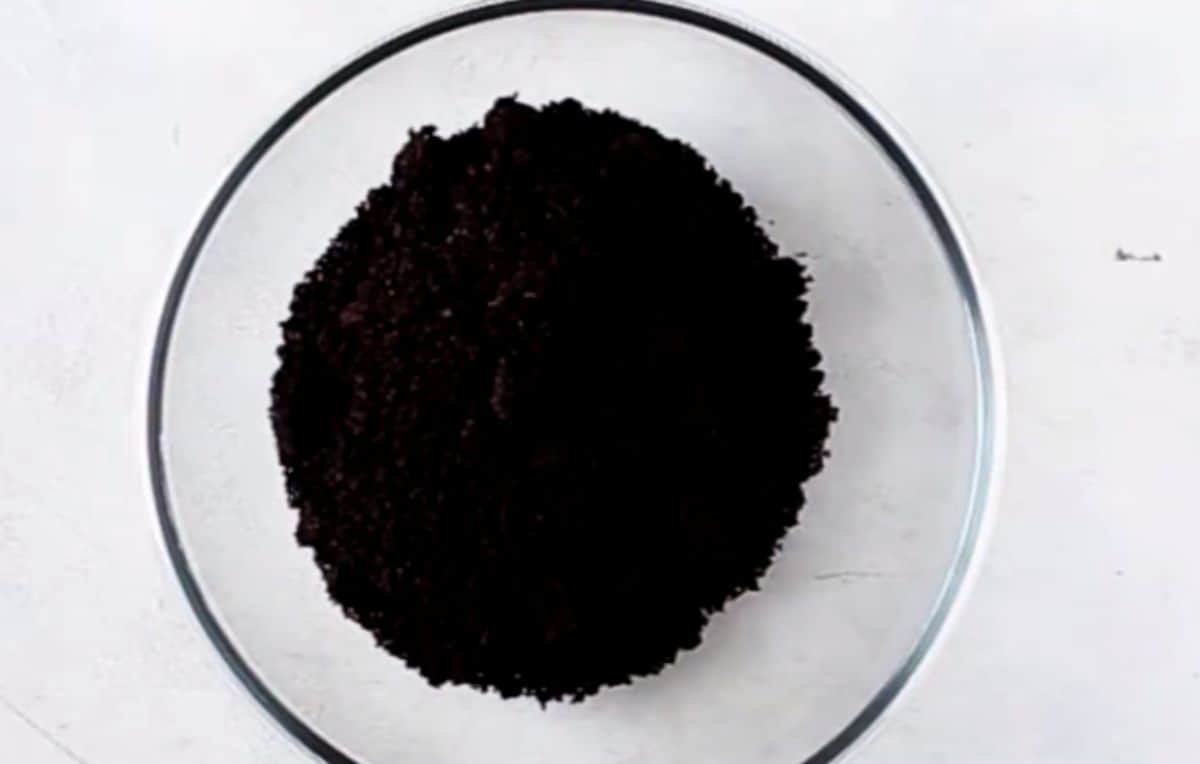
Step 2: Add the cookie crumbs to a large bowl with the melted butter and cocoa powder.
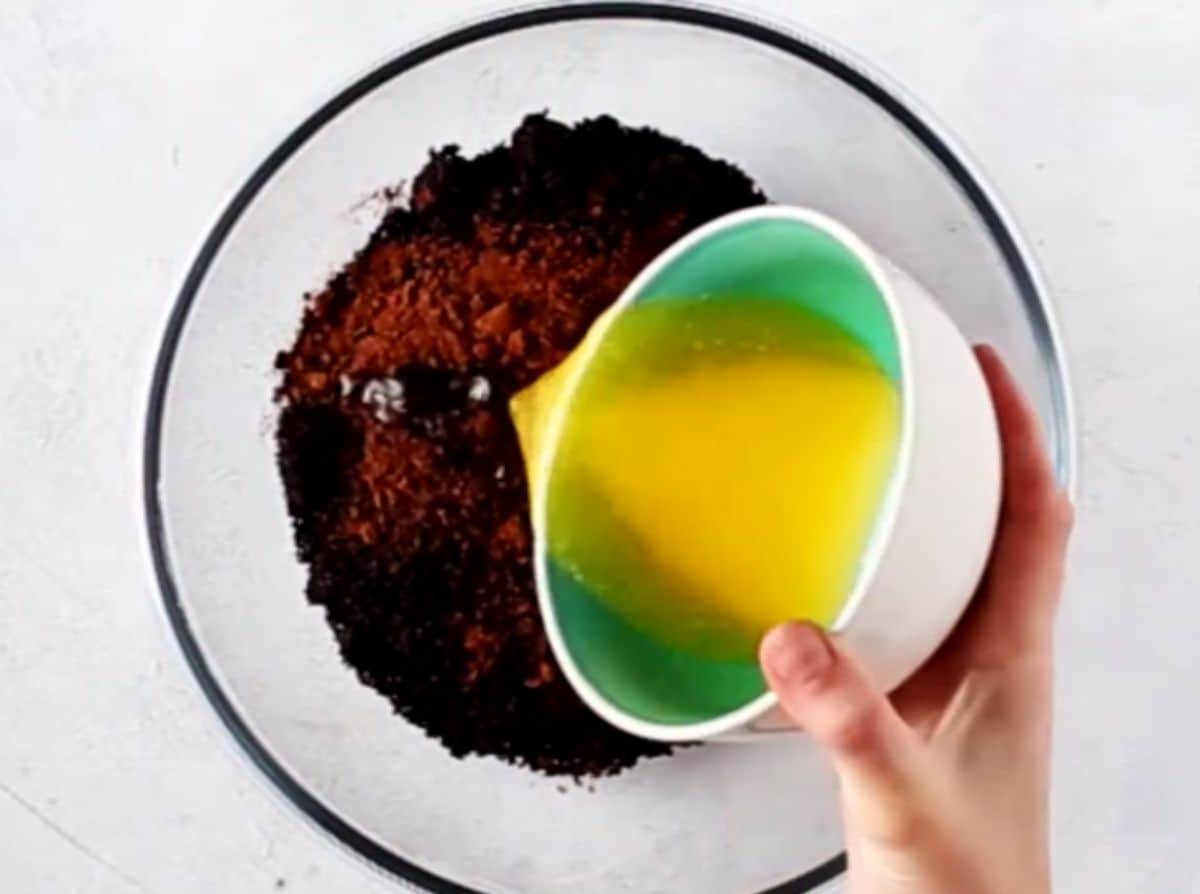
Step 3: Stir the crumbs, melted butter, and cocoa together until your mixture is evenly moist and well combined.
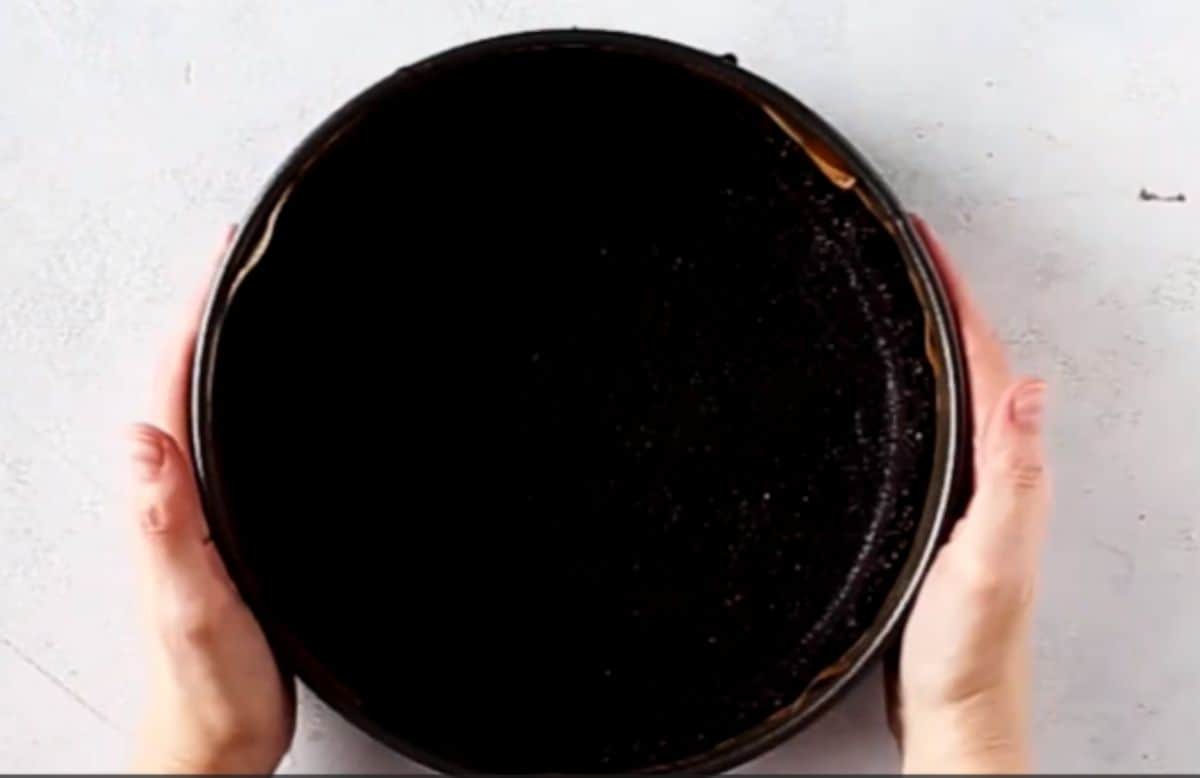
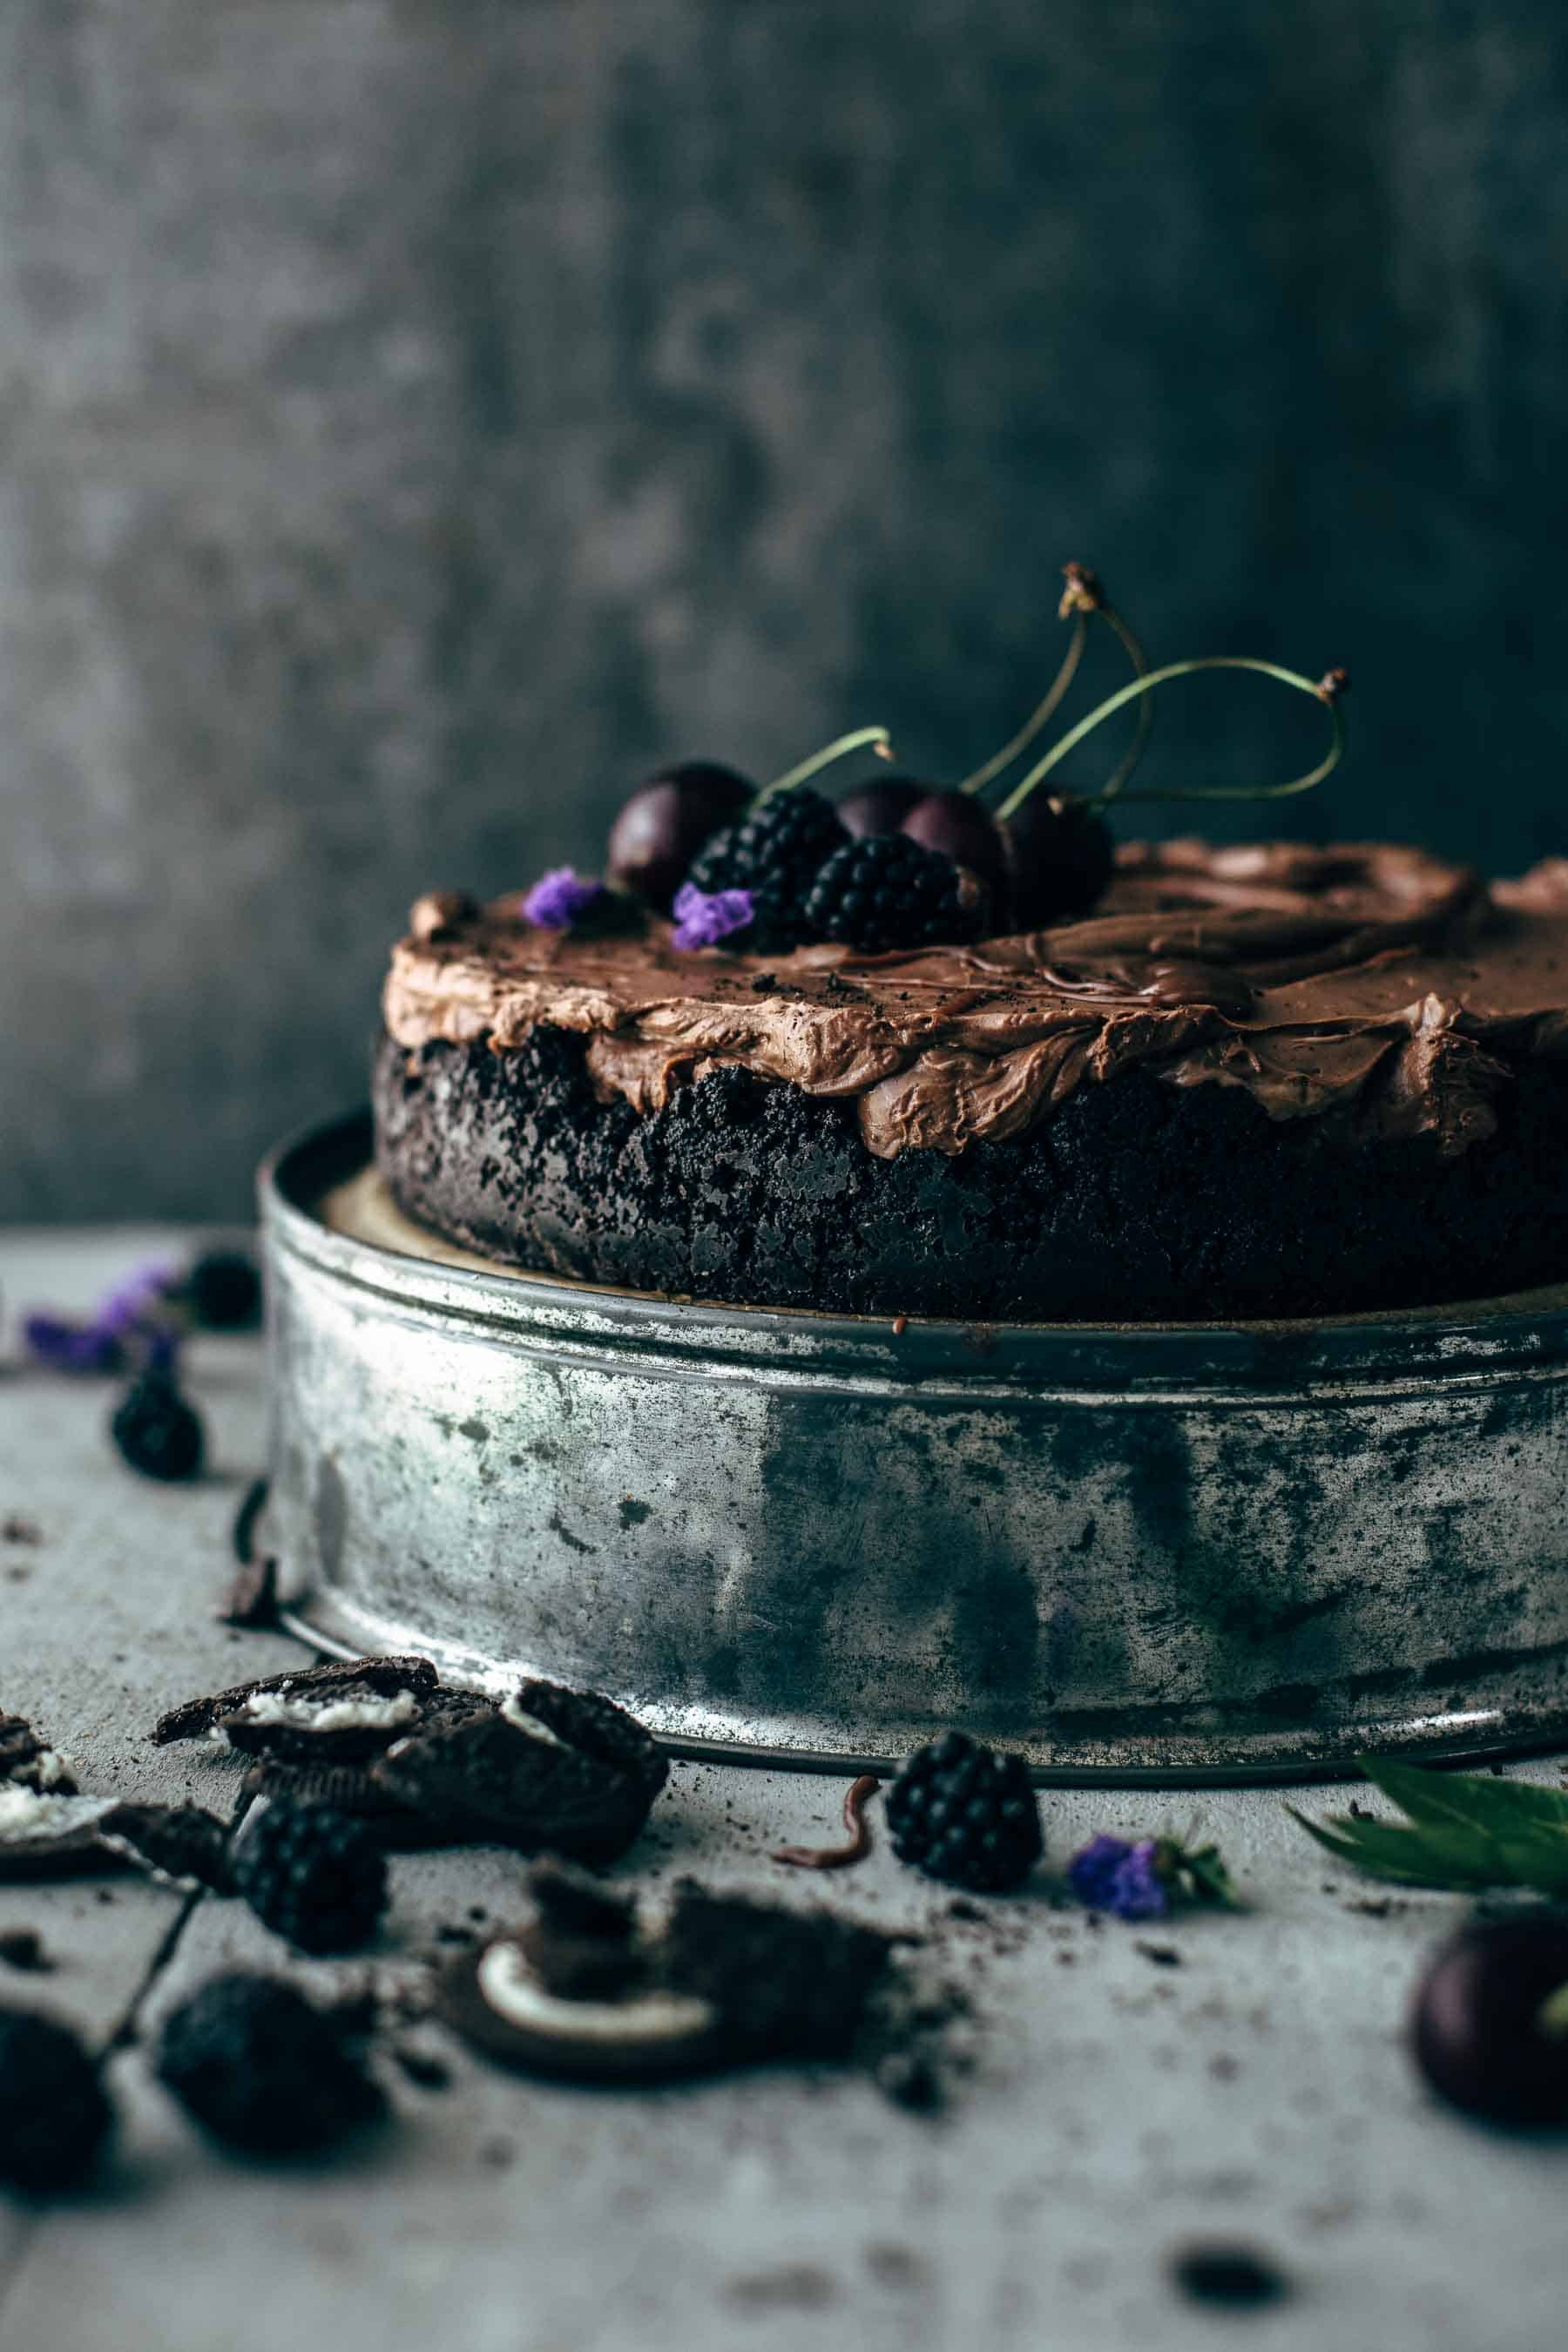
Step 4: Place the cookie mixture in your pan evenly. Flatten it using the bottom of a flat-bottomed cup. Don’t forget to press the crumbs halfway up the sides of your springform pan as well. Put your chocolate cookie crust in the freezer to set.
Make the Chocolate Cheesecake Filling
PRO TIP: Melt your chocolate before you start the filling. Keep in mind that you need to let your chocolate cool down before adding it to your mixture otherwise it may impact the texture of your cheesecake filling.
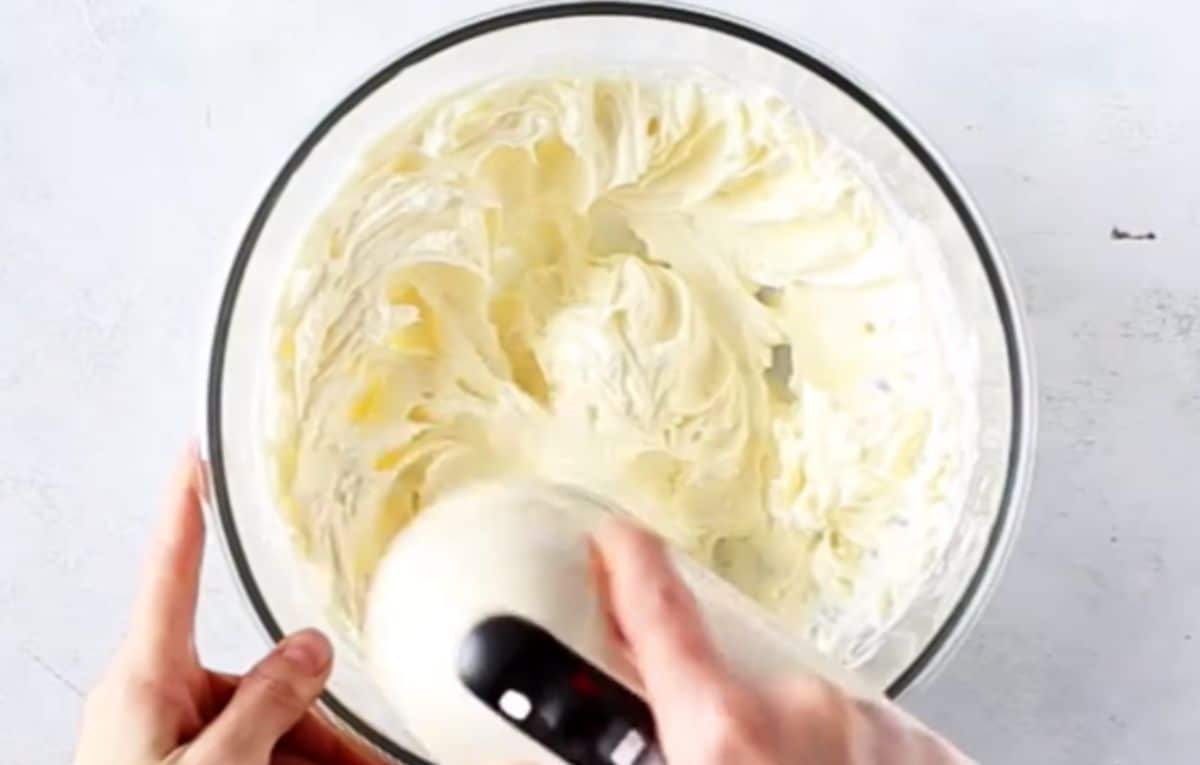
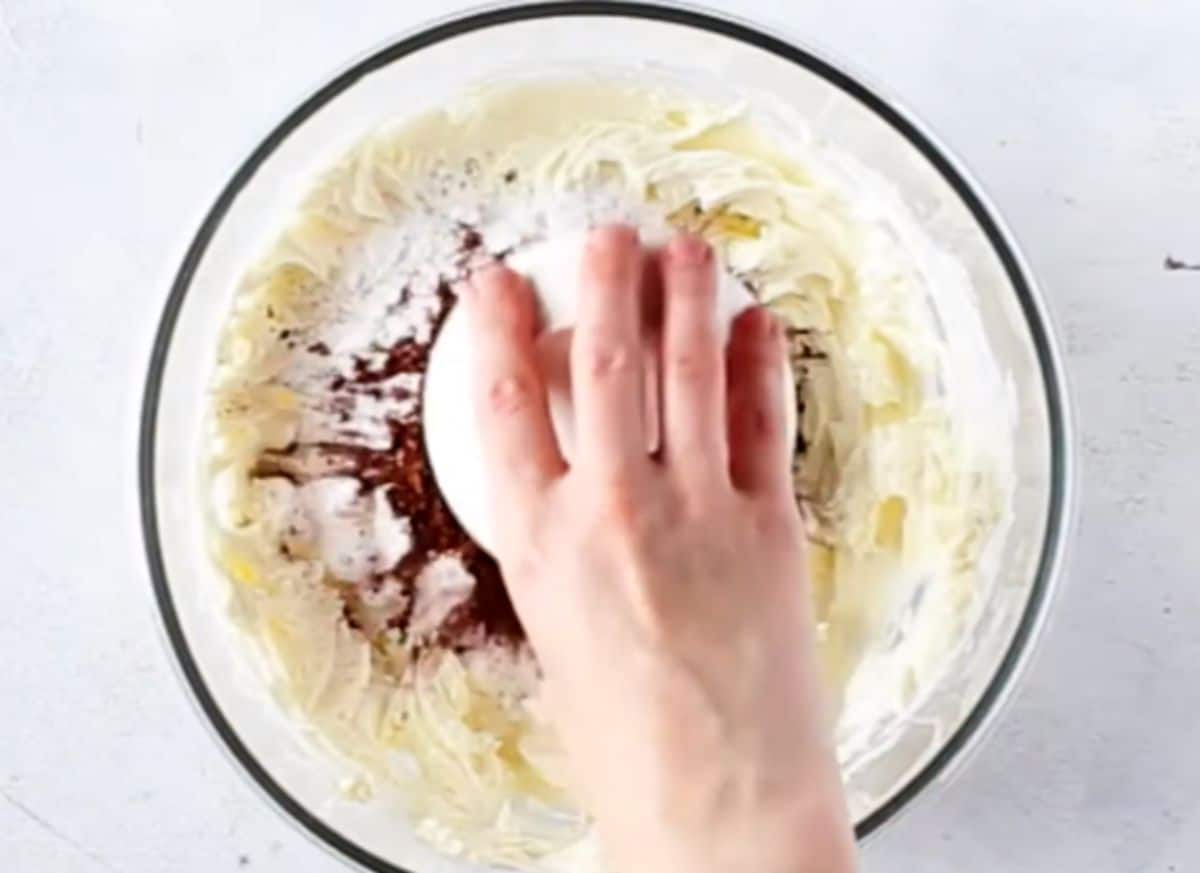
Step 1: Beat the cream cheese with an electric mixer for about a minute or until it’s creamy.
Step 2: Add the granulated white sugar and cocoa powder. Mix it for a minute or until it’s completely smooth and creamy.
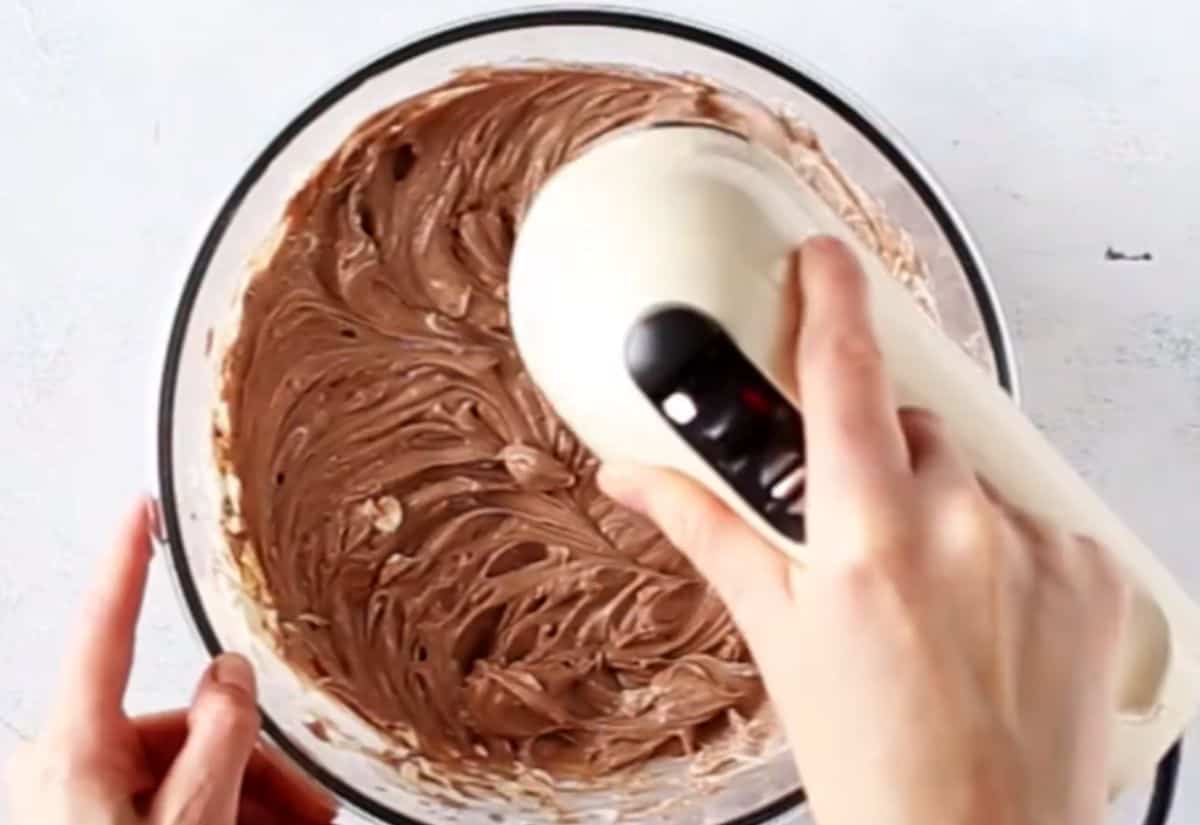
Step 3: Add the vanilla extract and your melted chocolate to the cheesecake filling. Mix it again to combine.
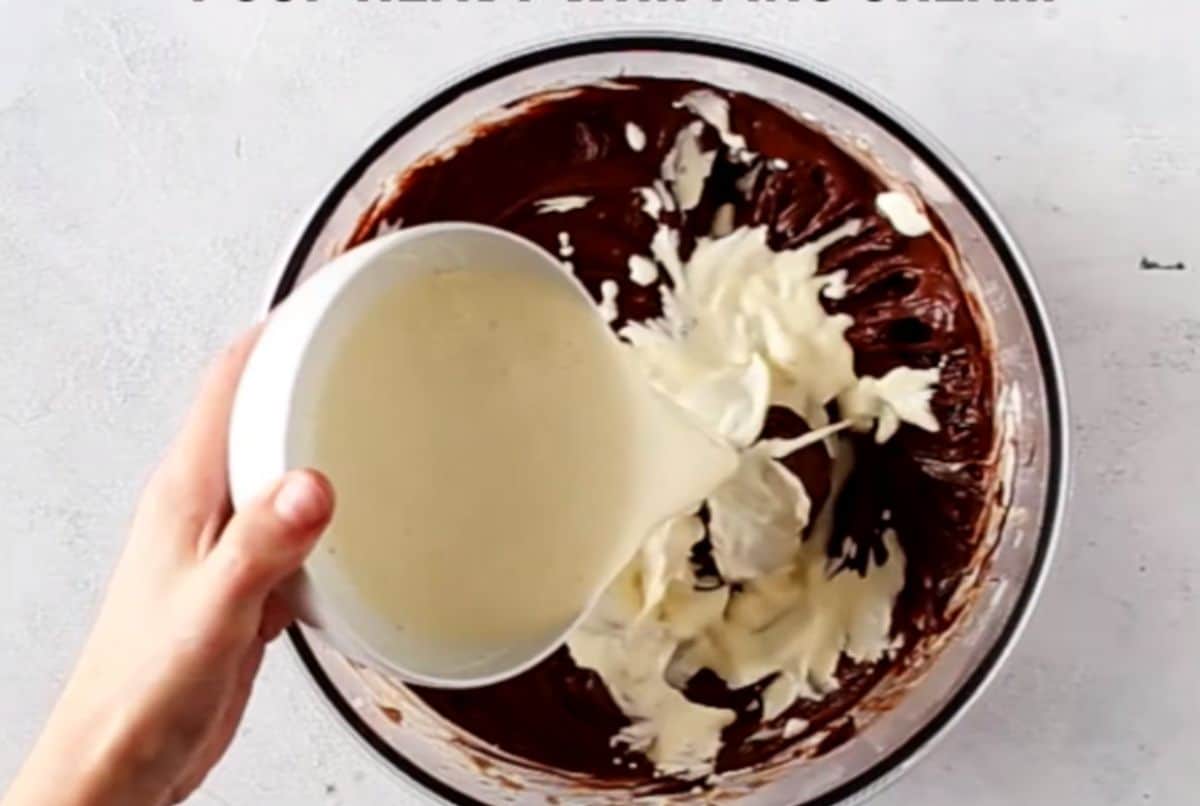
Step 4: Add the heavy whipping cream. Mix until stiff peaks form. This takes around 1 to 2 minutes.
Assemble the Chocolate Cheesecake
Step 1: Add the cheesecake filling to your frozen crust.
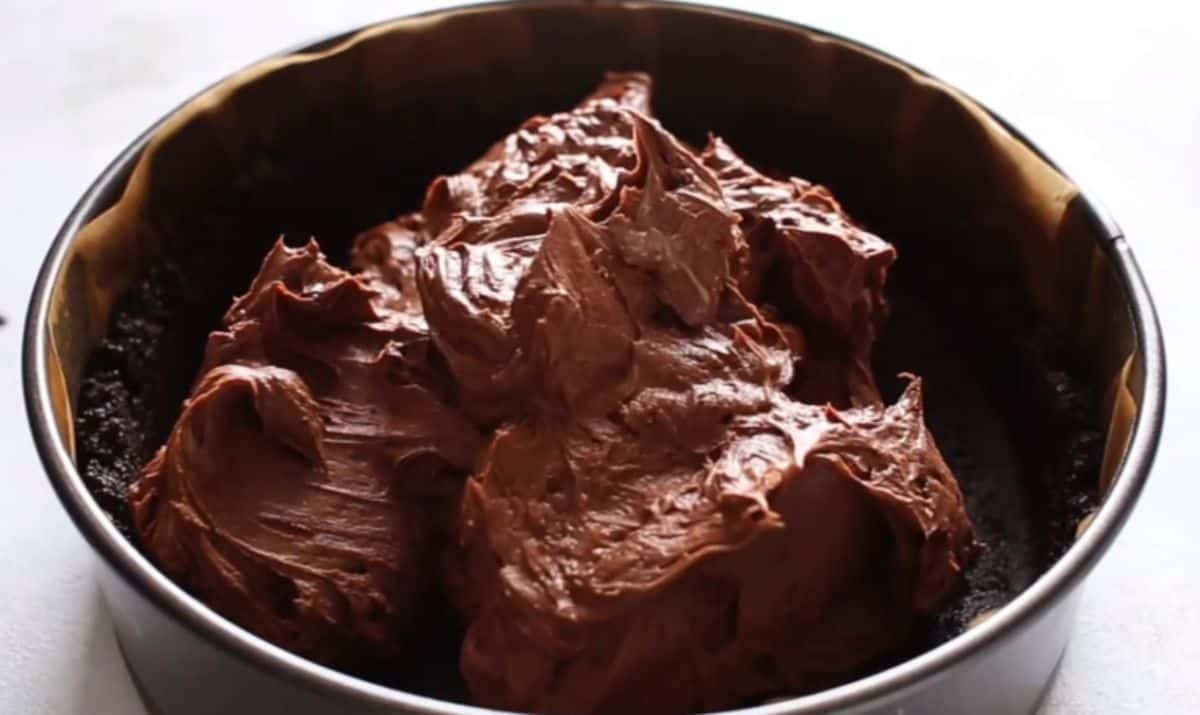
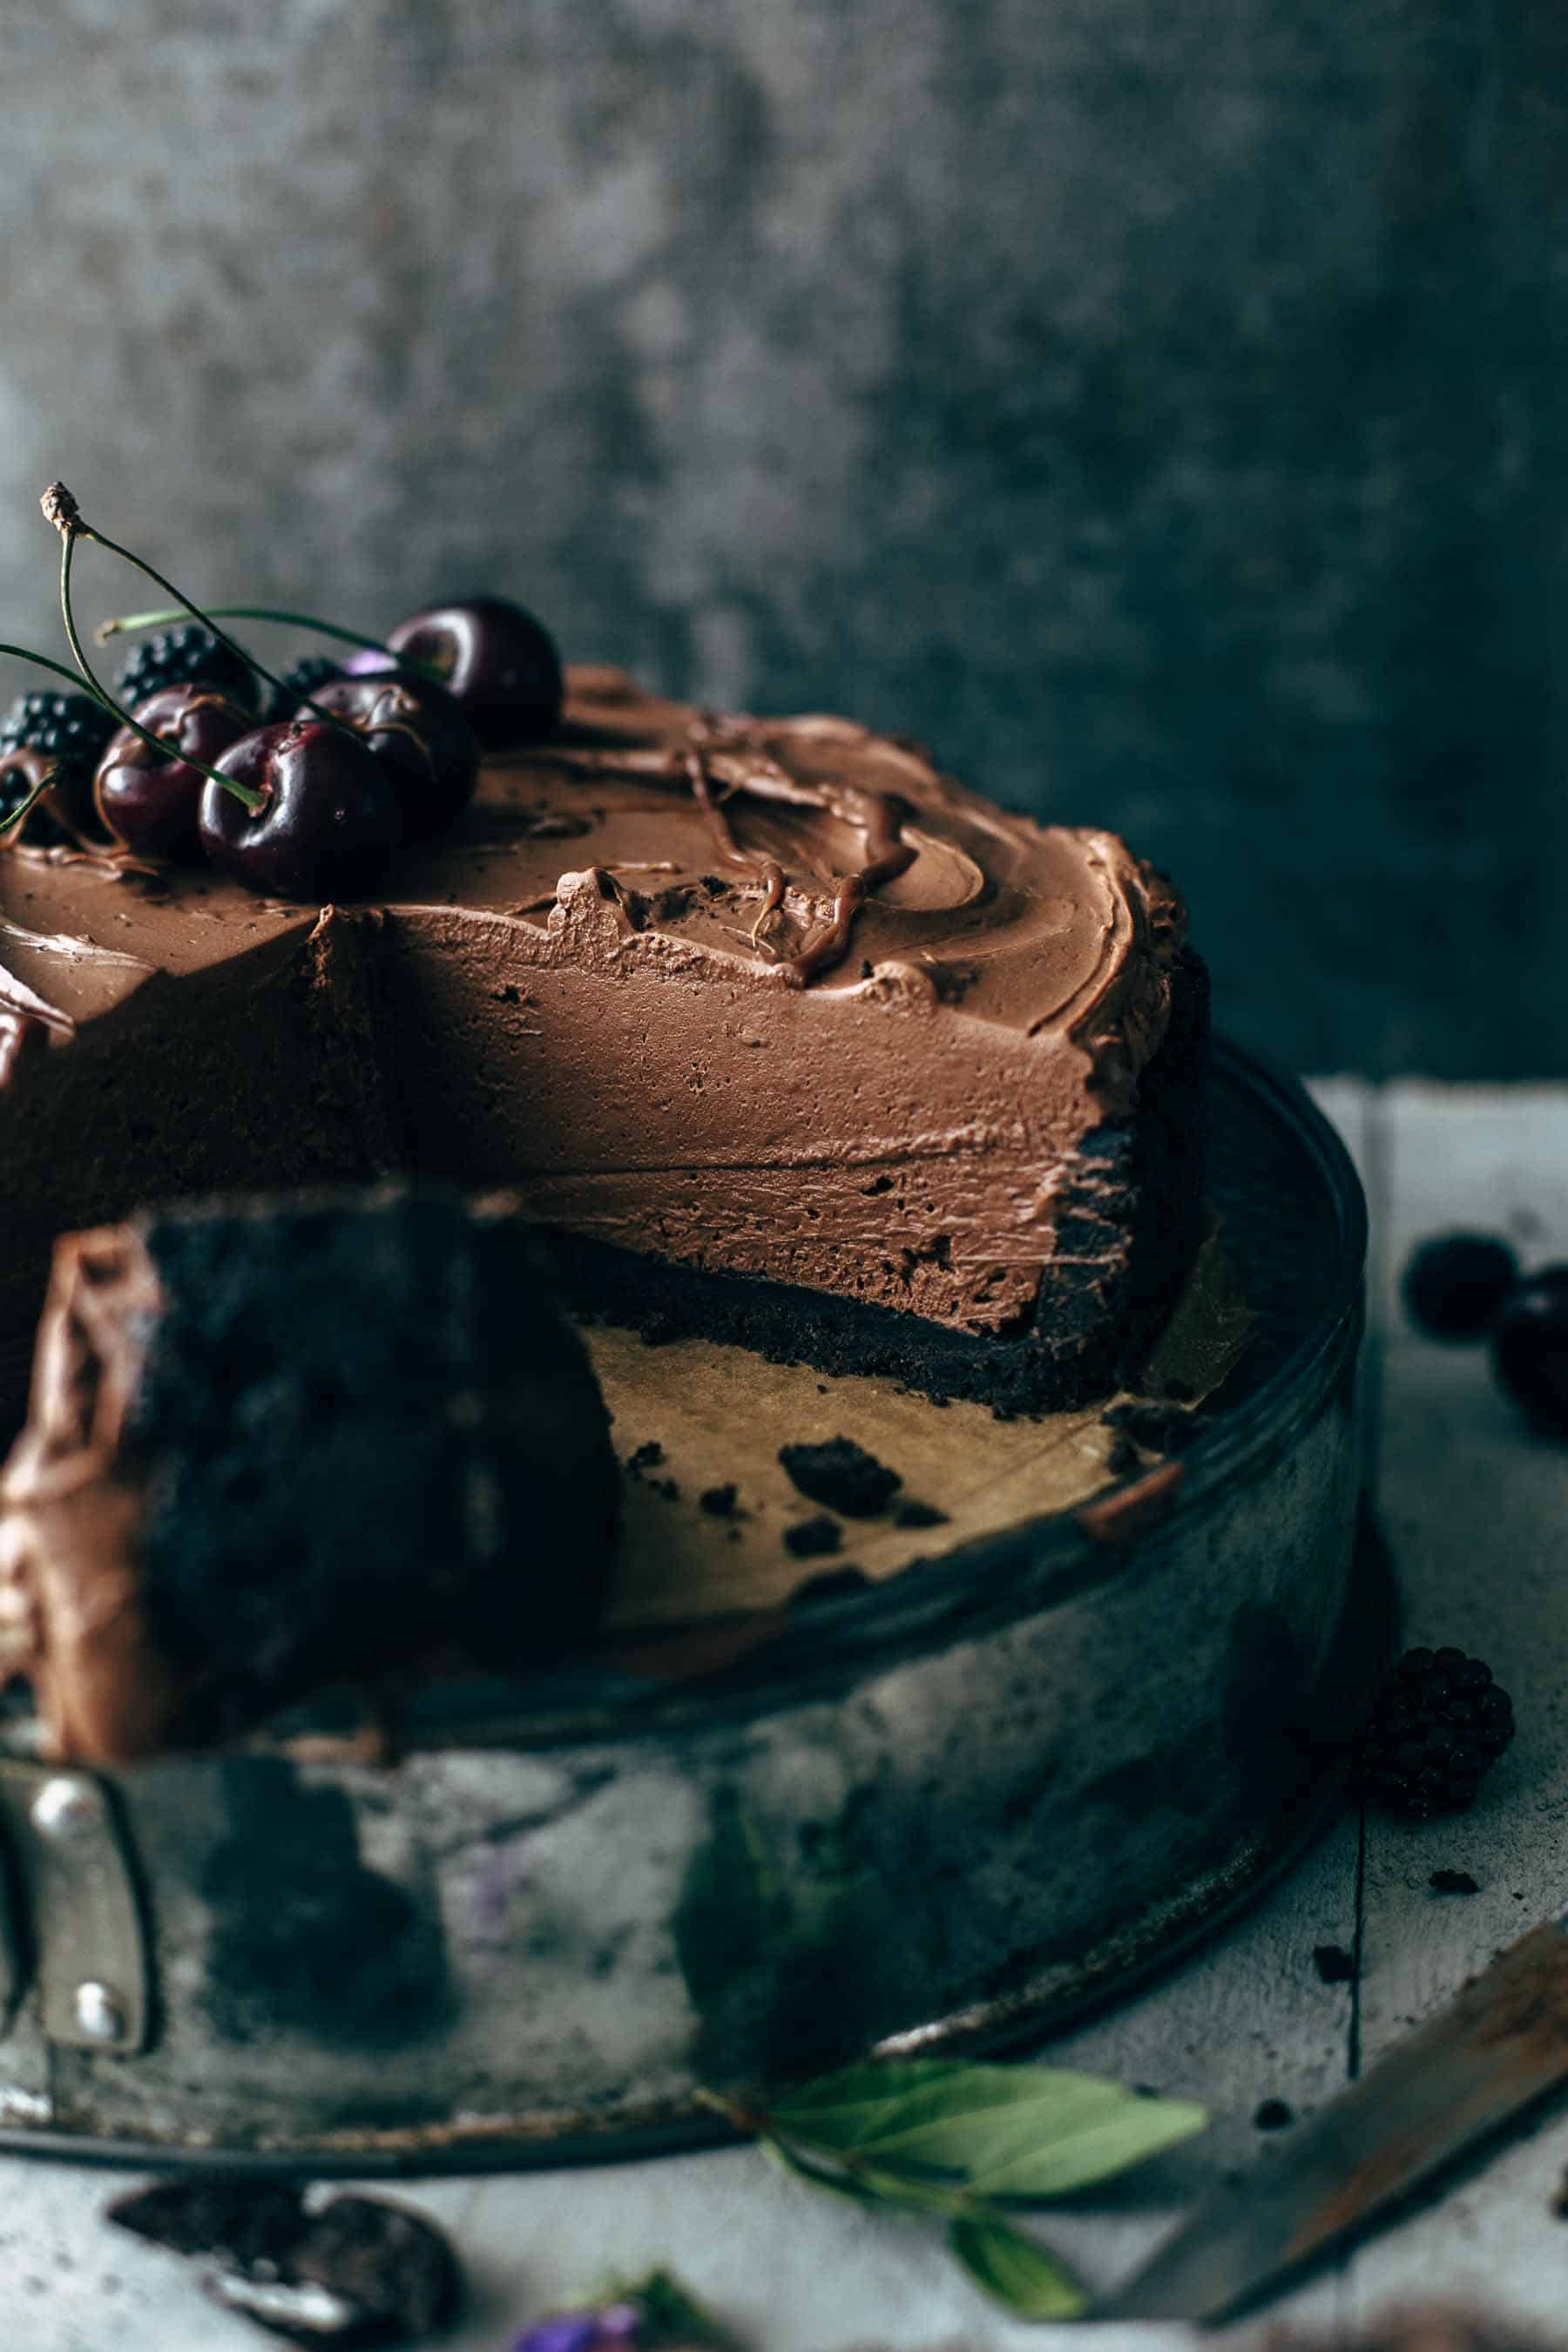
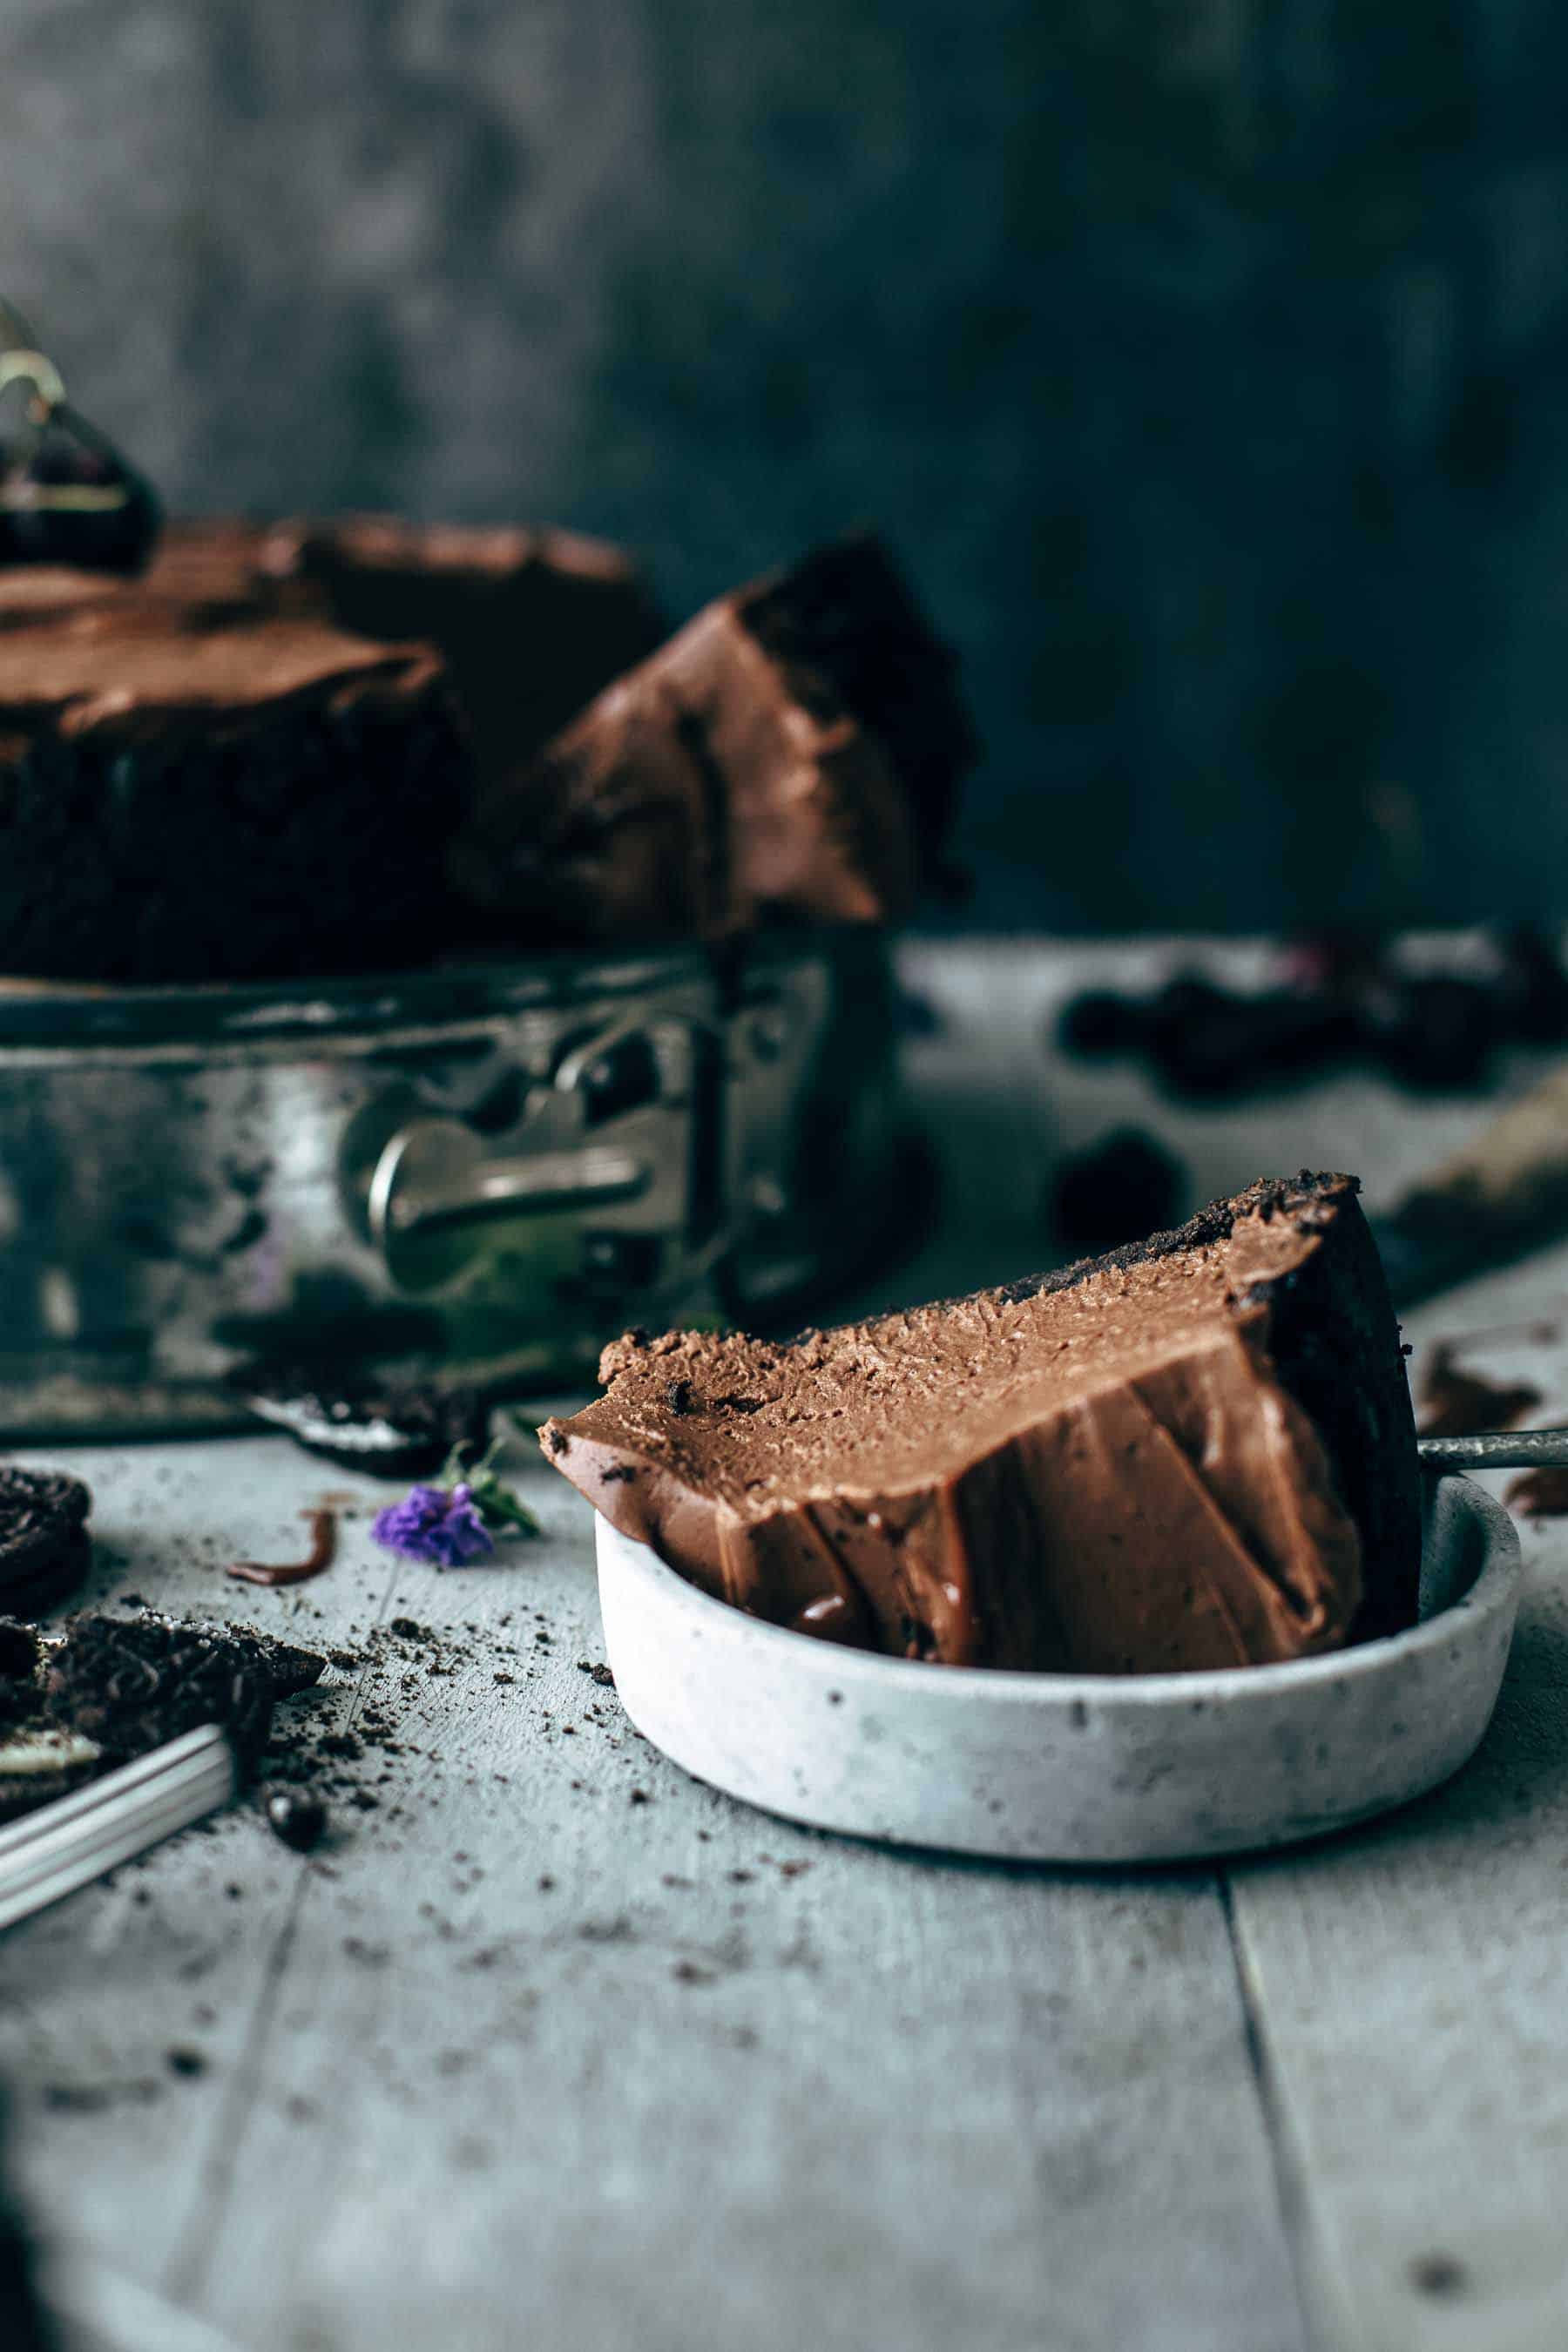
Step 2: Spread it evenly on your crust. Let your homemade cheesecake chill in the fridge for at least 4 hours.
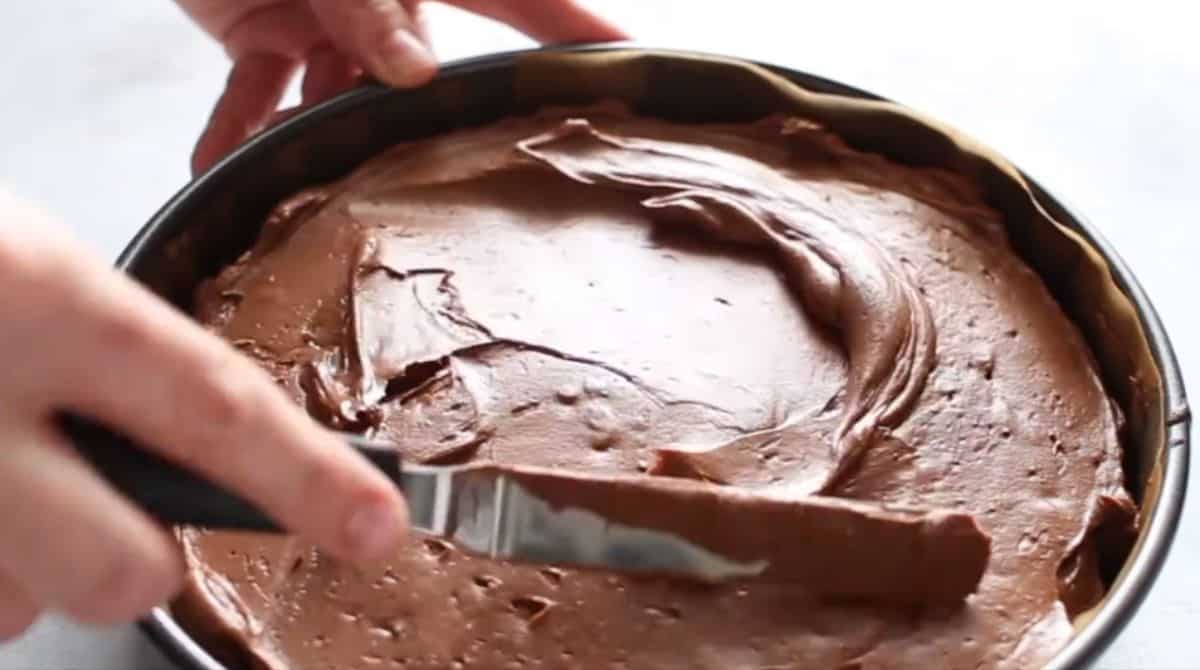
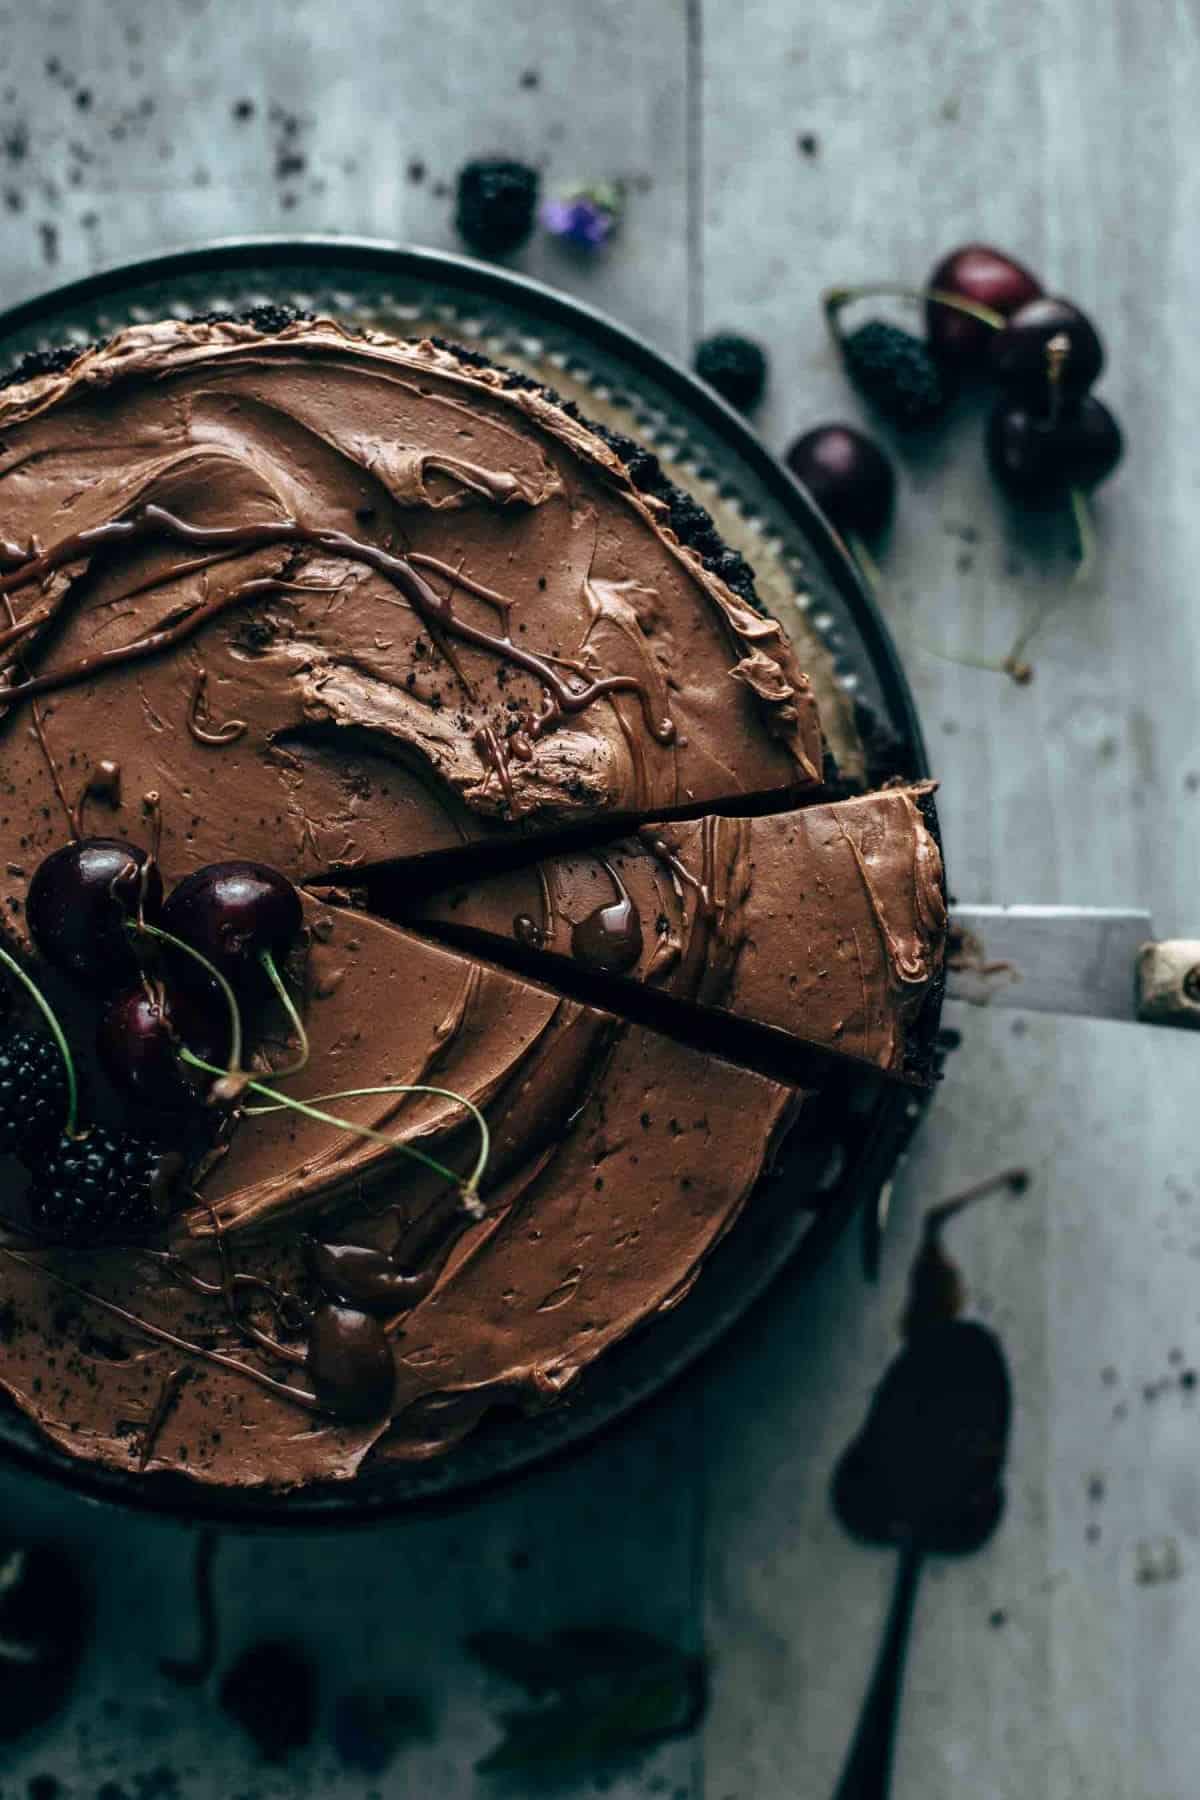
Step 3: Garnish it with your choice of toppings. Serve and enjoy!
Expert Tips
- Avoid Chocolate Chips: They do not melt smoothly due to ingredients added to help them main their shape when baked. I have noticed that they give my filling a grainy texture and interfere with the smooth, creamy consistency of the filling.
- Refrigeration is Key. Always keep your dessert refrigerated. Don’t let your cheesecake sit at room temperature for too long. More than 15 minutes may make it too soft and difficult to cut.
- Make a Day Ahead: Whenever possible as I have found that this dessert’s is best after letting it set overnight. Even better freeze it for an hour before storing it in the fridge. Just be sure to wrap it well and don't freeze longer than one hour.
- Serving: Garnish the top of your cheesecake with a sprinkle of powdered sugar, chocolate chips, fresh fruit and berries, chocolate ganache, or whipped cream. You can use any combination of these options you prefer!
Storage Tips
- Storing: This dessert can last in your fridge for up to 2 days. Just store it in an airtight container to keep it fresh.
- Freezing: Freeze your chocolate cheesecake slices for an hour on a lined baking tray. Then, wrap them in plastic wrap and store them in freezer bags. This way you can take out a slice at a time to enjoy. Thaw then at room temperature for an hour or overnight in the fridge.
Recipe FAQs
Yes, absolutely! In the end, it will all boil down to your needs and preferences. For instance, if you enjoy dense and velvety cheesecake (that pairs perfectly well with a light meal), then baked cheesecake is going to be the more ideal choice.
On the other hand, if you’re coming from a heavy meal and you just want to have a light and airy sweet ending, then a slice of this no-bake cheesecake will be perfect for you.
More Cheesecake Recipes to Try

If you tried this No-Bake Chocolate Cheese Recipe or any other recipe on my website, please leave a 🌟 star rating and let me know how it went in the 📝 comments below. Thanks for visiting!
Recipe
No-Bake Chocolate Cheesecake Recipe
Ingredients
Oreo cookie crust
- 14 oz Oreo cookies with filling - about 36, crushed into crumbs
- 1 tablespoon unsweetened cocoa powder
- ½ cup unsalted butter, melted
chocolate filling
- 24 oz cream cheese, softened
- 1 ½ cups granulated white sugar
- 2 tablespoon unsweetened cocoa powder
- 2 teaspoon vanilla extract
- 12 oz semi-sweet chocolate bars, melted and cooled
- 1 cup heavy whipping cream
Instructions
- Line a 9" (23cm) springform pan with parchment paper and set aside.
- Crust: In a large bowl, stir together Oreo crumbs, melted butter, and cocoa until well combined and evenly moist. Transfer to the prepared pan and use the bottom of a flat-bottomed cup to press the crumbs into the bottom and halfway up the sides of the pan. Freeze until the filling is prepared.
- Filling: In a large mixing bowl, using an electric mixer fitted with the whisk or paddle attachment, beat cream cheese until creamy, about 1 minute. Add sugar and cocoa and mix until smooth, about 1 minute. Mix in the vanilla and melted chocolate just to combine. Add heavy whipping cream and mix until soft peaks form, about 1-2 minutes.
- Spoon filling into the crust and spread evenly. Chill in the fridge for 4 hours or until firm. Store in an airtight container in the refrigerator for up to 2 days.
Notes
- Avoid Chocolate Chips: They do not melt smoothly due to ingredients added to help them main their shape when baked. I have noticed that they give my filling a grainy texture and interfere with the smooth, creamy consistency of the filling.
- Refrigeration is Key. Always keep your dessert refrigerated. Don’t let your cheesecake sit at room temperature for too long. More than 15 minutes may make it too soft and difficult to cut.
- Make a Day Ahead: Whenever possible as I have found that this dessert’s is best after letting it set overnight. Even better freeze it for an hour before storing it in the fridge. Just be sure to wrap it well and don't freeze longer than one hour.
- Serving: Garnish the top of your cheesecake with a sprinkle of powdered sugar, chocolate chips, fresh fruit and berries, chocolate ganache, or whipped cream. You can use any combination of these options you prefer!
You can find the video in the post above. If you don't see a video, please check your browser settings.
Beth
This is an update to my earlier comment. I ended up with a few extra slices, our guests cancelled our dinner plans. So I sliced the cheesecake and individually wrapped them and froze them. Honestly it was even better after freezing. Win win!
Beth Arnold
I made this on Monday to eat on Tuesday. I followed the recipe exactly, I even froze it for one hour prior to refrigerating. It is delicious. I used my spring form pan which measured10.5 inches in the interior of the pan. So maybe it wasn’t quite as thick as it would have been. Definitely going in my favorites. Thanks so much for this easy recipe.