
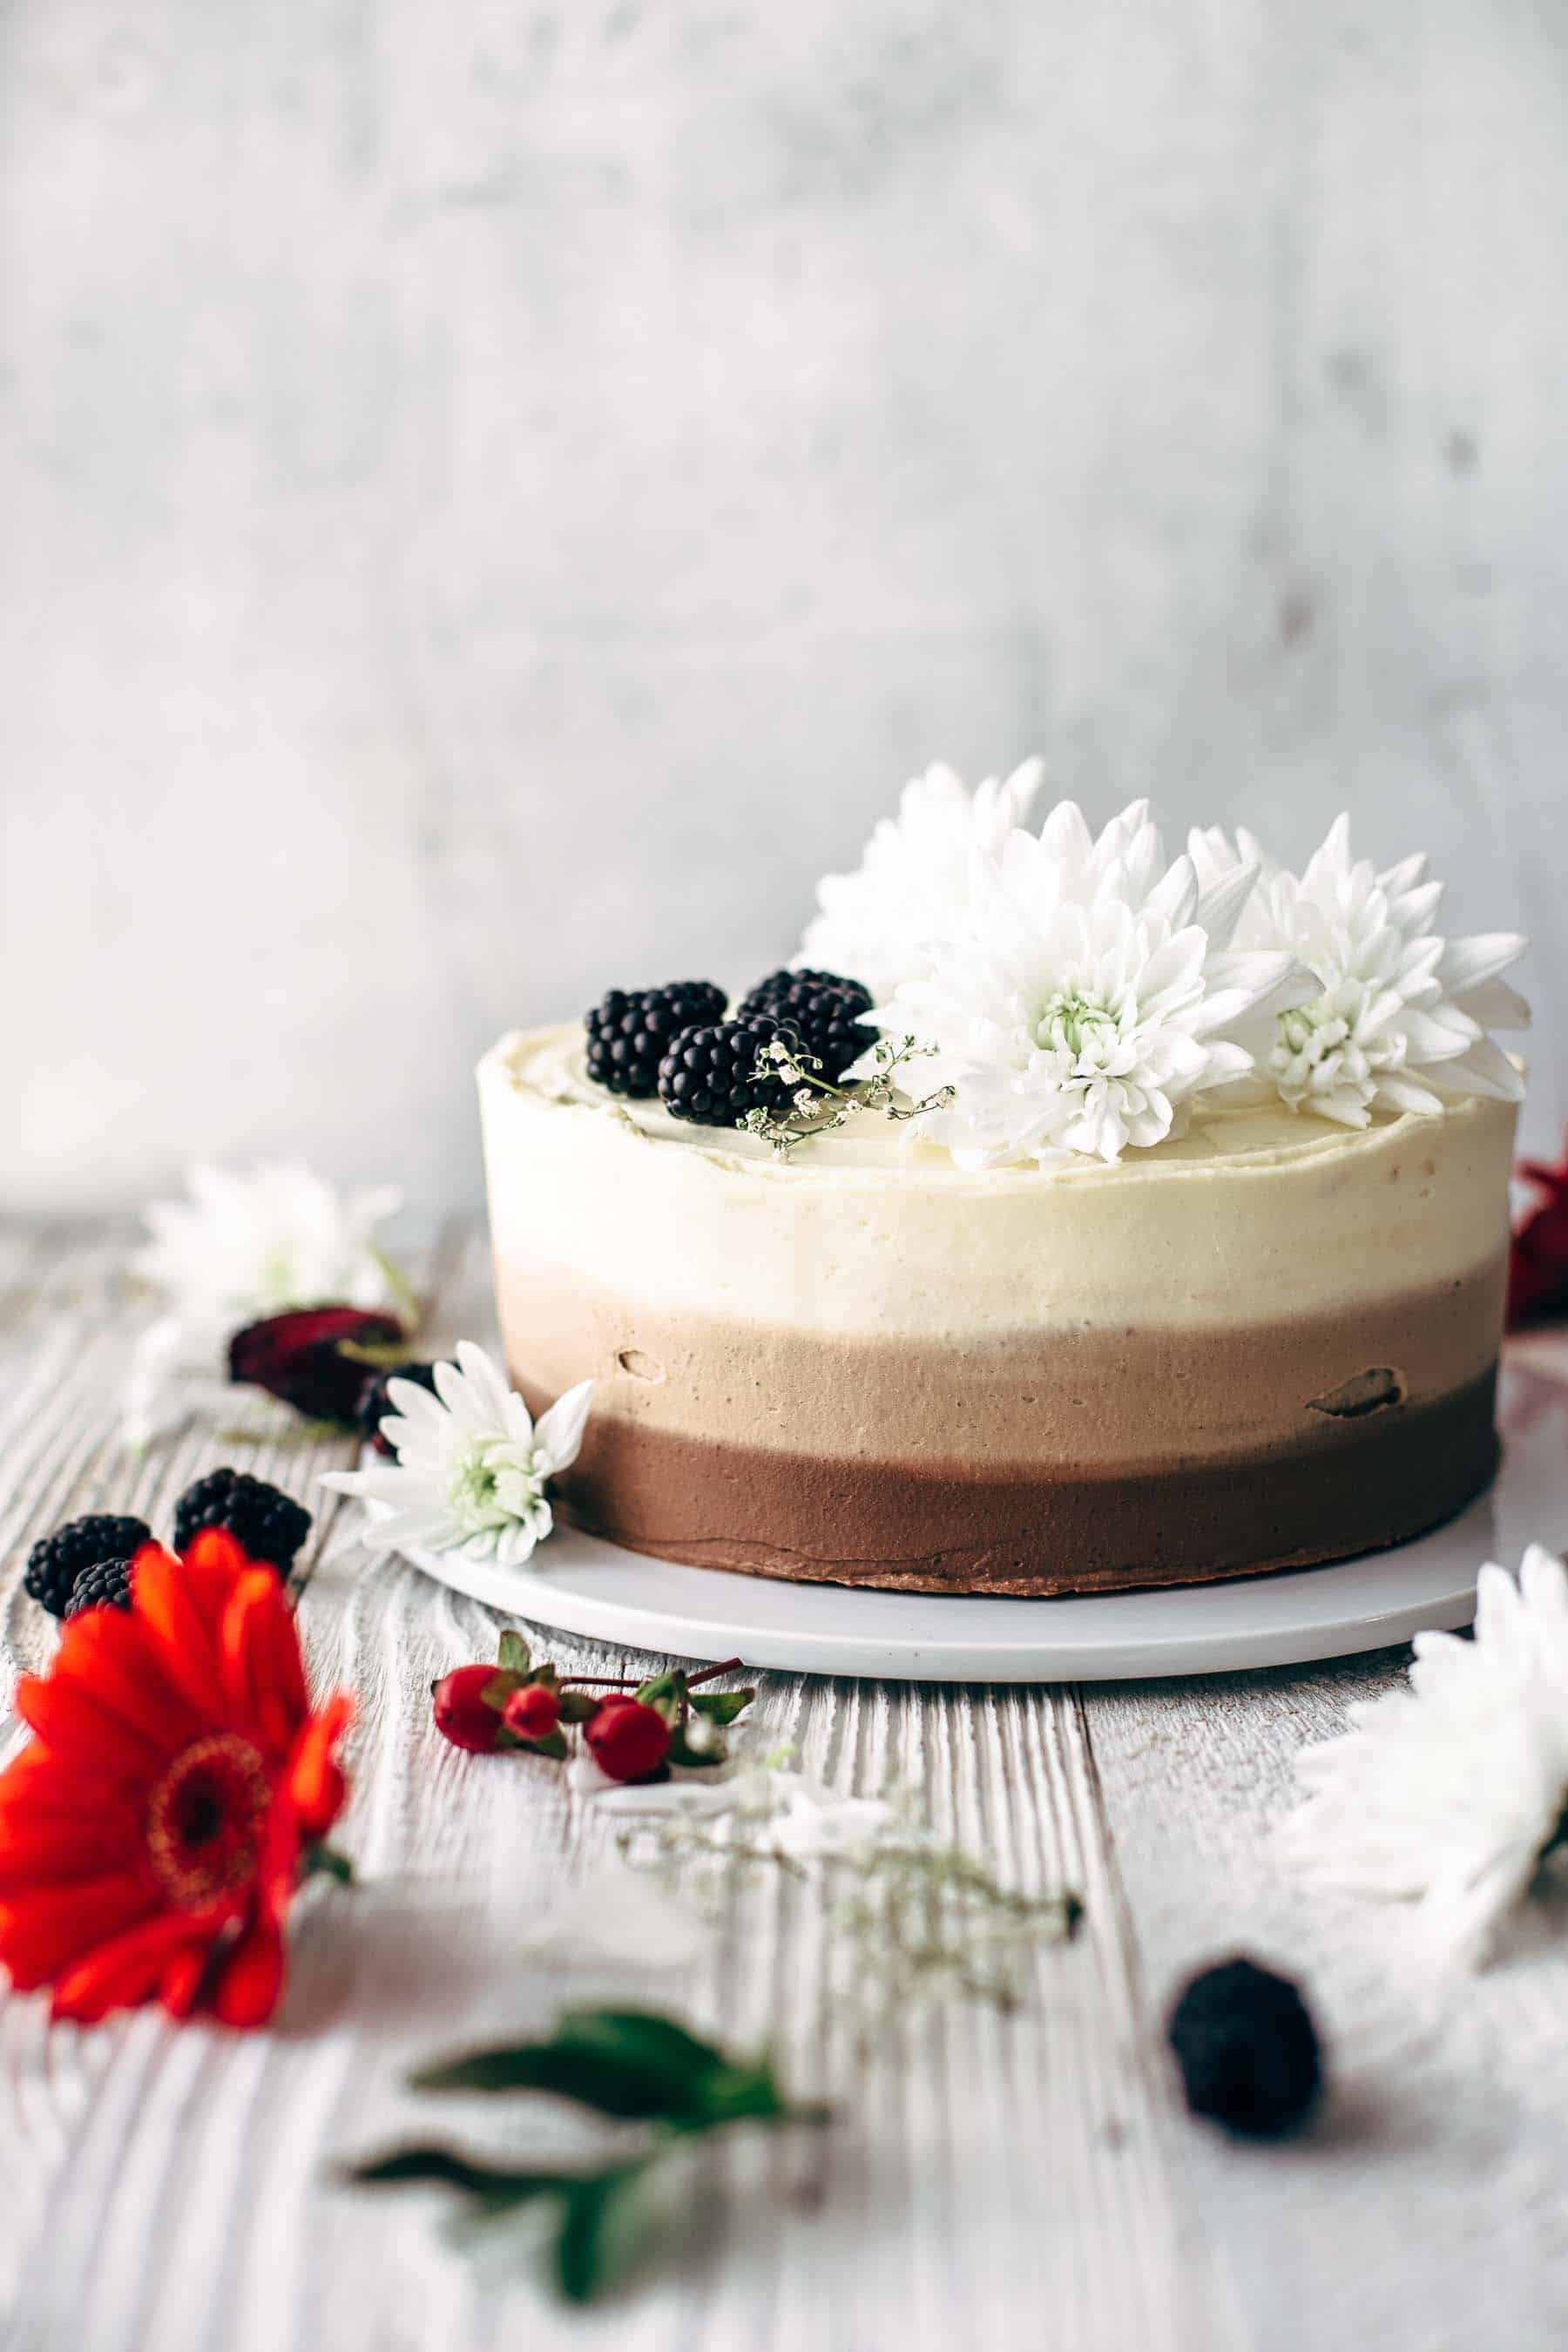
Are you looking for a stunning yet surprisingly easy-to-bake cake that can definitely soothe the deep cravings of a chocolate lover? Then, I present to you this triple chocolate ombre cake that has three layers of various types of chocolate.
In this article, I am going to share with you an absolutely Instagrammable cake that looks complicated yet surprisingly easy to do! Allow me to walk you through all the steps, provide expert tips, answer your most frequently asked questions about triple chocolate ombre cakes, and more.
Looking for something more creamy and decadent? Then check out this chocolate mousse cake recipe as well.
Jump to:
- Video Tutorial
- Ingredients
- Kitchen Tools & Equipment Needed
- Let’s Talk About the Chocolate for Your Triple Chocolate Ombré Cake
- Step-by-Step Guide to Making the Best Triple Chocolate Ombré Cake
- Expert Tips for Success
- How To Perfect a Dramatic Ombré
- Serving Recommendations
- Other Ombre Frosting Recipes
- Make Ahead and Storage Information
- FAQs
- Wrapping Up Our Triple Chocolate Ombré Cake Recipe
- More Chocolate Cake Recipes to Try
- Recipe
Video Tutorial
Ingredients
Triple Chocolate Cake Layers
- 2 ⅓ cups all-purpose flour, spooned and leveled
- 1 tablespoon baking powder
- 1 teaspoon salt
- ½ cup unsalted butter, at room temperature
- ½ cup mild-flavored oil (vegetable oil, sunflower oil, and canola oil are good options)
- 1 cup granulated white sugar
- 2 large eggs
- 2 teaspoons vanilla extract
- 1 cup buttermilk
- 3 oz high-quality dark chocolate bars, melted and cooled
- 3 oz high-quality milk chocolate bars, melted and cooled
- 3 oz high-quality white chocolate bars, melted and cooled
Triple Chocolate Buttercream
- 1 ½ cups unsalted butter, at room temperature
- 3 cups powdered sugar
- ⅓ teaspoon salt (or to taste)
- 3 oz high-quality dark chocolate bars, melted and cooled
- 3 oz high-quality milk chocolate bars, melted and cooled
- 3 oz high-quality white chocolate bars, melted and cooled
Kitchen Tools & Equipment Needed
- Baking pans
- Parchment paper
- Utility bowls
- Electric mixer or stand mixer with a whisk or paddle attachment
- Oven
- Toothpick
- Small offset spatula
- Cake board
- Cake stand
Let’s Talk About the Chocolate for Your Triple Chocolate Ombré Cake
Feel free to skip ahead to the actual recipe. However, I would like to take this opportunity to talk a little bit more about the most essential ingredient in this recipe: the chocolate.
It is imperative for you to use high-quality chocolate bars if you want your ombre cake to have a soft and delicately creamy texture. I am recommending chocolate bars instead of chocolate chips because I find them to have a smoother consistency when melted compared to chocolate chips which tend to be crumbly and gritty. In my experience, I have also found that using chocolate chips leaves my cake layers dry.
As for the brand, you can go for the one you most prefer. As for me, I love Valrhona, Guittard, Ghirardelli and Lindt. I love their rich flavors and I find that they work with my layers and icing splendidly.
As for the flavor, I prefer 50-60% chocolate for semi-sweet layers and frosting. You can certainly adjust according to your preferences. I just opt for 50% chocolate as I find that it best gives my three-layer cake a rich and deep chocolate flavor that’s not too bitter yet also not too overwhelmingly sweet.
Anyway, now that we have talked about what chocolate to use for your ombre cake in detail, we can move on to the fun part: the recipe!
Step-by-Step Guide to Making the Best Triple Chocolate Ombré Cake
1. Prepare the Baking Implements
Before anything else, let’s begin by preheating the oven to 350°F (or 175°C). As you’re waiting, line the bottom and sides of three 8-inch (or 20cm) baking pans with parchment paper. We are going to use them for our cake layers later. Set them aside for now.
2. Prepare the Cake Batter in One Large Bowl
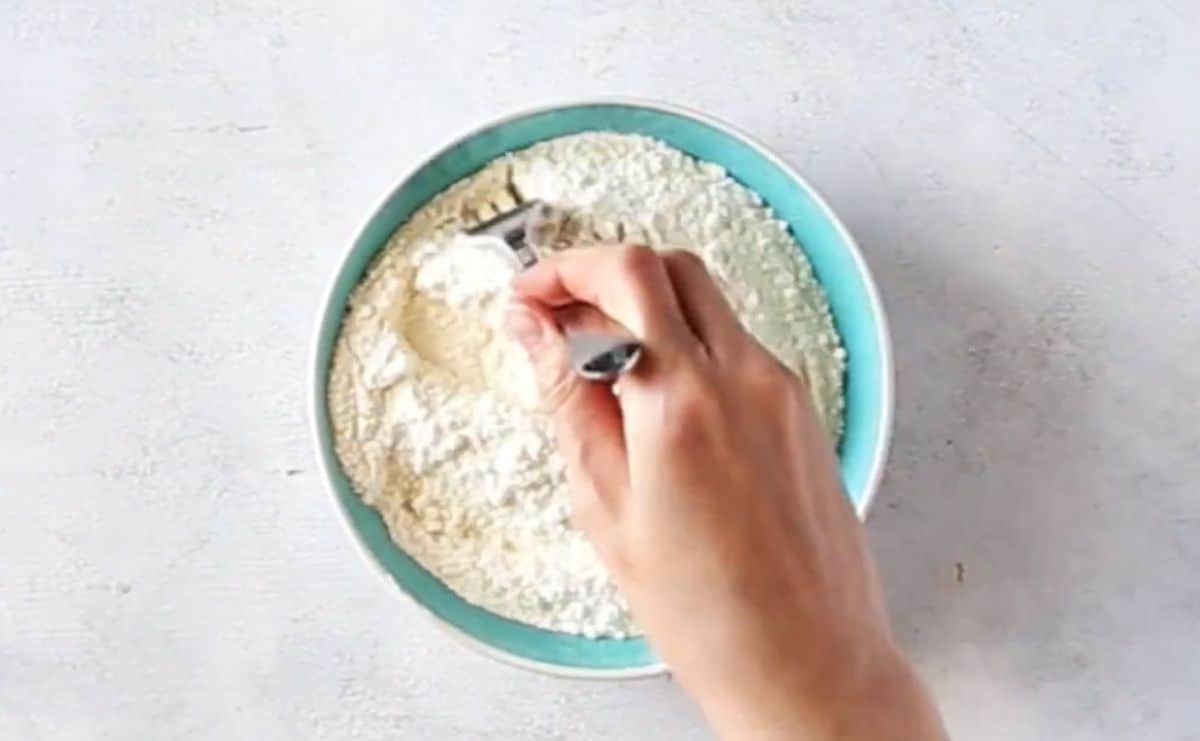
In one bowl, combine 2 and ½ cups of flour, 3 teaspoons baking powder, and 1 teaspoon of salt. Stir them to combine. Set this bowl aside.
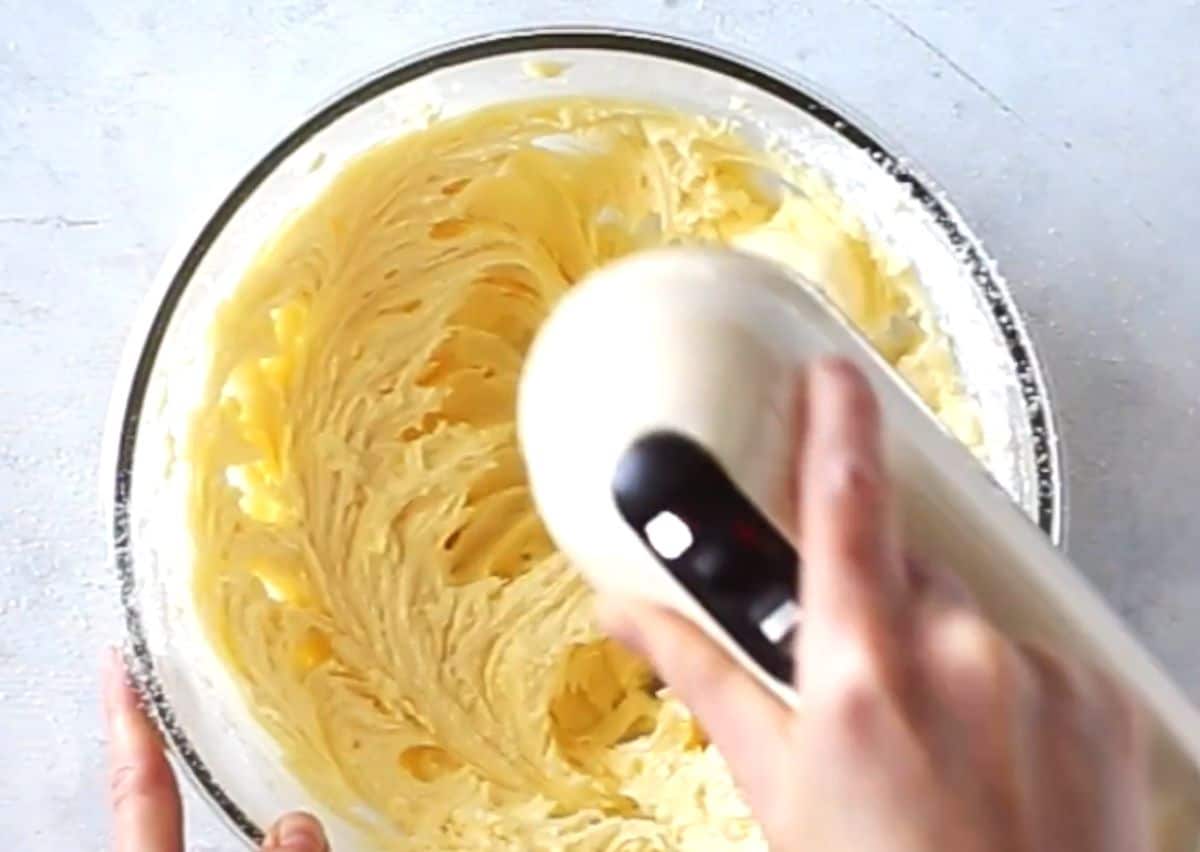
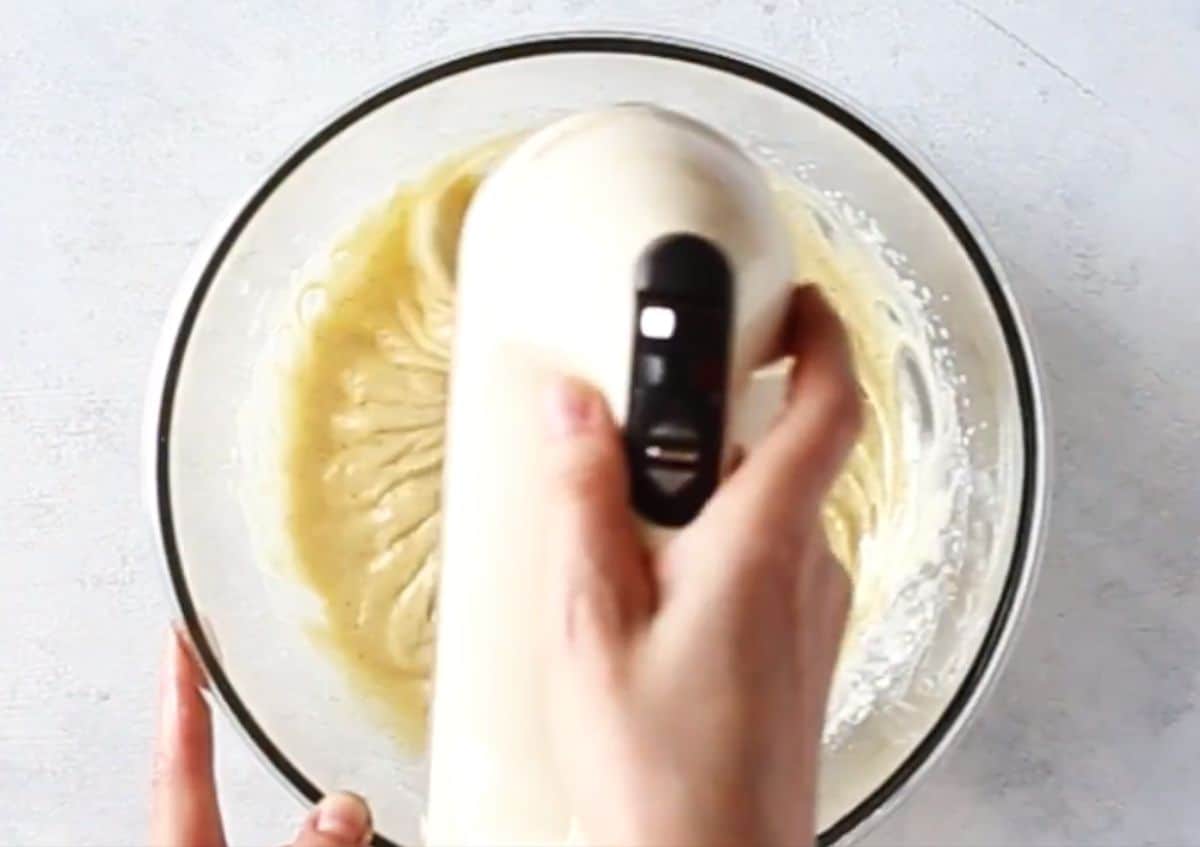
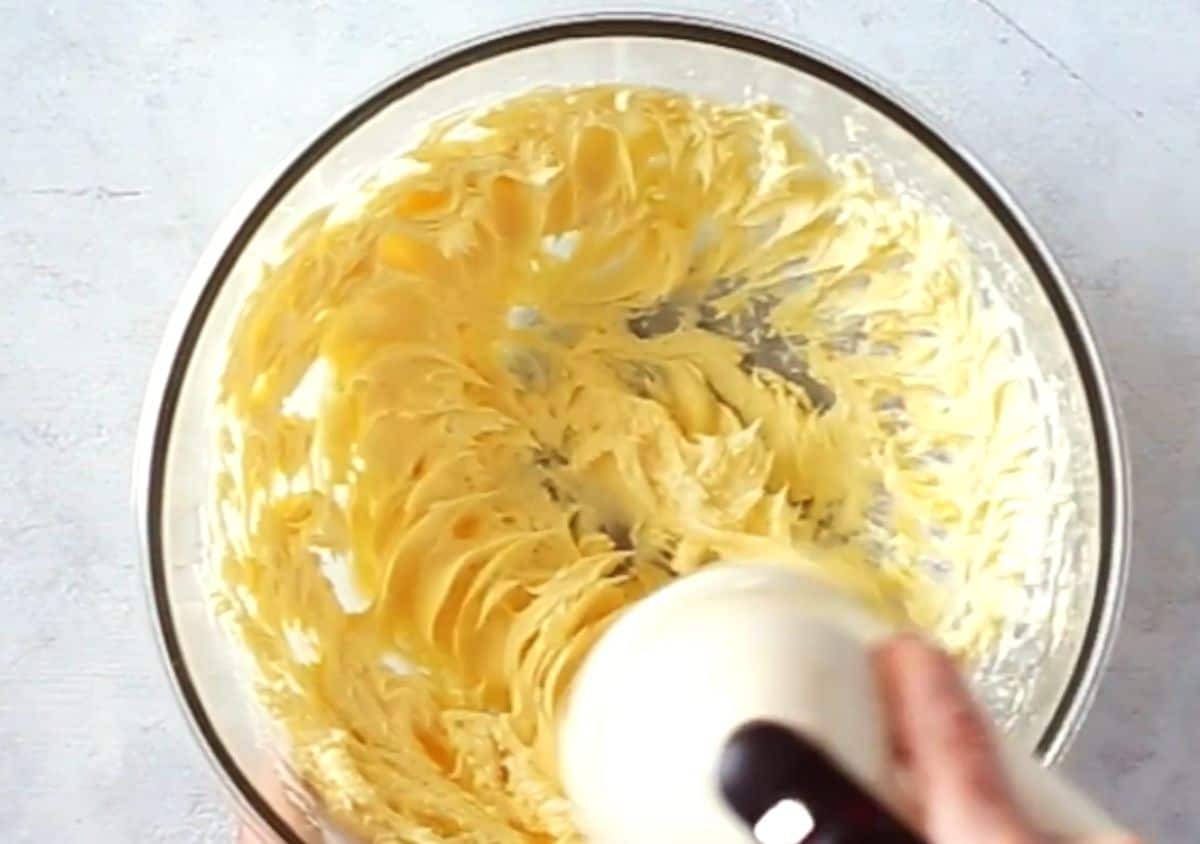
In a large mixing bowl, beat ½ cup of butter, ½ cup of oil, and 1 cup sugar for 2 to 3 minutes or until creamy using a hand or stand mixer fitted with a whisk or paddle attachment.
By the way, a quick note on the oil. I have used vegetable oil for this recipe, but as I have mentioned above, any mild-flavored oil with work. Just avoid oils with strong and distinct flavor profiles to prevent affecting the taste of your ombre cake.
If you don’t have an electric mixer, then you can use a whisk to combine the ingredients for your cake batter instead. A word of caution, though. It will be more challenging to achieve a smooth finish by hand-whisking your cake batter.

Moving on, add 2 large eggs and 2 teaspoons of vanilla extract to your cake batter and mix until they are fully incorporated.
Then, alternately add your dry ingredients and 1 cup of buttermilk, beginning and ending with your dry ingredients.
Again, mix your cake batter until all ingredients are fully combined.
3. Create the Ombré Effect in Your Cake Layers
In my opinion, a real ombre cake achieves the ombre effect in two aspects: the cake layers and the frosting. Let’s start with the cake layers first.
To do this, divide your ombre cake batter evenly into three bowls in equal portions. I highly recommend using a kitchen scale for better accuracy. This will also make sure that you’ll have enough batter for your ombre cake.
Anyway, the three bowls will allow us to create the different shades that we need for our cake layers.
You will need three bowls for your melted chocolate as well. Don’t forget to let them cool completely.
Starting with the lightest color, pour the white chocolate into your first bowl of batter. For the darker shade, pour the milk chocolate into the second bowl. And for the final layer, pour the dark chocolate into the third bowl.
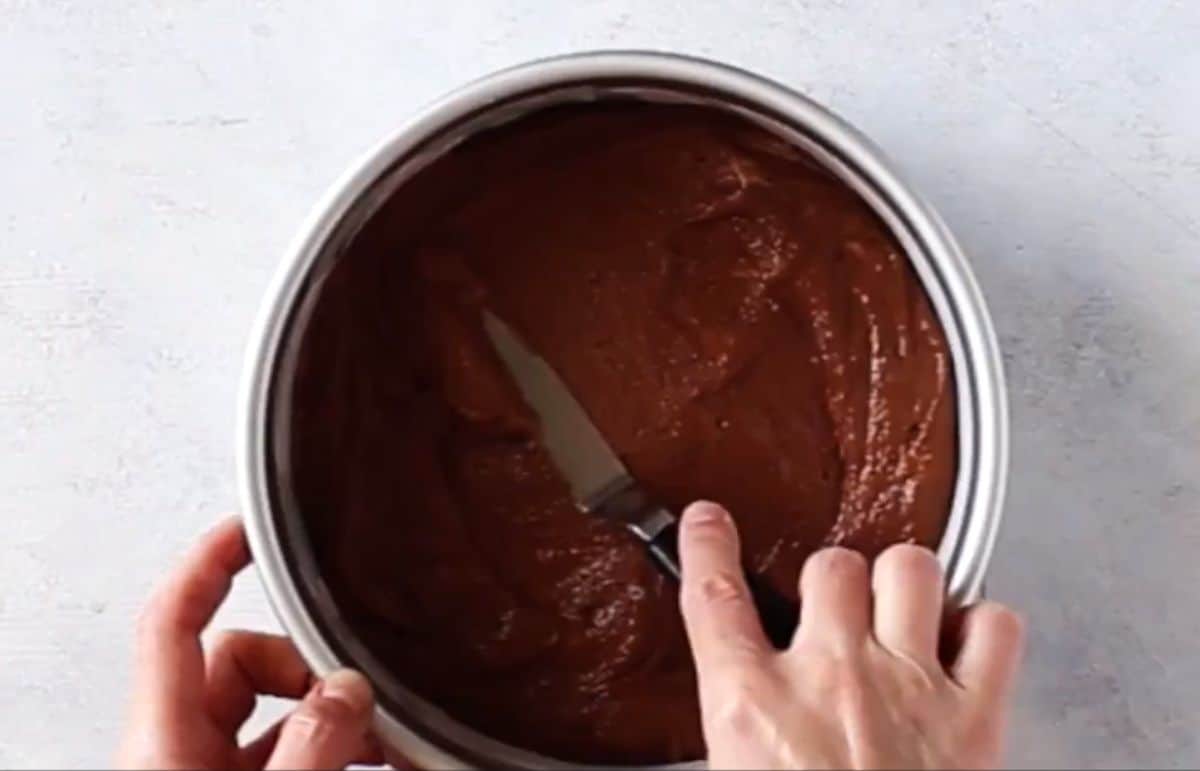
Stir each of your bowls until you achieve an even color. Even out each of your layers using a small offset spatula.
4. Bake Your Ombre Cake Layers
Pour each of your batter bowls into the baking pans we prepared earlier. Then, bake all your cake layers for 20 to 24 minutes. Poking a toothpick in the center to check if it comes out clean is also a great idea to make sure that your batter has completely baked.
You don’t want to overbake your cake layers. Otherwise, your ombre cake will end up dry. The goal is to achieve a soft and fluffy layer cake.
After baking, allow your cake layers to cool down to room temperature. I usually remove the cake layers from the baking pans and let them air-cool on wire racks.
5. Create the Ombré Effect With Your Buttercream Frosting
The next step in our ombre cake recipe is making the buttercream frosting. One tip that I want to stress is to make sure that you have enough buttercream frosting. You can do that by sticking accurately to my recipe.
Just keep in mind that we are going to need buttercream frosting to spread in between our cake layers and around the cake.
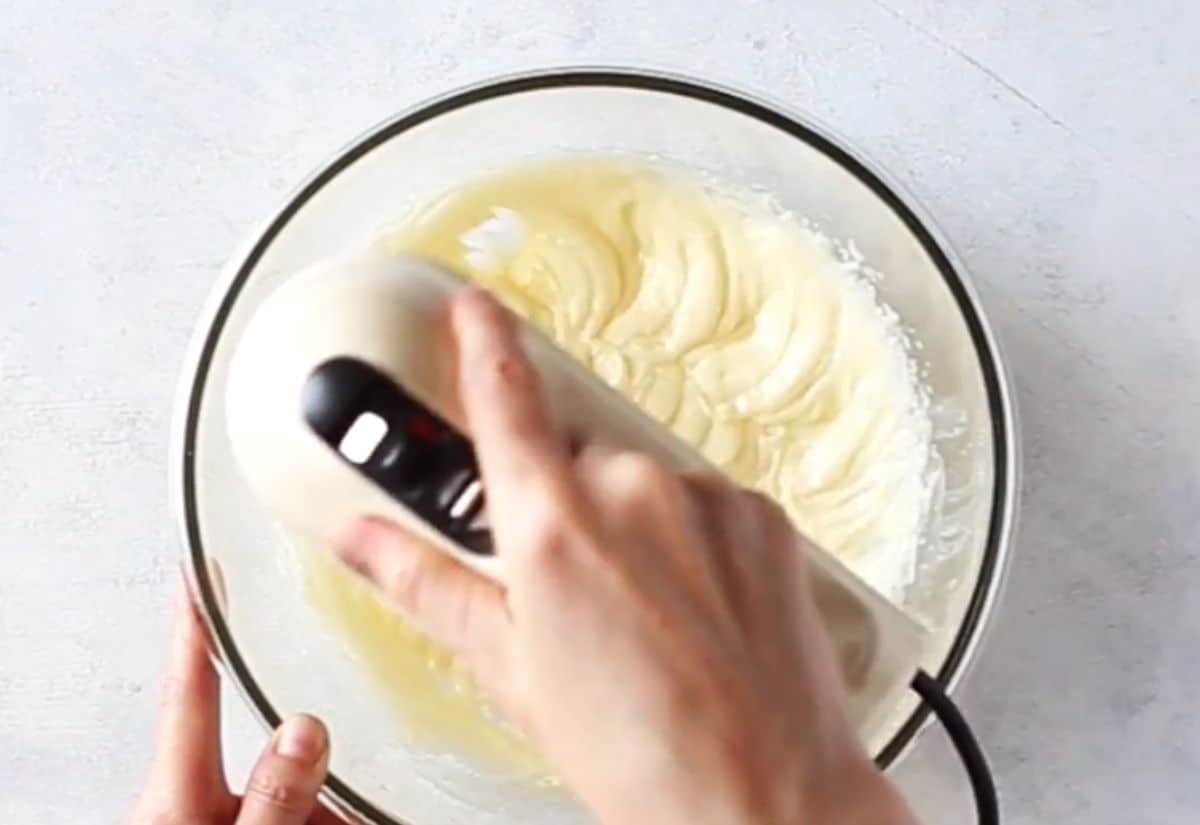
With that out of the way, let’s start making our buttercream frosting. In one bowl, beat 1 and ½ cups of unsalted butter at room temperature with your mixer at medium speed. Do so for 2 to 3 minutes or until your butter is soft and creamy.
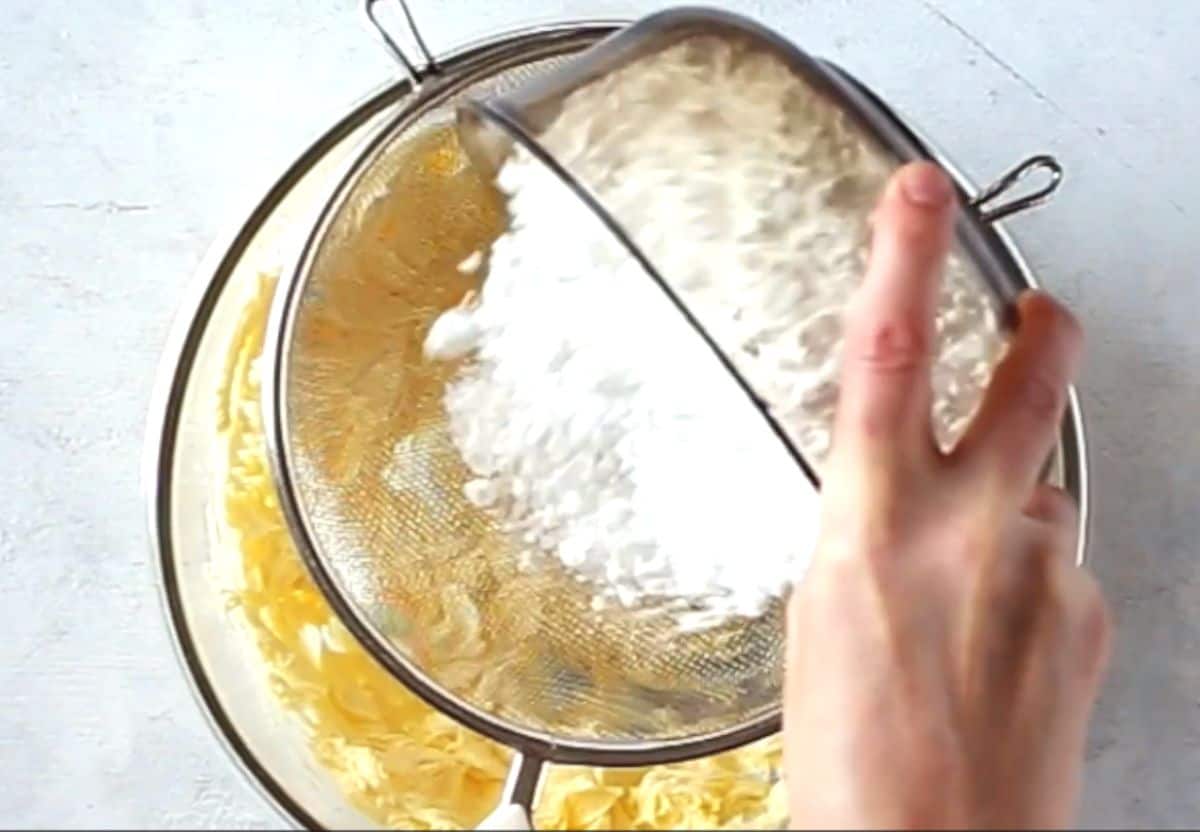
Add 3 cups of powdered sugar and beat until fully combined. Then, add ½ teaspoon of salt to taste. Continue mixing until smooth and you’re done with the base of the buttercream frosting.
Can I use another frosting recipe?
As you can see, I have a very straightforward buttercream frosting recipe. However, you can certainly opt for another type of cake frosting if you prefer. I will share some ideas for that at the end of this recipe.
Let’s move on with this one for now.
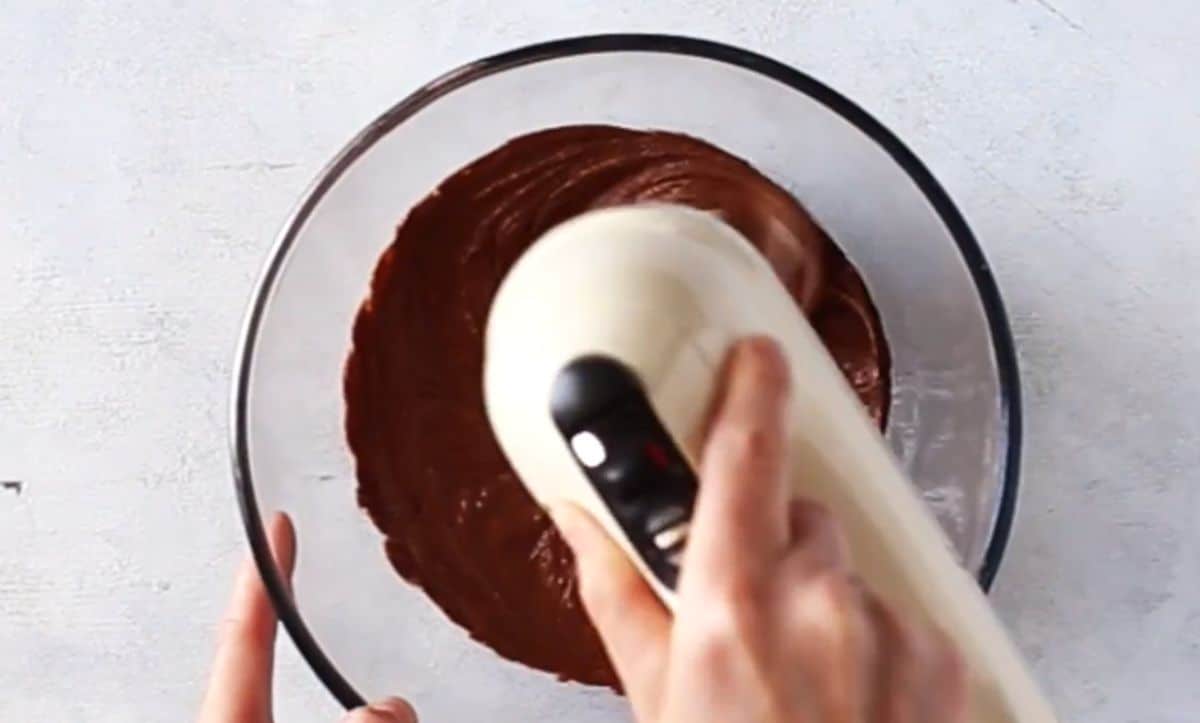
Melt all your chocolate and let them cool. Place your white chocolate, milk chocolate, and dark chocolate in separate bowls.
Next, divide your buttercream frosting base into three. Again, using a kitchen scale will help you make sure that your portions are equal.
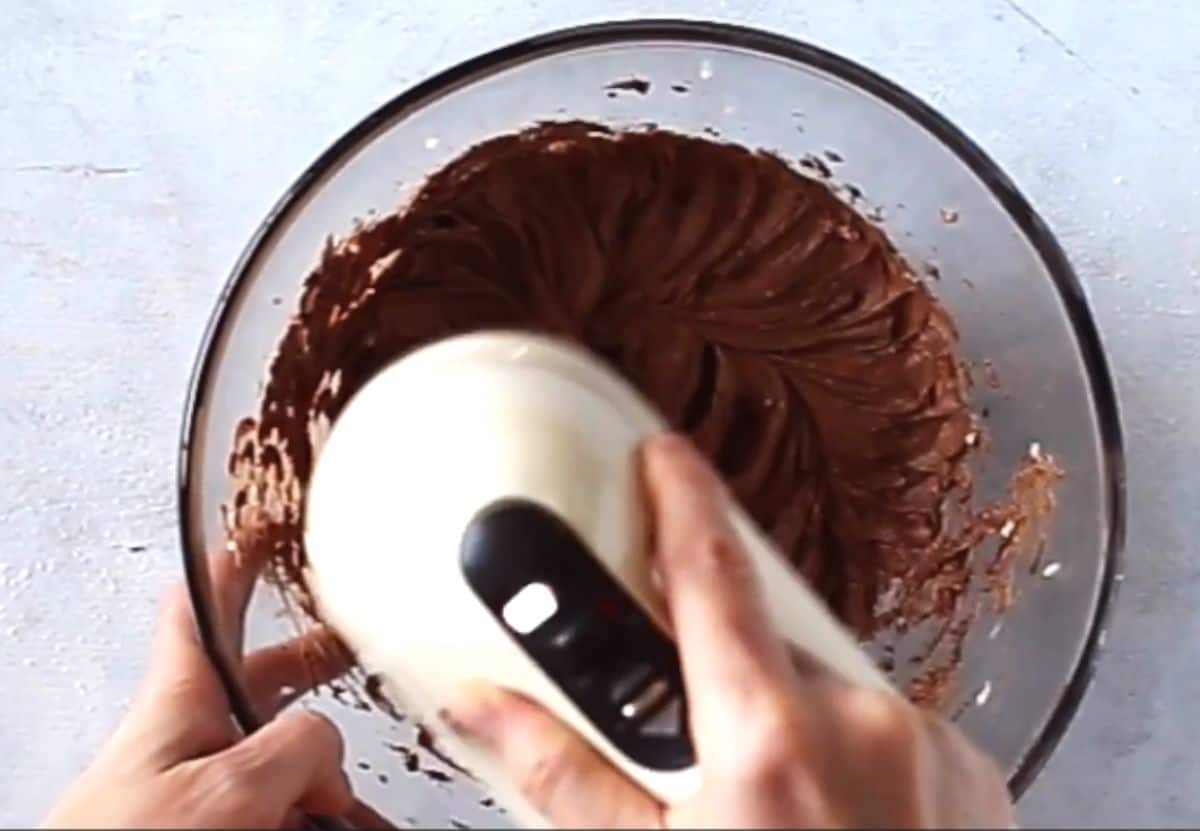
Put the melted white chocolate into the first bowl of buttercream frosting base. Put the melted milk chocolate into the second bowl. And finally, put the melted dark chocolate into the third one.
Then, mix all of your frosting bowls until each of their colors is even and smooth.
6. Assemble the Ombre Cake
Here comes the most exciting part of this triple chocolate ombre cake recipe (at least for me): assembling our cake!
I recommend cutting a thin layer off the tops of the cake layers. This will give me smooth flat surfaces to work on.
Put your cake board on your cake stand. I use a rotating cake stand because it makes applying an even, thin layer of frosting on the sides of the cake a little bit easier.
You don’t need to use a rotating cake stand if you don’t have one.
Another optional tip is putting a dollop of frosting at the center of the cake board. This can help make the bottom cake layer more stable, especially as you’re spreading the frosting around the cake later on.
Before we start spreading the creamy buttercream in between our ombre cake layers, let me just remind you to put aside 25% of your three chocolate frostings as we’re going to use the remaining frosting for the sides of the cake.
Rule of thumb: It’s better to have excess buttercream than end up with not enough.
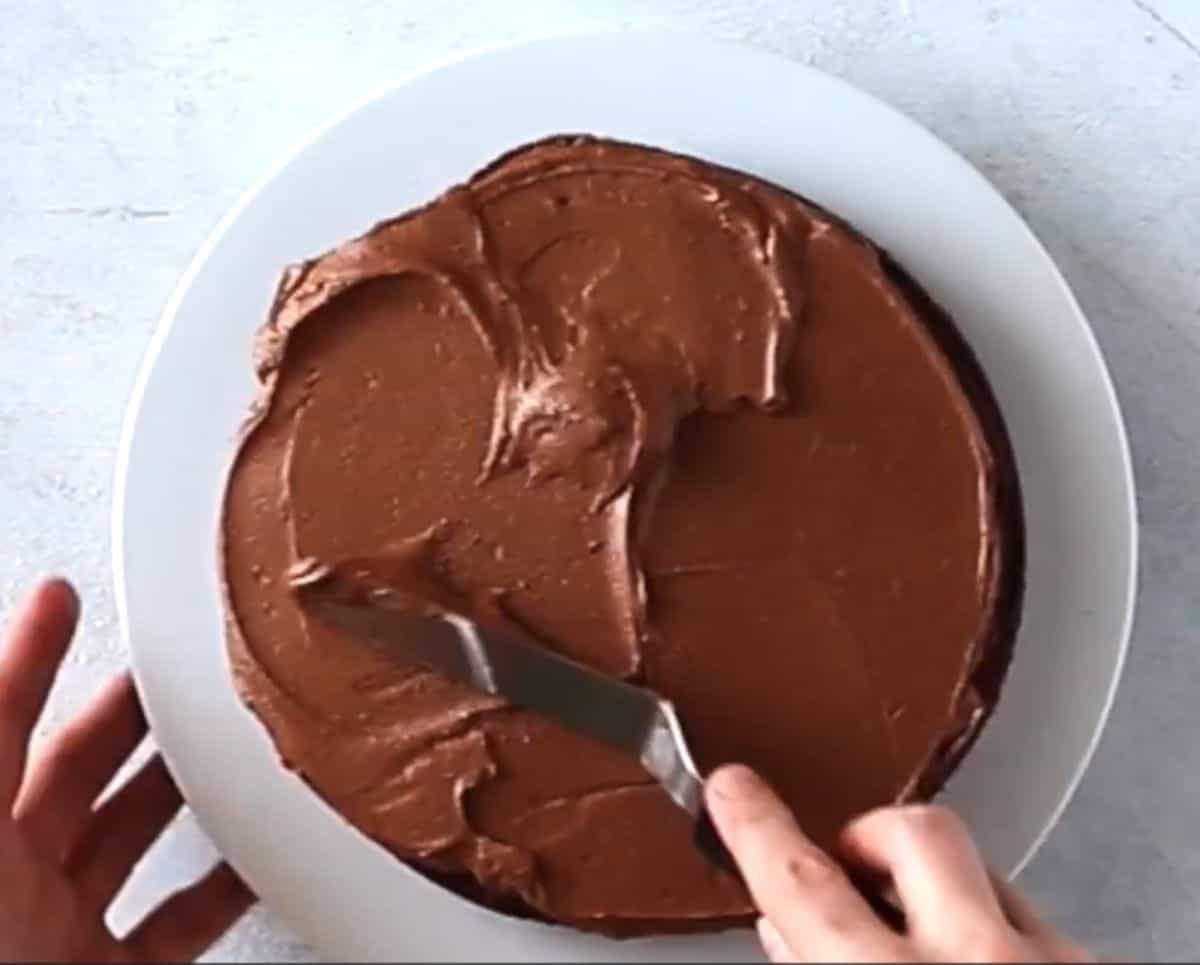
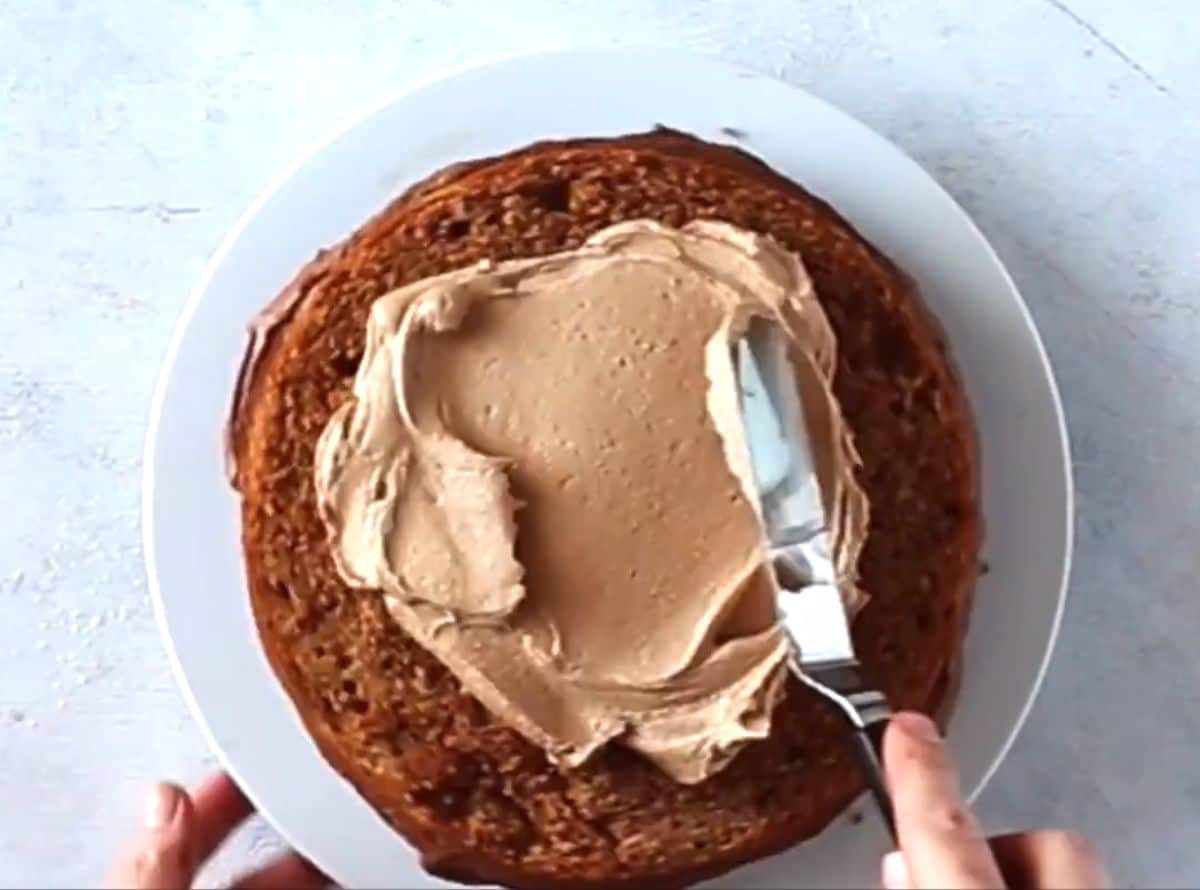
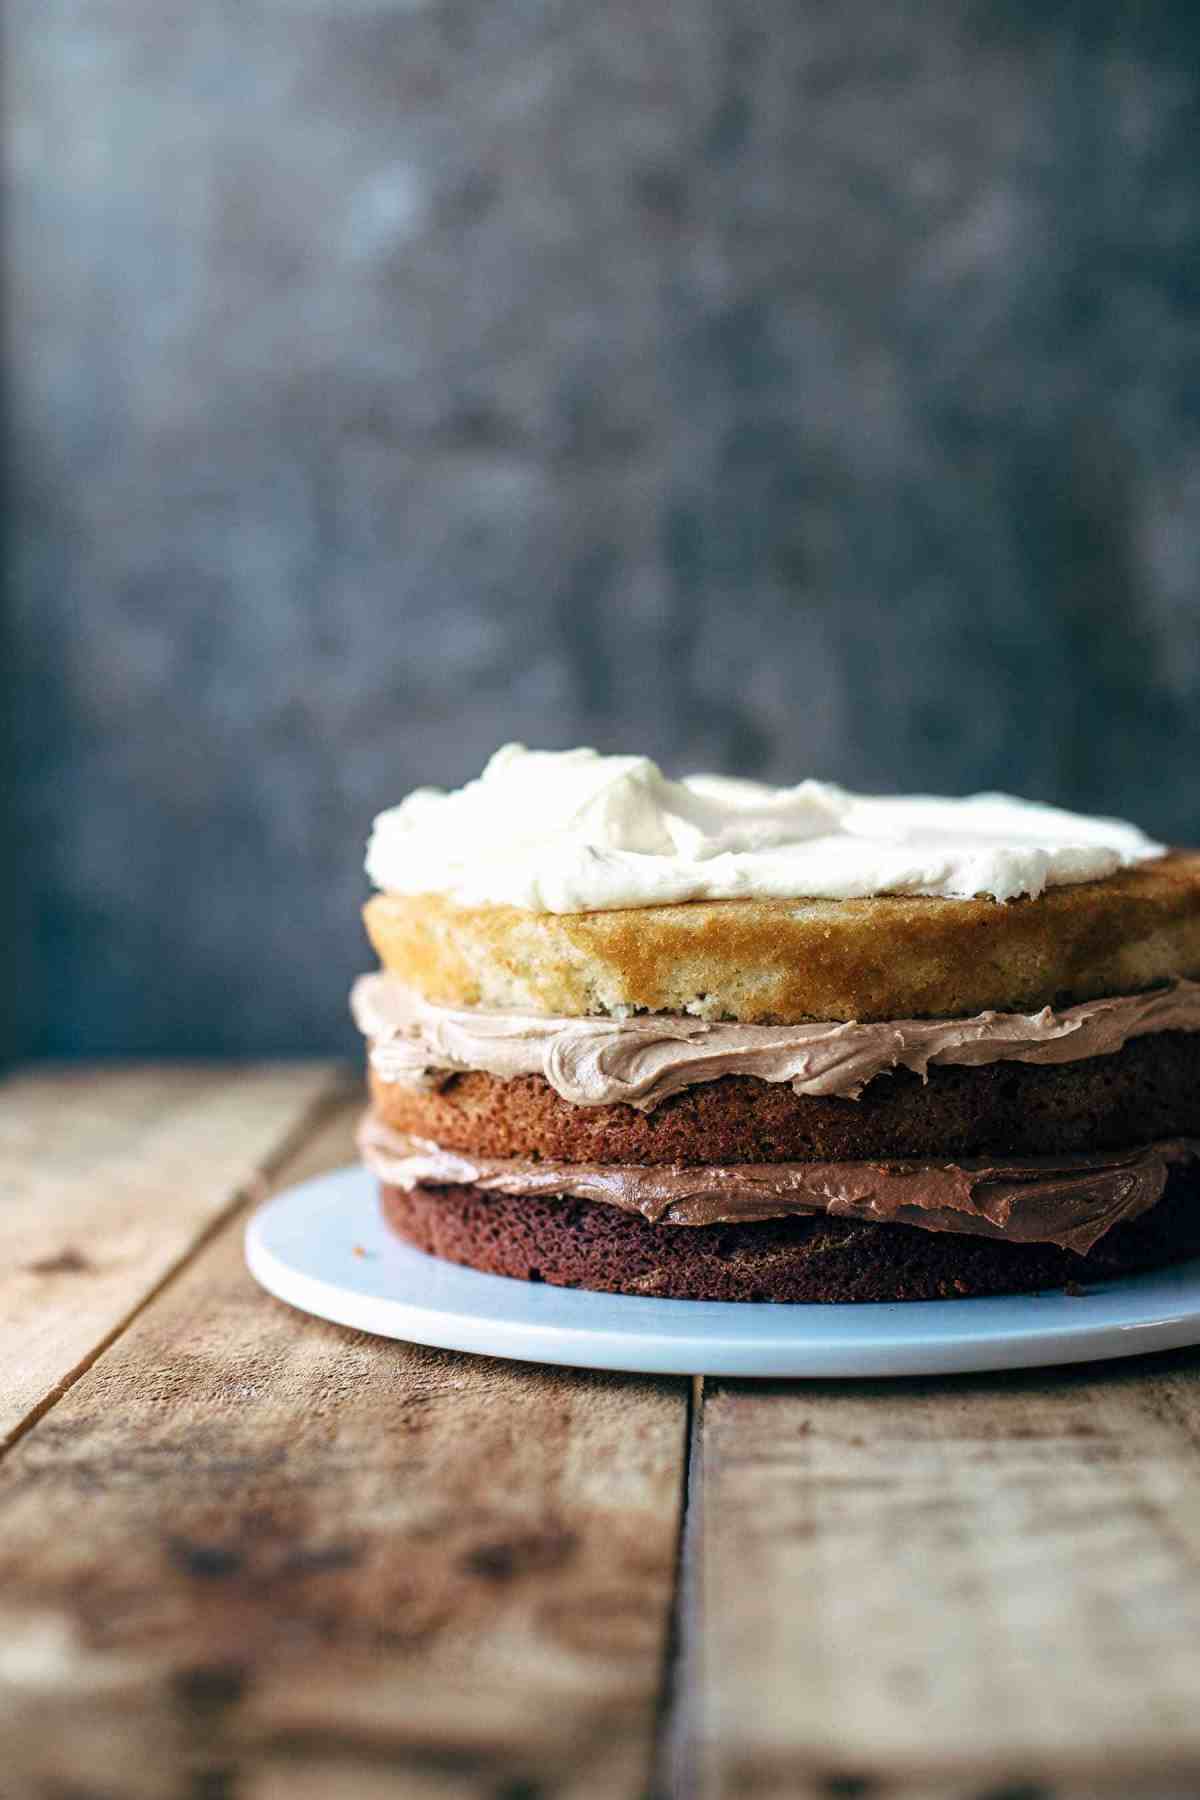
Once you’re ready, place the dark chocolate cake layer on your cake stand and spread the dark chocolate buttercream evenly over its top surface. You may use an offset spatula for this, but a palette knife will also work fine.
Take your milk chocolate cake layer and white chocolate layer and do the same. I like to take extra care in spreading the buttercream on the final layer as it’s going to be the top of the ombre cake.
7. Finish the Ombre Cake
We are in the final stretch of our triple chocolate layer cake recipe. The next step is to apply the remaining frosting to the whole cake.
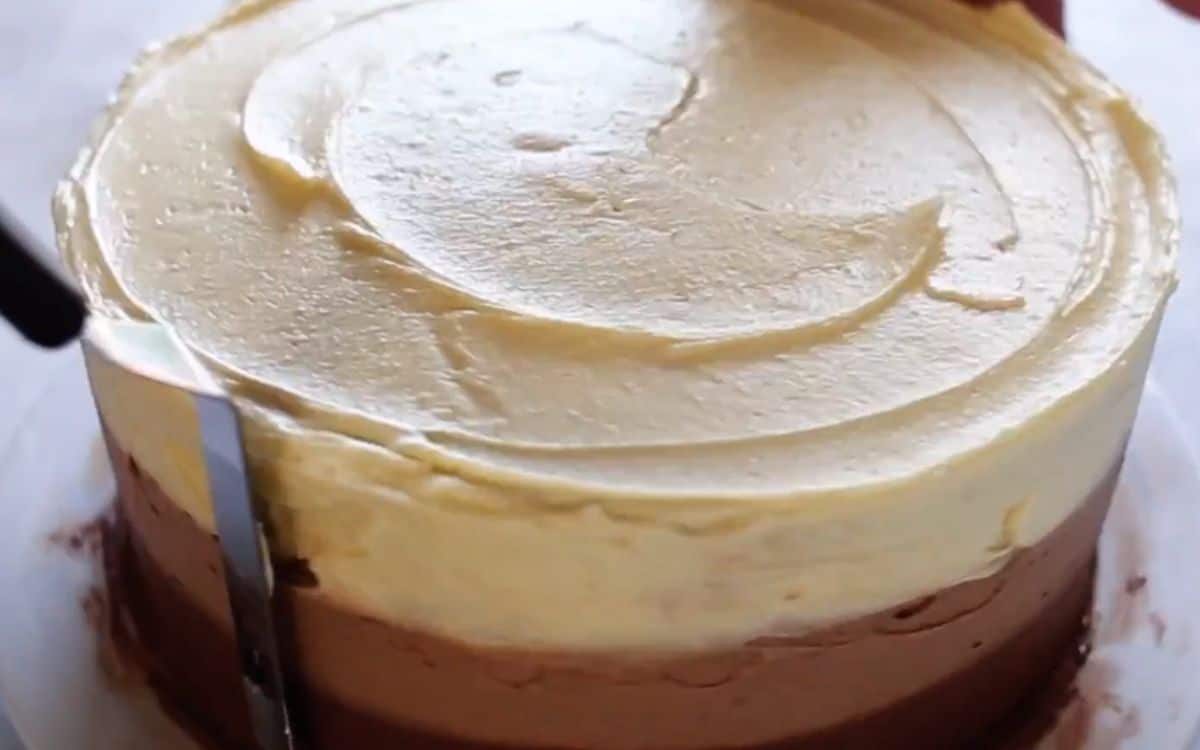
Starting with the dark chocolate layer, spread the remaining buttercream on the side of the dark chocolate cake with your offset spatula. Do the same for the remaining buttercream for your milk and white chocolate layers.
Try to keep the layers straight to really bring out the beauty of the ombré effect we want to achieve.
Don’t worry if your spreading is not that smooth at the beginning. You can always work your offset spatula to fix any awkward layers. The most important thing is to make those three layers distinct.
Here’s a quick tip: You can smooth over the areas where your chocolate layers meet with your offset spatula to blend your colors further and achieve a more dramatic effect.
Finally, chill your ombre cake in the fridge for 4 hours before serving.
I usually let mine chill in the fridge overnight if I’m expecting guests the next day. This way, I am absolutely sure that my frosting had fully set.
Expert Tips for Success
Congratulations! You have just baked a triple chocolate ombré cake. Now, before I move on to discuss serving recommendations, make ahead and storage information, and answer the most frequently asked questions related to this recipe, I want to take the time to share with you some tips on how to further improve your ombre layer cake.
I will also include how to perfect the dramatic ombre of your cake.
Use Parchment Paper
For my first tip, line your baking pans with parchment paper. There are other recipes out there that recommend using baking spray, but I find that they make it challenging to remove the baked layers, especially for beginners.
In my experience, it is significantly easier to extract a cake layer from its baking pan when using parchment.
Always Divide Before Adding
Another tip that I want to stress out is to always divide your bases first before adding in your melted chocolate, whether it’s the batter or buttercream base.
Allow Things to Cool Down Before Proceeding to the Next Step
This is very important. Allow your melted chocolate to cool down before adding it to your buttercream. Don’t add your frosting to a cake layer if it’s still hot.
Keep in mind that buttercream tends to melt easily so heat can significantly impact its resulting smooth and creamy texture.
Don’t Be Afraid to Make Small Adjustments
Had your buttercream gone too soft? Then don’t worry. Adding more powdered sugar to your frosting can thicken it.
Is your frosting too sweet? It’s nothing that a pinch of salt can’t fix.
What if the buttercream is too thick? Then you can soften it with whole milk. Add a teaspoon at a time until you achieve the ideal consistency.
Is your cake layer uneven? You can make tiny slices to flatten it better. If they’re already too thin, then you can always compensate with your frosting. You can even cover up most imperfections by working your buttercream with your offset spatula.
In fact, you can even hide surface imperfections by putting the remaining frosting into a piping bag and further decorating your cake.
How To Perfect a Dramatic Ombré
As I have mentioned above, you can only claim that you have baked an ombré cake if you have met two requirements:
1. You have ombré cake layers.
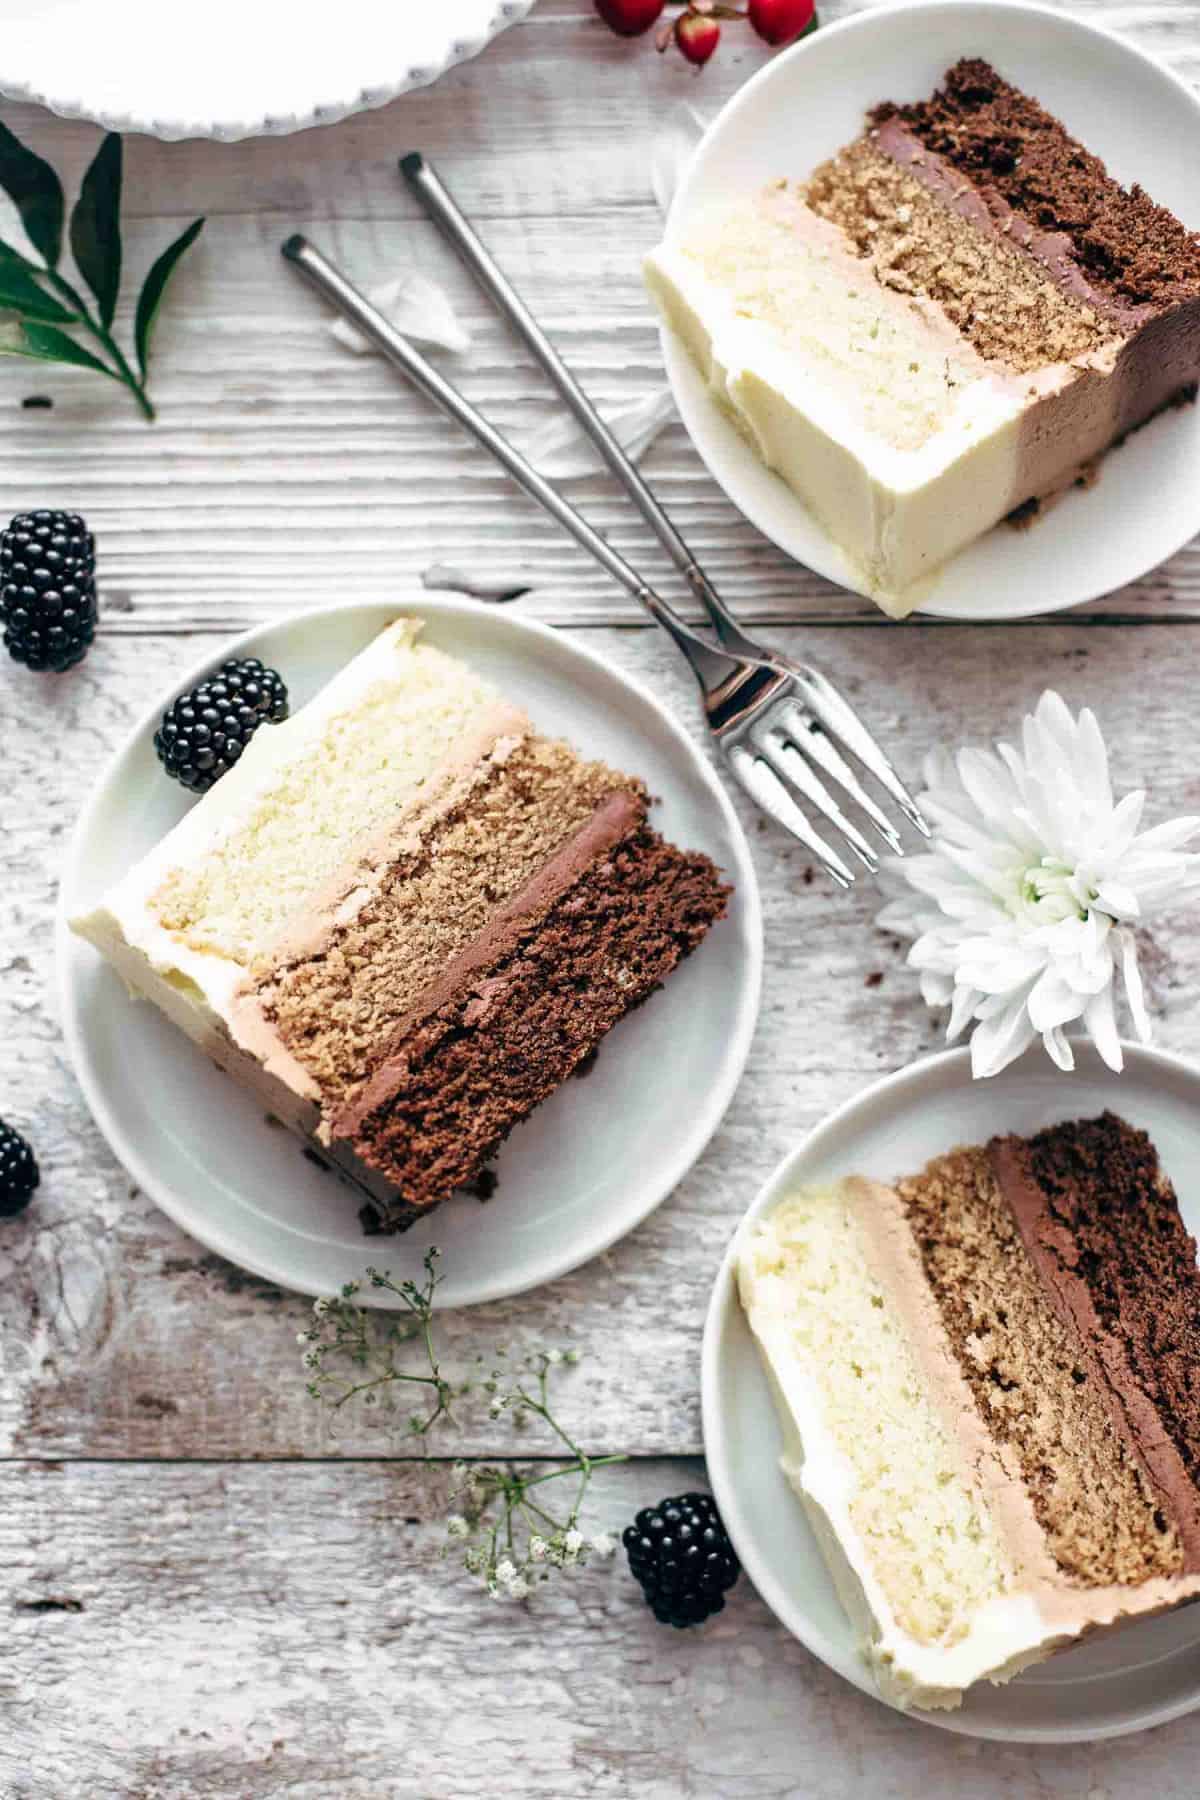
First, you must have a multiple layer cake. Having at least three layers is enough, but you can certainly add more. However, each cake layer must have a distinct shade from the others, and these different shades must be in the right arrangement to make a gradient.
It doesn’t matter whether your darker shade is at the bottom or at the top as long as the gradient is clearly visible. It is just my personal preference to start with a darker shade since I find that it looks more dramatic.
2. You have ombre frosting.
Next, your frosting must also display blending gradient colors. One of the things I love about this triple chocolate ombré cake recipe is the fact that it doesn’t require any food colouring.
The different shades of luscious brown can be easily achieved by using different types of chocolate.
That said, you can definitely incorporate other colors into your creation if that’s what you prefer. You also don’t have to limit yourself to just three layers of color. It is easy to achieve four shades of color or even more with a few drops of food colouring into your white frosting.
You can even make a colorful three-layer cake with a gradient rainbow frosting!
On the other hand, don’t take this as a go signal to pile more colors into your cake. Remember, the dramatic impact of an ombré cake doesn’t rely on the number of color layers it has. It’s in the blending.
You’d want to pay attention to the areas where two different shades meet. Softly blend them together with your spatula in the direction you want your gradient to go. It might take some practice and patience, but before you know it, you’ll be blending colored frosting like a pro.
Serving Recommendations
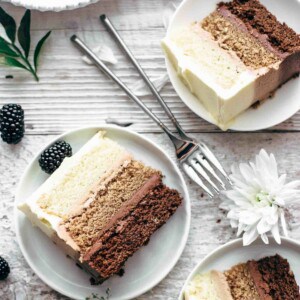
I enjoy highlighting the understated elegance of a triple chocolate ombré cake. This is the reason why I usually decorate mine with a rustic aesthetic in mind. For this instance, I have chosen blackberries and white flowers. I don’t want excessive cake decor to overpower the simple yet regal look of my ombré cake. But, that’s just me.
I encourage you to garnish your cake in a way that will bring you pride and joy!
The Crumb Coat
If there is one pro tip that I want to share in terms of frosting is to pay attention to your crumb coat. The crumb coat is the first layer of frosting that coats your cake. As the name suggests, this is the layer of frosting responsible for catching your cake’s crumbs while also efficiently sealing in its fluffy moistness.
I understand that some people find it difficult to get an even crumb coat for an ombré cake since it requires different frostings. Of course, patience and practice are needed but I’ve found that using a piping bag can also help.
Other Ombre Frosting Recipes
Don’t limit yourself to the frosting recipe I have used. You can also tweak your cake by playing around with other types of frosting.
For instance, I have stumbled upon an ombre frosting recipe that uses unsalted vegan butter to make the buttercream.
You can also get inspiration from the reason why you’re baking an ombré cake in the first place. After all, this recipe is a good go-to cake for special occasions. One good example of this is using Italian meringue frosting for Easter or baby showers since it uses egg whites.
Again, the important part is achieving that gradient of color, even if that means adding a few drops of food coloring to a base white frosting.
Pro Tip: If you have decided to use food coloring, then I recommend using gel food coloring over liquid coloring since they give a more brilliant color.
Make Ahead and Storage Information
This triple chocolate ombré cake can last for up to 4 days as long as it’s stored in an airtight container kept in the fridge or at cool room temperature.
You can also make your ombré cake ahead of time. Find the steps below.
For Cake Layers
Bake your cake layers and let them cool completely. Then, tightly wrap each cake layer with plastic wrap twice. You can also use a freezer bag as an alternative.
When done properly, this storage method will keep your ombré cake layers fresh for up to a month.
Once you’re ready to assemble your cake, all you need to do is to thaw your cake layers by unwrapping them and letting them sit at room temperature for 1 to 2 hours. Then, you may go ahead and make the frosting and assemble the cake as instructed.
For the Whole Cake
You may also freeze and prolong your whole ombré cake’s shelf life. To do so, chill your cake for 3 hours after baking. Then move your cake to the freezer for about 2 hours or until it’s firm. Then, remove the cake from the freezer and tightly wrap it with plastic wrap twice. I also recommend wrapping the cake with aluminum foil twice or placing it inside a freezer container.
This storage method will give your ombré cake up to 3 months of shelf life.
To consume, just unwrap your cake the night before and let it thaw by letting it chill in your fridge overnight. You can serve it the very next day.
For Single Slices
Lastly, you can also freeze slices of your ombré cake. This is great for dealing with leftovers.
To do this, let your slices freeze for about an hour. Then, remove it from the freezer and wrap each slice with plastic wrap twice. It will help to place it in a freezer bag as well.
This storage method will give your ombré cake slices up to 3 months of shelf life.
To consume, just unwrap your cake slice and place it at room temperature for an hour.
Quick Reminder: Completely wrapping your cake in plastic wrap is the crucial step in the storage process if you want to keep your cake for up to a month or more.
It is not enough to just put your cake in an airtight container. It will only last for up to 4 days at most this way.
FAQs
Coming from the French word “ombrer” which means to shadow, it is a term used for a gradient of colors that blend from dark to light (or vice versa). Displaying this beautiful blending of colors is considered an advanced technique in cake decoration.
You can smooth the appearance of your ombré cake and highlight the beautiful blending of colors by using a palette knife to go around the sides of your cake very gently. The objective is to blend the colors so be careful not to scrape off your frosting. Using a rotating cake stand and an actual cake scraper really makes a difference.
In my experience, buttercream is the ideal icing to use for an ombré cake. I have found that it provides the right texture and consistency that allows the beautiful blending and fading of colors.
The secret lies in using baking powder. When mixed with flour and dough, baking powder undergoes a chemical reaction that produces carbon dioxide. This gas that gets trapped in the dough then creates the light, airy texture that makes cakes spongy and smooth.
Wrapping Up Our Triple Chocolate Ombré Cake Recipe
Indeed, the ombré is considered an advanced cake decoration technique. When done properly, it creates a stunning look that you won’t find anywhere else.
That said, there is no reason to be intimidated by it especially when there are plenty of tips and tricks that can help you out.
As long as you follow all the steps I have detailed in the recipe above, I am confident that you’ll be able to bake and decorate a magical triple chocolate ombré cake that embodies the ombré technique from the inside out!
By the way, this is not the only scrumptious chocolate cake my website has in store for you. Feel free to explore Also the Crumbs Please for other chocolate cake recipes like this sinful and satisfying hot chocolate cake, and this rich and decadent chocolate mousse cake.
Don’t forget to check out our ingredient substitution guides and air fryer tips as well.
Finally, please feel free to share your experience in trying this recipe in the comments section below because I really want to know. Happy baking!
More Chocolate Cake Recipes to Try
- Flourless Chocolate Cake
- Black Forest Cake
- Texas Sheet Cake
- S'mores Cake
- Chocolate Cake
- Air Fryer Chocolate Cake
Recipe
Triple Chocolate Ombré Cake
Ingredients
triple chocolate cake layers
- 2 ⅓ cups all-purpose flour, spooned and leveled
- 1 tablespoon baking powder
- 1 teaspoon salt
- ½ cup unsalted butter, at room temperature
- ½ cup mild flavored vegetable or canola oil
- 1 cup granulated white sugar
- 2 large eggs
- 2 teaspoon vanilla extract
- 1 cup buttermilk
- 3 oz high-quality dark chocolate bars, melted and cooled
- 3 oz high-quality milk chocolate bars, melted and cooled
- 3 oz high-quality white chocolate bars, melted and cooled
triple chocolate buttercream
- 1 ½ cups unsalted butter, at room temperature
- 3 cups powdered sugar
- ⅓ teaspoon salt (or to taste)
- 3 oz high-quality dark chocolate bars, melted and cooled
- 3 oz high-quality milk chocolate bars, melted and cooled
- 3 oz high-quality white chocolate bars, melted and cooled
Instructions
- Preheat oven to 350°F / 175°C. Line the bottom and the sides of three 8" (20cm) baking pans with parchment paper and set aside.
- Cake layers: In a medium bowl combine flour, baking powder, and salt, and stir to combine. Set aside.
- In a large mixing bowl with an electric mixer fitted with a whisk or paddle attachment, beat butter, oil, and sugar until creamy for about 2-3 minutes. Add eggs and vanilla and mix until fully incorporated. Alternately add dry ingredients and buttermilk, beginning and ending with dry ingredients. Stir just until combined. Divide the batter evenly among three bowls (use a kitchen scale for accurate results). Pour the dark chocolate into one of the three bowls, stir and pour the batter into one of the prepared baking pans. Repeat with milk chocolate and white chocolate. Bake for 20-24 minutes or until a toothpick in the center comes out clean. Don't overbake or the cake will be dry. Let cool to room temperature.
- Buttercream: Beat butter on medium-high speed until soft and creamy, about 2-3 minutes. Add powdered sugar and beat until fully combined and smooth. Add salt to taste and mix to combine. Divide the buttercream evenly among three bowls (use a kitchen scale for accurate results). Pour the dark chocolate into one of the three bowls and stir until creamy. Repeat with milk chocolate and white chocolate.
- Assemble the cake: If necessary, cut a thin layer off the tops of your cakes to create a flat surface. Place the dark chocolate cake layer on a cake stand and spread the dark chocolate buttercream evenly over the cake. Reserve about ¼ of the buttercream for the sides. Repeat with the milk chocolate and white chocolate layers. Spread the remaining buttercream along the sides of the cake. To do this, spread one buttercream after another along the sides of each cake layer with an offset spatula, smoothing at the end with the offset spatula to slightly blend the colors where they meet. Chill 4 hours in the fridge before serving. Store in an airtight container in the fridge up to 4 days.
Video
You can find the video in the post above. If you don't see a video, please check your browser settings.
Emma
This is the best cake recipe ever. I've made this recipe at least 5 times now. All my family members want this cake for their birthday. It's so good!!!!!
Tessa
Hello! Can this recipe be made in advance? My thought was to make everything day before, assemble day of. Any suggestions?
Sabine
Hi, yes that is absolutely possible. Store the cake layers in an airtight container at room temperature and the frostings in the refrigerator. Let the frosting sit at room temperature for 30-60 minutes before assembling the cake. I hope that helps.
Ashish Jain
Hi Sabine,
I am planning to bake this cake for my wife on her bday as she has been thinking of baking a chocolate ombre cake herself for quite some time now.
Request your help on couple of queries
1. Can I substitute eggs with 1/2cup Greek yogurt?
2. Are the chocolates used for cake batter and frosting sugar less or should they have some % of sugar?
Sabine
Hi Ashish, I haven't tried this particular recipe with Greek yogurt but you can certainly use 1/4 cup of Greek yogurt for each egg. The chocolates I used were white (no percentages), milk (about 35%), and dark (about 50%). I hope that helps. Good luck and happy birthday to your wife.
Ashish Jain
Thanks Sabine,
Your comment came on the day when I had to bake the cake!
We all loved the cake, especially dark chocolate and milk chocolate layer.
Maybe it was the white chocolate I used, but the white frosting was too sweet for our taste. Will definitely try it again next time.
Gabi
This cake was definitely a little more involved but SO worth it!! It’s a huge party pleaser because it’s so unique and tastes like you’re eating pure chocolate <3. Thank you so much for the recipe!
Ritika
Hi,
I have a small oven. Can I bake all the three layers together in 1 cake tin ?
Sabine
No, that wouldn't work out, sorry.
Navodi Peiris
Can I use milk instead of buttermilk?
Sabine
You can replace the buttermilk as follows. Pour 1 tbsp (15ml) of vinegar into a 1 cup (240ml) measuring cup and add milk until you measure 1 cup (240ml) of liquid in total. Then let stand for 5 minutes until it curdles a little. Then use it.
Marianne
Hi Sabine! I'm gonna make this cake this weekend and it looks great. I would like to use a coffee flavored simple syrup. Is this advisable? I'm making the cake layers 2 days in advance and putting on the buttercream the day I will be serving it, is it better to use the simple syrup right after baking and cooling, or should I wait and do it on the day I'm serving? Thanks so much in advance! Greetings from the Netherlands.
Sabine
Hi Marianne, I would add it when you assemble and frost the cake. Sounds delicious. Hope that helps. Have a wonderful weekend.
Sherrie Bowen
I'm planning to make this cake for my sons birthday, per is request. Can I use Ghirardelli baking chocolate or do I need to use regular chocolate bars found in the candy aisle?
Sabine
Yes, you can use Ghirardelli baking chocolate for the batter. You could also use it for the frosting if you like the taste of it when eaten plain. If you prefer the taste of another chocolate more, I would go with another one for the frosting since the chocolate flavor determines the flavor of the frosting. I hope that helps!
Darina
Hi Sabine,
thank you so much for this recipe! I made it for my birthday and it turned out great. OMG. Sooooo chocolatey! My friends loved it and one of them even asked me about the recipe. It's foolproof and easy.
Darina ❤️
Sabine
Hi Darina,
Thank you so much for your nice feedback! I'm happy that you like the cake as much as we do. It's a fantastic birthday cake for sure. Happy belated birthday.
Sabine 🙂
doyle
The wife made this for my birthday. It turned out great. Thanks for sharing.
Sabine
Thank you!