

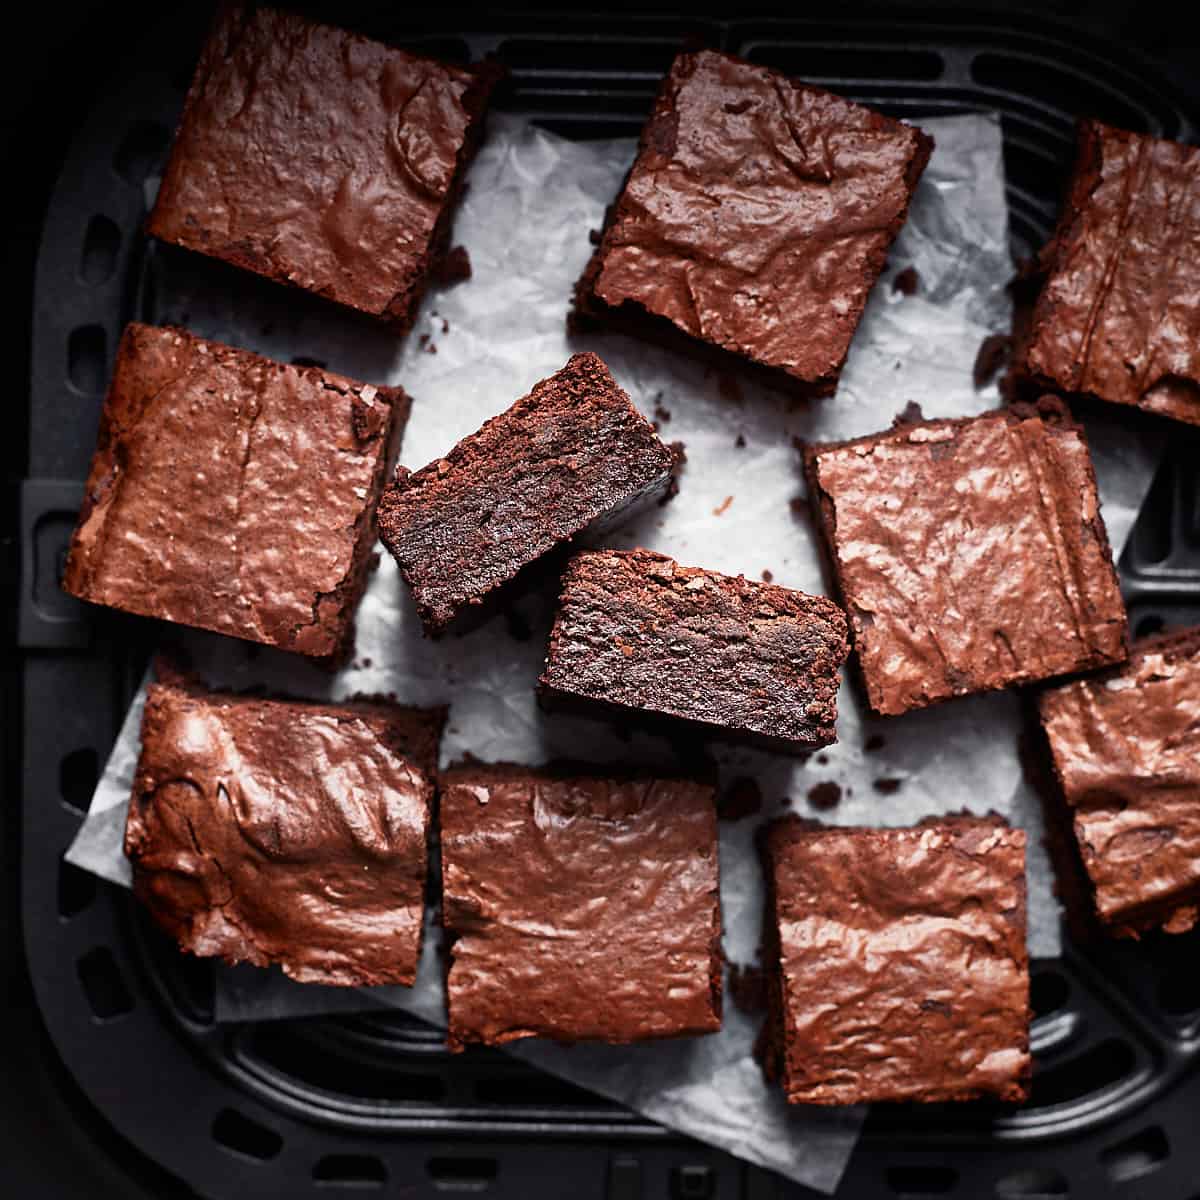
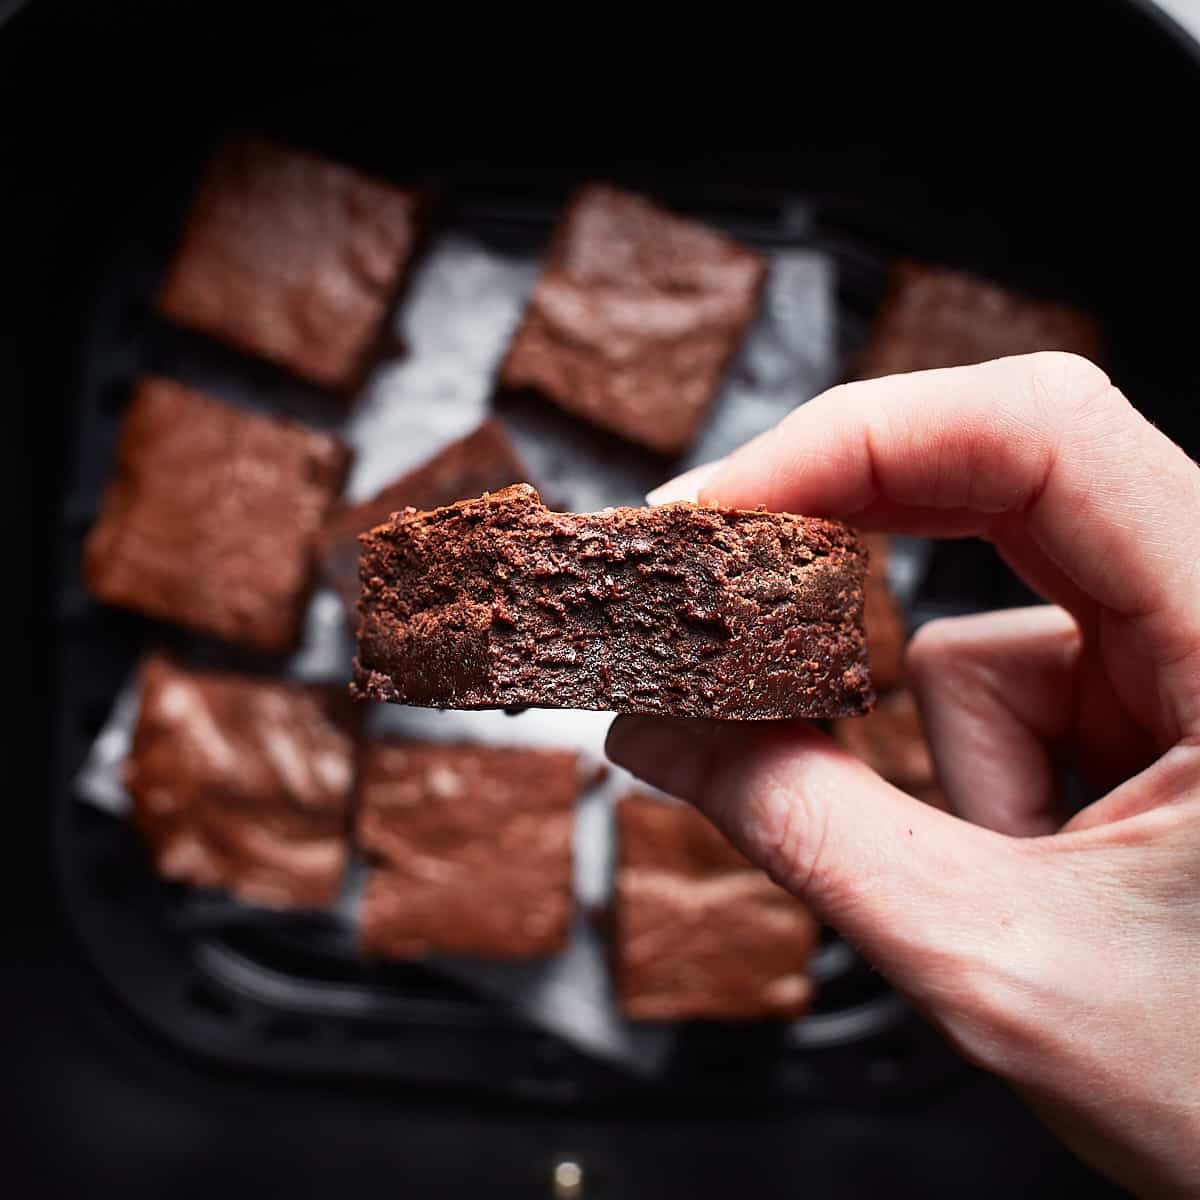
Have you ever tried baking brownies in an air fryer? It's so easy, and you get even better results than with an oven. If you follow my step-by-step process, you will achieve soft and fudgy brownies from edge to edge. Plus, I'll tell you my secret to create shiny, crinkly tops. Whenever I make them, I always bake two batches because they disappear in a matter of minutes. These brownies are made with chocolate and cocoa but I have an all-cocoa brownie recipe for you, just in case.
Jump to:
Which chocolate and which cocoa is best?
- Chocolate
- I recommend using semi-sweet chocolate with 50 - 65% cocoa content. With higher or lower percentages, you will need to adjust the sugar used in this recipe. I used 60%.
- You get the best possible texture when using baking chocolate or candy bars that can be found in the candy aisle. If you choose to melt chocolate chips, the texture will be dryer as desired.
- Only use chocolate that you would eat as a treat. The taste of the chocolate determines the taste of the brownies.
- Depending on which chocolate you use, the raw batter can be more or less liquid. If you notice a grainy texture, this could mean that the chocolate you use contains stabilizers like soy lecithin. I also noticed that organic or raw chocolate sets faster.
- Cocoa
- Since the batter does not contain any baking soda or baking powder, you can use your favorite unsweetened cocoa powder. The taste and color of natural and dutch-processed cocoa powder are different, but the results are amazing either way.
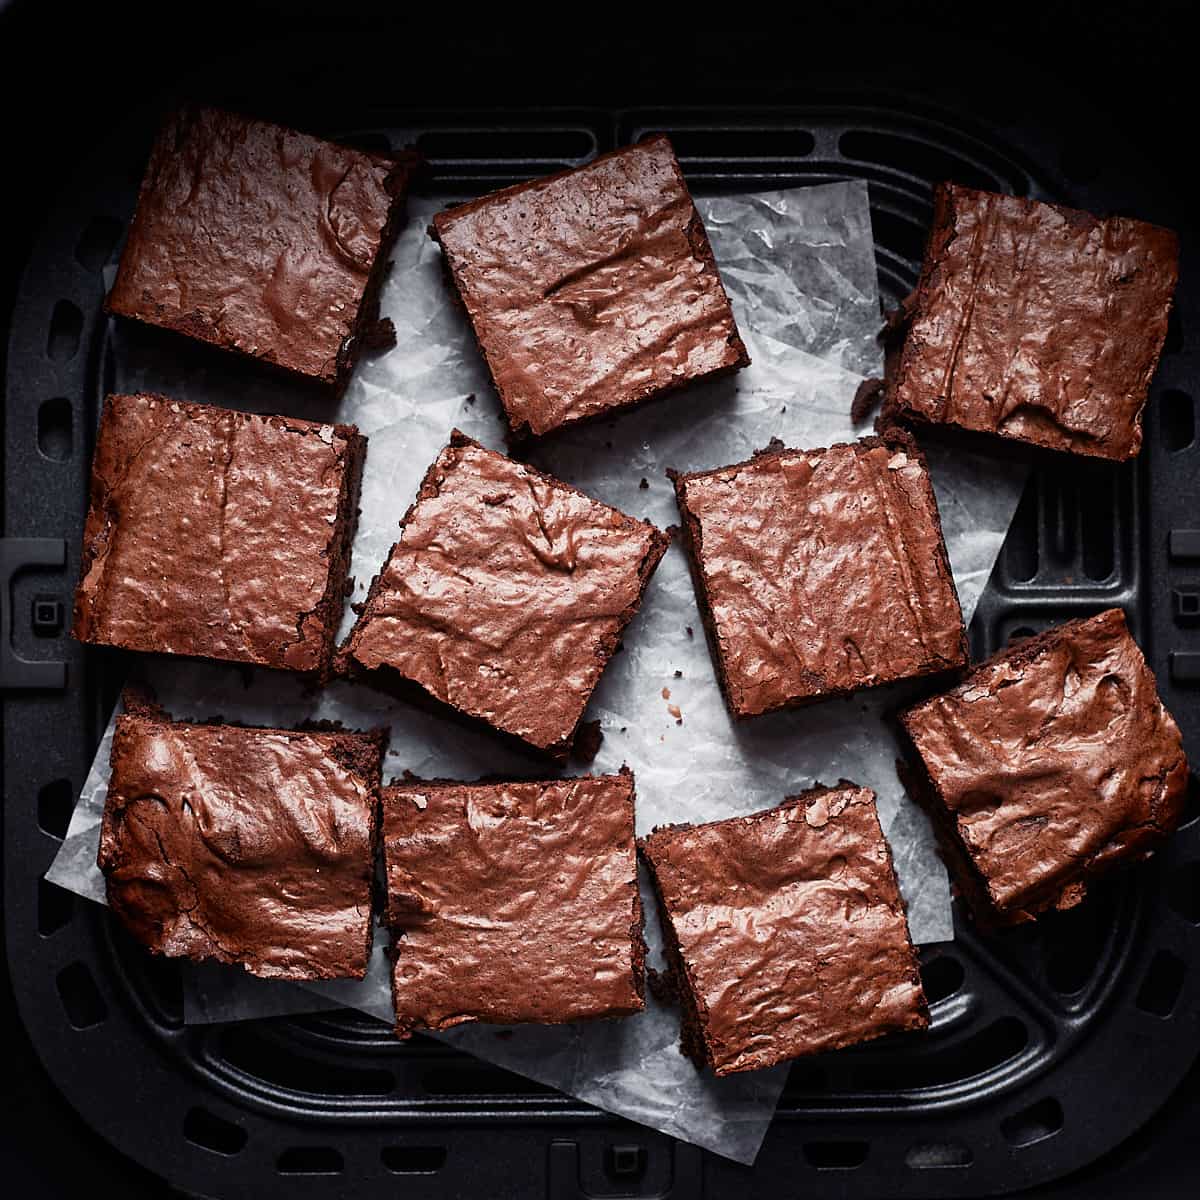
How to create a shiny and thin crust
- Whipping the eggs and sugar until it's frothy and bubbly contribute a lot to develop a shiny crust as it helps the sugar dissolve. Therefore, a meringue-like layer forms on top of the brownies. Whisking works great, but you can use an electric mixer to quickly mix the eggs and sugar if your arm tires quickly.
- If possible, use European-style butter with 82-84% fat content. The reason for this is that with having more fat and less water in the butter, a shiny crust is more likely to develop, as more water in brownie batter results in a dull crust.
- The chocolate shouldn't cool for too long, and the egg mixture should be bubbly when the chocolate is added. How to achieve that? By measuring and preparing all of the ingredients beforehand, so that you can work through the steps quickly.
How to create a fudgy texture from edge to edge
- After 15 minutes of baking, remove the brownies from the air fryer and let them rest for 5 minutes on the kitchen counter. This allows the batter to cool down around the edges and distributes the heat more evenly. Then bake for another 10-15 minutes.
- This was just a happy discovery because I wrapped the pan in aluminum foil to create some sort of handles to easily lift the brownies in and out of the air fryer basket. The foil also helps to distribute the heat more evenly and prevents the edges from heating up too quickly.
Pan conversion
I used an 8-inch (20cm) square baking pan. If you use a different pan size, you will need to adjust the recipe. For example, for a 6-inch (15cm) pan, I suggest dividing the recipe in half. In my air fryer cheesecake recipe post, you find an easy calculation to convert a recipe to any pan size you wish to use.
Step-by-step photo tutorial
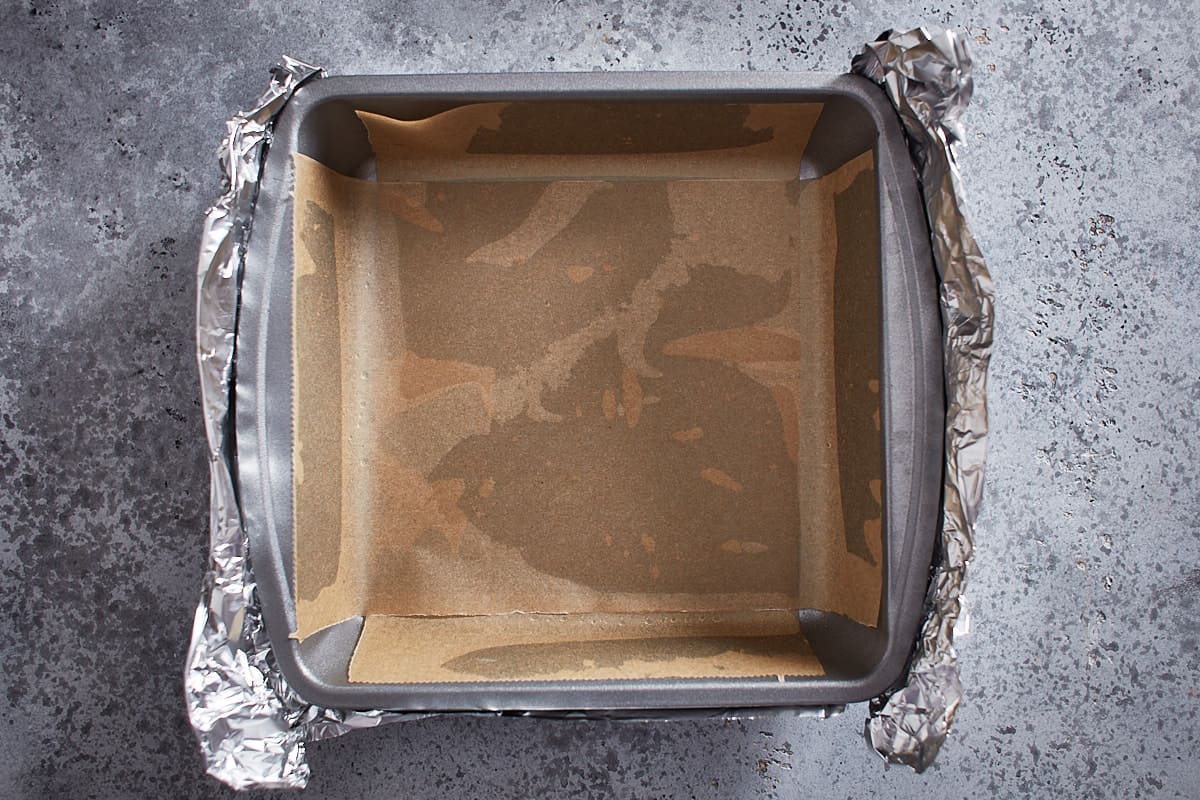
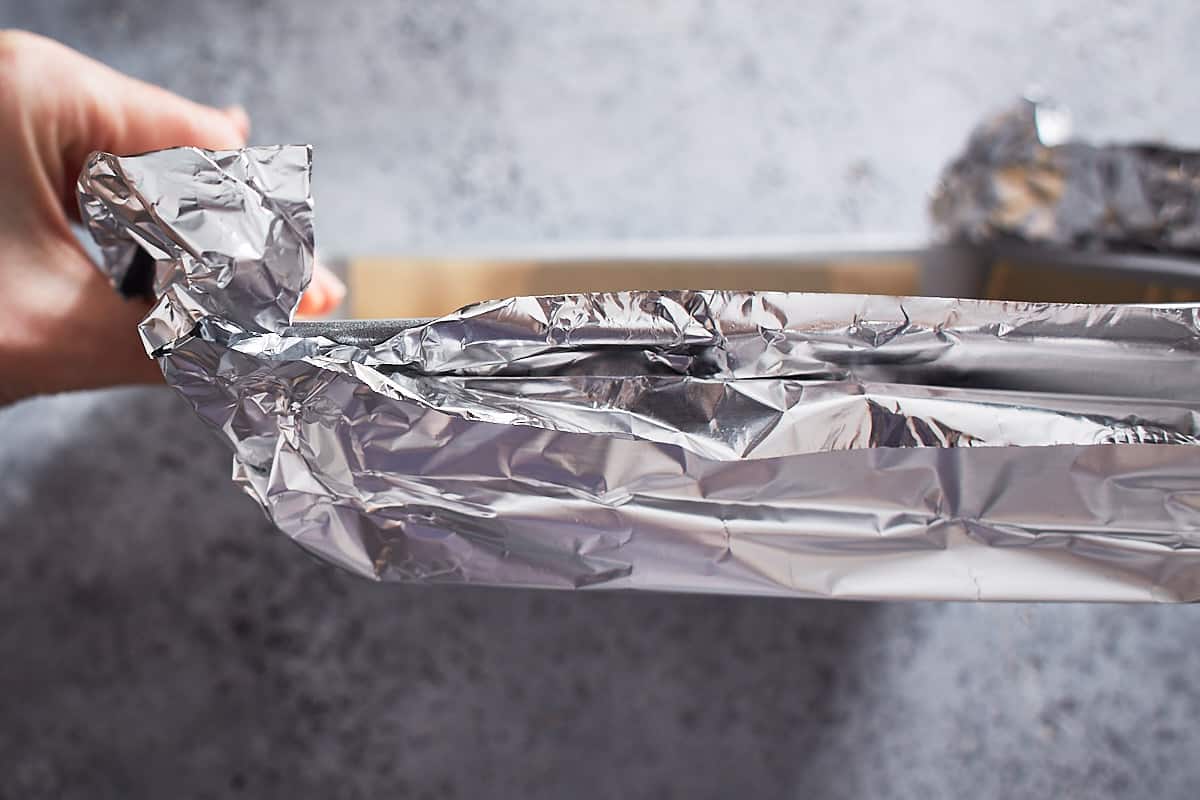
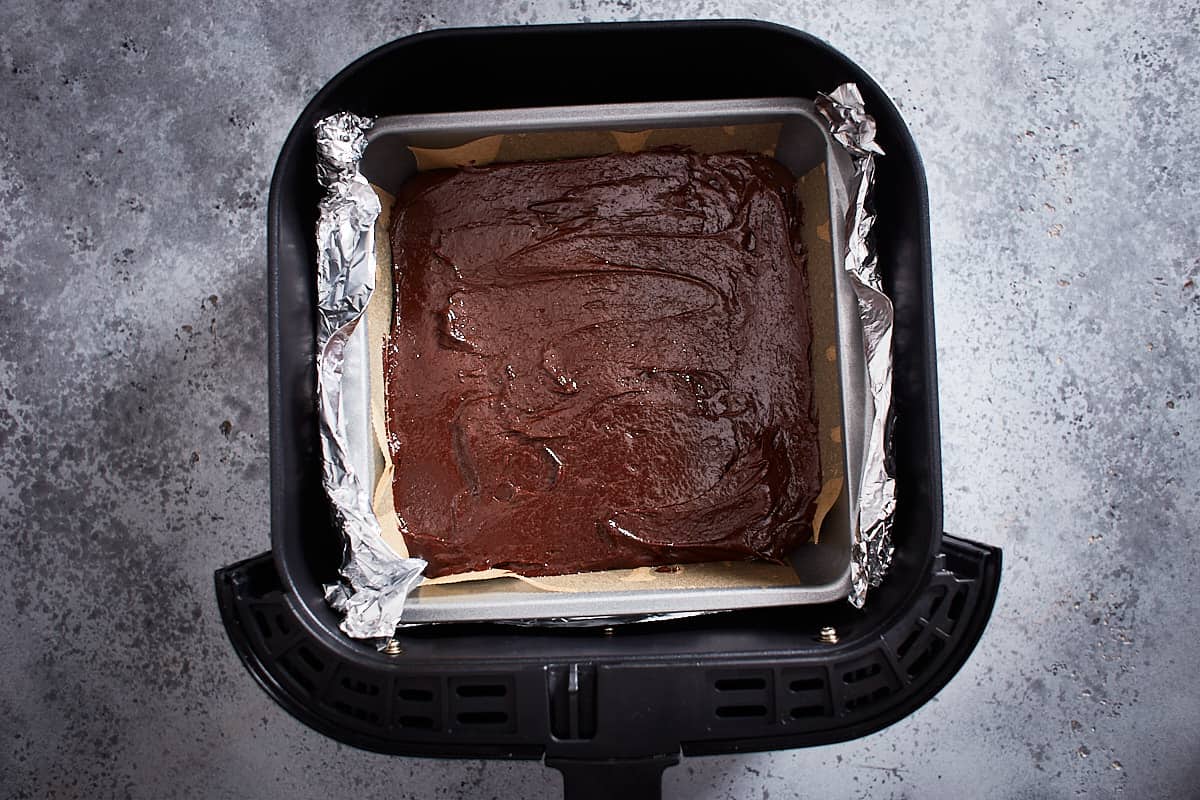
Line the inside of a baking pan with parchment paper and wrap the outside with aluminum foil to create some sort of handles for the pan.
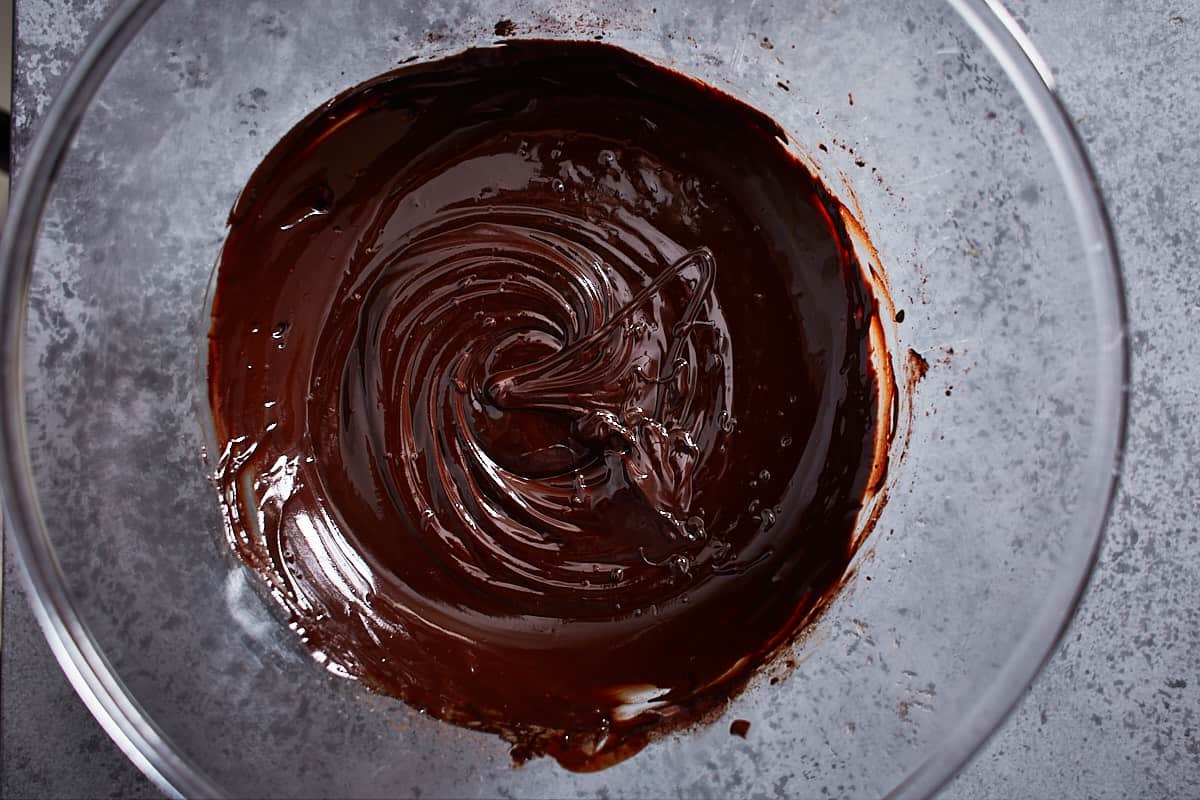
Melt the chocolate and butter until combined and smooth. Then, stir in the cocoa and let sit for 5 minutes.
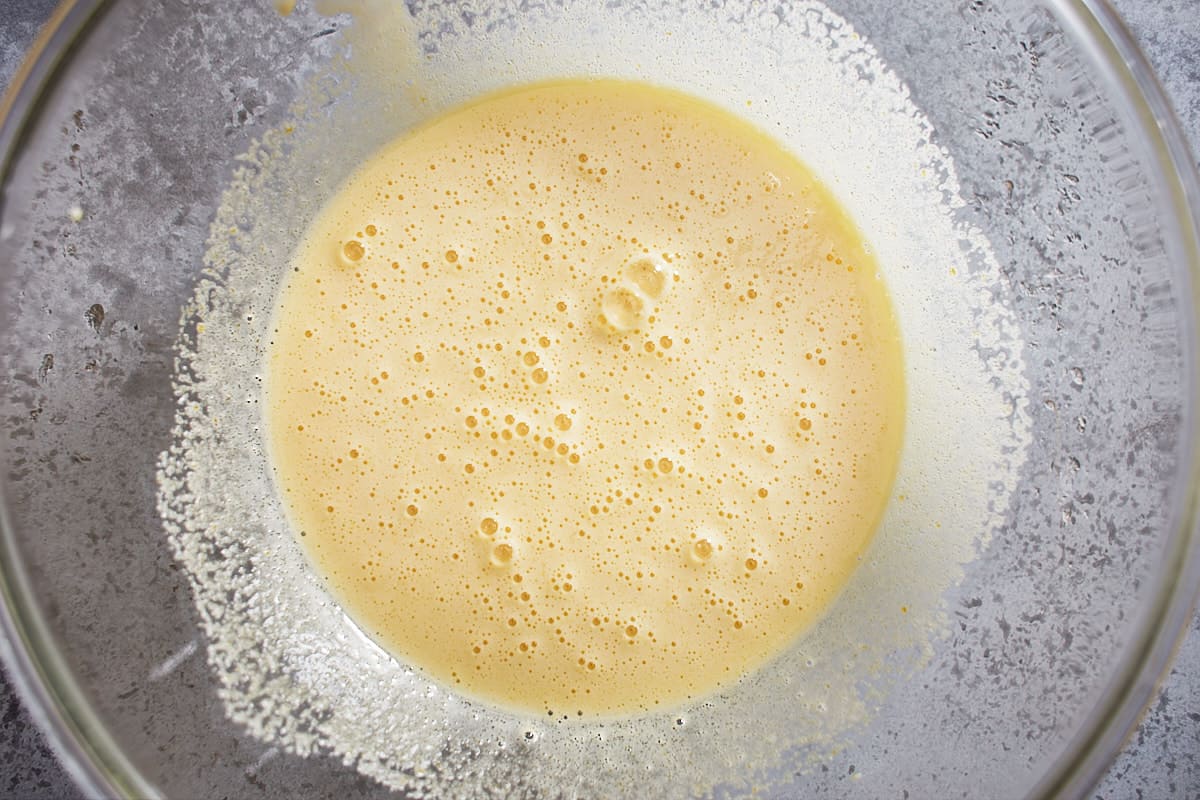
In the meantime, whisk the eggs, sugar, and vanilla until frothy and bubbly.
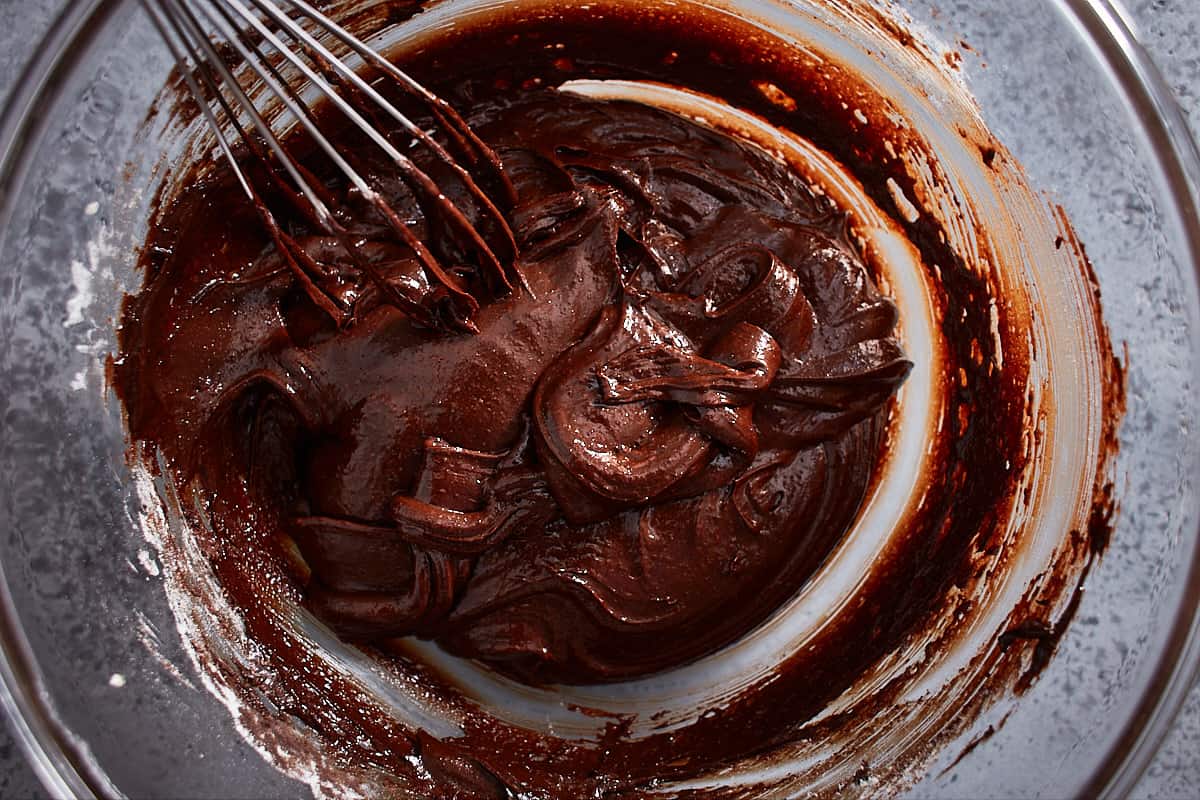
Add the warm chocolate mixture and whisk until combined. Then, add the flour and salt and whisk just to incorporate.
Note: If you are like me and have a hard time to resist eating some of the raw brownie batter, be excited about my edible brownie batter!
Spoon the batter into the prepared pan and spread evenly. Transfer to the air fryer and bake.
Tip: If you love peanut butter, you can also make my peanut butter brownies in the air fryer.
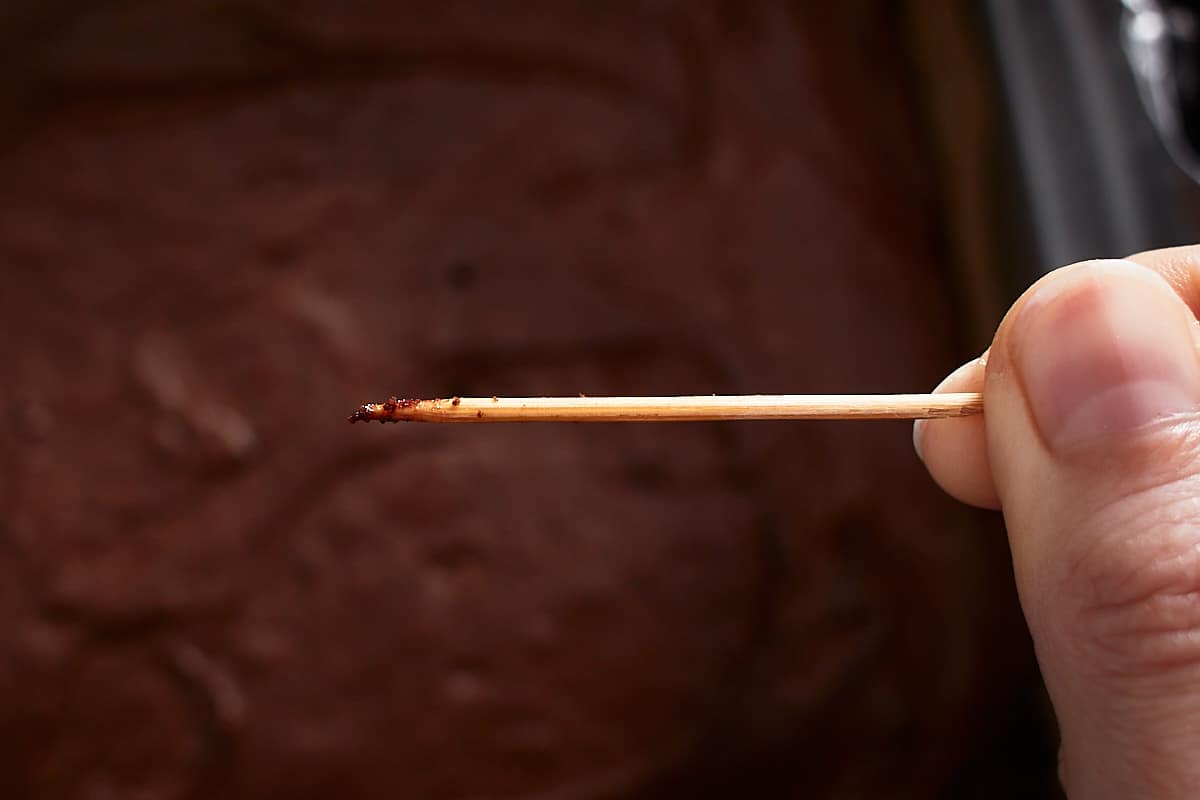
You know when it's done when a toothpick inserted in the middle comes out slightly dirty with a few moist crumbs attached.
More air fryer recipes
If you love air fryer baking as much as I do, you've come to the right place. Try some classics specially designed to bake in the fryer.
Recipe

Air Fryer Brownies
Ingredients
- 8 oz semi-sweet chocolate bars, chopped
- ½ cup unsalted butter
- ¼ cup unsweetened cocoa powder
- 2 large eggs
- 1 cup sugar
- 2 teaspoon vanilla
- ⅔ cup all-purpose flour, spooned and leveled
- ½ teaspoon salt
Instructions
- Line the inside of an 8-inch (20cm) baking pan with parchment paper and wrap the outside of the pan with aluminum foil to create some sort of handles for the pan. This makes it easier to lift the brownies in and out of the air fryer basket. (See photos in post above for visual guidance.) Set aside.
- Preheat the air fryer to 325°F (163°C). In a heat-proof bowl, melt the chocolate and butter until combined and smooth. Make sure that the chocolate doesn't get too hot too quickly. If you're using a microwave, then stir every 15-20 seconds to prevent the chocolate from seizing. Then, stir in the cocoa and let sit for 5 minutes.
- In the meantime, whisk the eggs, sugar, and vanilla in a large mixing bowl until frothy and bubbly, about 3-5 minutes. Add the warm chocolate mixture and whisk until combined. Then, add the flour and salt and whisk just to incorporate.
- Spoon the batter into the prepared pan and spread evenly. Place the pan in the preheated air fryer and bake for 15 minutes.
- Remove the pan from the air fryer and let it sit on the kitchen counter for 5 minutes.
- Return the pan to the air fryer and bake for another 10-15 minutes. A toothpick inserted in the middle should come out slightly dirty with a few moist crumbs attached. Let cool completely. Cut the cooled brownies with a long, sharp knife. Store in an airtight container at room temperature for up to 4 days or freeze for up to 3 months.
Video
You can find the video in the post above. If you don't see a video, please check your browser settings.
Leave a Reply