

This is the best ever custard pie ever because it has the most amazing custard filling along with a buttery crust! Plus, you only need 9 ingredients to make this unforgettable egg custard pie. Can't get enough pie recipes? Try out my banana cream pie because it's practically legendary!

Photo instructions
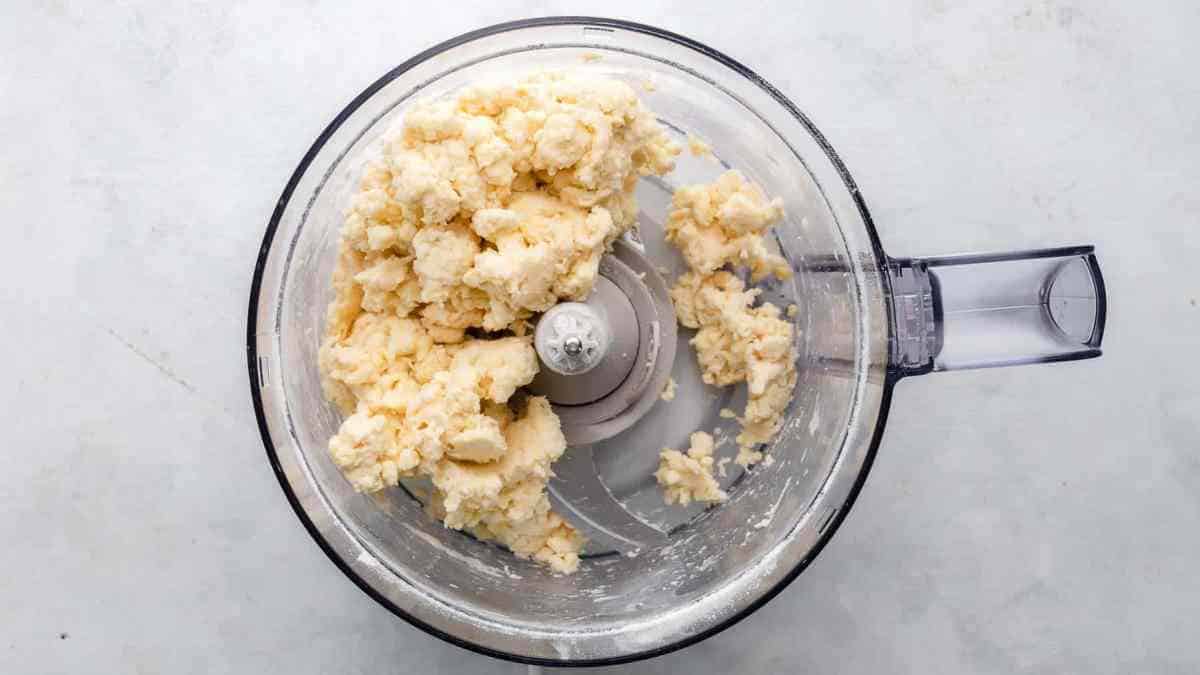
Start by making the pie crust in the food processor. Add in the salt, flour, sugar, and butter then pulse until it forms into pea-sized flakes. Slowly add water one tablespoon at a time and pulse until the dough clumps.
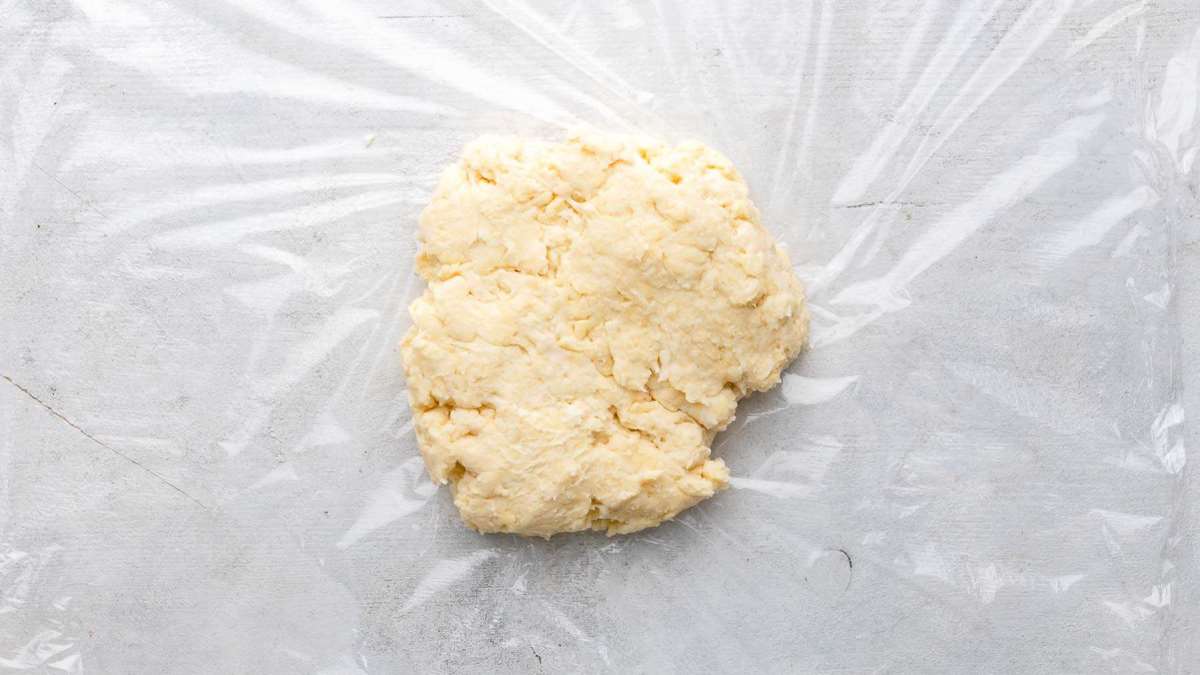
Transfer the dough to a plastic wrap and form into a 1 - 1.5-inch thick disk without kneading. Refrigerate the dough for anywhere from 2 hours up to 2 days.
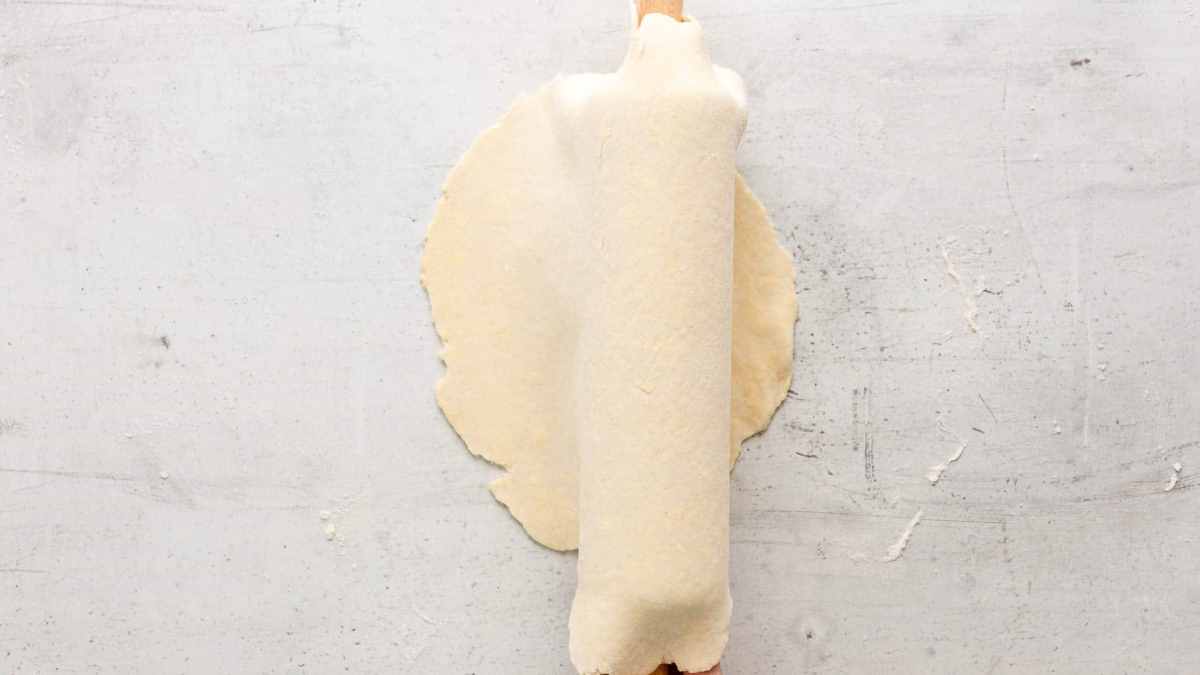
Roll dough on a lightly floured surface until it is a 12-inch circle. Then transfer to a 9-inch pie pan.
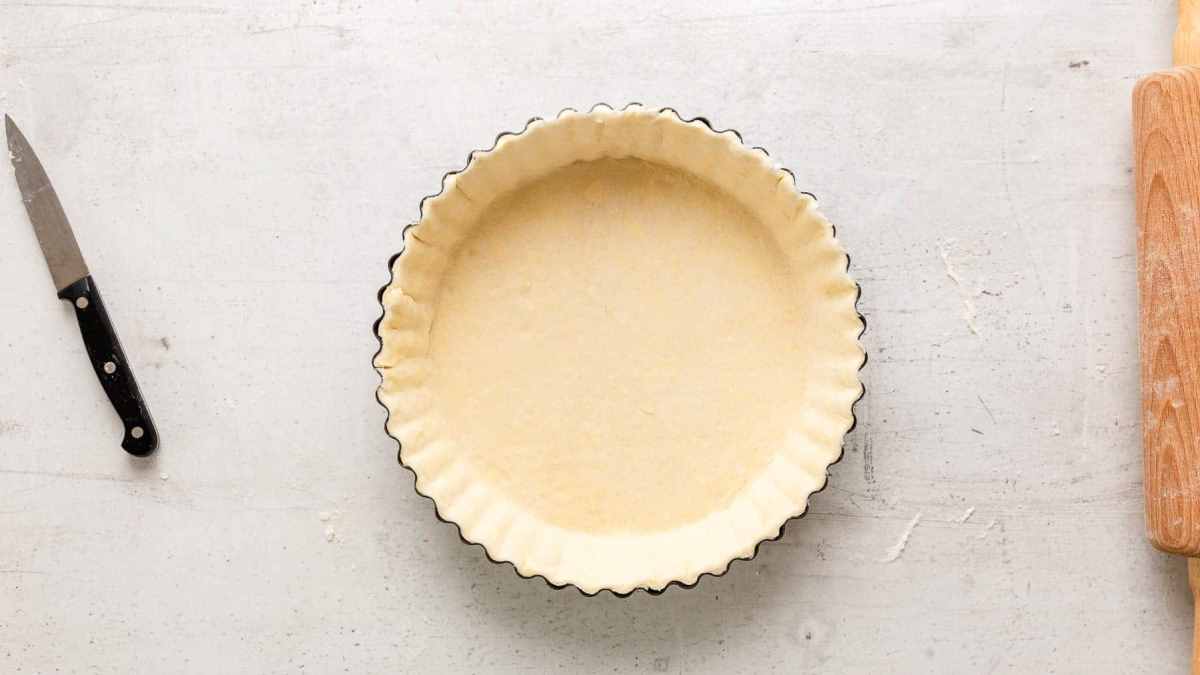
Press the dough, so it fits into the dish well, then cut off any edges that hang over. Freeze the crust for 15 minutes.
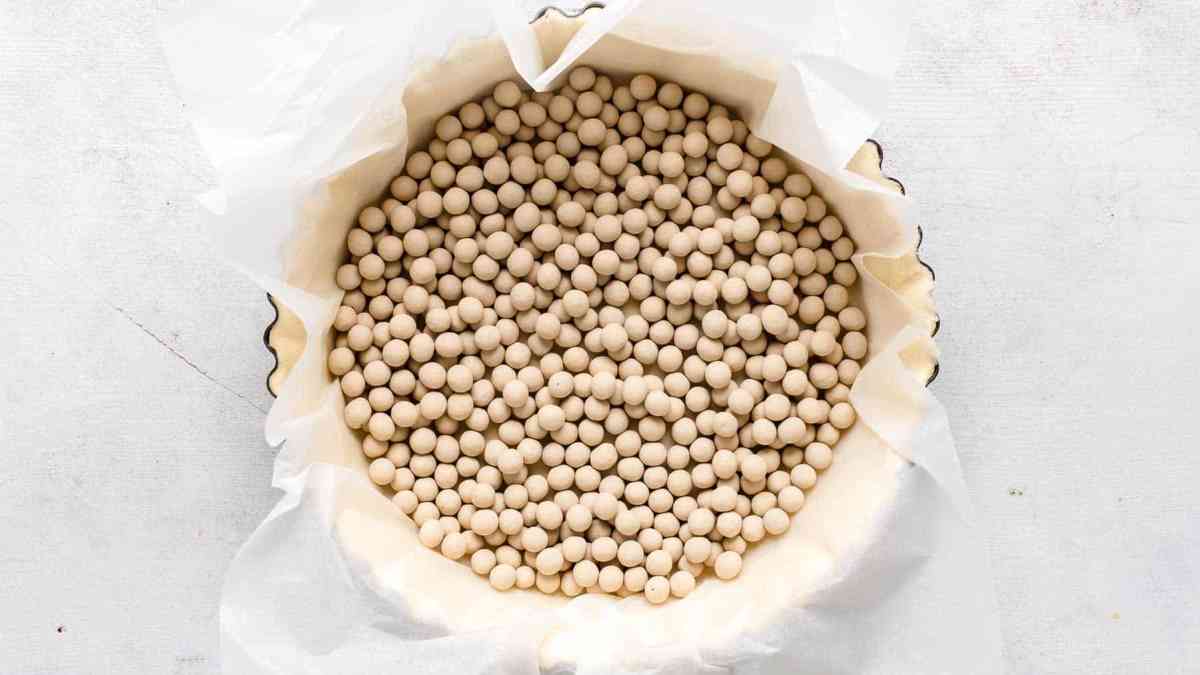
Preheat the oven to 350°F (175°C). Remove the crust from the freezer and add parchment paper to the pan. Cover all the edges and crust entirely with parchment paper. Add baking beans, regular beans, or rice to the pan.
The baking beans should be pushed against the sides, so they don't sink down when baking. Bake for 10 minutes then take out of the oven and remove the paper and beans.
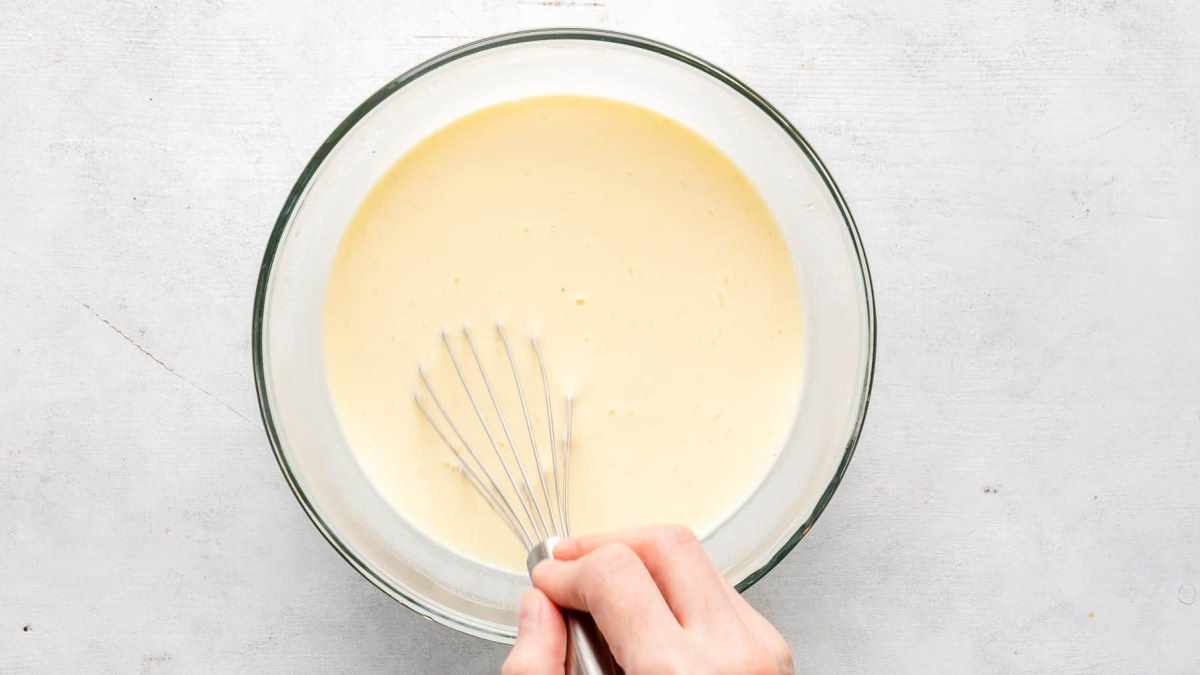
Add the eggs, sugar, milk, heavy cream, salt, vanilla, and nutmeg to a bowl and whisk until sugar dissolved entirely. This will take around 3-5 minutes.
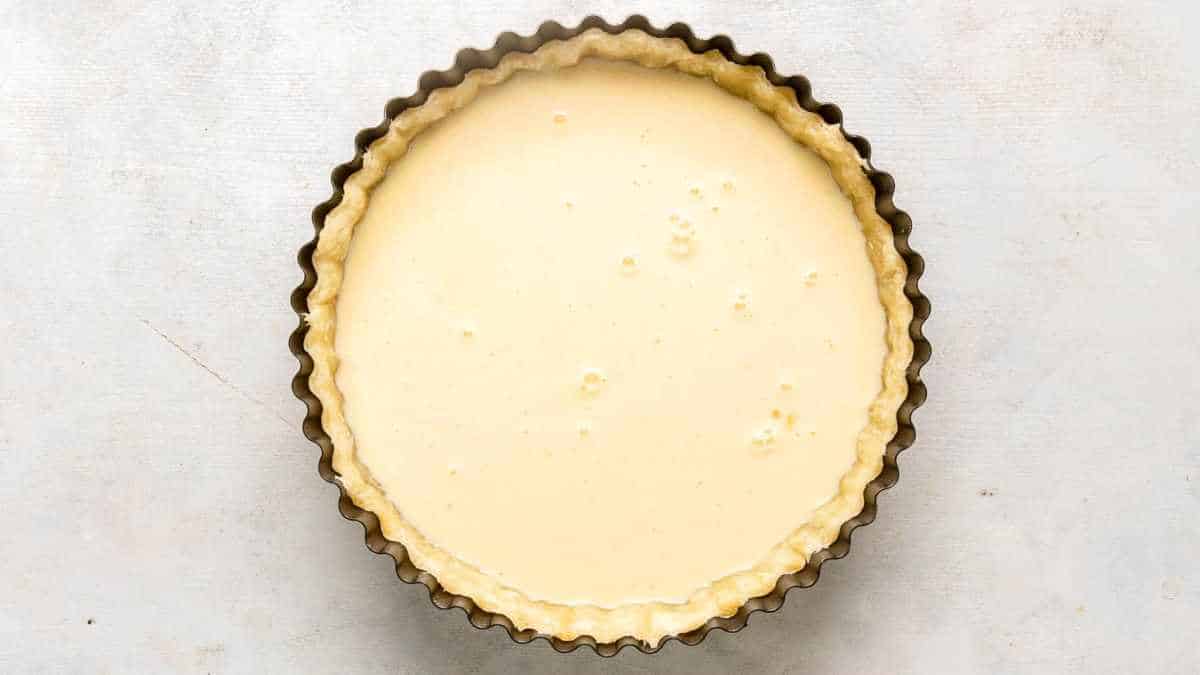
Pour the custard filling into the pie crust and bake for 40 - 45 minutes. After it bakes for 20 minutes cover with parchment paper, so the top doesn't brown too much.
Expert Tips for Success
- Don't overwork the pie crust. It won't have that desired flaky, buttery texture if you do.
- When it's done cooking, the top is set and it will have a slightly jiggly center.
- Make sure the pie cools entirely before you refrigerate it.
- Don't skip refrigerating overnight before eating. It needs time to rest and set.
Why is my filling watery?
If you follow the recipe there usually isn't any type of issue when it comes to a watery filling. Usually, if you do end up with a watery filling, it could be due to the fact that the sugar was not completely dissolved when pouring it into the crust or it is simply underbaked.

Storage
It should be stored in an airtight container in the refrigerator. It should be covered and away from moisture, so it doesn't get soggy. It will last around 3 days in the fridge.
You should never let it sit out of the fridge for longer than 2 hours at a time. If you know it's going to be out for 2 hours or more, then make sure to have it on ice. This will keep it cool and safe to eat.
Freezing
Unfortunately, it's not a great idea to freeze custard pies as the filling will separate during the freezing and thawing process. The result is going to be a watery pie instead of a delicious leftover. If you want to try it, you sure can, but the results won't be ideal.
More pie recipes to try
Recipe

Best Ever Custard Pie
Ingredients
Crust
- 1 ¼ cups all-purpose flour, spooned and leveled
- ¼ teaspoon salt
- ¼ teaspoon granulated white sugar
- ½ cup unsalted butter, cold
- 4-6 tablespoon cold water
Filling
- 4 large eggs, room temperature
- ½ cup granulated white sugar
- 2 cups milk, room temperature
- ½ cup heavy cream, room temperature
- ¼ teaspoon salt
- 2 teaspoon vanilla extract
- ⅛ teaspoon nutmeg
Instructions
Crust
- Make it with a food processor: Place flour, salt, sugar, and butter in a food processor and pulse 4-5 times. Pea-sized butter flakes should still be visible. Add one tablespoon water after another and pulse 1-2 times after every tablespoon. Stop adding water when the dough starts to clump.
- If you don't have a food processor, then make it with a pastry cutter or two forks instead: In this case mix together flour, salt, and sugar in a large mixing bowl. Then add butter and cut it into the mixture until it resembles coarse meal with pea-sized butter flakes. Then add water little by little until the texture starts to clump.
- Transfer dough to a plastic wrap and form a 1 - 1.5 inch thick disc without kneading. Cover tightly in plastic wrap and refrigerate at least 2 hours or up to 2 days.
- On a lightly floured surface, roll out the dough disc into a 12-inch circle. Transfer to a 9-inch pie dish. Press into the bottom and the sides of the pan and trim off any excess crust. Freeze for 15 minutes.
- Preheat oven to 350°F (175°C).
- Line chilled crust with parchment paper and push it lightly against the bottom and the sides of your crust. Make sure that the parchment paper covers the edges of your crust completely to prevent it from heavy browning. Then heavy it down with baking beans (or beans or rice). Also, make sure that your baking beans push against the sides as well to prevent them from sinking down to the bottom. Transfer to the preheated oven and place a piece of parchment paper underneath the baking pan. Bake for 10 minutes. Remove from the oven and remove the paper and the baking beans and let cool as you prepare the filling.
Filling
- Whisk eggs, sugar, milk, heavy cream, salt, vanilla, and nutmeg until sugar is completely dissolved about 3-5 minutes. You can either use a whisk or an electric mixer. Pour into pie crust.
- Bake for about 40-45 minutes until the top is set with a slight wobble in the center. Cover after 20 minutes with parchment paper loosely to prevent it from heavy browning if needed.
- Remove from the oven and let cool completely. Then transfer to an airtight container and store in the fridge overnight. It will stay fresh in the fridge for up to 3 days.
Video
You can find the video in the post above. If you don't see a video, please check your browser settings.
Shayla
This is the easiest custard pie I've ever made. Super tasty too. I make it every year for thanksgiving and everyone always raves about it. Thanks for a great recipe!
Laura Schisler
I would love to make this custard pie , however , it does not show the ingredients/measurements for the recipe . Only pictures and general instructions ..
Sabine
Thank you so much for telling me. I saw that there was a technical glitch. Fortunately, I could solve it quickly and the recipe card including ingredients and instructions are visible at the bottom of the post.