
Learn how to make a sourdough starter from scratch. I will guide you step by step through the process with lots of useful tips, a photo diary, and a video. It's an easy-to-understand guide and suitable for beginners who can't wait to bake beautiful and delicious loaves of bread, sandwich, pizza crust, and brioche. All you need is flour, water, and time.
Note: Please understand that I can only give an orientation of what I've learned from experience and tests. Every sourdough starter behaves differently. So, there is no one-size-fits-all approach. Activity and growth depend on many different factors, and you need to figure out what works for you in your environment with the flour and water you are using. It may be possible that my outlined feeding schedule doesn't suit your starter well. It's best to watch your starter and adjust the feedings accordingly.
Ingredients notes
- Flour - I highly recommend using organic white bread flour when possible. A strong bread flour contributes a lot to growing a healthy and strong sourdough starter that is reliable. However, any grain-based gluten flour will work, such as rye, einkorn, spelt, whole wheat, or all-purpose white flour. It may take a little longer to have a reliable starter, and the activity of your starter with such flours can fluctuate a lot. No matter which flour you choose, be sure to use organic flour, as the chemical traces in non-organic flours can interfere with the healthy growth of the wild yeast cultures. You don't need to stick to one flour forever. Once you have a healthy and active starter, you can switch flours anytime.
- Water - Use only filtered or bottled water. The chlorine in tap water greatly reduces and disrupts the activity of the wild yeast cultures and can cause your starter to die.
Recommended equipment
- Kitchen scale - I recommend investing in a kitchen scale as working with cups is not accurate. A gram or an ounce is always a gram or an ounce, but a cup is never a cup. I suppose you would like to start baking bread with your starter, and for baking bread, you will need a kitchen scale anyway.
- Jars - I recommend a set of two weck jars that can hold 1 pound to change glasses between feedings (you don't need to change them every time, though). I just place my lid with the rubber seal on top, without sealing the jar, so that the air can escape from the jar. It's important that you allow the air to escape, or the glass could break.
- Markers - It is important that you mark the jar right after you feed your starter so that you can better control how much your starter grows between feedings. You can use either water-based markers or a rubber band to mark how full the glass is.
- Spatula - To keep the sides of the jar clean and monitor growth, it's best to use a spatula to scrape down the sides of the glass. After feeding, the sides of the jar will be dirty, making it difficult to tell how much growth has happened.
Top tips
- My top tip is to watch your starter. Look at it, smell it, and learn from it. Try to understand what happens at which stage. This will give you the confidence to tell when your starter is ready, when to feed it, or if something is wrong.
- Don't overfeed it. You want your starter to be at or past peak before you feed it again. If you regularly feed it before peak, you will dilute the wild yeast cultures and weaken the starter over time.
- Don't start baking bread with your starter until it predictably doubles in 5-6 hours when fed at a ratio of 1: 5: 5 (1 part starter, 5 parts flour, 5 parts water). Why do I recommend this ratio? Because it's the same or a similar ratio that you use to bake bread, and you can be sure that your starter is strong enough to make a loaf of bread rise.
FAQ's
What should it smell like?
The smell will change depending on which state your starter is in and which bacteria are growing. The freshly fed starter will smell floury or doughy like unbaked bread. When it smells like alcohol or vinegar your starter is already hungry and should be fed. At the very beginning, when your starter is very young, it can smell like cheese. There is nothing to worry about, just feed it regularly and give it time to develop.
If bad bacteria overwhelm the good bacteria, the smell can be very unpleasant, ranging from old socks to vomit. As long as the starter responds to regular feedings and shows signs of growth and activity, everything is fine. Just keep feeding it regularly. If you feed your starter with non-organic flour or self-rising flour, the smell can also be very unpleasant because of the additional ingredients or chemical traces in those flours. It's best to stick to organic flour to avoid this.
An active starter that is ready to use for bread making should ideally smell yeasty / beer-like or sweet and sour like overripe fruit.
What does it look like when it is ready?
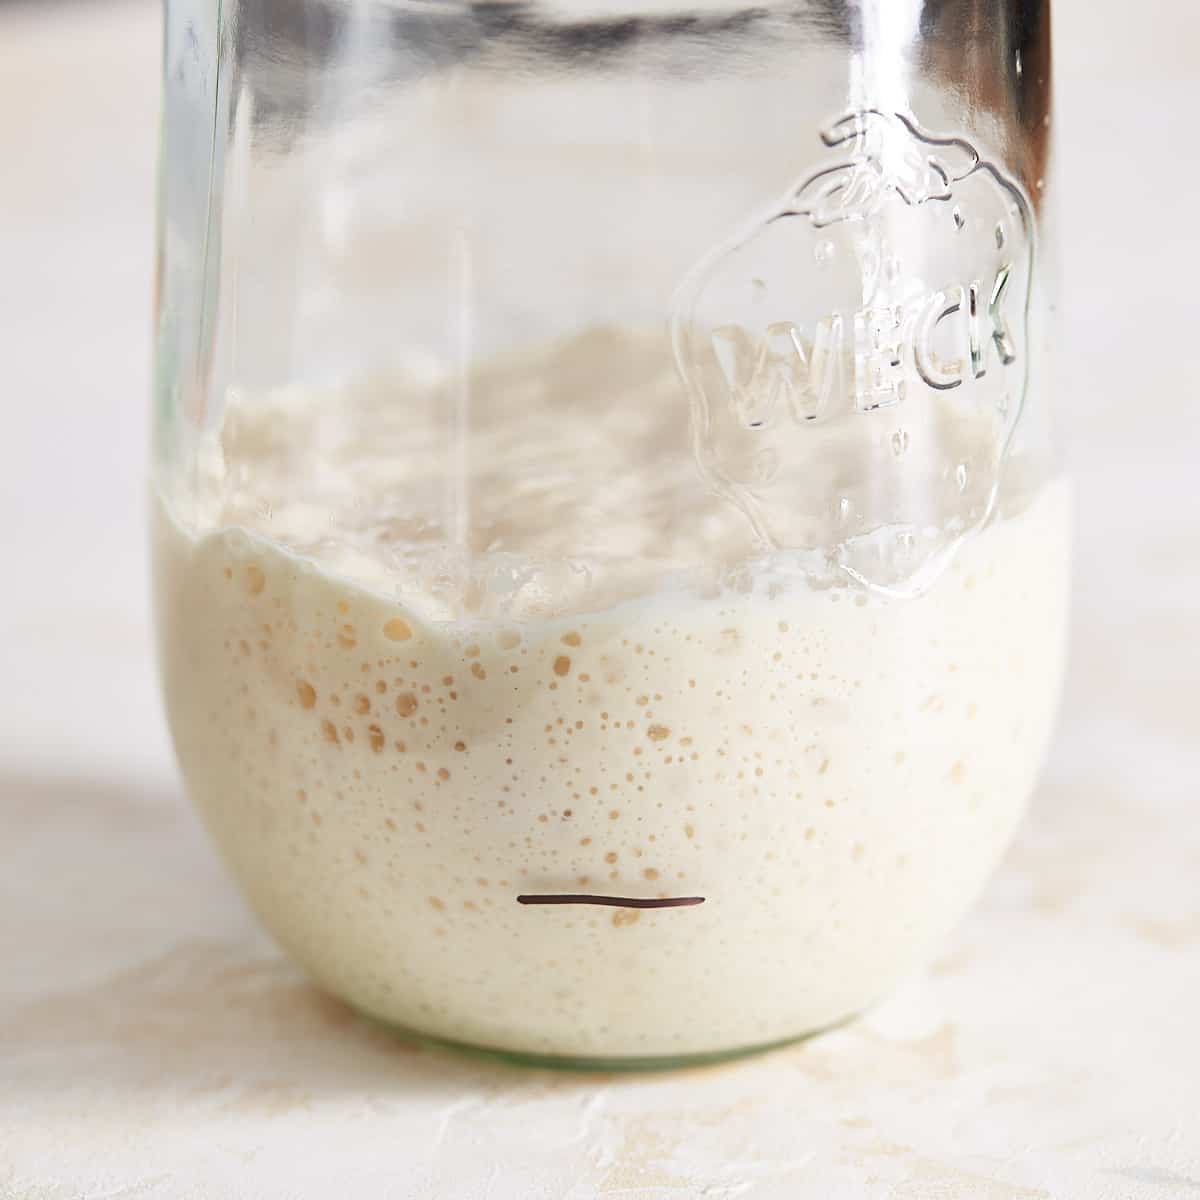
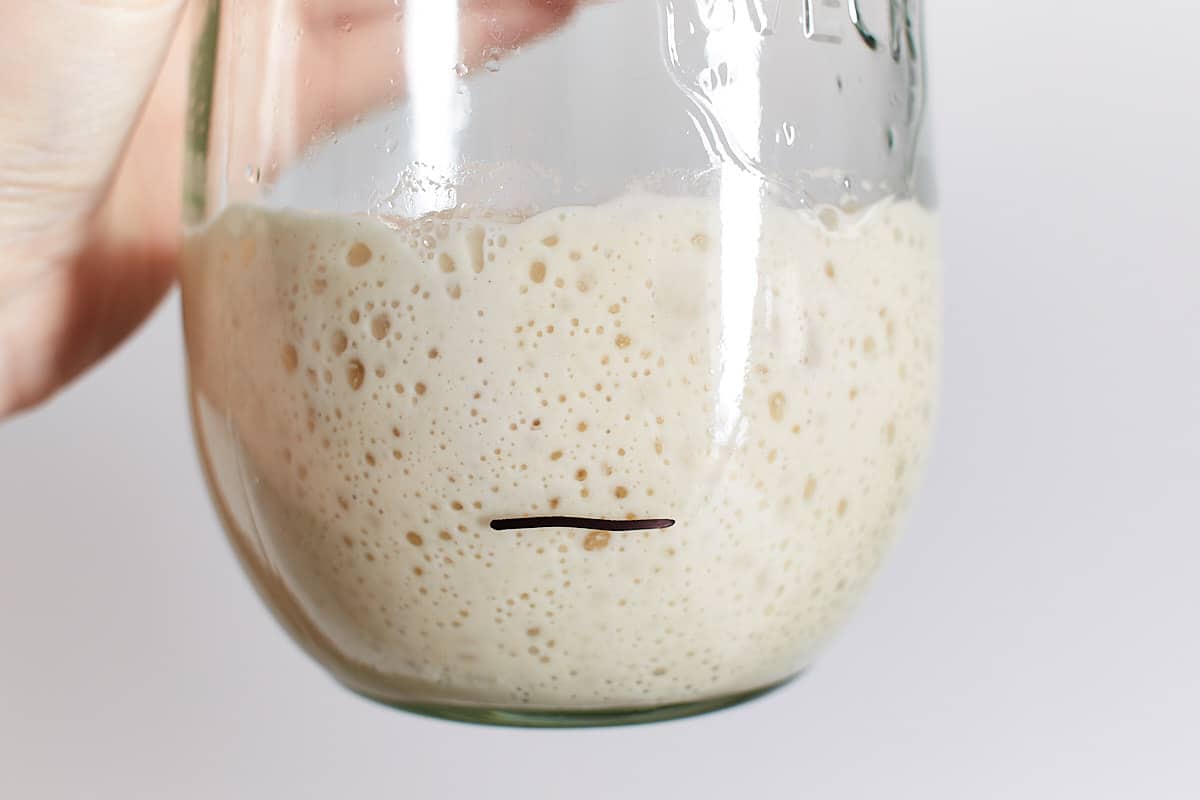
It will look different at different stages. A ready-to-bake starter doubles or triples in 4-6 hours, has lots of bubbles, and is thick.
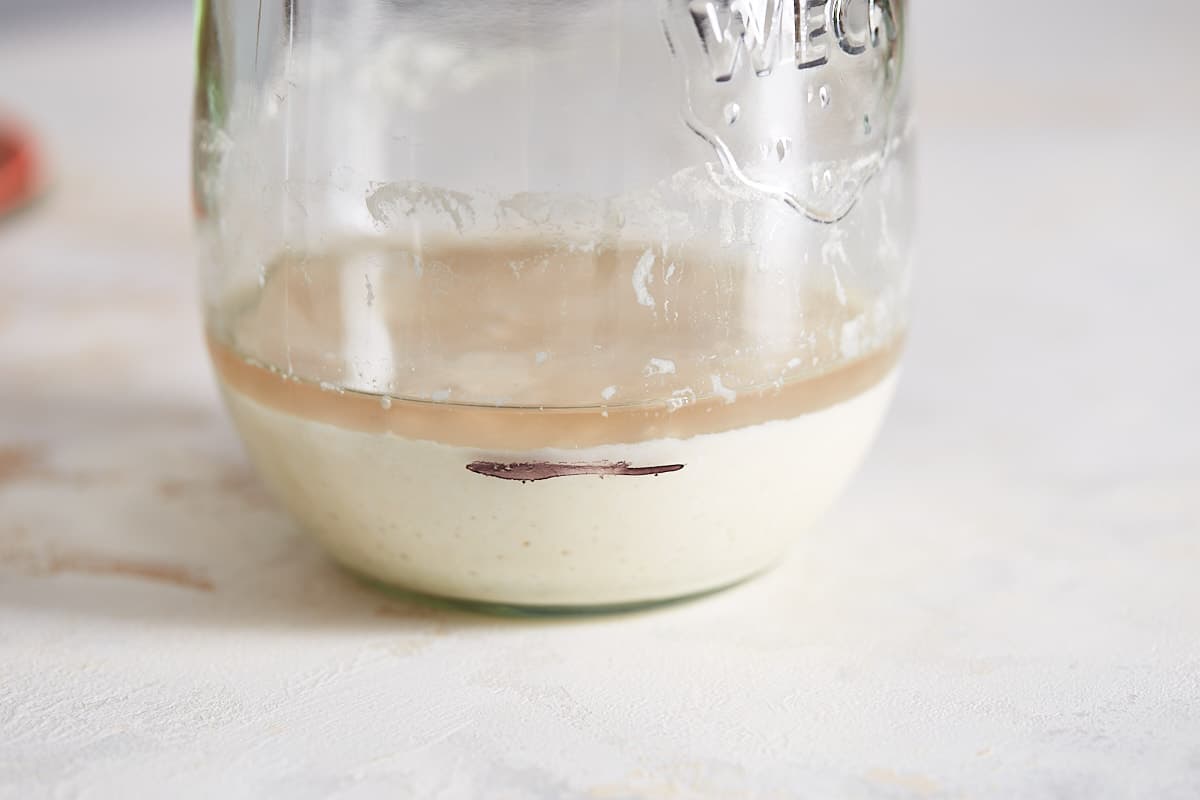
Why does my starter have a dark liquid on top?
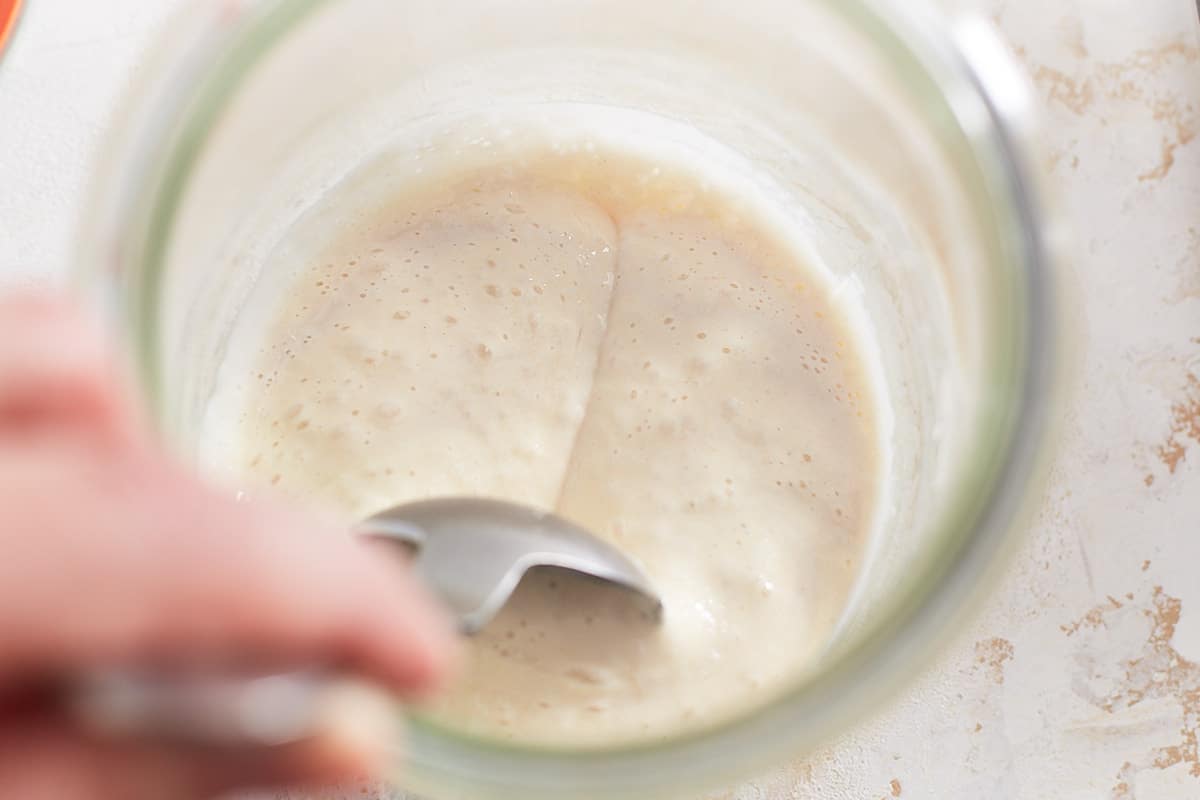
The liquid is called hooch and is alcohol that is produced as the wild yeast ferments. It's nothing to worry about. It's just an indicator that it's time to feed as your starter is hungry. Stir the liquid back into the starter before feeding and don't discard it. Otherwise, the hydration level of your starter is altered.
How to tell if it's dead?
There are some signs to tell if bad bacteria have overwhelmed good bacteria and your starter has gone bad. If you notice the following signs, it's best to discard it and start over.
- When it doesn't show any signs of activity after a couple of days of regular feeding.
- If it discolors and turns blue, pink, yellow, green, or orange.
- Mould built up.
- It smells like feces.
Be sure to keep the equipment and environment clean to prevent bad bacteria from building up and overwhelming the good bacteria.
Why doesn't it rise?
You will find that the activity of your sourdough starter fluctuates. This is completely normal and nothing to worry about. However, try the following to see if this gets the activity going:
- Put it in a warm place at room temperature. It feels most comfortable and is most active when kept between 70-75°F (22-24°C).
- Be patient with your starter. Maybe at this point, it's just too young and not strong enough. Keep feeding it regularly.
- If it shows very slow activity after 2-3 weeks, try another flour. Perhaps the one you use doesn't have enough wild yeast bacteria to grow a healthy and strong sourdough starter.
How long will it take until my starter is ready?
Approximately 14 days, but this depends on many different factors like the temperature it is stored at, which flour you use, etc. From my experience, you should get reliable, predictable, and well-rising bread loaves with a one-month-old starter.
Can it be frozen?
Yes. It freezes well in freezer bags for up to 1 year. When you need it, thaw it in the refrigerator overnight, then feed it regularly at room temperature for 2 weeks to revive it.
How to maintain and store it?
Until it's ready to use for baking, keep it at room temperature between the feedings. Once it's strong and ready to use, store it in the fridge and feed it once a week. Before baking bread with it, I recommend removing it from the fridge and feeding it once or twice at room temperature to revive and wake it up.
Where to discard it?
Until it's a strong and ready-to-use starter I recommend throwing the discards in the trash. Check with your local food waste disposal laws.
Once it predicably doubles between the feedings, after about 14 days, you can use the sourdough discard in pancakes, brownies, muffins, cake, sourdough cookies, sourdough banana bread, or the like.
Photo diary
The following photo diary is a visualization of how my new starter grew from day 1 to day 14. Remember, your starter can look and behave very differently than mine. Every starter is different.
Day 1 - The freshly mixed flour and water mixture is thick and heavy like thick pancake batter. It just smells like flour.
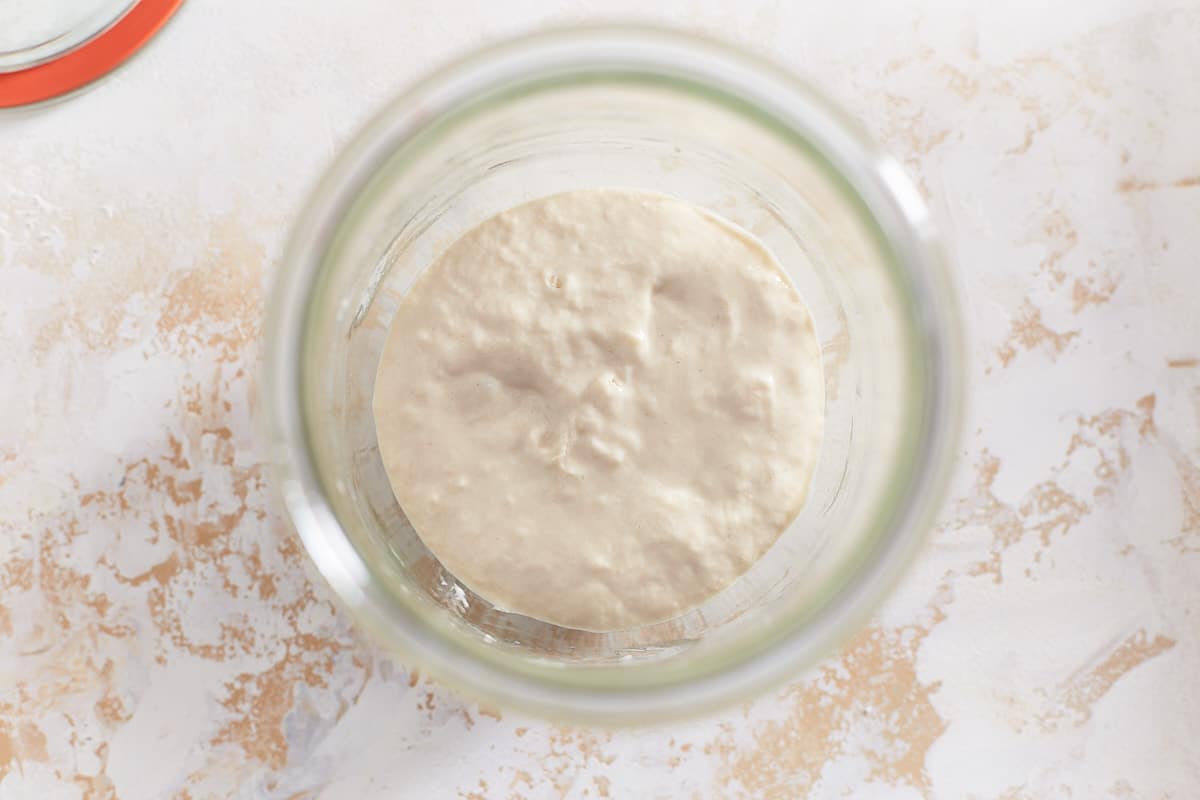
Day 2 - Very little activity, just a few tiny bubbles, and minimal growth. The consistency is a little thinner than yesterday and looks like thick paint. The smell reminds me of cream cheese.
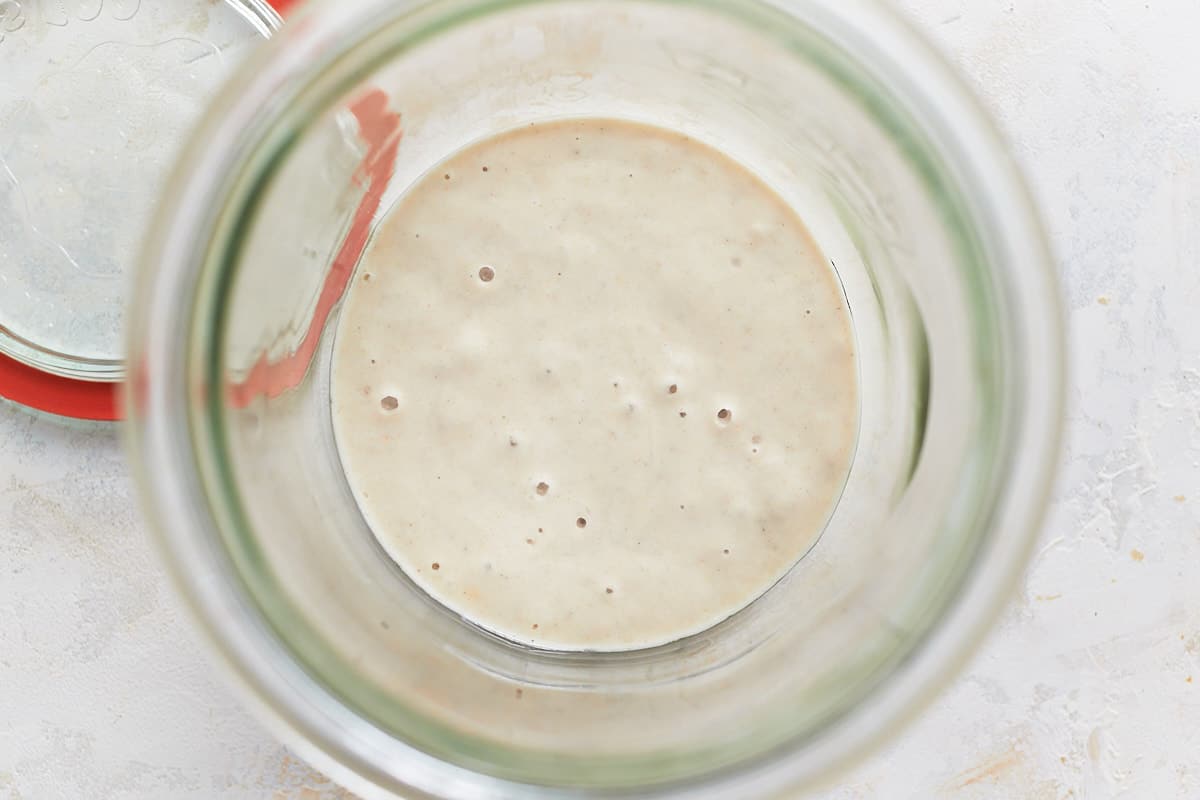
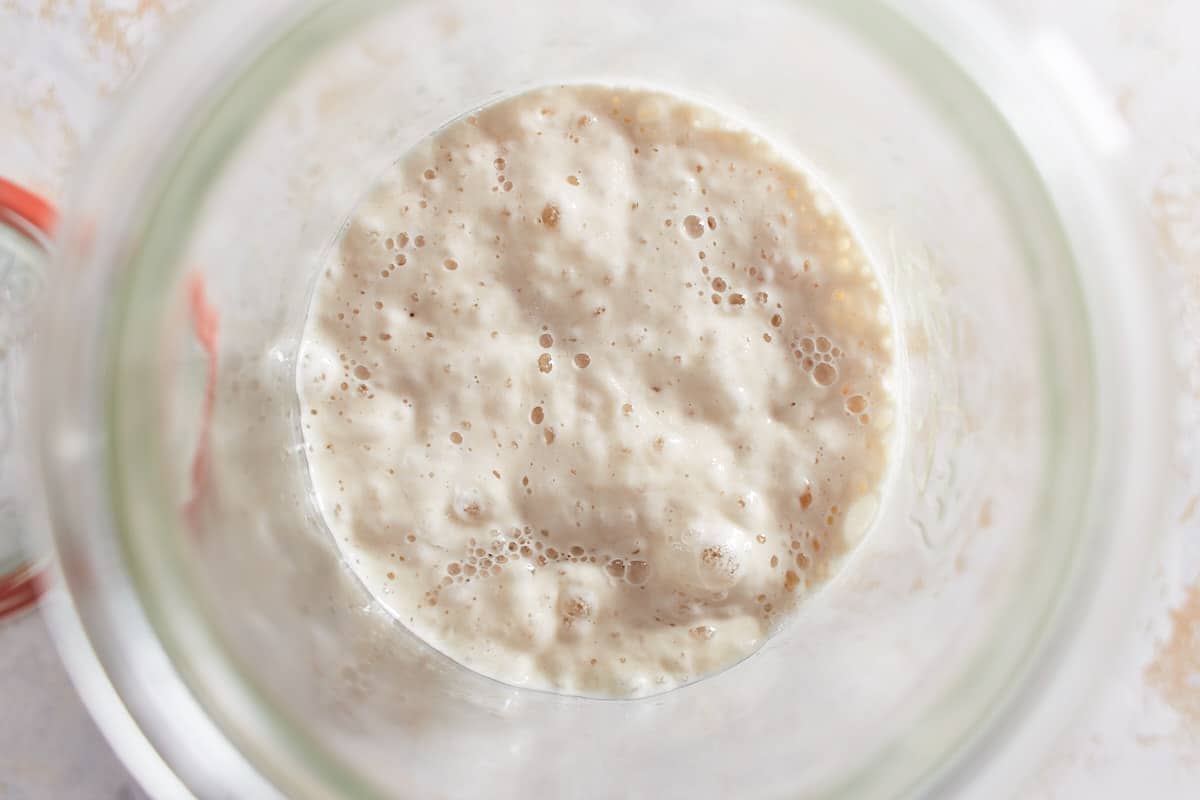
Day 3 - I see on the sides of the jar that the starter is already past peak and deflating (it is below the highest point it has ever reached). This means it's past peak activity and time to feed. It grew about 10-20% until it reached the highest level of activity. It's much thinner, has lots of tiny bubbles, and the smell is fruity and cheesy.

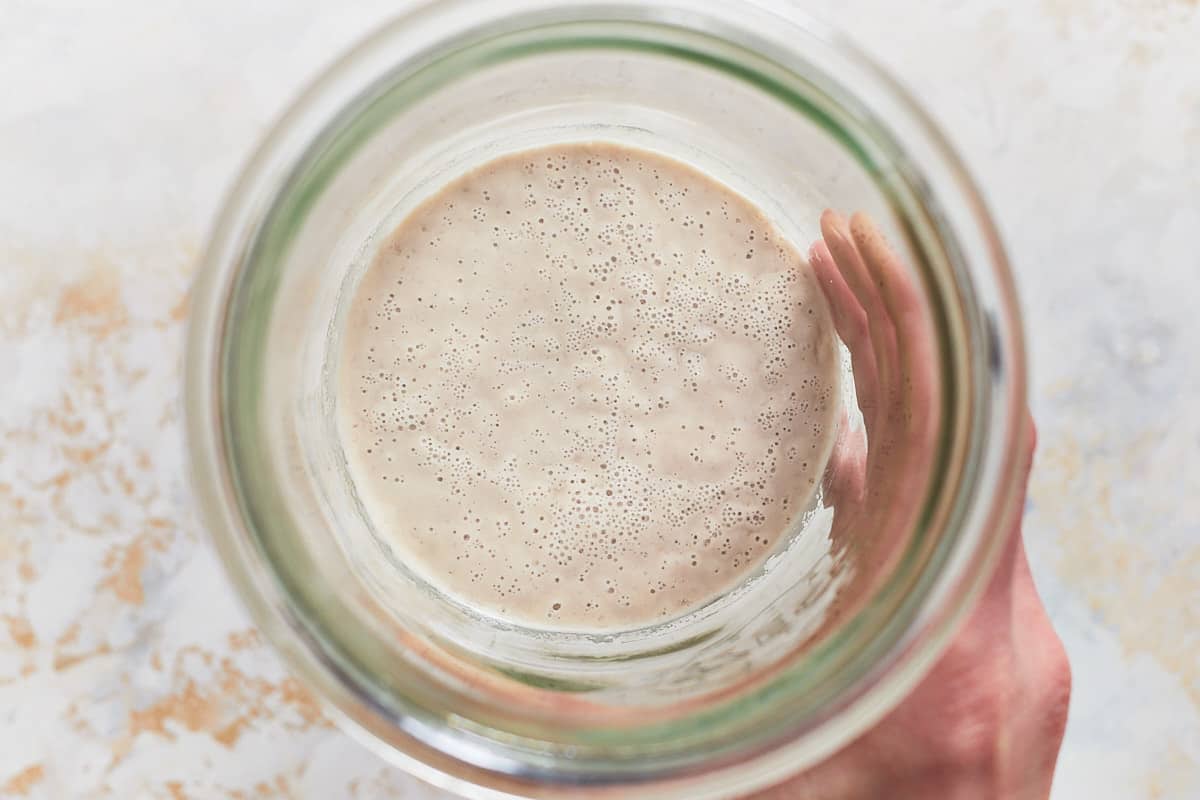
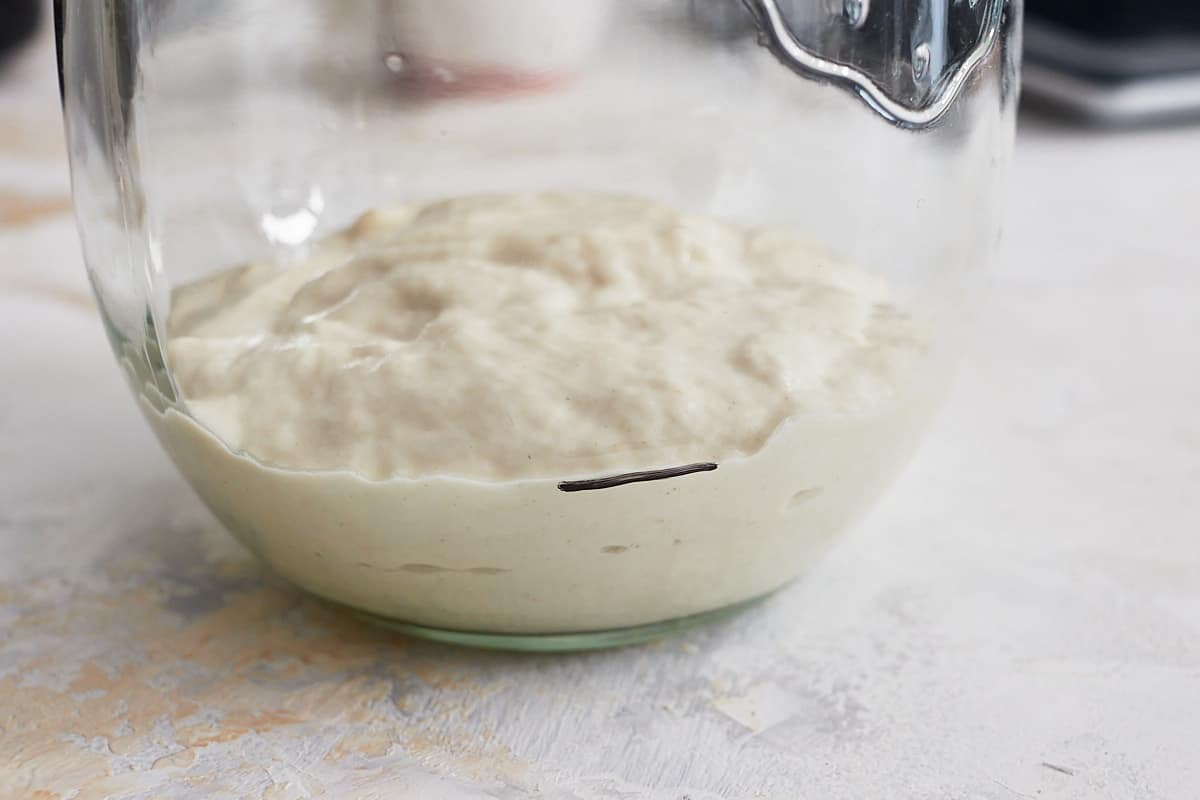
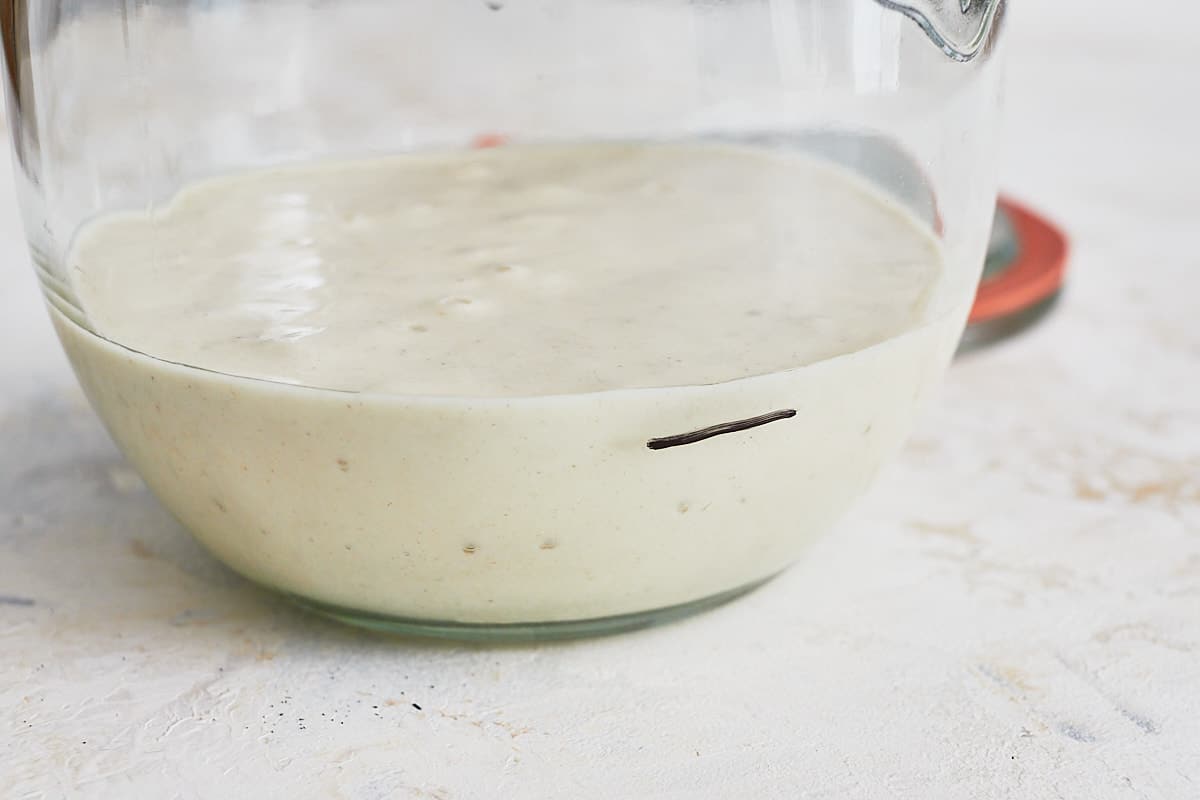
Day 7 - After feeding my starter regularly for another 4 days, I see it change noticeably. It's full of bubbles, thicker, and already doubles in between feedings. The cheesy smell has completely disappeared and ranges from sweet and yeasty to sour.
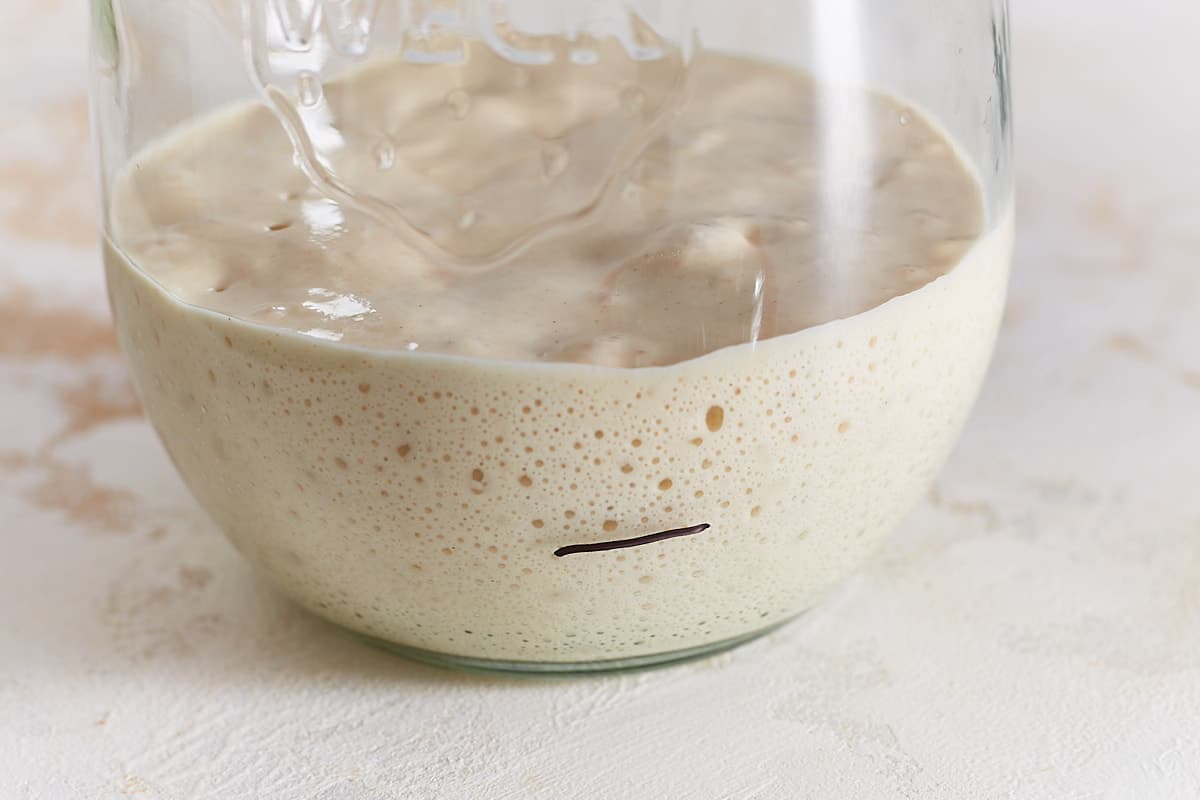
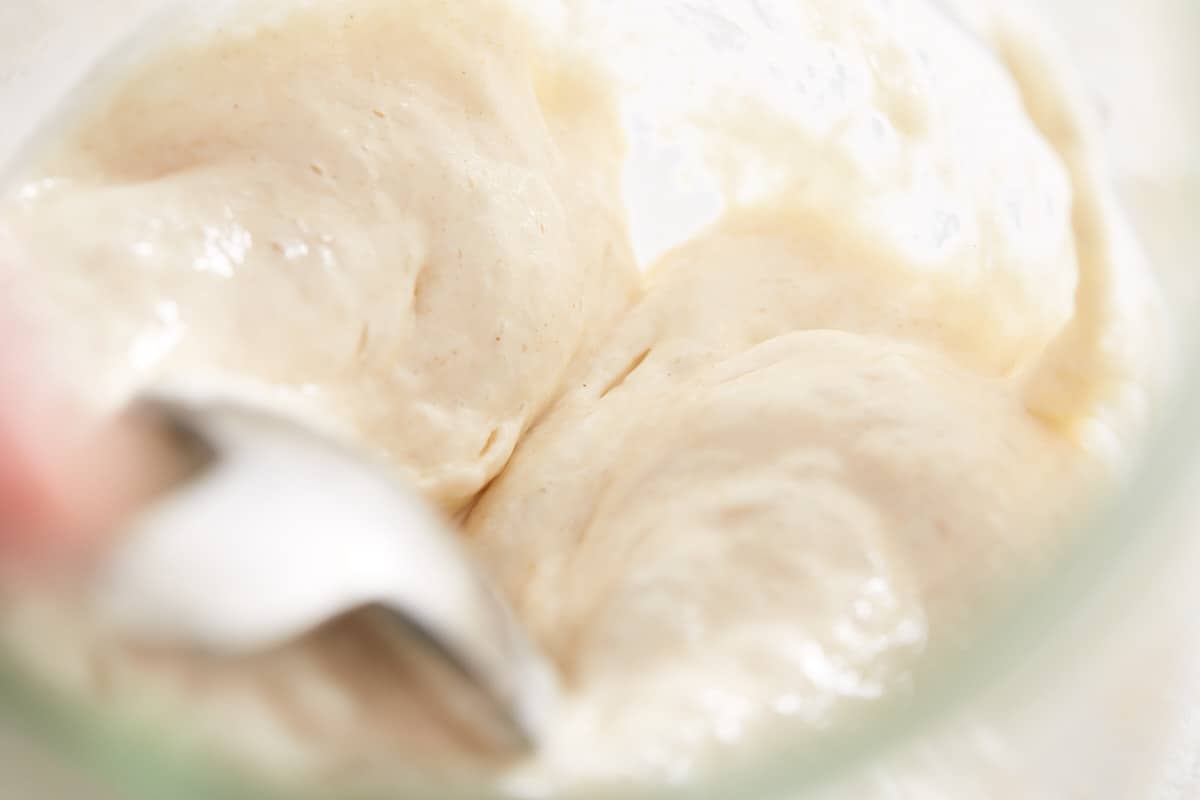
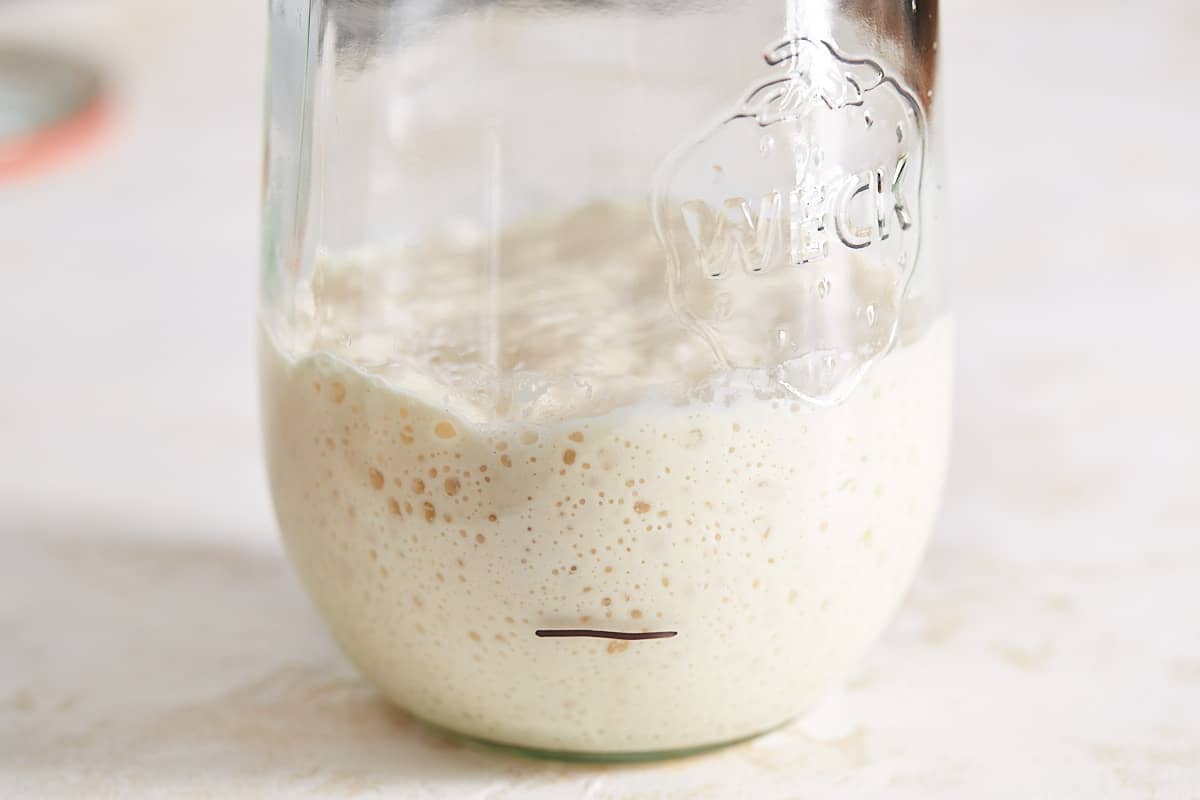
Day 14 - I've steadily increased the feedings and after 14 days I can say I have a healthy and active starter. It's very thick, airy, and bubbly. It peaks around 6 hours after feeding. The smell reminds me of overripe fruit.
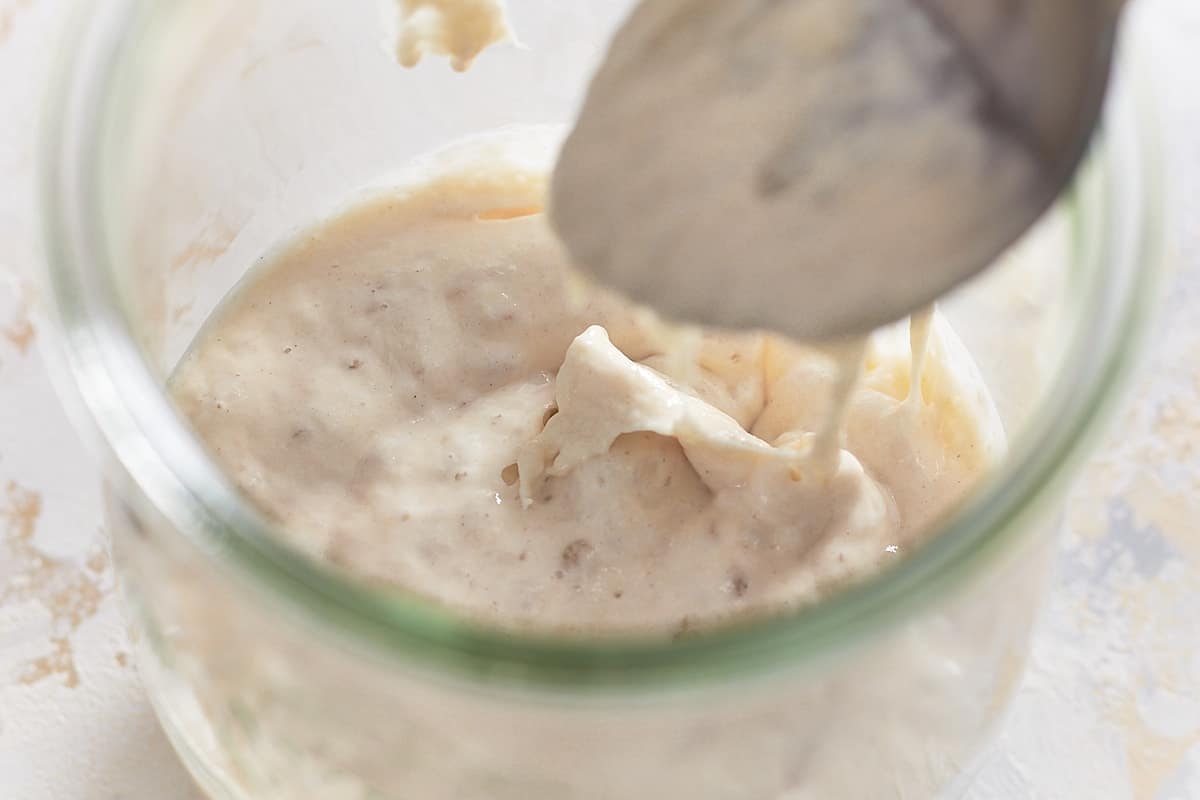
At this point, you can start using your starter for baking. Store it in the refrigerator and feed it once a week.
Recipe

Sourdough Starter
Equipment
- 2 Weck jars that hold 1 lb
- Spatula
- Water-based markers or rubber bands
- Kitchen scale
Ingredients
- organic strong white bread flour
- filtered or bottled water
Instructions
- Combine 60g (½ cup) of flour and 60g (¼ cup) of water in a weck jar and stir until no lumps remain. Scrape down the sides of the jar to keep them as clean as possible. Put on the lid with the rubber seal without sealing the jar. Then mark the glass with a water-based marker or a rubber band to remember how full the glass was. Store at room temperature 70-75°F (22-24°C) for 2-3 days.
- Once your starter has small bubbles on top, has risen a little, peaked, and deflated again, usually around day 3, discard everything but 60g (¼ cup). Add 60 g (½ cup) flour and 60g (¼ cup) water and stir. Scrape down the sides of the jar, place the lid on top, and mark again. I usually change jars at this stage. Store at room temperature for 24 hours.
- Feed every 24 hours in a ratio of 1:1:1 (60 g starter, 60 g flour, 60 g water). You will find that the starter grows more and more and develops a lot of bubbles every day. Once you find that your starter doubles in 12 hours, increase the feeding to twice a day and feed every 12 hours. Maintain this feeding schedule and ratio for 2-5 days. Store at room temperature.
- It's time to gradually increase the feeding ratio to 1:5:5 every 2-3 days. Store at room temperature.- So after the 1:1:1 feeding ratio, increase to 1:2:2, by using 30g (2 tbsp) starter, 60g (½ cup) flour, and 60g (¼ cup) water. - Then increase to 1:3:3, by using 15g (1 tbsp) starter, 45g (6 tbsp) flour, and 45g (3 tbsp) water. - For a 1:4:4 ratio, use 15g (1 tbsp) starter, 60g (½ cup) flour, and 60g (¼ cup) water. - Finally feed in a 1:5:5 ratio by using 15g (1 tbsp) starter, 75g (⅔ cup) flour, and 75g (⅓ cup) water.
- When your starter, fed at a 1:5:5 ratio, peaks after 5-6 hours at room temperature it's ready to use for bread, pizza, brioche, etc. It will take about 1 month to develop a predictable and reliable starter, strong enough to bake beautiful loaves of bread.
- You can transfer the starter to the fridge at this point and feed it in a ratio of 1:5:5 once a week. Depending on how much and how often you bake, adjust the amount of starter to your needs. Before baking bread with it, I recommend removing it from the fridge and feeding it once or twice at room temperature to revive and wake it up.
Video
You can find the video in the post above. If you don't see a video, please check your browser settings.
Leave a Reply