
Learn how to make sourdough bread with sourdough starter from scratch. It is not as complicated as you might think to make beautiful and tasty bread. I will walk you through the process and give you tips, tricks, step-by-step photos, and a tutorial video so that you can successfully bake your own bread.
This recipe provides the instructions for making a levain (also called a leaven - an active sourdough starter). It's is very beginner-friendly and perfect for a busy schedule as you only have to let the bread rise once. By the way, you could also try my sourdough sandwich bread!
Note: Please understand that I can only give an orientation of what I have learned from experience and tests. I will do my best to guide you through the process so that you can successfully bake your own bread. Every sourdough starter and every bread behaves differently. So there is no such thing as a one-size-fits-all approach. The activity and growth of your sourdough bread depend on many different factors and you need to figure out what works for you in your environment with the flour and water you are using. It is also possible that my outlined schedule does not work for you. Thank you for your understanding.
Jump to:
Ingredients notes
- Bread flour – I mainly use organic white bread flour with a protein content of 13.4%. The higher the protein content, the stronger the gluten. Bread flour is preferred when baking bread because it makes an incredibly airy and chewy crumb and you have more flexibility with longer and cold rises in the refrigerator. Low-gluten flour (all-purpose) will work too, but doesn’t give you the same results. Alternatively, you may explore a bread flour substitute for suitable options.
- Water – The wild yeast cultures in sourdough bread dough are sensitive to chlorine, so it’s best to use bottled water or filtered tap water.
Baker’s Percentages
Temperature and fermentation time
How long the fermentation takes depends on the dough and ambient temperature and can range from as little as 4 hours to 24 hours at room temperature. The cooler the temperature, the longer it will take, and the warmer the temperature, the shorter it will take. I recommend storing it at 68°-75°F (20°-24°C) so that the dough fully develops in 6-12 hours.
Cold fermentation in the refrigerator
You can also let the dough rise in the refrigerator for a few days to suit your schedule. In this case, after about 2-4 hours at room temperature and as soon as small bubbles form on the sides of the container in which the dough is stored, place in the refrigerator and store there for up to 5 days. It will still rise and develop in the refrigerator but at a much slower rate. Take it out of the refrigerator 1 hour before continuing with the recipe, when the dough is already fully developed. If it isn't wobbly and bubbly when you take it out of the refrigerator, let it sit at room temperature until it has fully developed.
Make-Ahead Tip: This recipe makes a small loaf that weighs 472g unbaked because we are a small family (my husband and I) and we love having freshly baked bread every day. I usually make 3-4 servings at a time, store them in the refrigerator, and bake them within 3-4 days. If you like this idea, double, triple, or quadruple the recipe and after the 4 sets of stretching and folding, divide the dough and keep the individual dough portions in individual containers. I usually keep one dough at room temperature to bake the same day or the next morning, and the others I keep in the refrigerator.
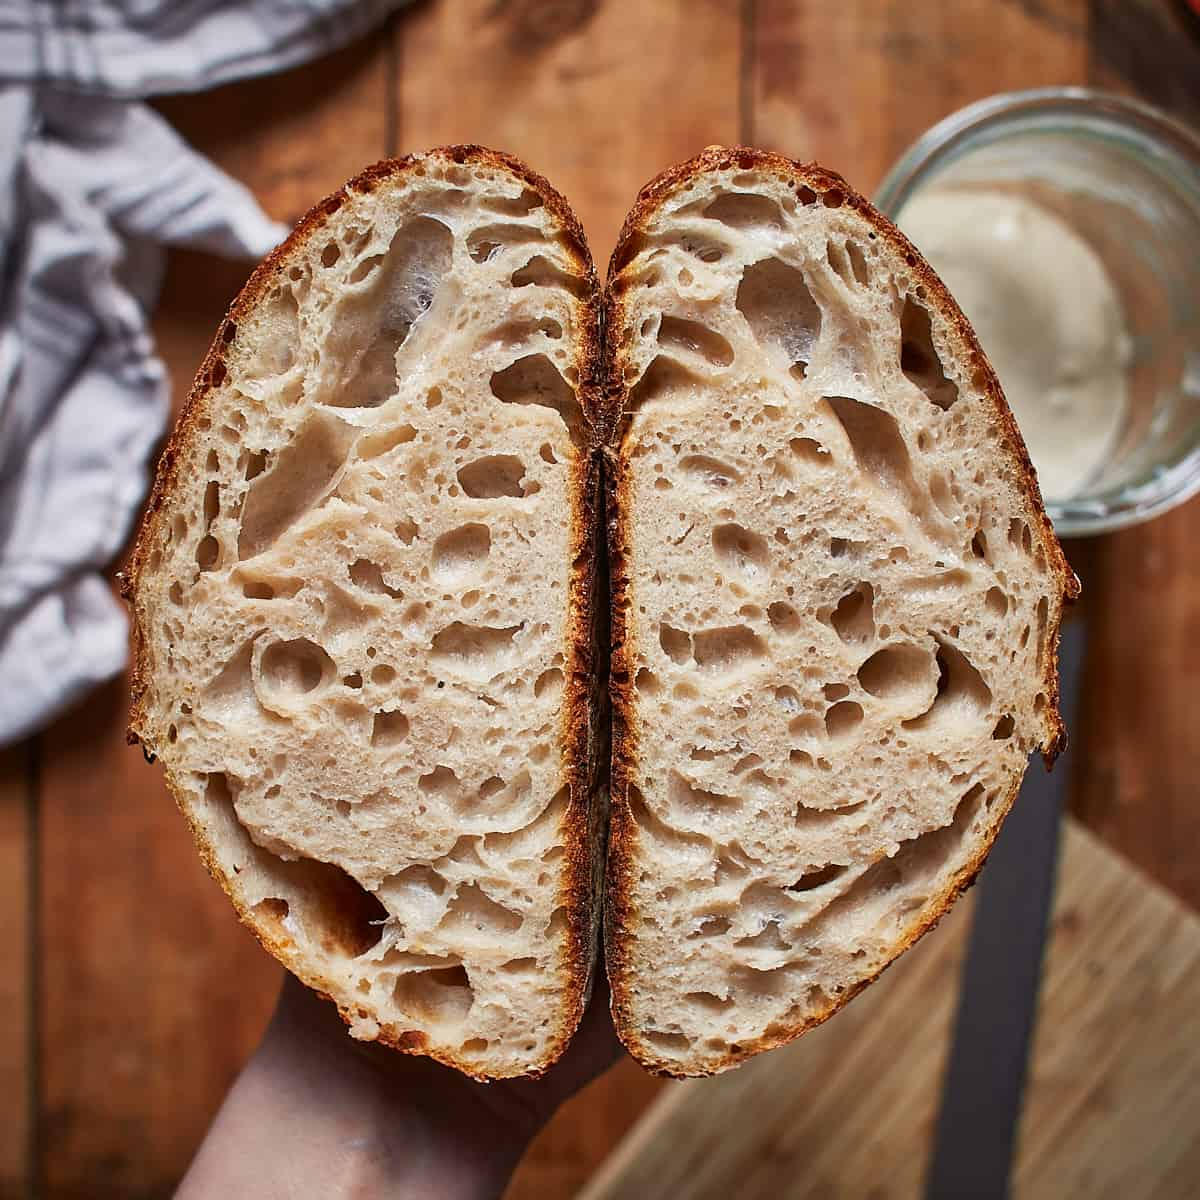
Please note that the bread from the same batch changes in appearance and taste from day to day (the longer it is stored, the more acidic/sour it becomes). The picture below shows a loaf that I baked after storing the dough in the refrigerator for 4 days. You see, it's a little flat and the crumb is full of large bubbles.
The 6 stages of successful bread baking
- Kneading - How long should you knead the bread? Kneading is important to develop gluten and to build and strengthen the gluten strands. By kneading, you push the flour into the water so it can absorb it. As soon as the water and the protein of the flour combine, gluten forms. You will find that the dough transforms as you knead. The longer you knead the dough, the smoother it will be. A few minutes are enough. In the end, it should feel smooth and soft but still a little tacky to the touch, and no lumps of flour remain.
- Rising - When is it ready for shaping? At the end of the bulk fermentation, the dough should be full of bubbles, lively, airy, and wobble like a jelly-fish when you shake the container. These are clear signs that the dough is ready to be shaped for the first time. It should have risen between 50% and 100%. To be absolutely sure it’s ready to shape, pinch up a bit of dough and stretch it between your fingers so thin that you can almost see through without tearing the dough. This is known as the window pane test. You know the dough is sufficiently developed and ready for the next stage when you pass the test.
- Shaping – How to shape it? You need to shape the dough twice. It helps organize and tighten the strands of gluten in the dough so the bread holds its shape as it bakes. The first shaping is called pre-shaping. You do this with as few movements as possible so that you don’t burst too many bubbles in the dough. Then let the dough relax a bit before you shape it again. The second shaping is mainly done by folding and tightening the dough. The key is not to overwork the dough, or the baked sourdough bread loaf could be flat and gummy.
- Scoring – When to score it? The scoring can be functional and decorative. I usually do just one large functional cut across the bread to determine its shape and to make sure that it doesn’t burst while baking. The scoring is done immediately before baking.
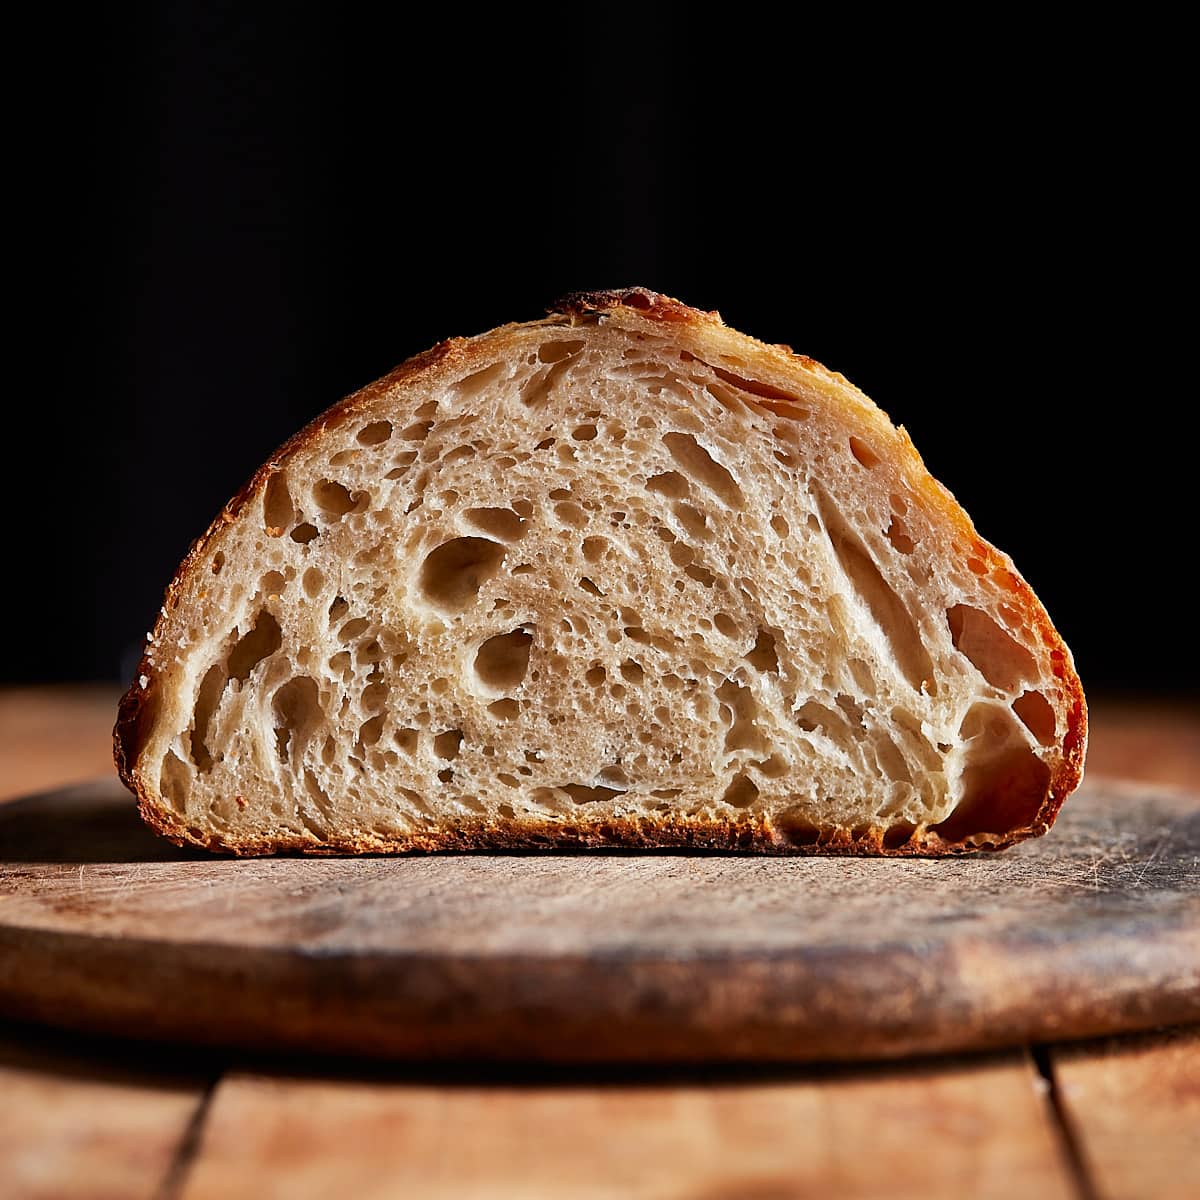
- Baking - Is it properly baked? Before baking the bread, make sure you have preheated the oven and Dutch oven for 30-45 minutes. This is important for a beautiful oven spring, meaning that the bread rises tall and properly. You know that the bread is fully baked when the crust is hard and golden, dark brown. When you remove the bread from the oven, knock on the bottom of the bread to hear if it sounds hollow. If so, it’s baked through.
- Cutting – When to slice the baked loaf? Let the loaf cool completely before slicing it. This is very important. I know how tempting it is to tear into warm bread, but please don’t. Cooling is just as important as any other stage. As long as it is warm, the crumb is moist and dense. If you cut it open while warm, you will end up with sticky and squished bread slices.
Top tips for dough success
- Watch your bread, not the time. Look at the signs (airy, bubbly, wobbly) to determine when it is ready for baking.
- You can retard the dough by putting it into the refrigerator during bulk fermentation. Especially if you have appointments, have to leave the house, or when it’s night, and want to go to bed, place it in the refrigerator and bake it at another time. Don’t let the sourdough dictate your schedule. Integrate bread baking into your schedule that suits you.
- Depending on which climate or environment you live in, the absorption rate of flours can be different. It can be that you need to hydrate your dough more or less, depending on humidity, temperature, or altitude.
- If you are new to bread baking, I suggest sticking to the recommended flour and gain experience. Later on, with more bread baking experience, feel free to use any grain-based flour you wish but be aware that you might need to adjust the recipe regarding hydration level and bulk rise time.
Storage and freezing instructions
Store it in an airtight container at room temperature for up to 4 days. You can also freeze sourdough bread by wrapping it tightly with aluminum or plastic wrap and placing it in freezer bags or containers. Freeze for up to 2 months. You can thaw it by placing it on the kitchen counter in an airtight container overnight, or reheat it if you want to toast it.
FAQs
I knead my dough a little longer and let the first fermentation time last until the gluten has fully developed in the dough (gluten develops either through kneading and time). Most bread bakers recommend bulk rise until it has doubled, then shaping it and letting it proof a second time. Following this advice, I often ended up with bread that was a little flat after baking (most certainly a little over-proofed). I have never achieved a beautiful oven spring as I imagined it. Plus, it just didn't fit my schedule.
After months and months of testing and adjusting my bread-baking process, I have found that I had the most beautiful oven spring when I knead the dough a little longer at the beginning with a longer initial rise and only a short rest time between the shaping.
By the way, you don't need a proofing basket with my method. You may think that the crumb, texture, or taste suffers from only rising once, but I can assure you that it’s not the case. I prefer the taste and appearance of this white sourdough bread according to my method.
If you don’t have a Dutch oven, you need to find a way to create steam in your oven. My favorite method is to preheat a cast-iron skillet (or baking steel) and a baking pan. Place the baking pan on the bottom of the oven. Then, place the bread in the skillet (or on the baking steel), add a few ice cubes to the baking pan, and quickly close the oven door. After 20 minutes, open the oven door to release all the steam, remove the baking pan and bake an additional 15-20 minutes.
That could be due to under-fermentation, over-fermentation, overworking the dough when shaping, not baking long enough, or cutting it when it is still warm. Make sure to let the dough rise until the gluten is fully developed, but not for much longer. If you notice that the dough is starting to deflate and the bubbles are getting fewer and fewer, then the dough has been over-proofed.
Also, when shaping the dough, be careful not to overwork it to prevent the air bubbles in the dough from bursting. It’s also important to bake it long enough until it sounds hollow when you knock on the bottom of the bread and that you let it cool completely before slicing.
A weak oven spring can be caused by under- or over-proofing the dough. It’s also possible that the levain was already past peak and exhausted at the time you mixed it with the water. Make sure that the levain has risen by at least 50% but no more than 100%. A weak levain starter doesn’t have the strength to properly rise a loaf of bread.
There may also be a lack of steam in the oven if a Dutch Oven is not used or steam is not introduced in any other way. Without steam, the crust forms too early and prevents the bread from rising. The result is a dense and tight crumb and a flat loaf.
This depends on how acidic the levain is, how long the fermentation takes, and what temperature the dough is kept at. I recommend using the levain starter when it has risen by about 75%, as this results in a mild-tangy taste. It’s also worth noting that the sourdough taste differs depending on where you live due to the differences in local flora.
Photo tutorial
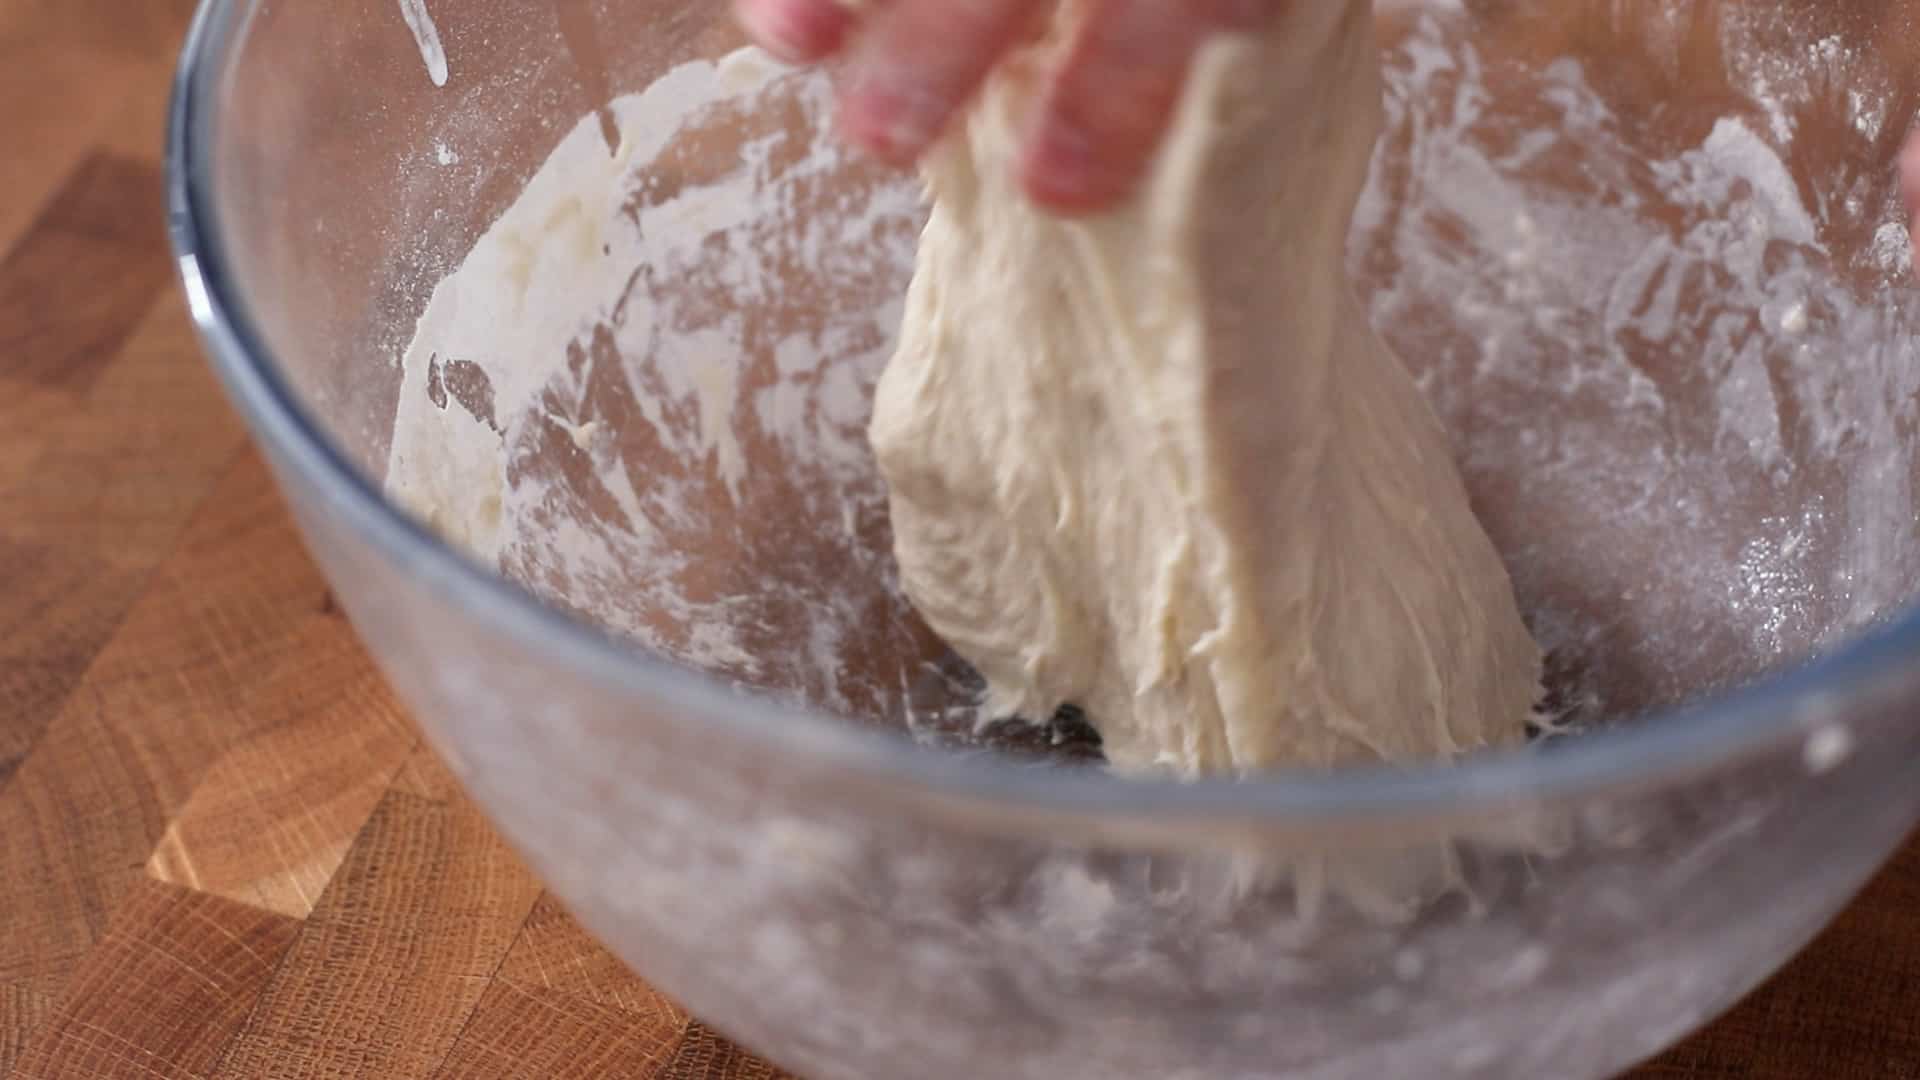
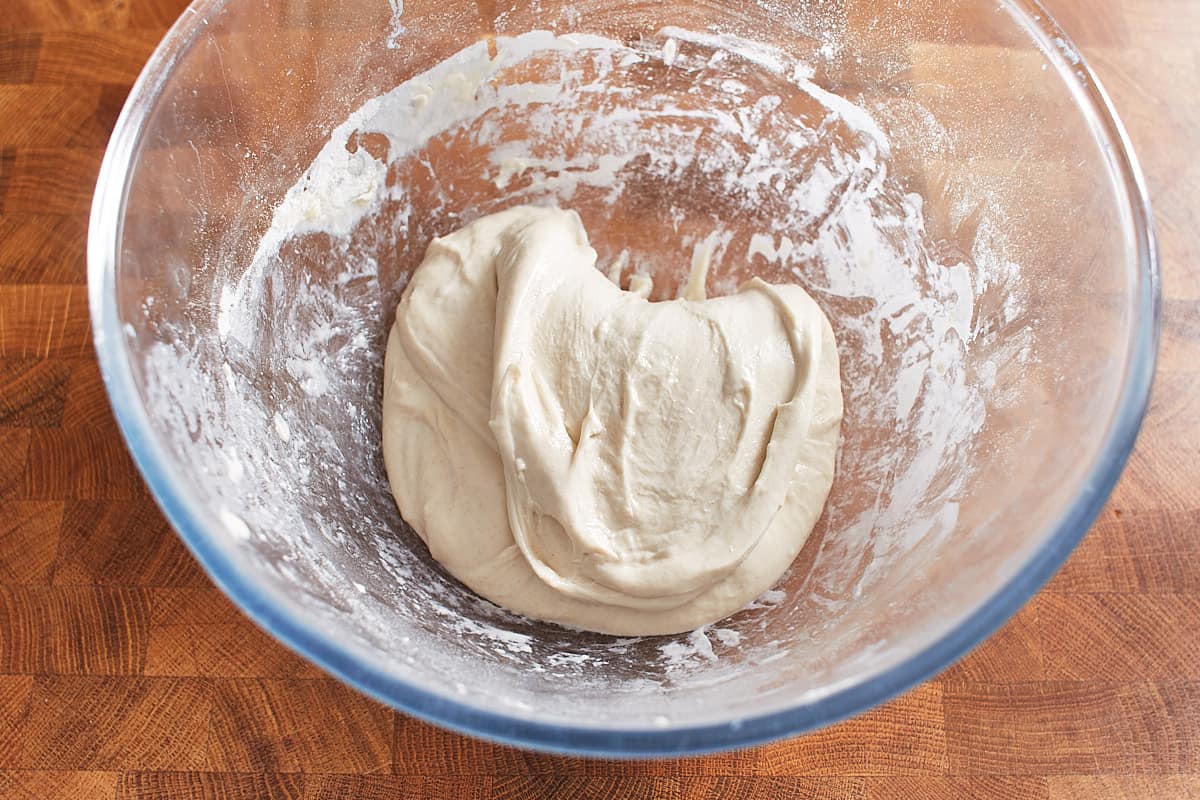
In a large mixing bowl, mix the water and levain until dissolved. Add the flour and stir with a spoon or spatula until a shaggy dough forms. With slightly wet hands, knead the dough for a few minutes until there are no more lumps of flour. Cover and let rest.

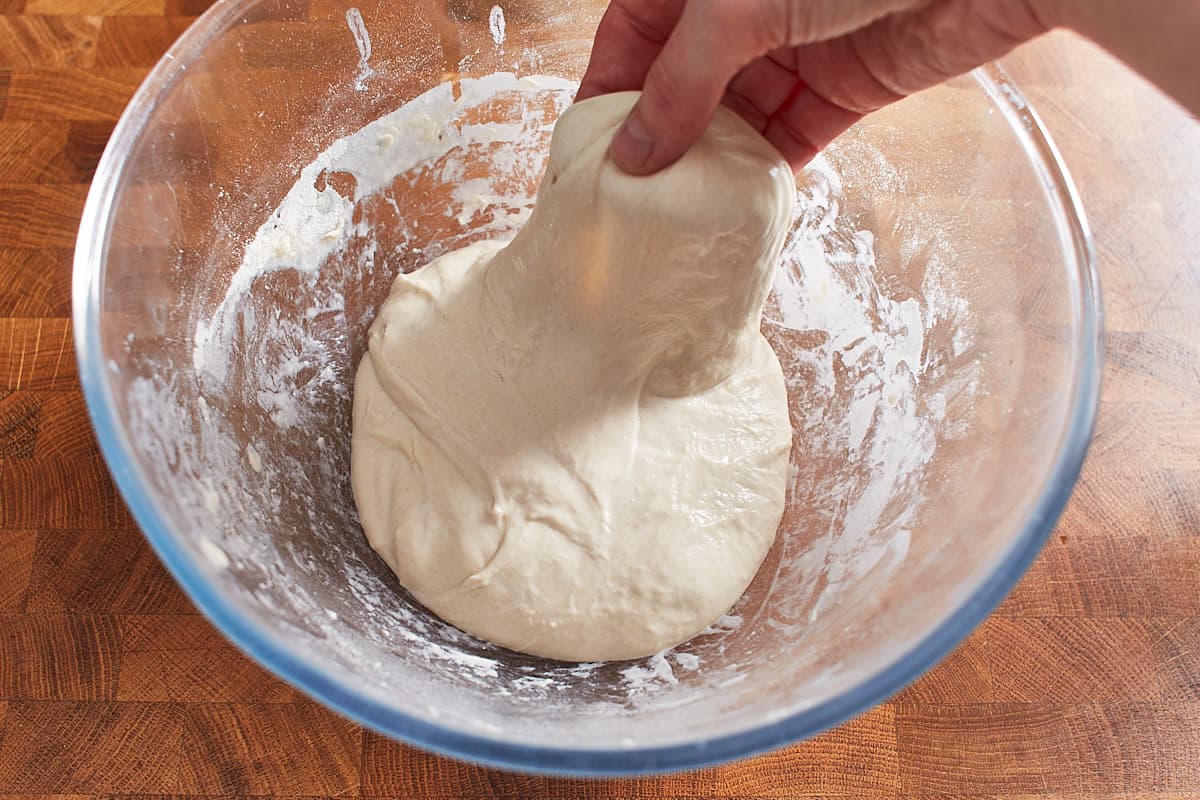
Add the salt-water mixture and knead with slightly wet hands for a few minutes until the dough is smooth and releases from the bowl. Cover and let rest.
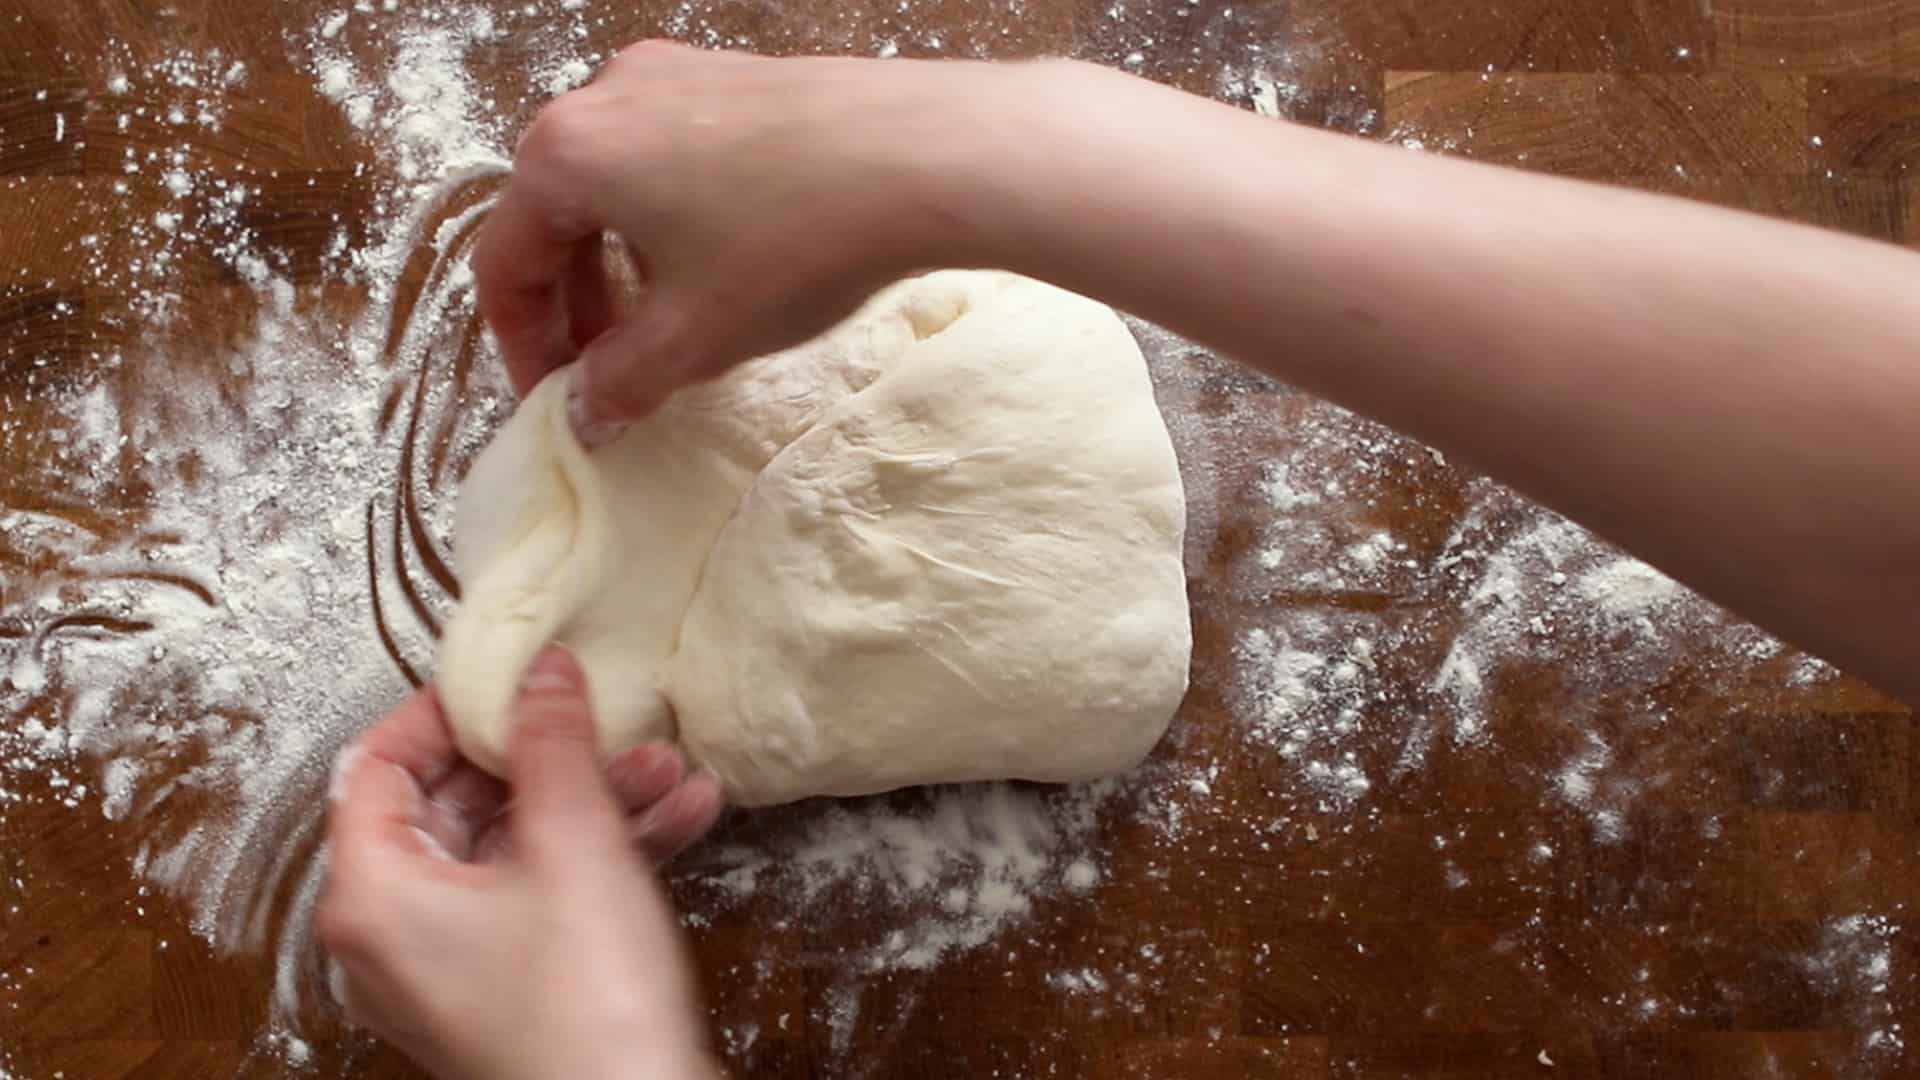
With slightly wet hands, grab one side of the dough and stretch it up.
And fold it onto itself.
Turn the bowl by 90° and stretch it and fold it again.
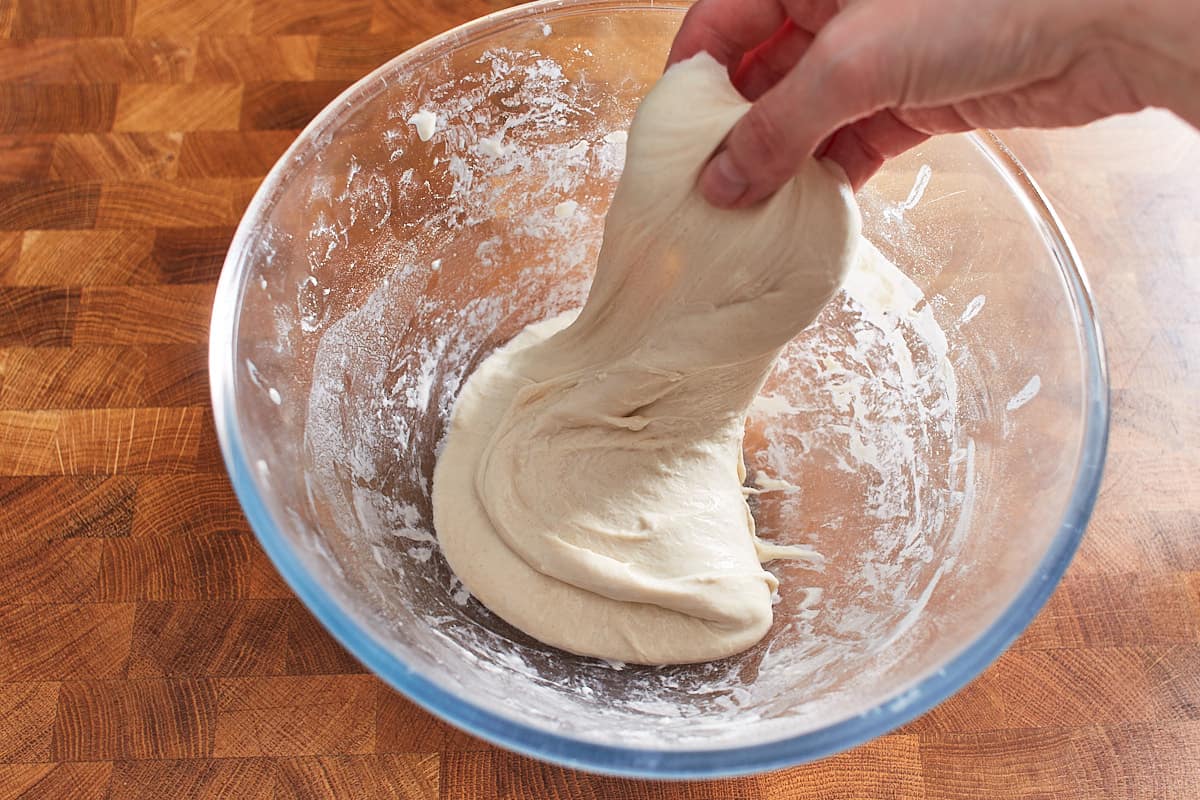
Repeat this two more times.
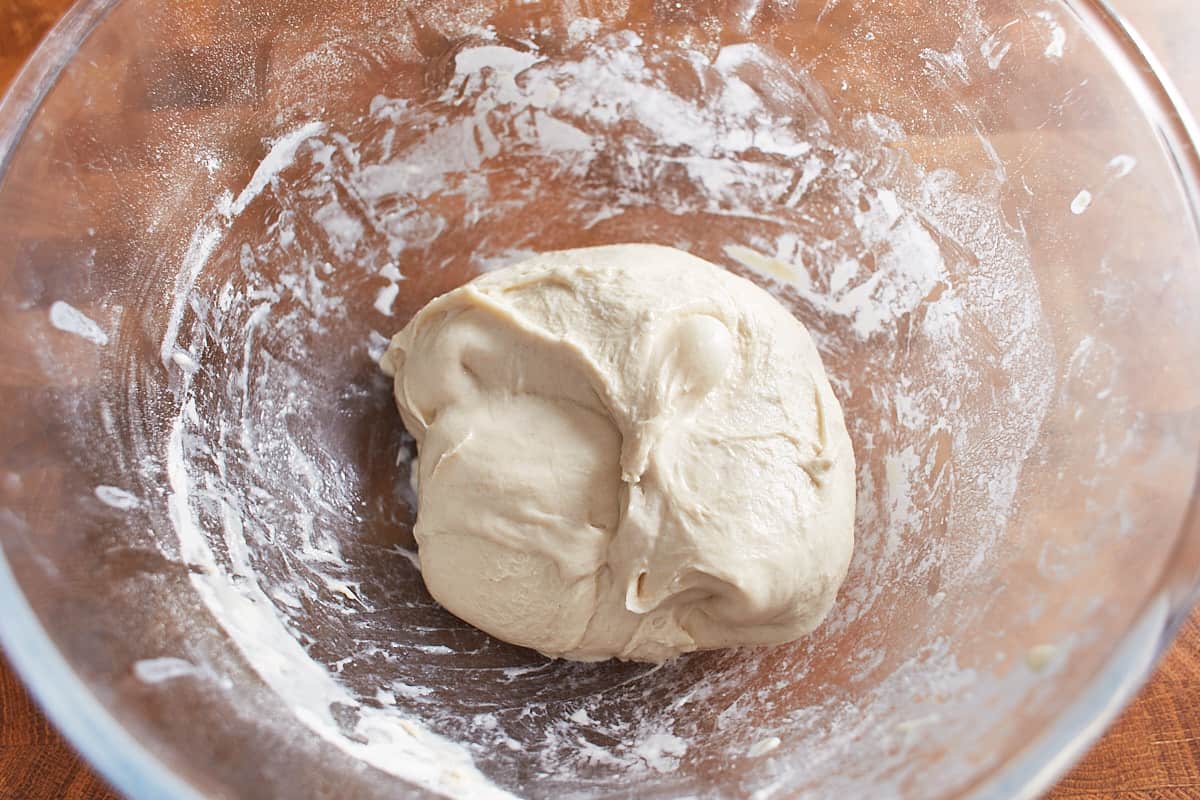
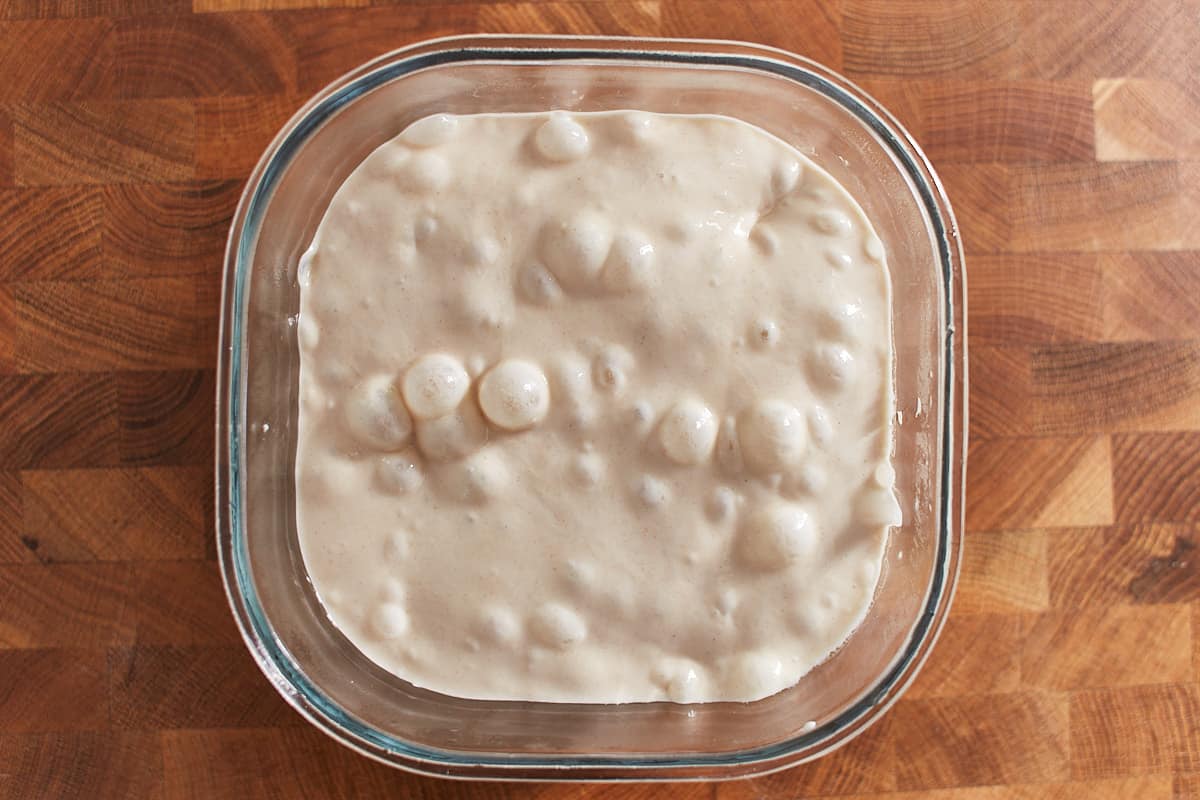
Let rest. Then, repeat the stretch and folds three more times every 30 minutes. Let the dough rest at room temperature for another 4-12 hours or until you see lots of small and large bubbles and it wobbles like jellyfish when you gently shake the container.
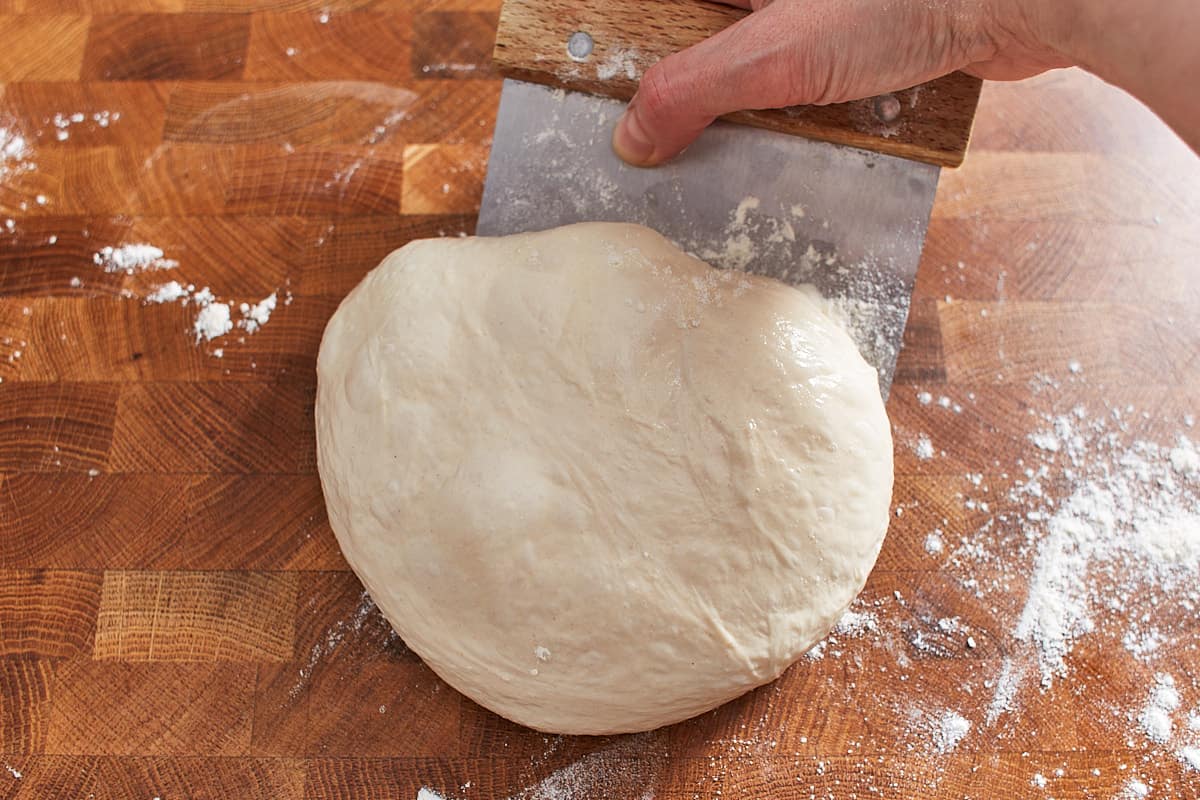
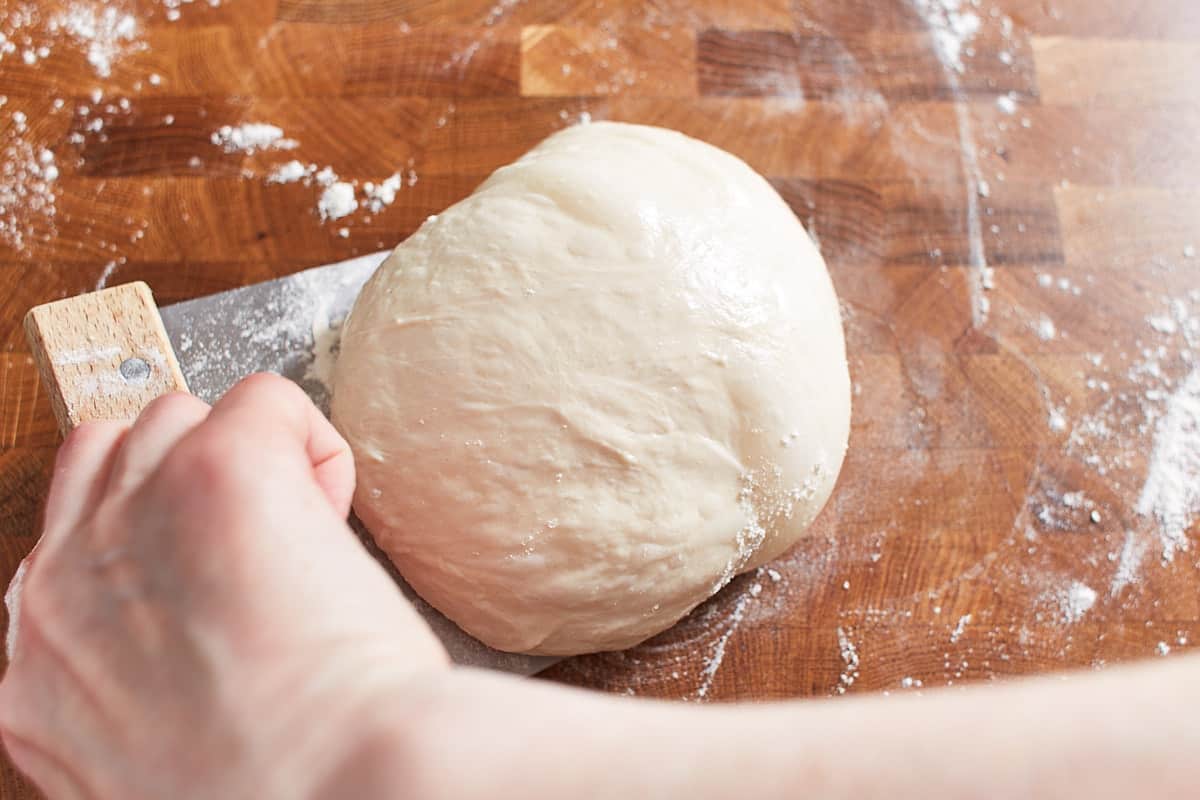
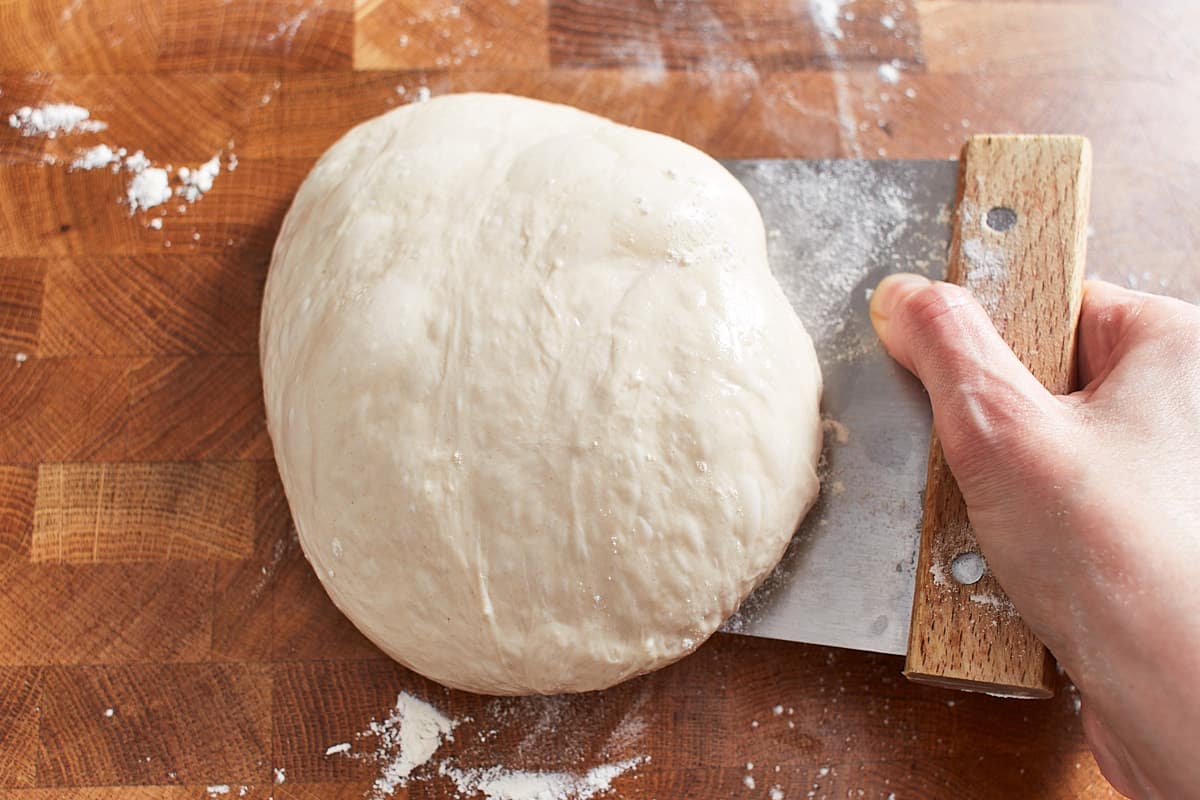
Carefully remove the dough from the container and shape the dough into a round ball with as few moves as possible. This works best with a lightly floured bench knife in a rotary motion.
Then flour the top of the dough ball and cover with a dry and clean kitchen towel and let rest.
Lightly flour the work surface and the dough and turn the ball over with the bench knife.
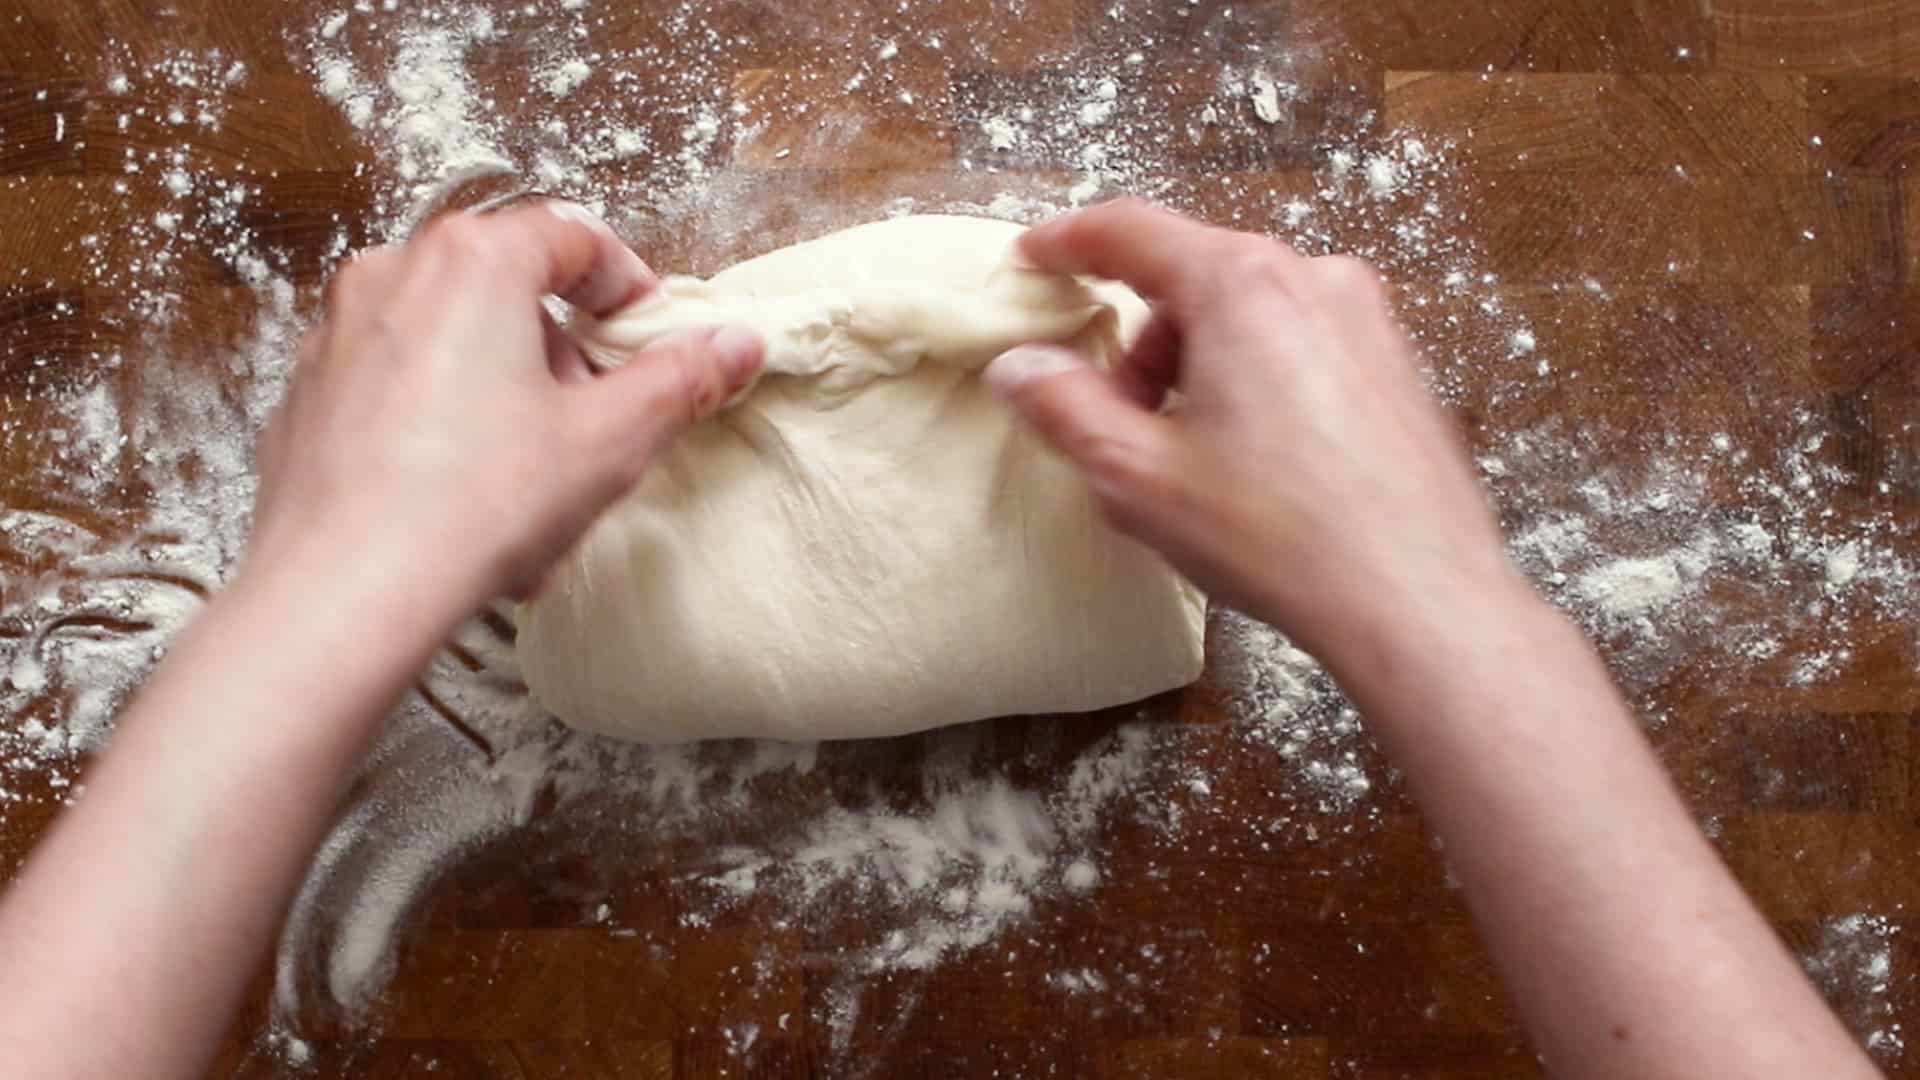
Then stretch the half of the dough closest to you up
and fold it over the other half of the dough, onto itself.
Stretch the right third of the dough horizontally and fold it over the center.
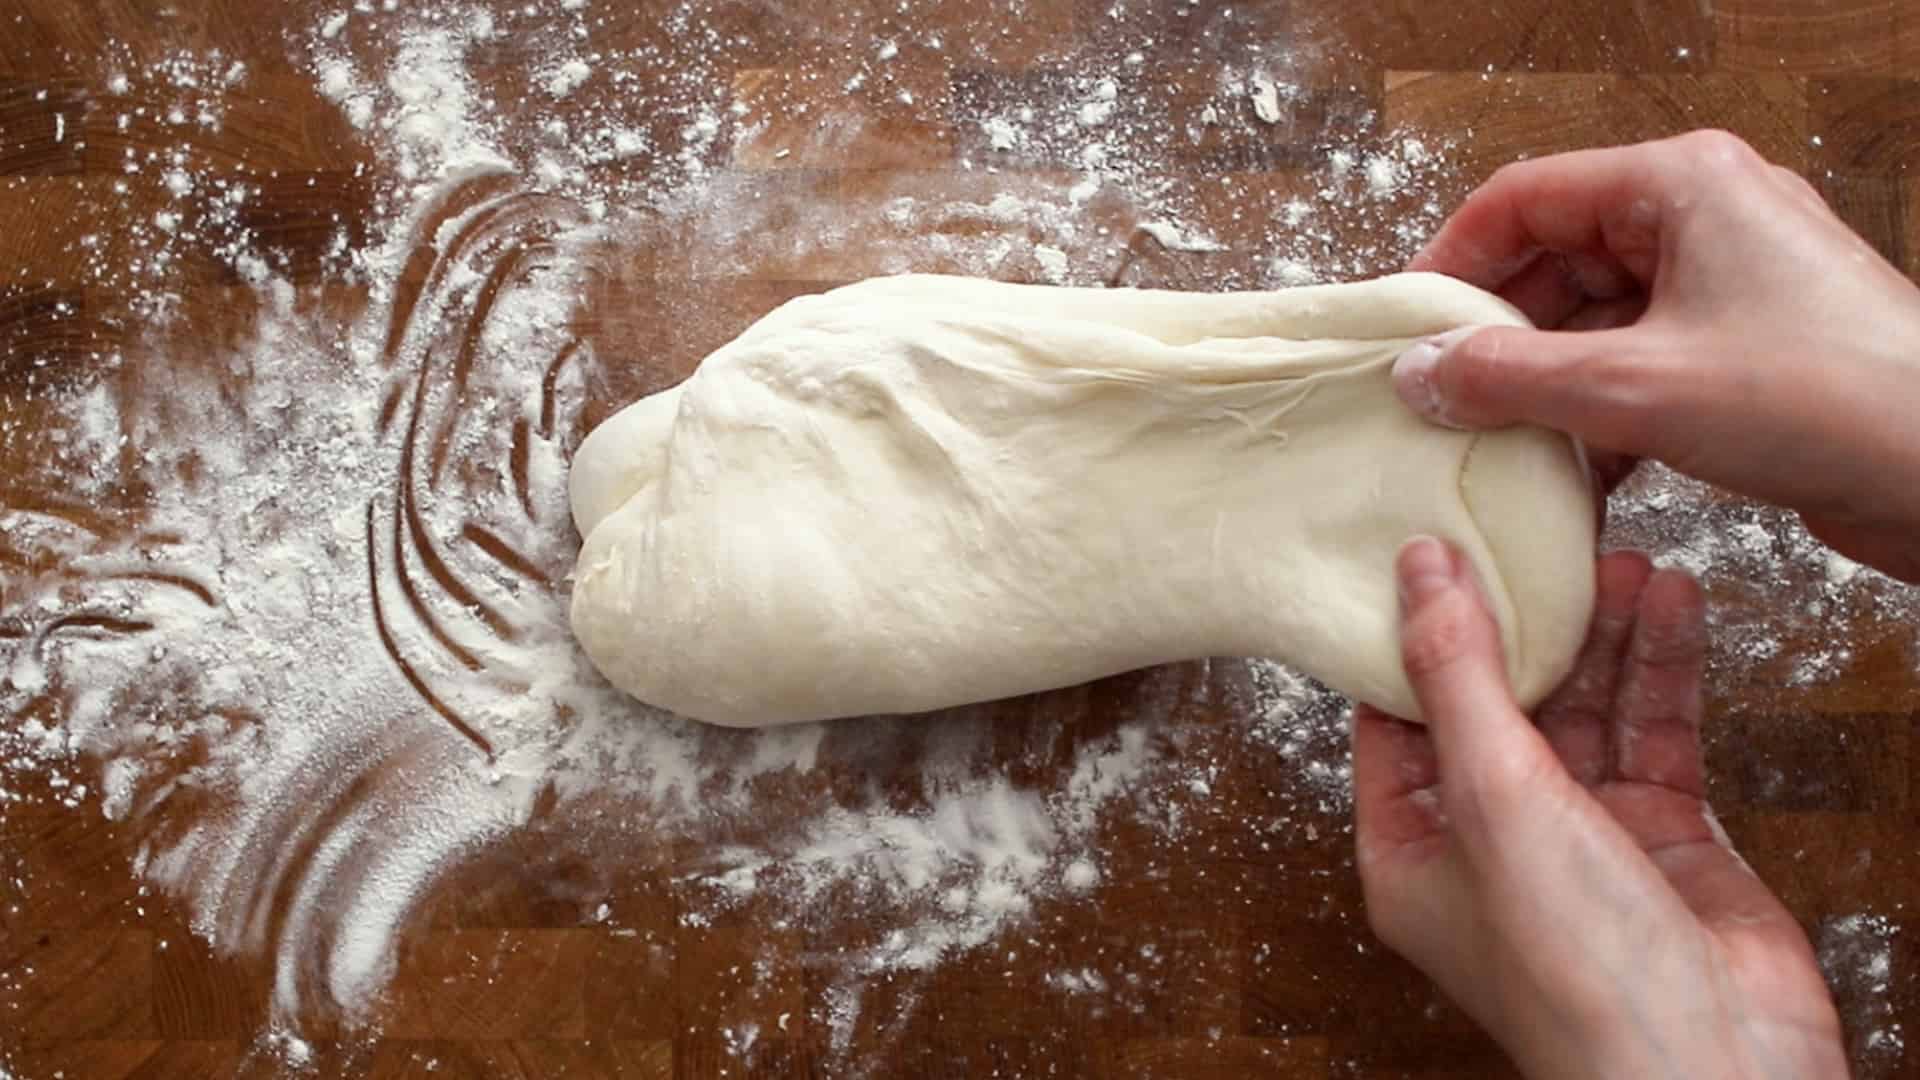
Then stretch up the left third of the dough horizontally
and fold it over the previous fold.
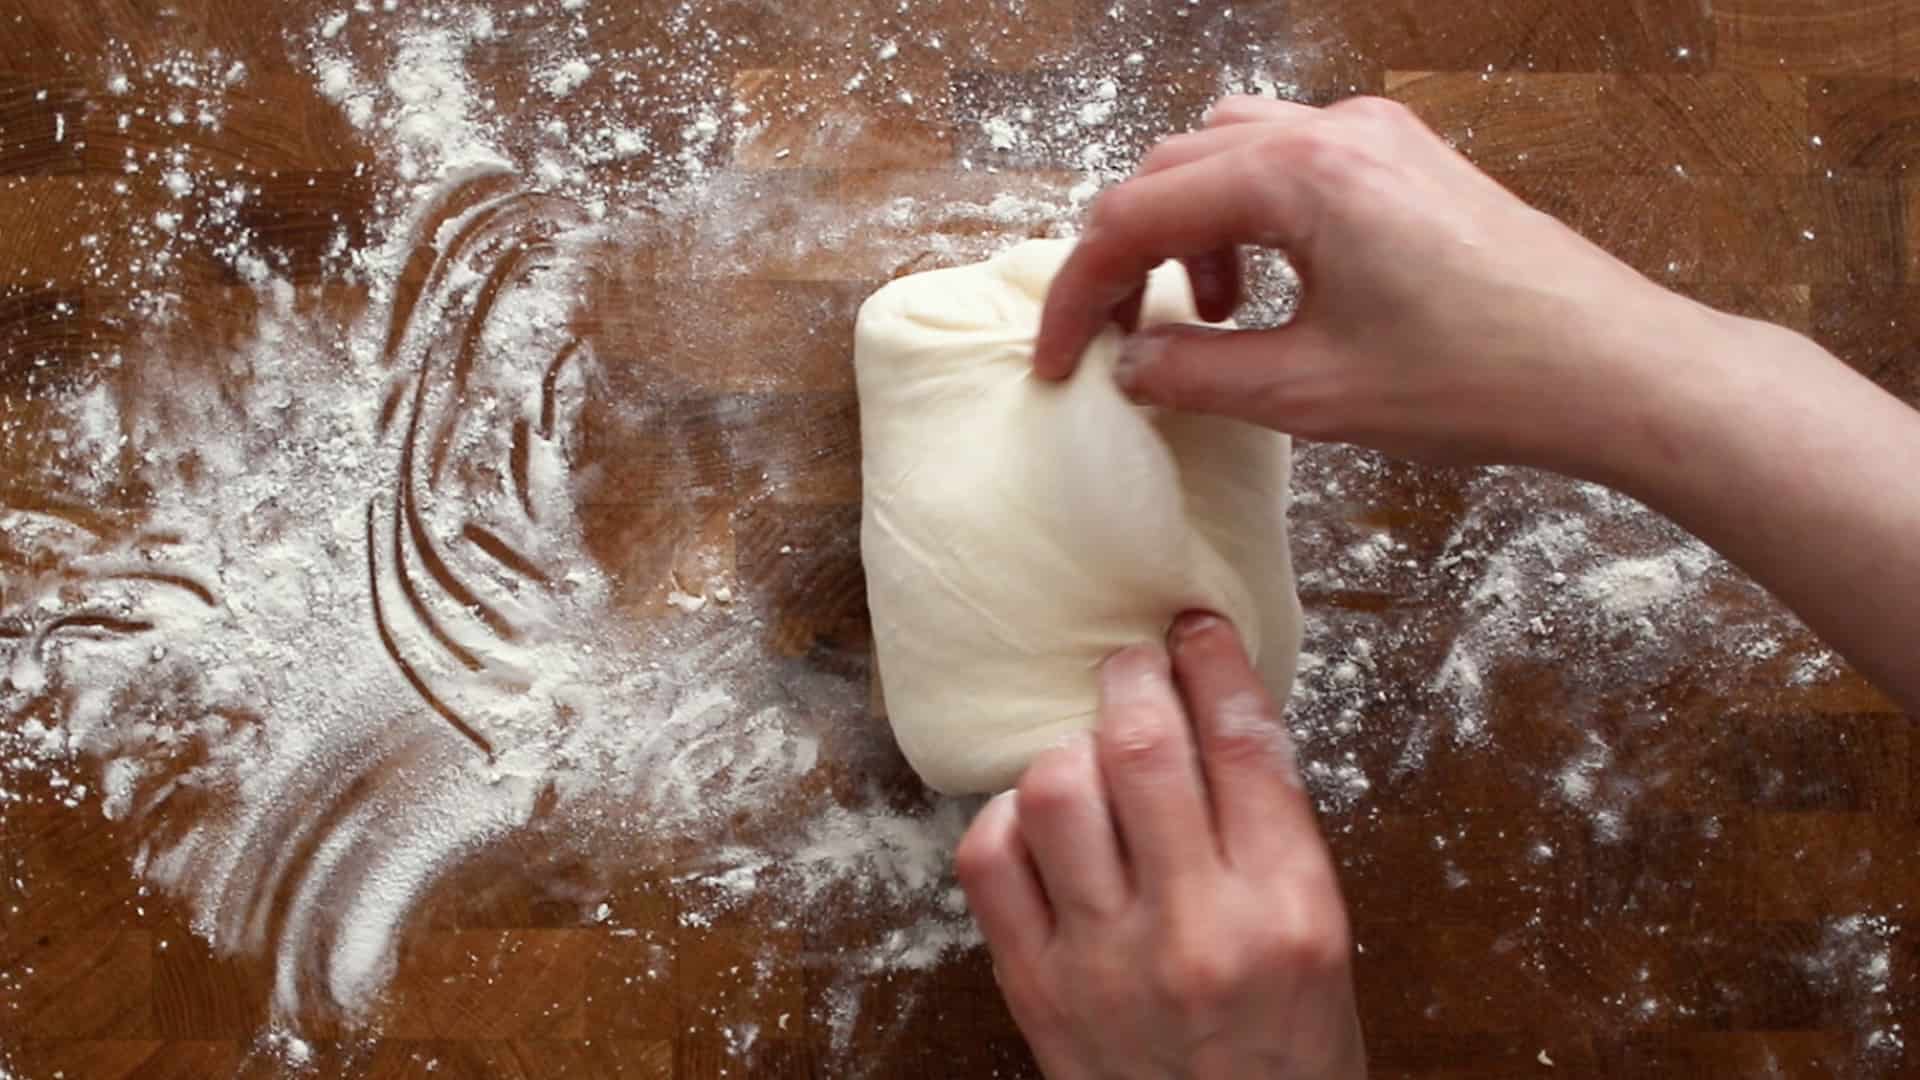
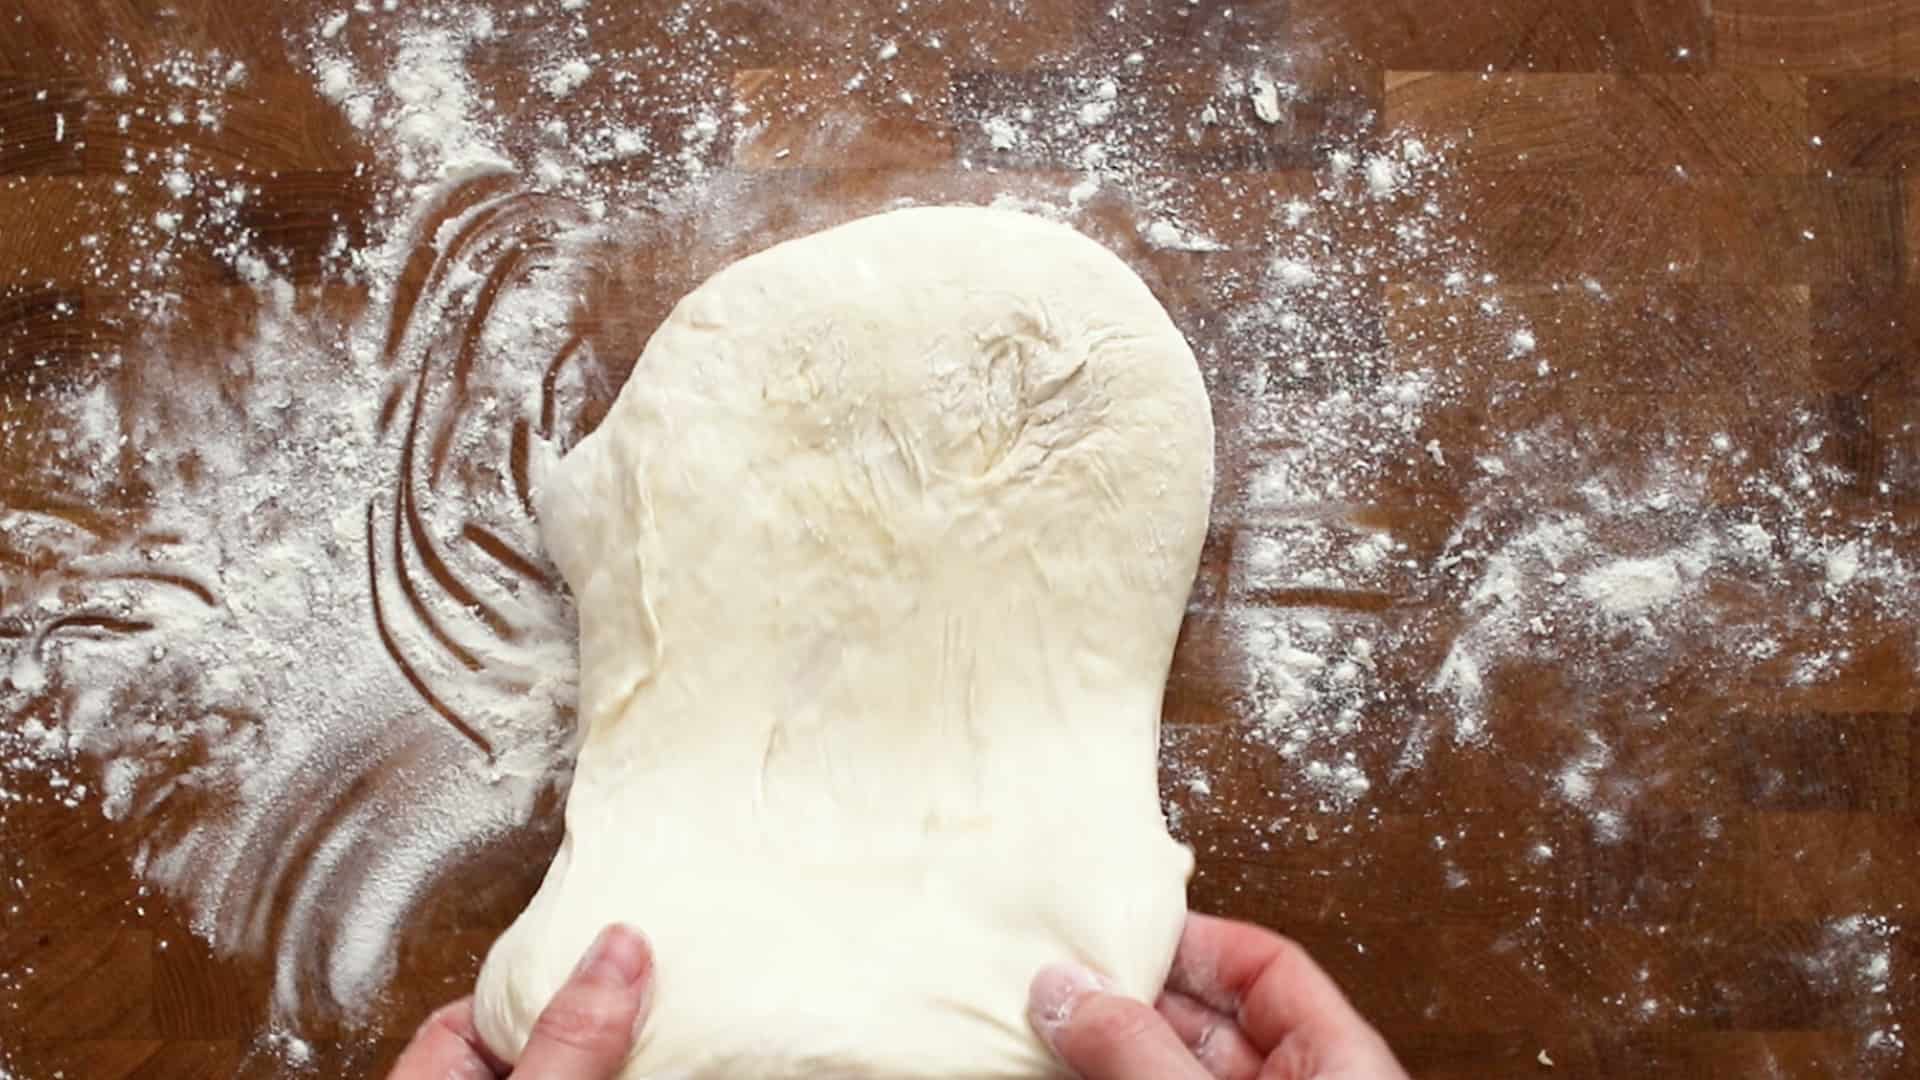
Stretch out the flap of dough farthest away from you
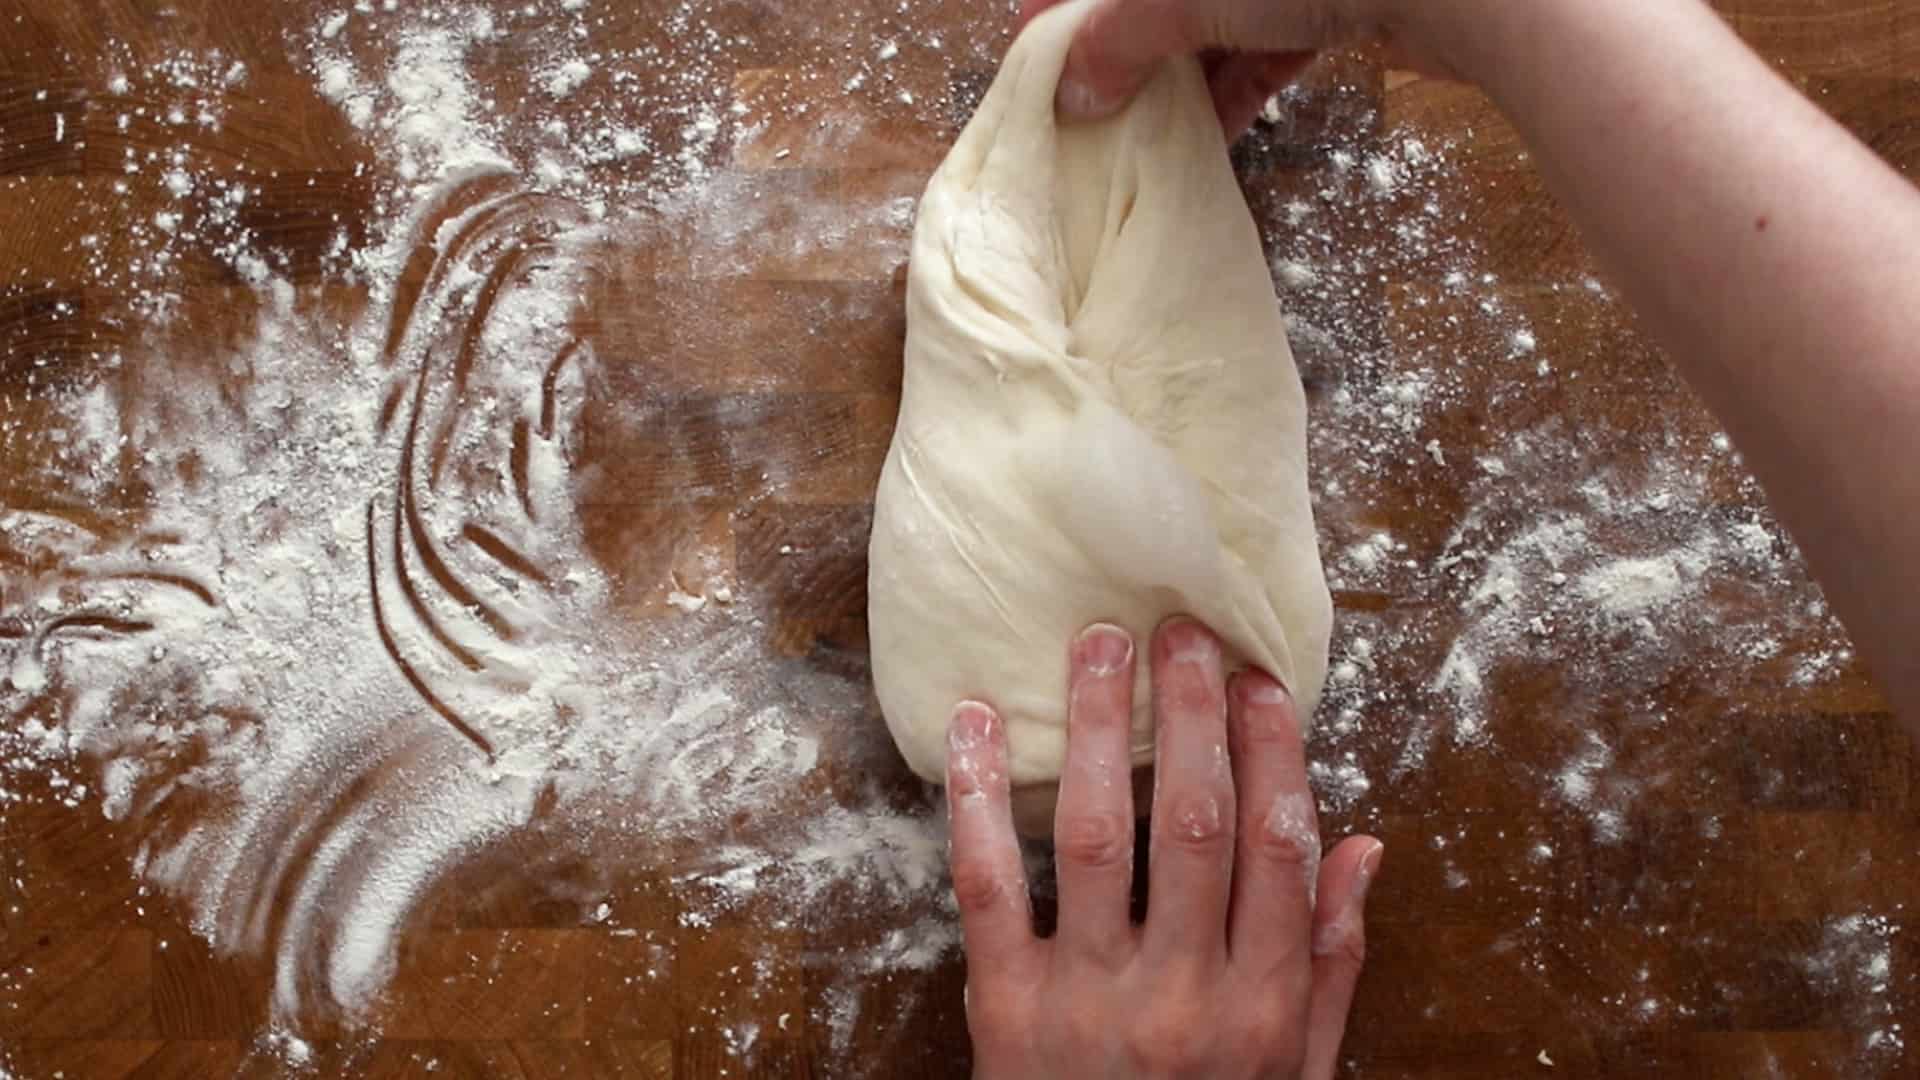
and fold it toward you and over the dough.
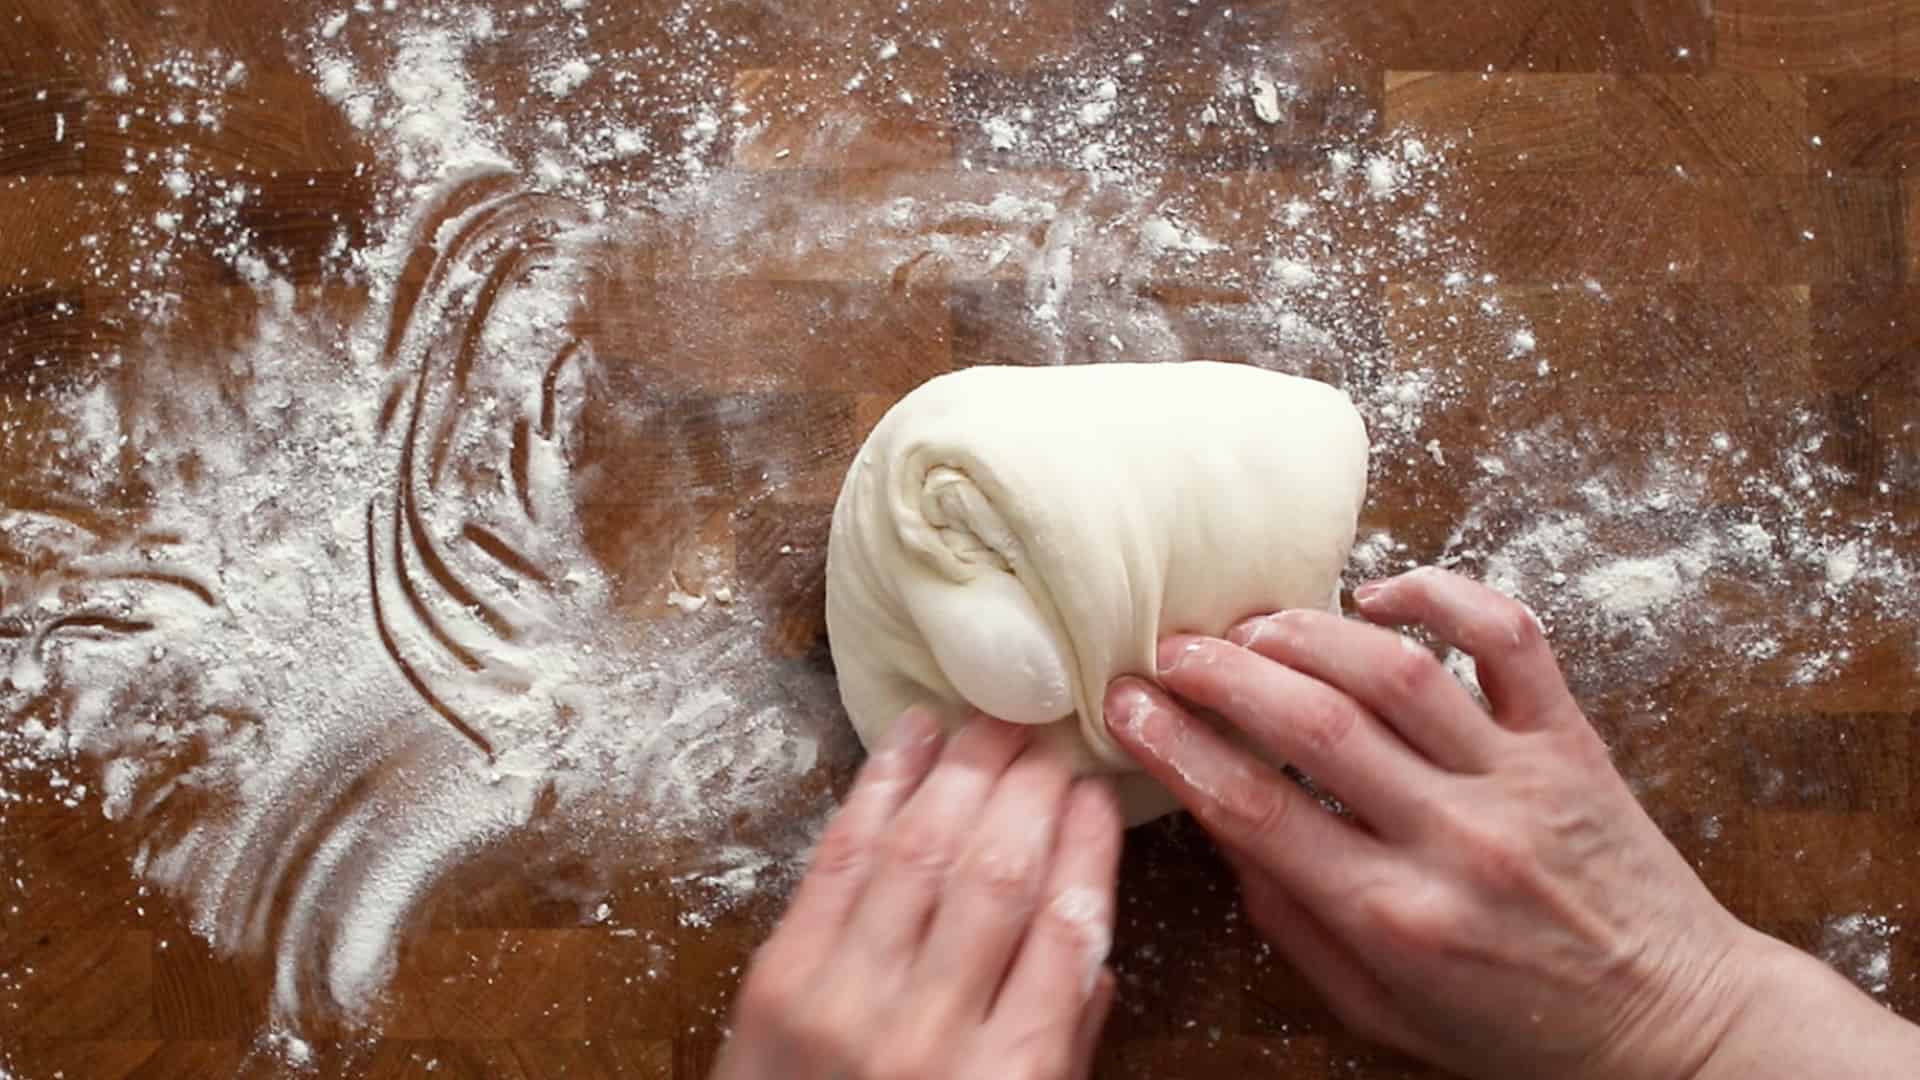
While holding and anchoring the flap, turn the dough over that the seams are on the bottom and the smooth underside on top.
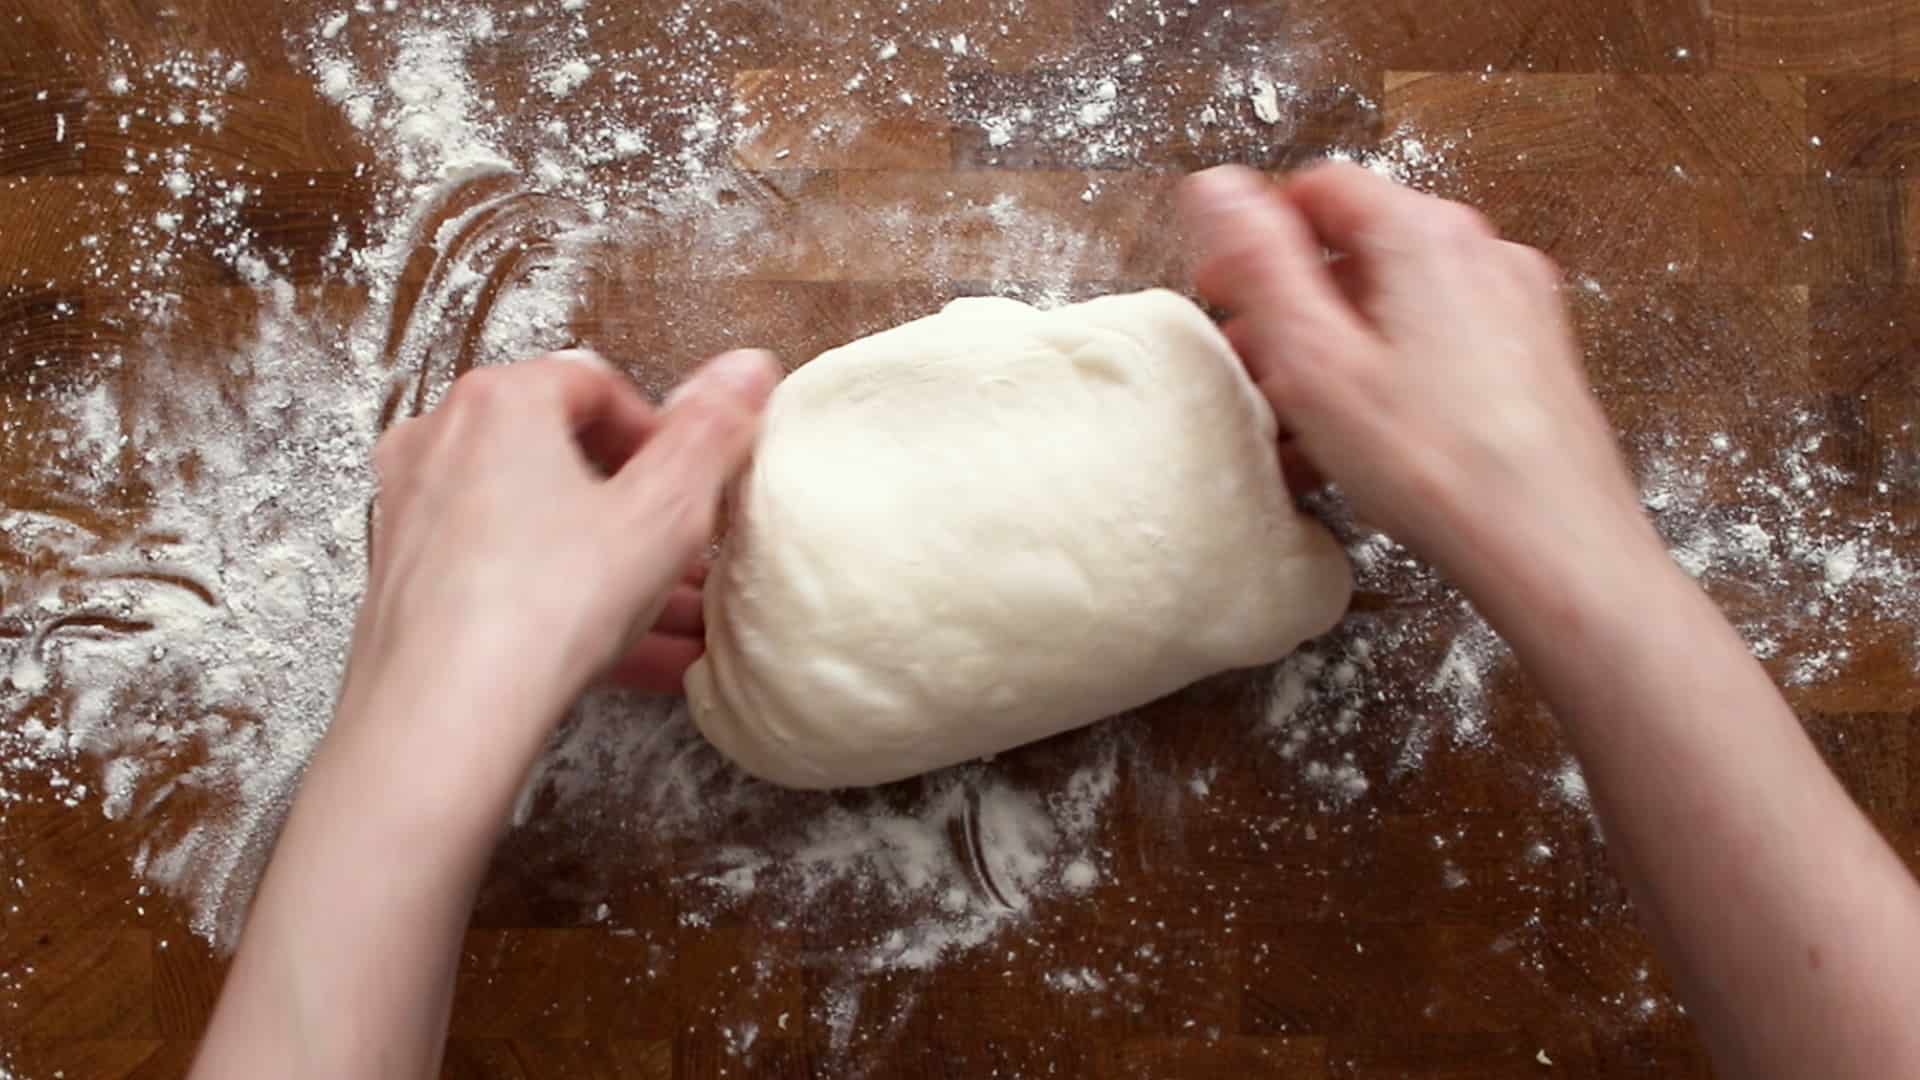
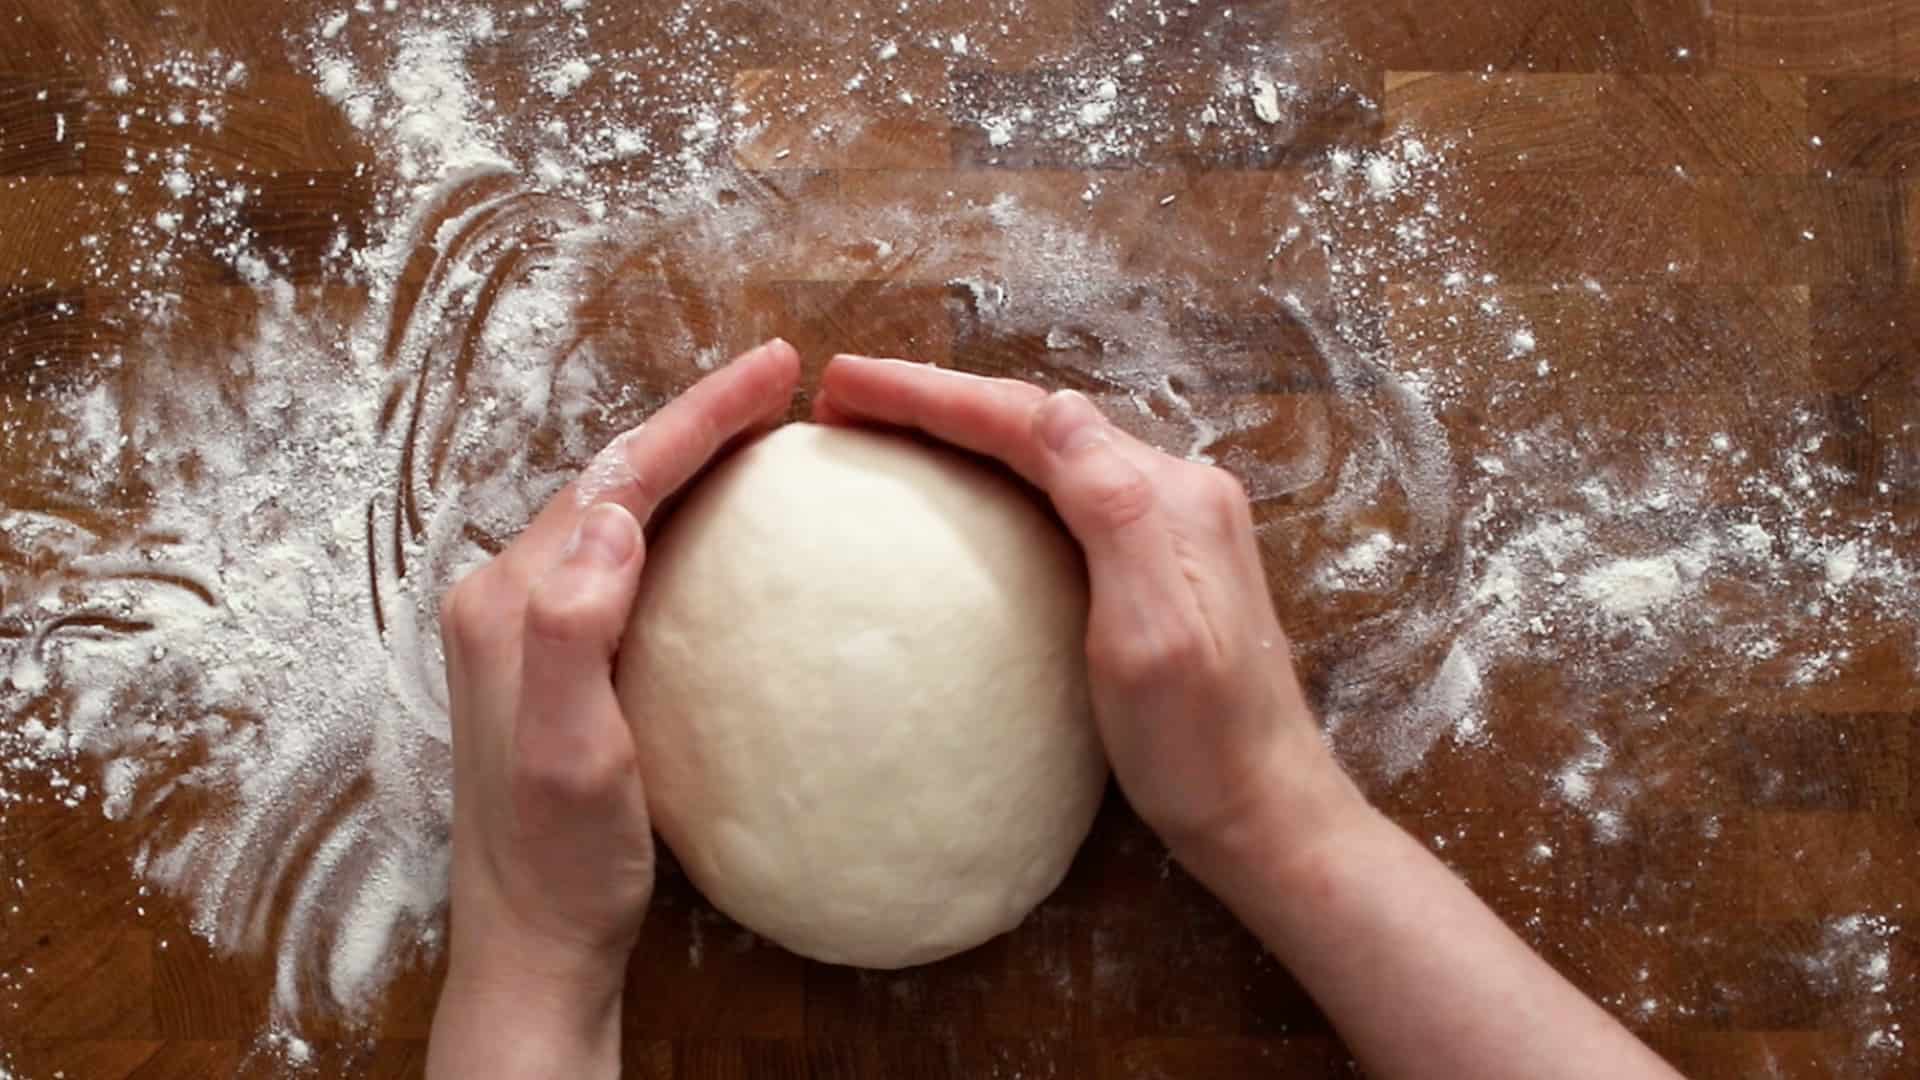
Gently cup the dough with lightly floured hands and move it around to build tension, stretch the surface of the dough, and close the seams at the bottom.
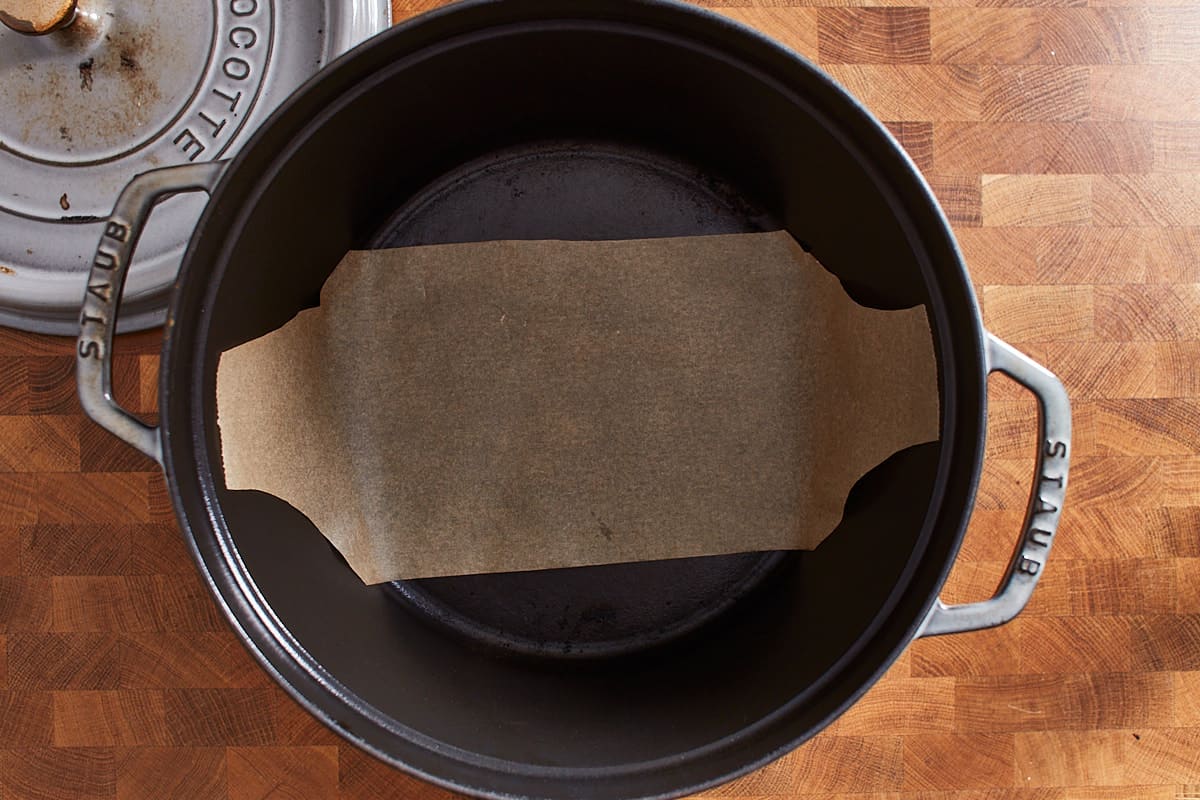
Cut a strip of parchment paper to fit your Dutch oven and easily lift the dough into the preheated Dutch oven without burning yourself.
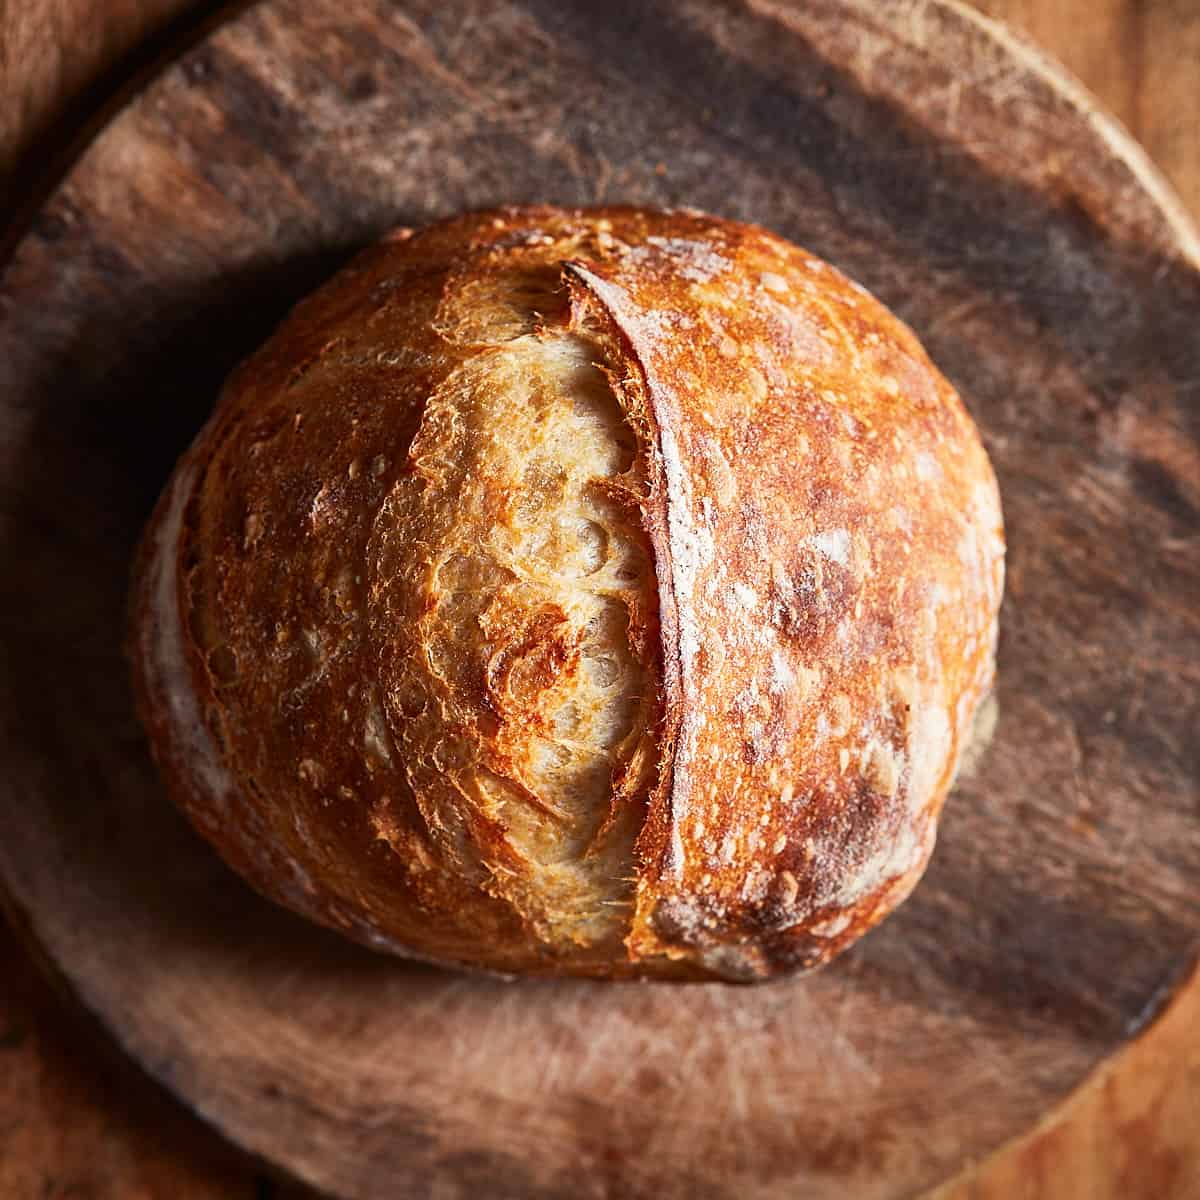
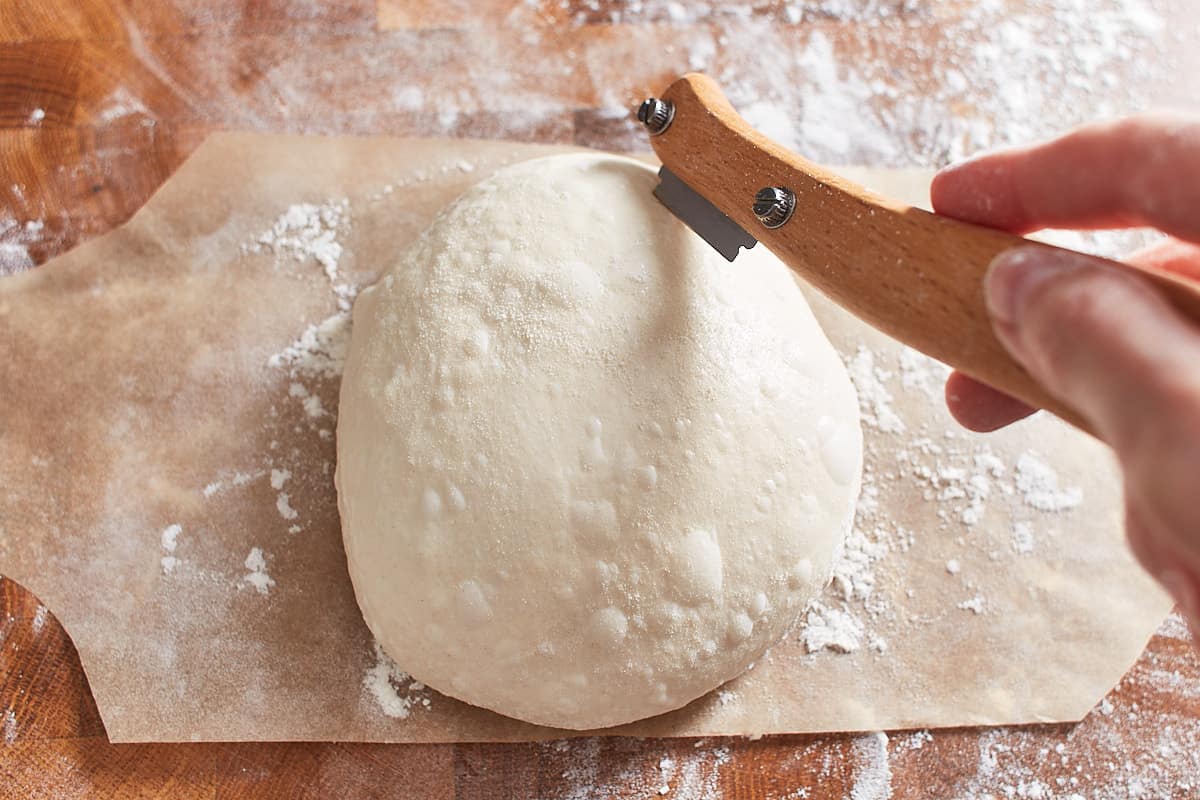
Then sprinkle with flour and transfer the dough ball with the bench knife to the parchment paper. Then score the bread. I like to make one cut lightly off-centered across the bread. Cut about ½ - 1 inch deep (1.3-2.6cm).

Transfer the dough with the paper to the Dutch oven and bake. Then let cool, slice and serve. By the way, it's the perfect bread for guacamole toast or gourmet grilled cheese!
Recipe

How to Make Sourdough Bread
Ingredients
Leaven* (see note)
- 5 g sourdough starter
- 25 g bottled or filtered water
- 25 g organic white bread flour
Sourdough Bread
- 168 g bottled or filtered water
- 4 g salt
- 250 g organic white bread flour
- 50 g leaven
Instructions
Prepare the leaven
- Combine the sourdough starter, water, and flour and stir until no lumps remain. Let sit in a warm spot (68-75°F / 20-24°C) until it has risen by about 75% and passes the float test, about 4-6 hours.
Prepare the dough
- Remove 1 tablespoon (15ml) of the water you need for the dough and mix it with the salt in a small bowl. Set aside.
- In a large mixing bowl, mix the water and leaven until dissolved. Add the flour and stir with a spoon or spatula until a shaggy dough forms. With slightly wet hands, knead the dough for a few minutes until there are no more lumps of flour. Cover and let rest for 60 minutes.
- Add the salt-water mixture and knead for a few minutes until the dough is smooth and releases from the bowl. Cover and let rest for 30 minutes.
- With slightly wet hands, grab one side of the dough, stretch it up, and fold it onto itself. Turn the bowl by 90° and stretch it and fold it again. Repeat this two more times. Then cover and let rest for 30 minutes. Repeat three more times until you have completed 4 sets of stretching and folding.
- Transfer the dough to a straight-sided container and cover it. Let the dough rest at room temperature for another 4-12 hours or until you see lots of small and large bubbles and it wobbles like jellyfish when you gently shake the container.
Prepare the loaf
- Preheat the oven and a large Dutch oven (pot and lid) to 485°F (252°C) for 30-45 minutes.
- Carefully remove the dough from the container with a dough scraper and place it on a work surface. Shape the dough into a round ball with as few moves as possible. This works best with a lightly floured bench knife in a rotary motion. Then lightly flour the top of the dough ball and cover with a dry and clean kitchen towel for 20 minutes.
- Lightly flour the work surface and turn the ball over with the bench knife. Then stretch the half of the dough closest to you up and fold it over the other half of the dough onto itself. Stretch the right third of the dough horizontally and fold it over the center. Then stretch up the left third of the dough horizontally and fold it over the previous fold. Stretch out the flap of dough farthest away from you and fold it toward you and over the dough. While holding and anchoring the flap, turn the dough over that the seams are on the bottom and the smooth underside on top.
- Gently cup the dough with lightly floured hands and move it around to build tension, stretch the surface of the dough, and close the seams at the bottom. Use as little flour as possible so that the dough can anchor to the surface while you move. Do this gently without deflating the dough, and don’t overwork the dough. Make as little movement as possible.
- Cut a strip of parchment paper to fit your Dutch oven and easily lift the dough into the preheated Dutch oven without burning yourself. I prefer cutting a strip that is about 8-inch (20cm) wide. Lightly sprinkle with flour.
- Transfer the dough ball with the bench knife to the prepared parchment paper and score. I like to make one cut lightly off-centered across the bread. Cut about ½ - 1 inch deep (1.3-2.6cm).
- Open the Dutch oven and lift the bread with the paper in. Close it and bake for 20 minutes.
- After 20 minutes, remove the lid from the Dutch oven and turn the heat down to 400°F (204°). Bake an additional 15-20 minutes until the crust is hard, golden-brown, and it sounds hollow when knocking on the bottom of the bread.
- Transfer to a cooling rack and let cool completely. Slice and enjoy.
Notes
* I feed my sourdough starter in a ratio of 1:5:5, 1 part starter, 5 parts flour, and 5 parts water and it doubles in 4-6 hours. If you feed your starter in a different ratio (1:1:1 for example), I recommend preparing the leaven in the ratio you would normally feed your starter. It has to be strong enough to double in 4-6 hours. Otherwise, the leaven may not grow as expected and the loaf may not rise properly.
Video
You can find the video in the post above. If you don't see a video, please check your browser settings.
Leave a Reply