
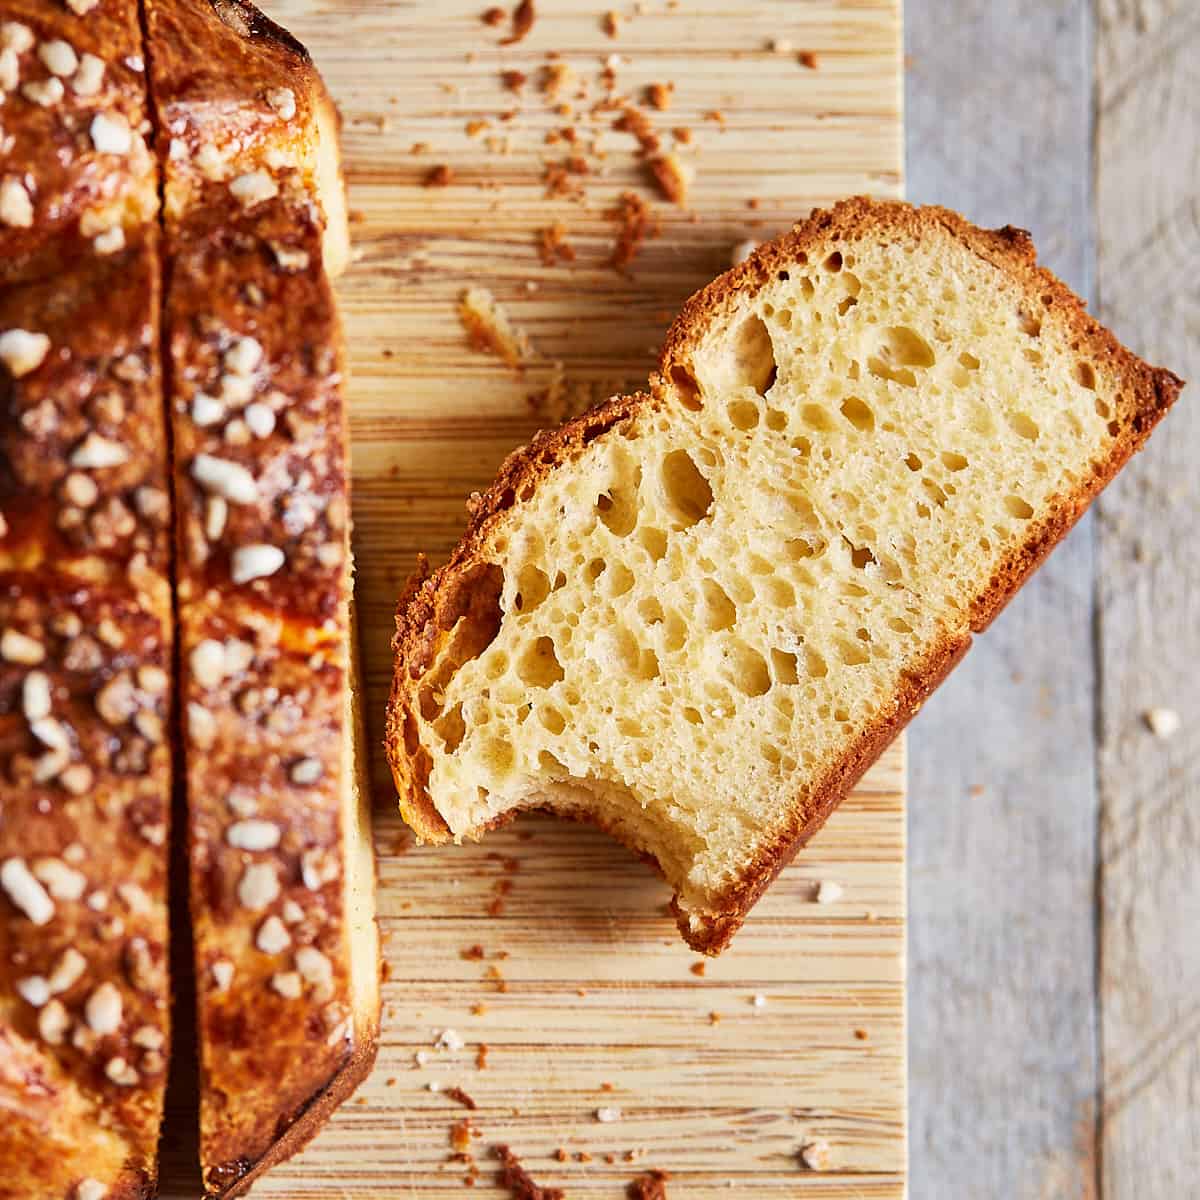
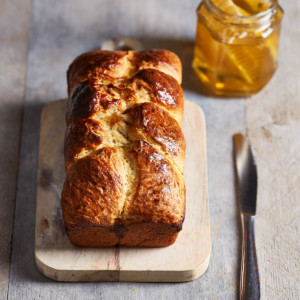
Have you ever wondered if you can make brioche with a sourdough starter? The answer is yes, you can. This sourdough brioche is mild-tangy and not too sour thanks to the moderate addition of sourdough starter and a shorter fermentation time. It rises naturally without the use of commercial yeast. It's a delicious treat and perfect for breakfast, brunch, or making French toast. By the way, have you tried my soft sourdough sandwich?
Jump to:
Ingredients notes and substitutions
- Bread flour - I mainly use organic white bread flour with a protein content of 13.4%. You can use all-purpose flour if you don't have bread flour available, but I highly recommend using bread flour whenever you can. Or at least find an all-purpose flour with the highest possible protein content. High protein content means a high gluten and gives bread the desired texture and chew.
- Sugar - You can replace the sugar with 2 tablespoon (42 g) honey if you like. Please note that this substitute will make the dough a little stickier.
Baker’s Percentages
This is an enriched bread dough with medium-high hydration and high fat content. Enriched bread means that milk, eggs, and butter are used, so it’s different from lean sourdough bread, which is just water, flour, and salt.
| Ingredient | Weight | Percentage |
| Bread Flour | 250g | 100% |
| Sugar | 30g | 12% |
| Salt | 5g | 2% |
| Eggs | 120g | 48% |
| Milk | 55g | 22% |
| Leaven | 80g | 32% |
| Unsalted Butter | 110g | 44% |
Can you make it in advance?
Yes, you can either prepare the dough on day 1 and bake it on day 2 or store it in the fridge one more night and bake it on day 3. I don’t recommend preparing it longer in advance, or it could end up too sour. The longer it is stored, the sourer it gets. With sourdough brioche in particular, a mild-tangy flavor is often preferred to a noticeably sour taste.

How to shape it
I prefer the appearance of brioche baked in a round or loaf pan, and in this case, shaping the dough is easy. You basically divide the dough into equal portions, shape them into round balls and place them in the pan. However, you can braid the dough if you wish.
Why doesn’t my dough rise?
It’s possible that the leaven was already past its peak and exhausted when you mixed it with the water, or you used it too early. Make sure the leaven has risen by at least 50% but not more than 100% and passes the float test. A weak leaven doesn’t have the strength to properly rise a loaf of brioche. Otherwise, fermentation takes longer at colder temperatures and especially in the winter months than at warmer temperatures. So that the dough doesn't take too long to rise and become too sour, it is best to find a place that is between 72°-77°F (22°-25°C).
Why is it dense?
That could be due to under-fermentation, over-fermentation, overworking the dough when shaping, not baking long enough, or cutting it when it is still warm. Make sure to let the dough rise until it is bubbly and risen by 50-100%. If you notice that the dough is starting to deflate and the bubbles are getting fewer and fewer, then the dough has been over-proofed. Also, when shaping the dough, be careful not to overwork it to prevent the air bubbles in the dough from bursting. It’s also important to bake it long enough until it sounds hollow when you knock on the bottom of the bread and that you let it cool completely before slicing.
Expert tips
- Depending on which climate or environment you live in, the absorption rate of flours can be different. It can be that you need to hydrate your dough more or less, depending on humidity, temperature, or altitude.
- Watch your dough, not the time. Look at the signs (airy, bubbly, growth of 50-100%) to determine when it is ready for baking.
- Don't overwork the dough as you shape it to avoid popping all of the little bubbles. Otherwise, the baked sourdough brioche loaf could be dense.
- You know that the bread is properly baked when the crust is golden brown, and it sounds hollow when you knock on the bottom of the bread.
- Let it cool completely before slicing it. This is very important. I know how tempting it is to eat it warm, but please resist. Cooling is just as important as anything else. As long as it is warm, the crumb is moist and dense. If you cut it while warm, you will end up with dense slices.
Photo tutorial
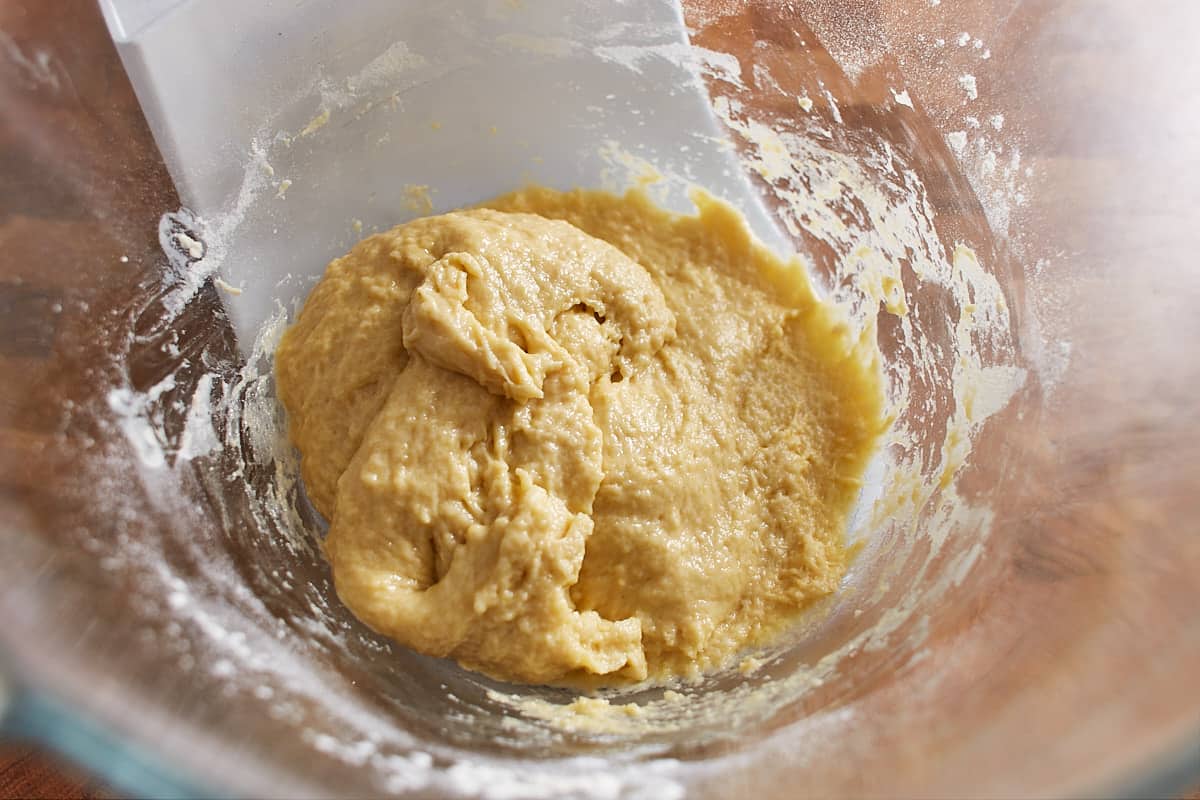
In a large bowl, knead the flour, sugar, salt, eggs, milk, and leaven until it comes together. Let rest.
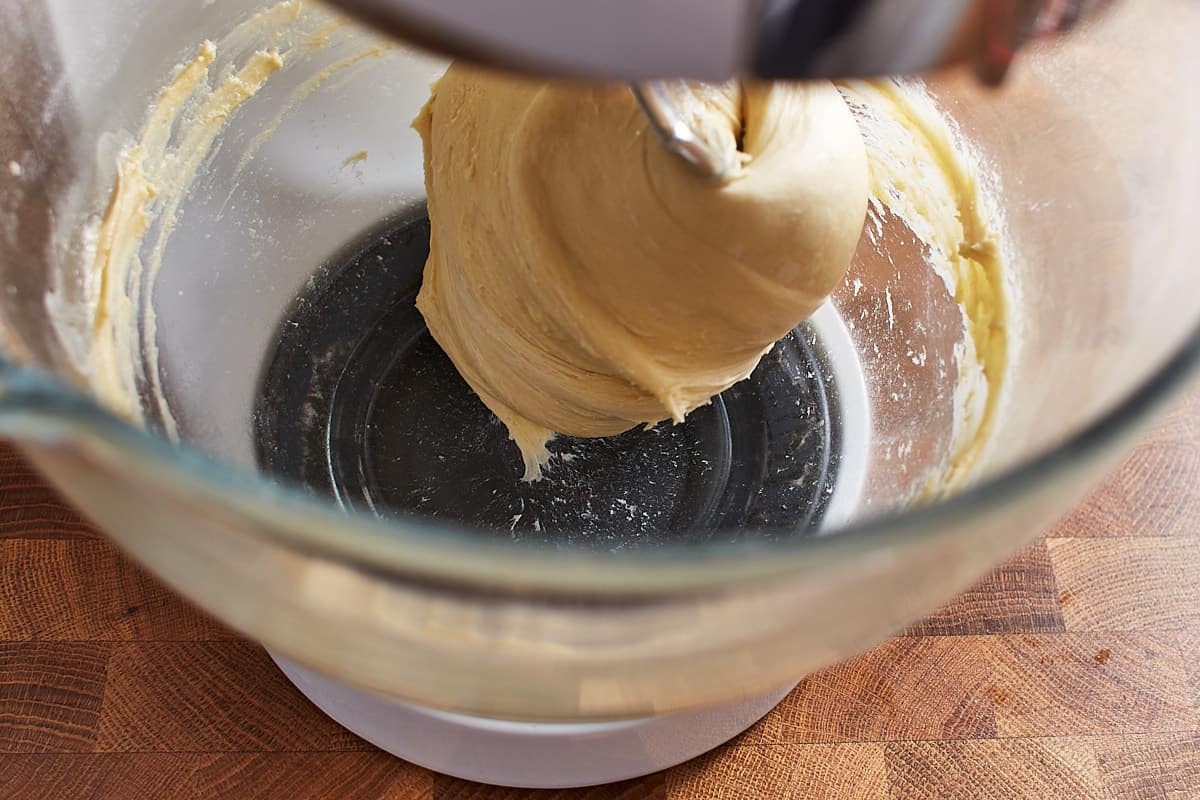
Then knead on high speed until the dough releases from the sides of the bowl and passes the windowpane test.
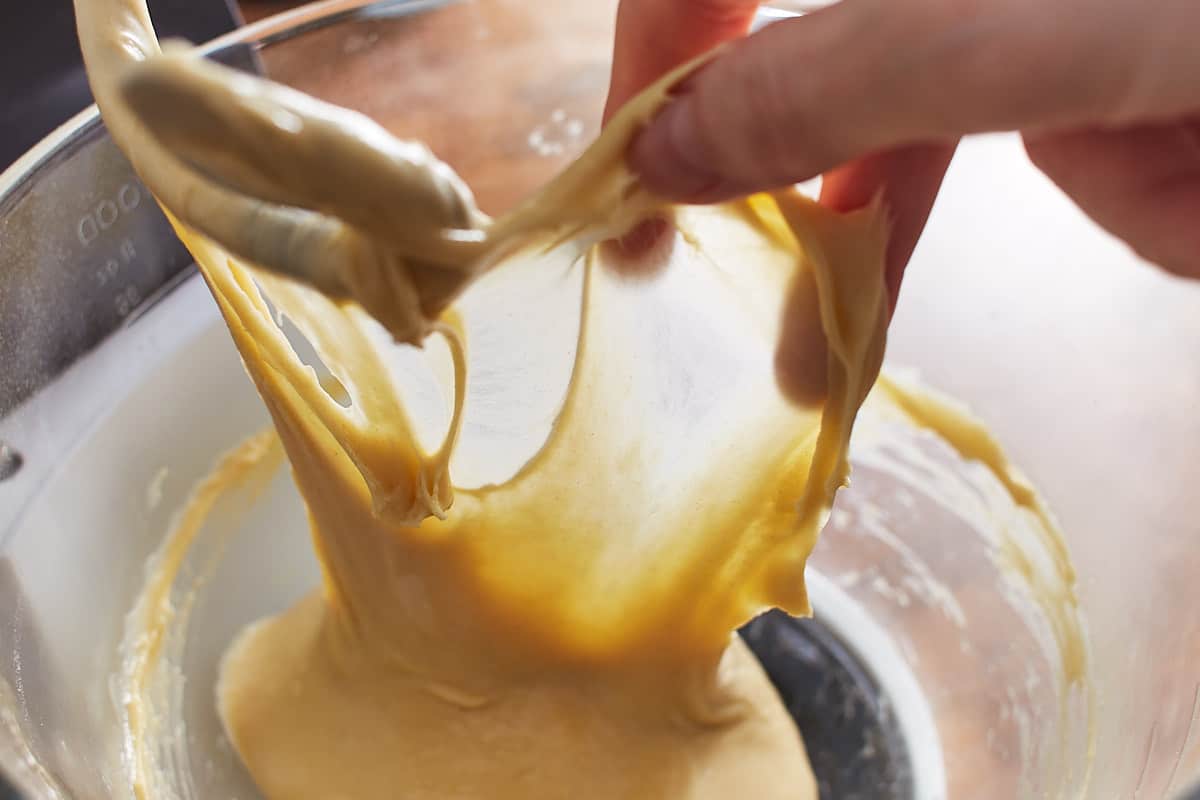
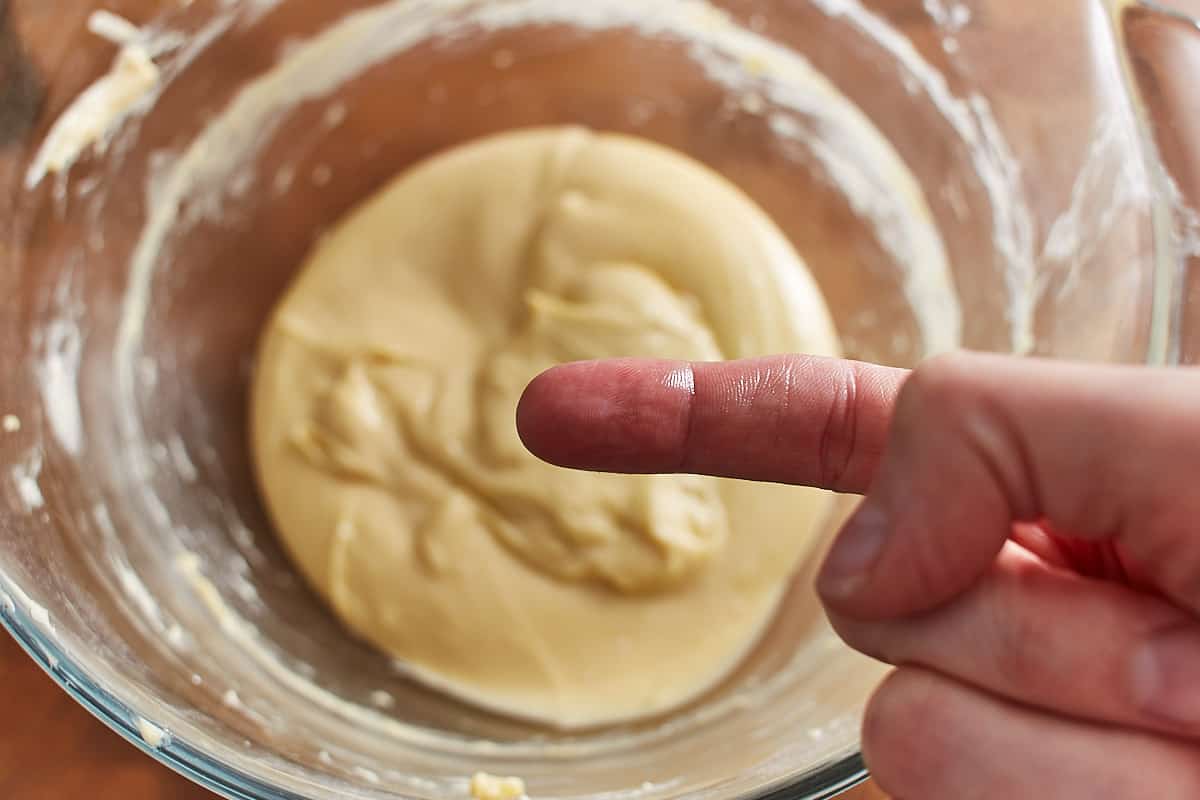
How to do the windowpane test?
To do the windowpane test, let the dough rest for about 1 minute after mixing. Then take a small portion of the dough between your fingers and slowly stretch it until the center is very thin and light can shine through without tearing. This means that you have kneaded and developed the dough sufficiently. If it doesn't pass the windowpane test and it tears, knead for 1-2 minutes longer.
Gradually add the butter and knead until the dough is smooth and releases from the sides of the bowl. It's a very soft and smooth dough that is slightly tacky to the touch.
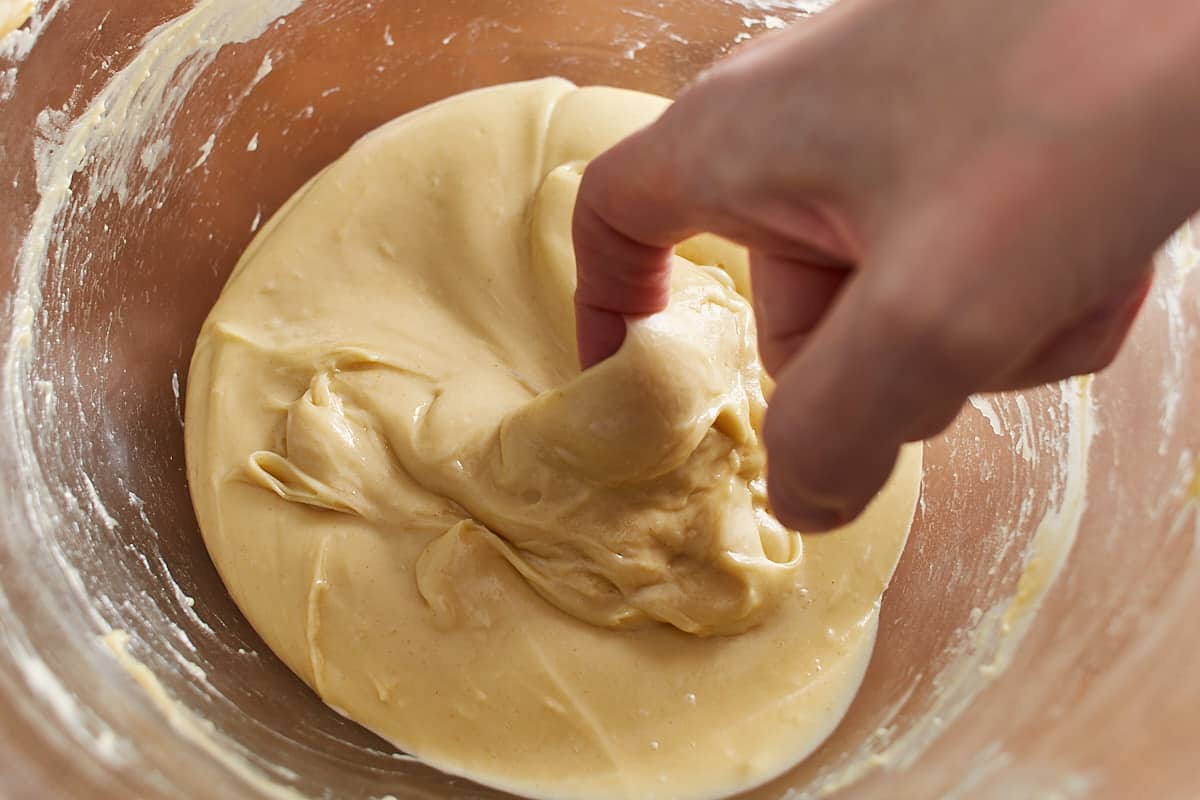
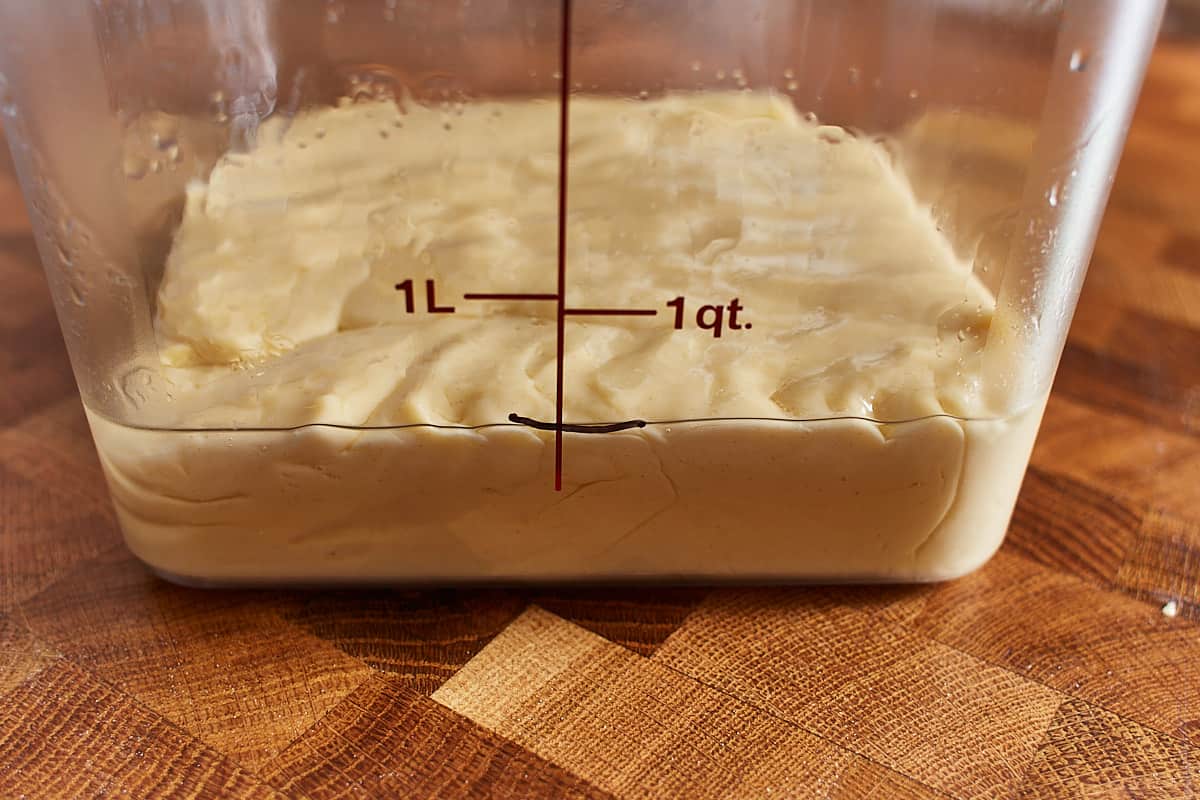
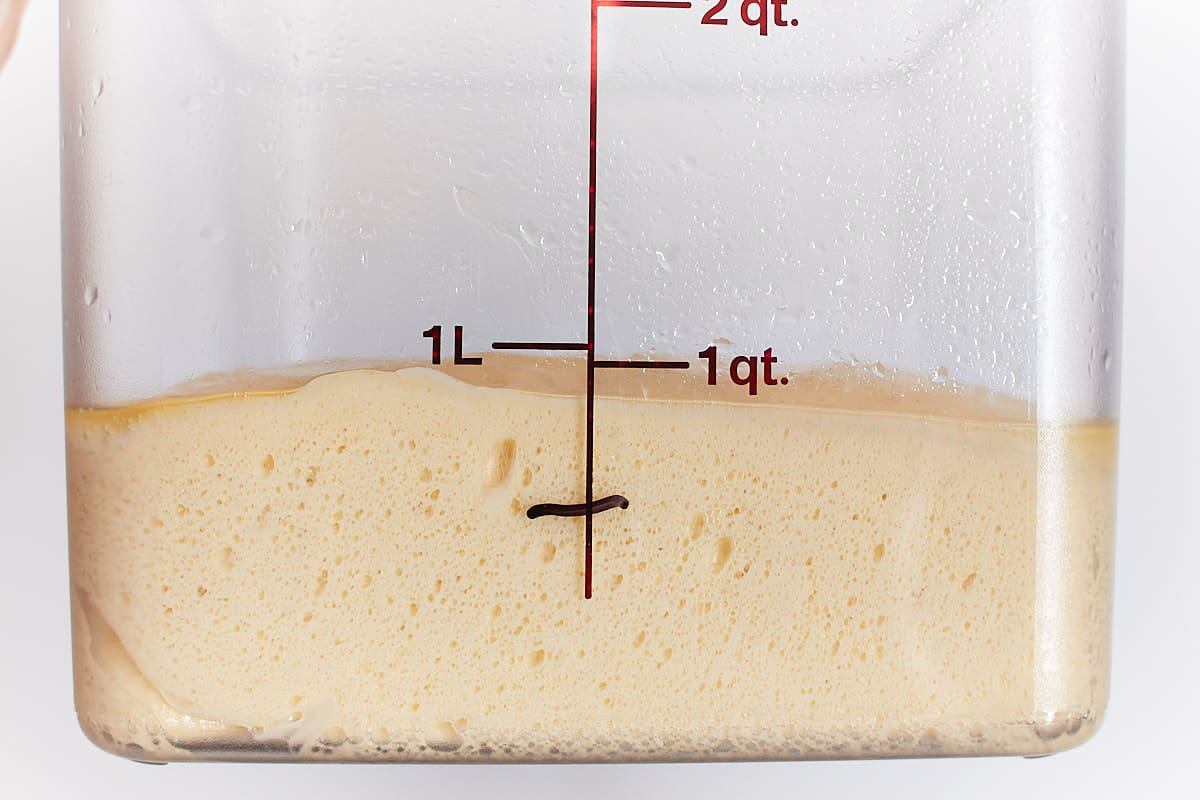
Transfer the dough to a lightly oiled container, oil the top of the dough as well, cover, and let rest in a warm spot until doubled in size, about 12-24 hours.
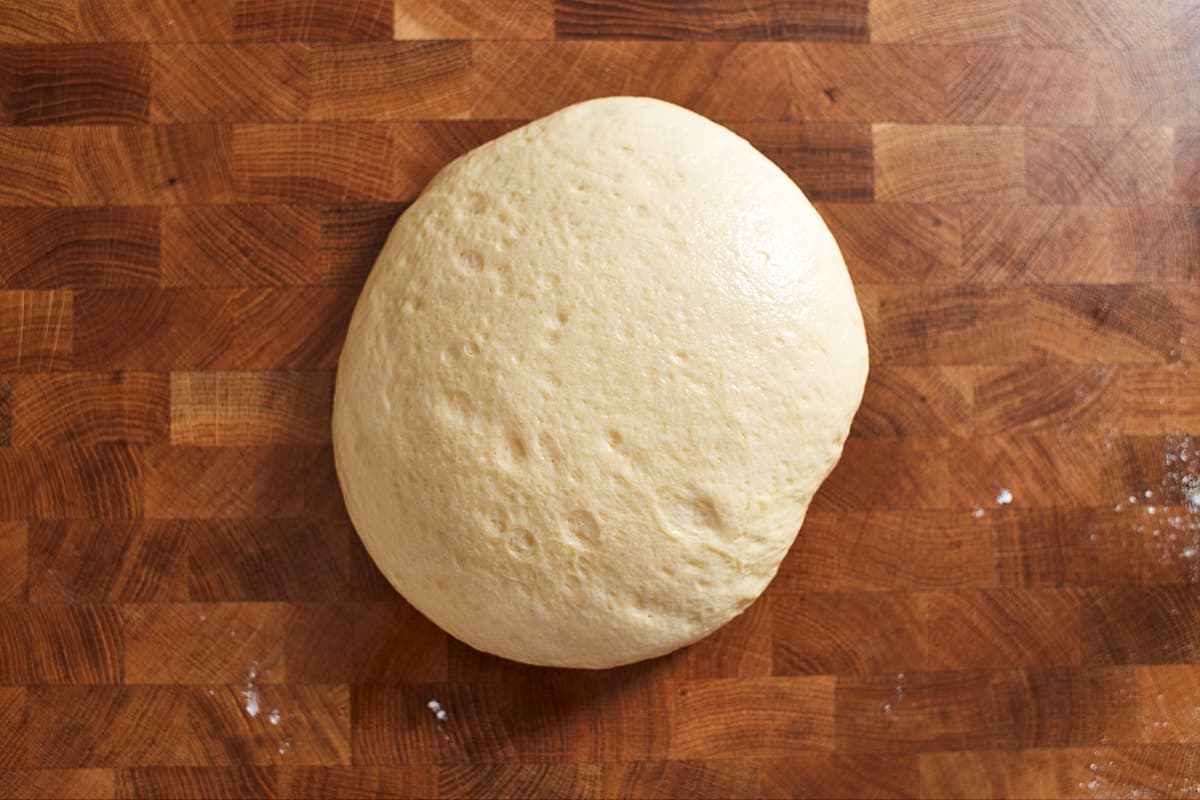
Carefully remove the dough from the container and place it on a work surface. Shape the dough with a bench knife into a round ball with as few moves as possible. Let rest.
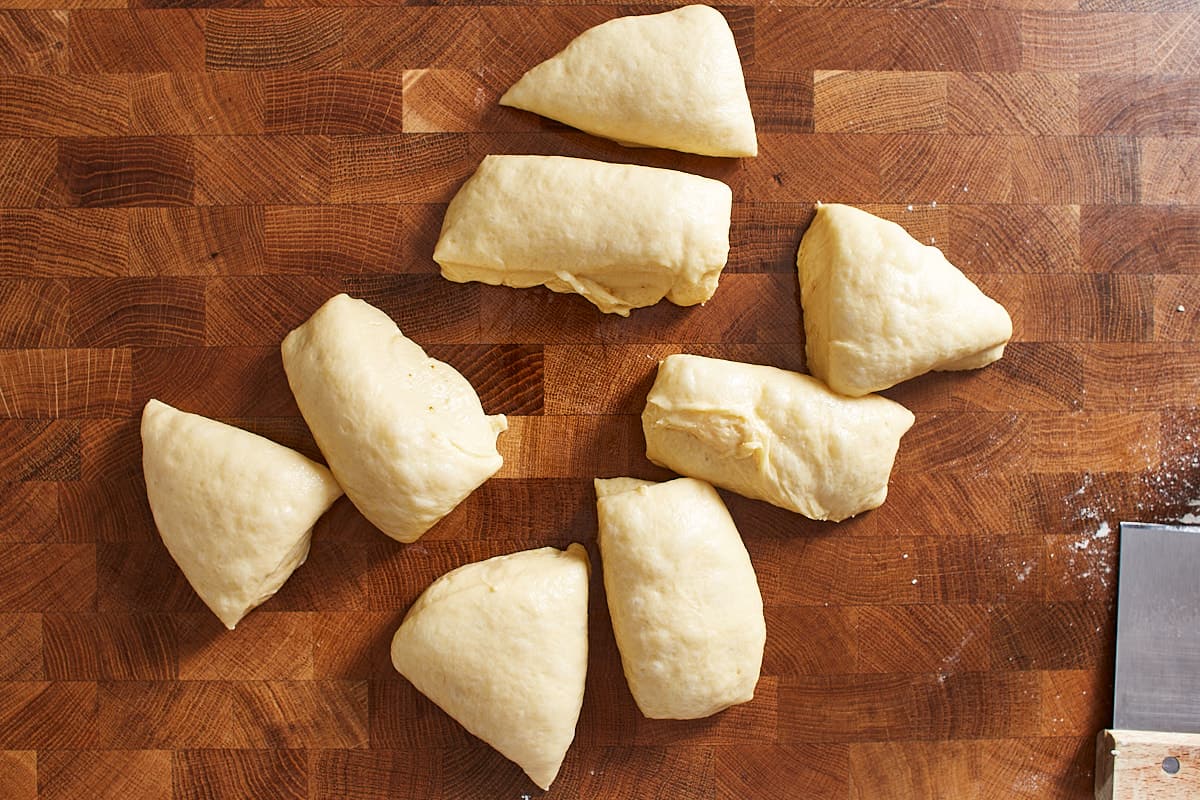
Divide the dough into 8 equal pieces.
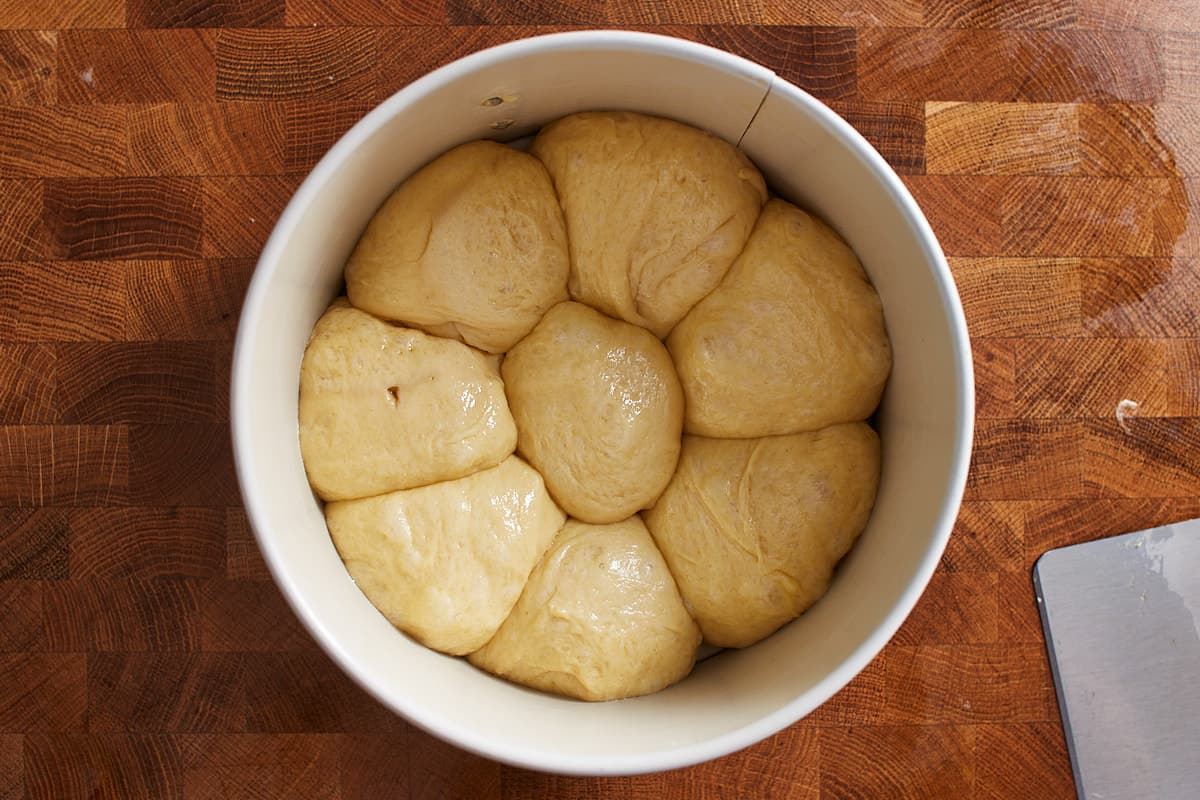
Shape into round balls and arrange in a baking pan. Let rest, then bake.
Storage and freezing instructions
Store it in an airtight container at room temperature for up to 4 days. You can also freeze it by wrapping it tightly with aluminum or plastic wrap and placing it in freezer bags or containers. Freeze for up to 2 months. You can thaw it by placing it on the kitchen counter in an airtight container overnight or reheat it if you want to toast it. Instead of freezing, you can use leftovers to make Air Fryer French Toast.
More sweet bread recipes to try
If you love sweet bread, you've come to the right place. Check out the following recipes as well!
Recipe
Sourdough Brioche Recipe
Ingredients
Leaven* (see note)
- 10 g sourdough starter
- 50 g bottled or filtered water
- 50 g bread flour
Dough
- 250 g bread flour
- 30 g sugar
- 5 g salt
- 2 large eggs, at room temperature
- 55-60 g milk, at room temperature (use enough milk so that the eggs and milk weigh a total of 175 g)
- 80 g leaven
- 110 g unsalted butter, at room temperature
For baking
- egg wash (1 egg + 1 tablespoon water or milk)
- Optional crushed nib sugar
Instructions
Prepare the leaven
- Combine the sourdough starter, water, and flour and stir until no lumps remain. Let sit in a warm spot (68-75°F / 20-24°C) until it has risen by about 75% and passes the float test, about 4-6 hours.
Prepare the dough
- In a large bowl, using an electric mixer fitted with a hook attachment, add the flour, sugar, salt, eggs, milk, and leaven and knead on low speed until it comes together about 3-4 minutes. Scrape down the sides of the bowl halfway through. Let rest for 20-30 minutes.
- Then knead on high speed for about 6-8 minutes until the dough releases from the sides of the bowl and passes the windowpane test. Reduce the speed to medium-low and gradually add the butter and knead until the butter is fully incorporated. Once all of the butter has been incorporated, increase the speed to high and knead until the dough is smooth and releases from the sides of the bowl. It's a very soft and smooth dough that is slightly tacky to the touch.
- Lightly spray a straight-sided container with oil and transfer the dough to the container; lightly oil the top of the dough as well. Cover and let rest in a warm spot (70-77°F / 21-25°C) until doubled in size, about 12-24 hours.
Prepare the loaf
- Carefully remove the dough from the container with a dough scraper and place it on a work surface. Shape the dough into a round ball with as few moves as possible. This works best with a bench knife in a rotary motion. Let rest for 15-20 minutes.
- Grease an 8x4-inch (20x10cm) loaf pan or a 6-inch (15cm) round/square pan with butter and set aside.
- Divide the dough into 8 equal pieces. Gently cup one dough portion with one hand and form a C shape with your hand. Move the dough with your hand in a circular motion and press it gently against the work surface to build tension, stretch the surface of the dough, and close the seams at the bottom. If the dough is a bit sticky, oil your hands very lightly. Avoid using flour on the work surface so that the dough can anchor to the surface while you move. Do this gently without deflating the dough, and don’t overwork the dough.
- Arrange the dough balls in the prepared pan. Lightly oil your fingers to prevent the balls from sticking to your fingers when you arrange the balls in the pan. In the loaf pan, I usually place two balls next to each other and make 4 rows. Cover and let rest for 1-2 hours at room temperature and then place in the refrigerator for 30 minutes or up to 12 hours. It doesn't double or grow significantly during the second rise as the butter firms up in the refrigerator and prevents the dough from growing in size.
- Preheat the oven to 485°F (252°C) for 20 minutes.
- Remove the dough from the fridge, brush with egg wash, and sprinkle with crushed nib sugar if desired. Transfer the loaf to the oven and immediately turn the heat down to 400°F (204°C) and bake for about 35 minutes until the crust is golden brown, and it makes a hollow sound when knocking on the bottom of the bread. After 20 minutes, cover it loosely with aluminum foil to avoid heavy browning if necessary.
- Remove from the pan, transfer to a cooling rack, and let cool completely. Slice and enjoy.
Notes
Video
You can find the video in the post above. If you don't see a video, please check your browser settings.
Mark
When cooking on the rack, does it cool IN the baking pan, or are we supposed to flip it out and THEN let it cool?
Sabine
After you knock on the bottom to listen if it sounds hollow and therefore can be sure it has baked through, transfer it without the pan to a cooling rack. I hope that helps.
Mark
Your video shows the last step as brushing with BUTTER. The instructions say EGG WASH. Which is it?
Sabine
I'm sorry for the inconvenience. The video shows the wrong label, I will correct that. Eggwash is correct. Thank you so much for letting me know!