
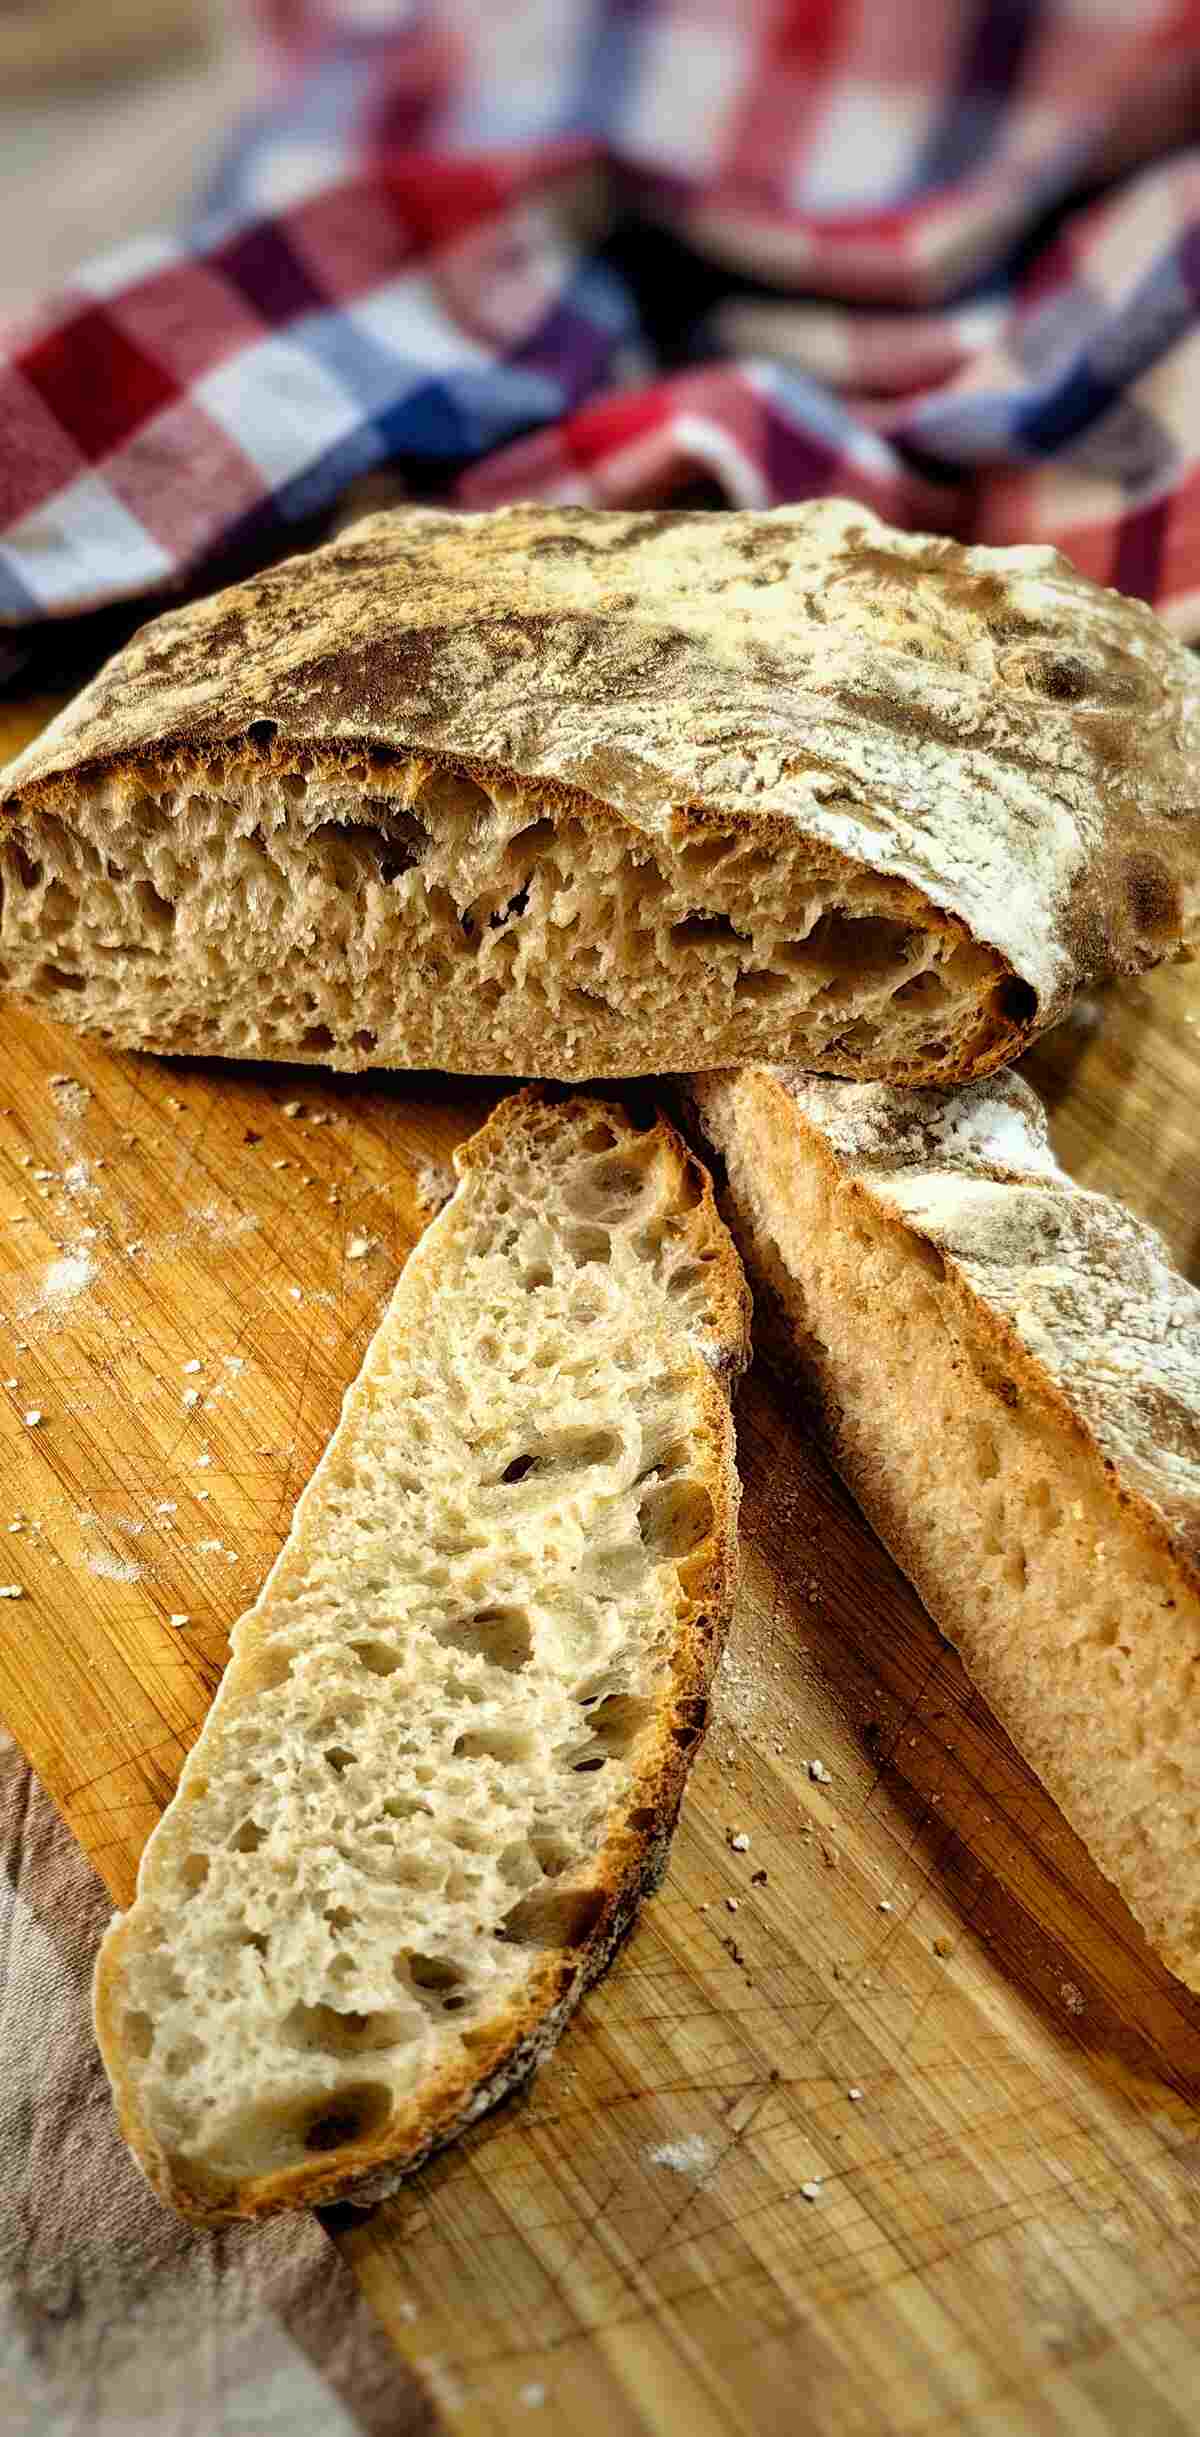
The air fryer ciabatta might sound unconventional, but trust me, it's a delightful twist in the world of home baking.
Think of the classic ciabatta, with its golden crust and soft inside, now made effortlessly in the convenience of your air fryer. As someone who loves experimenting in the kitchen, this method was an absolute revelation.
Curious? I promise, by the end of this article, you'll be itching to try it for yourself. Let's get that air fryer ready and make some mouthwatering bread!
Jump to:
Video Tutorial
Ingredients
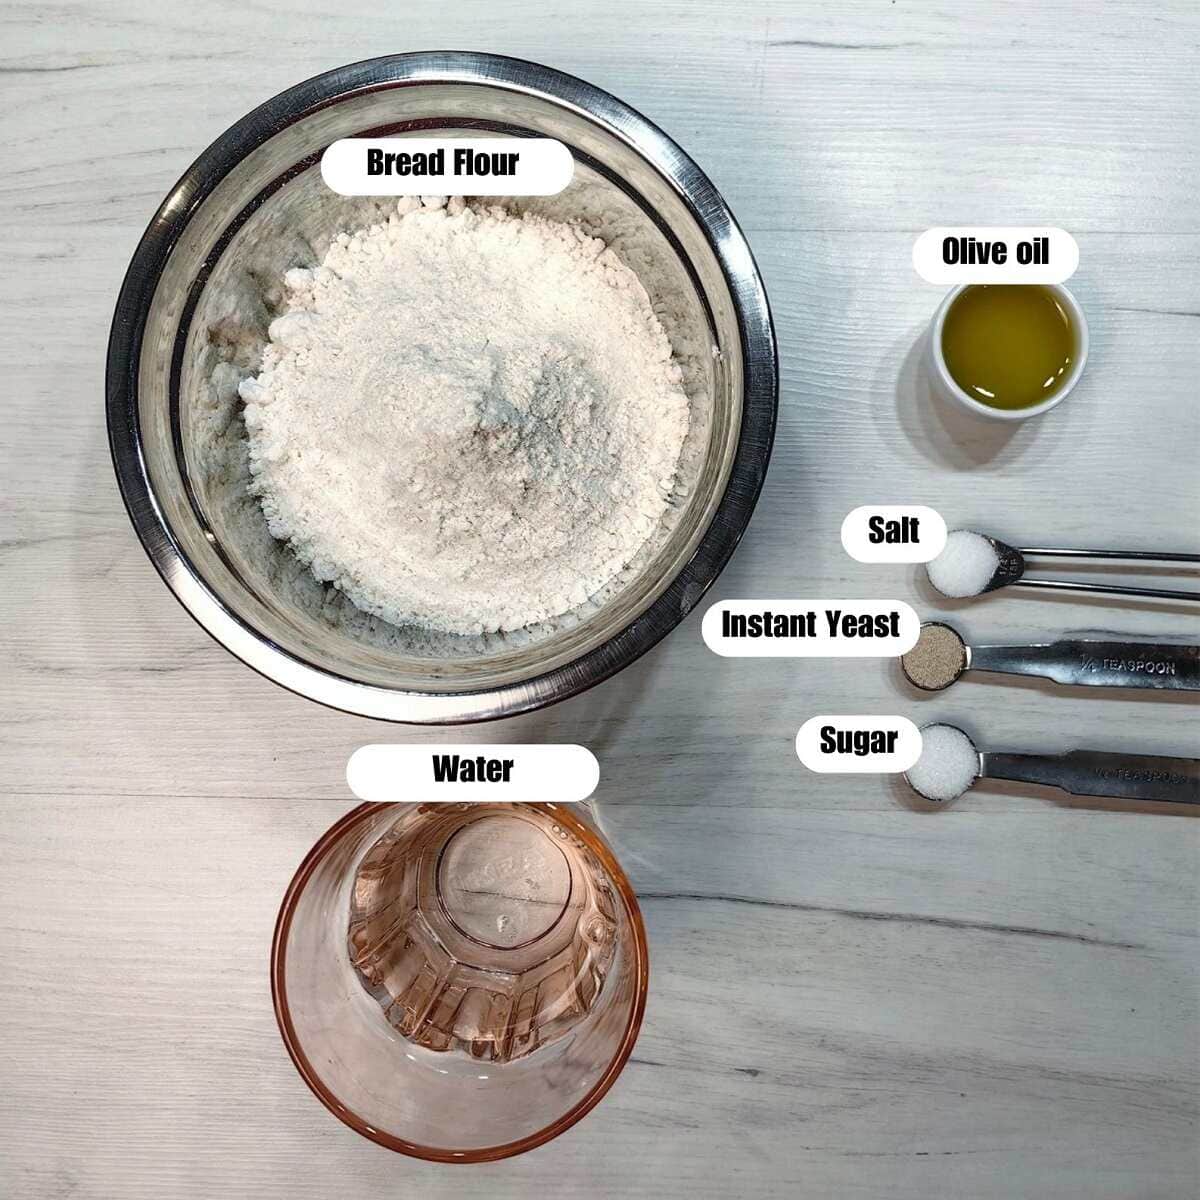
- 11 oz bread flour or bread flour substitute
- 7 oz water
- ¼ teaspoon instant yeast
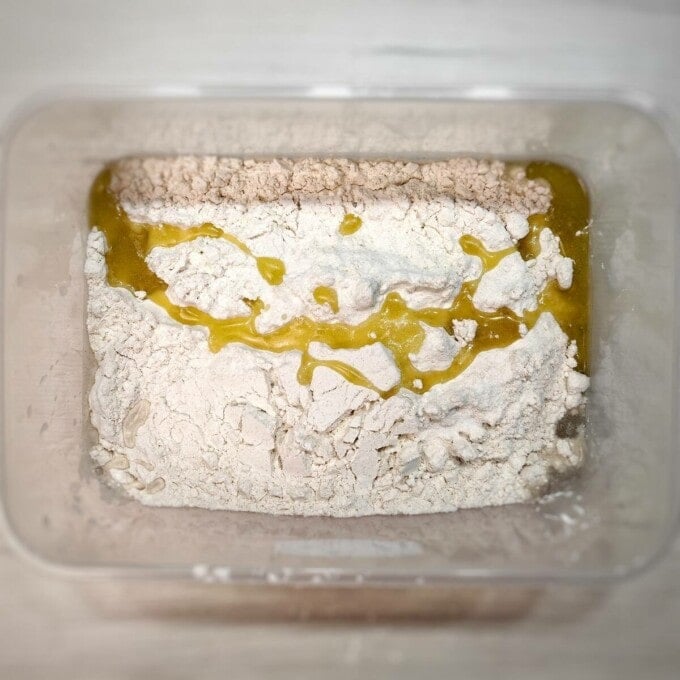
- 2 tablespoon olive oil
- ½ teaspoon sugar
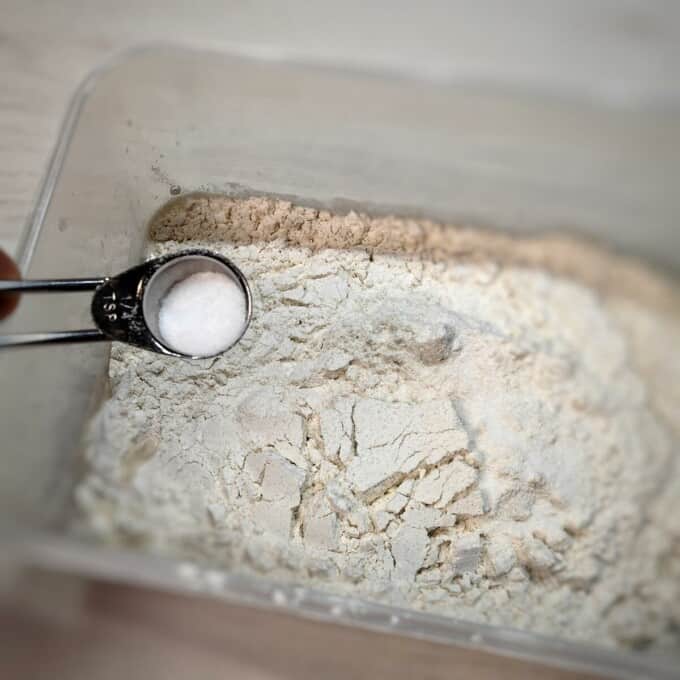
- ½ teaspoon salt
Kitchen Tools and Equipment Needed
- Air fryer
- Plastic container for the dough
- Kitchen towel
- Baking paper
- Spoon
Instructions
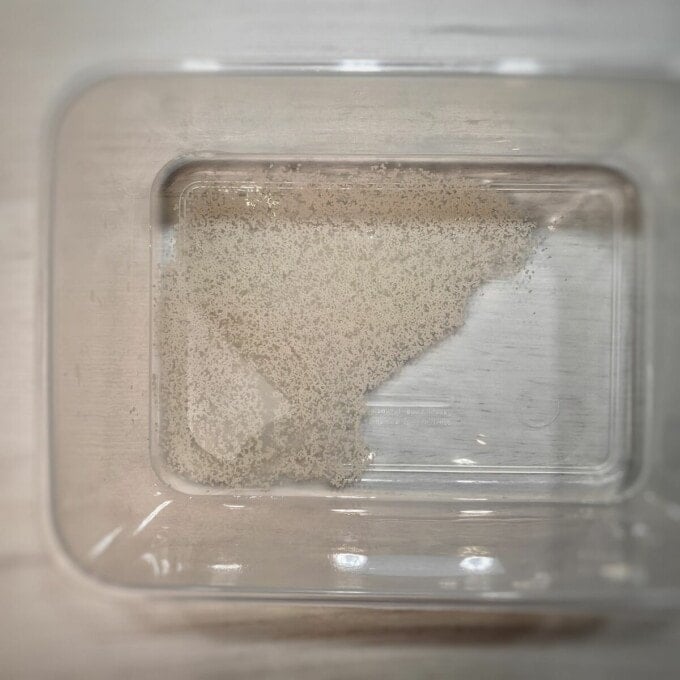
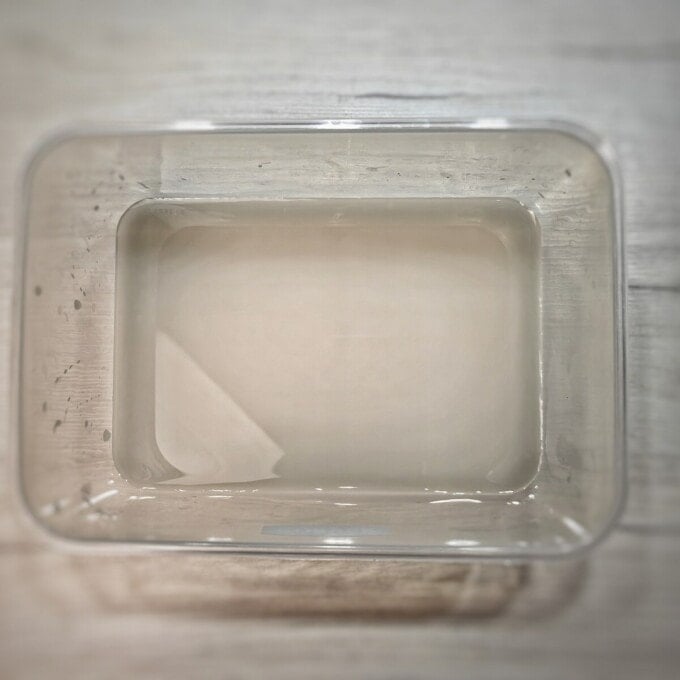
In a plastic container, combine water, sugar, and yeast. Stir well until the sugar is fully dissolved.
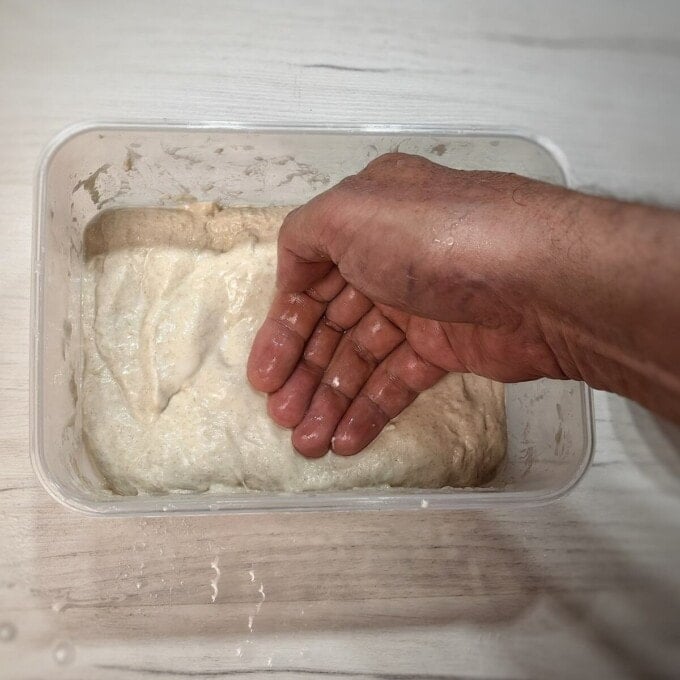
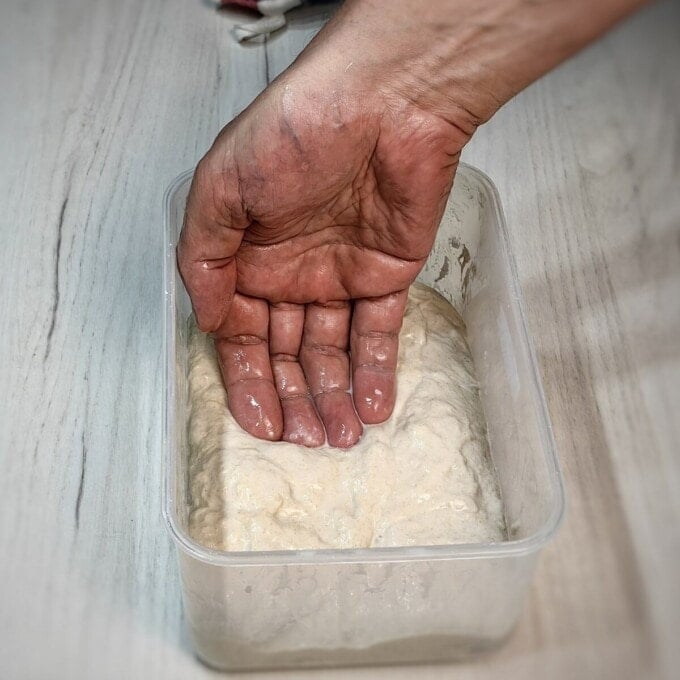
Add all the flour, olive oil, and salt. Mix well and knead the dough. You don't need to knead it for a long time, just make sure everything is well combined. Cover with a lid and let it rest at room temperature for 45 minutes.
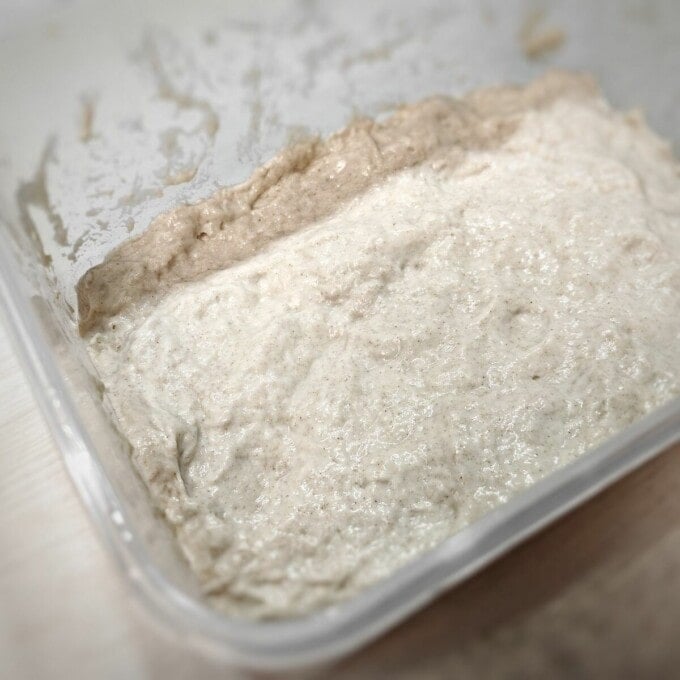
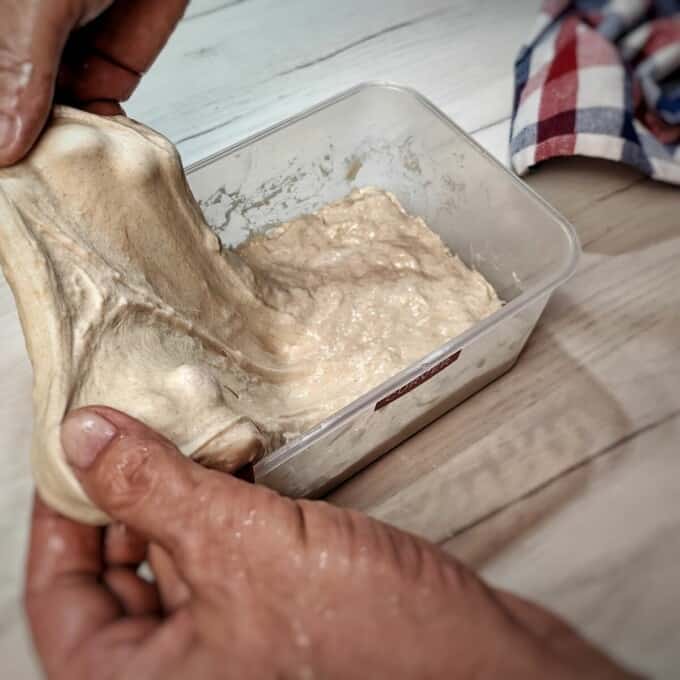
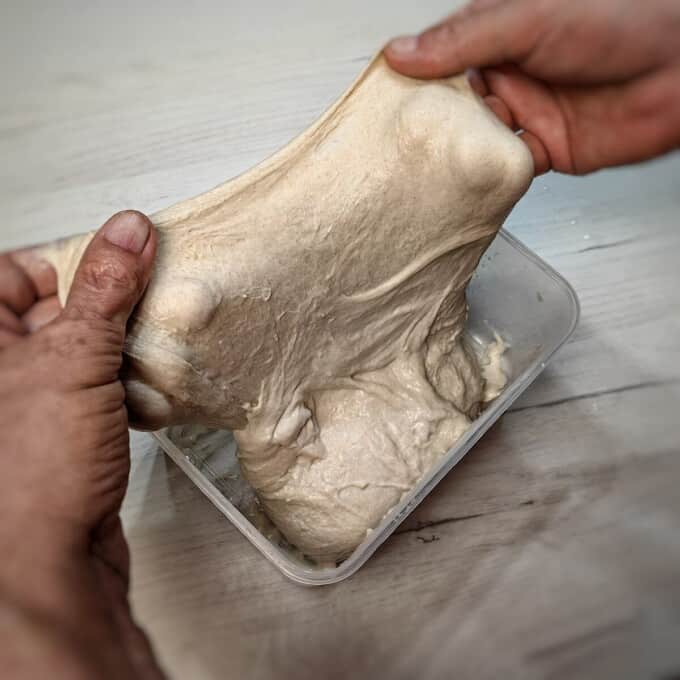
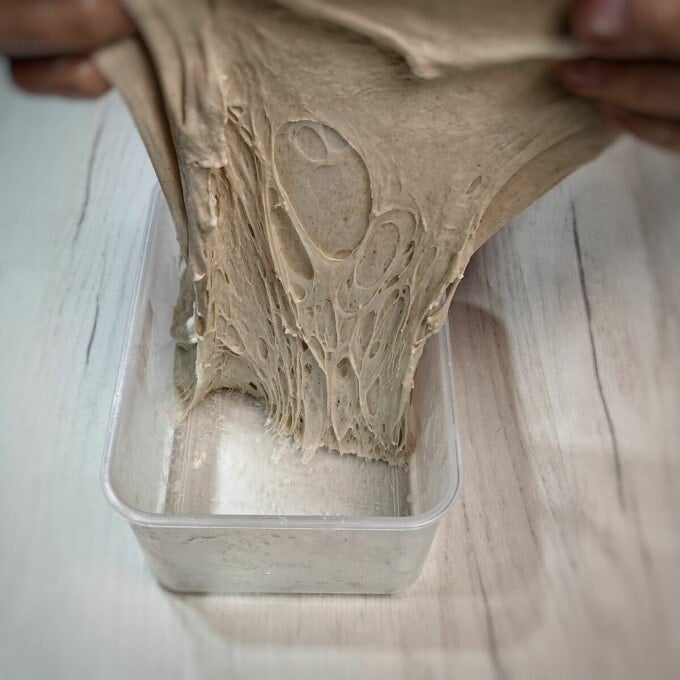
After 45 minutes, begin the first of four "stretch and folds". Stretch the dough as much as possible from one side and fold it towards the center.
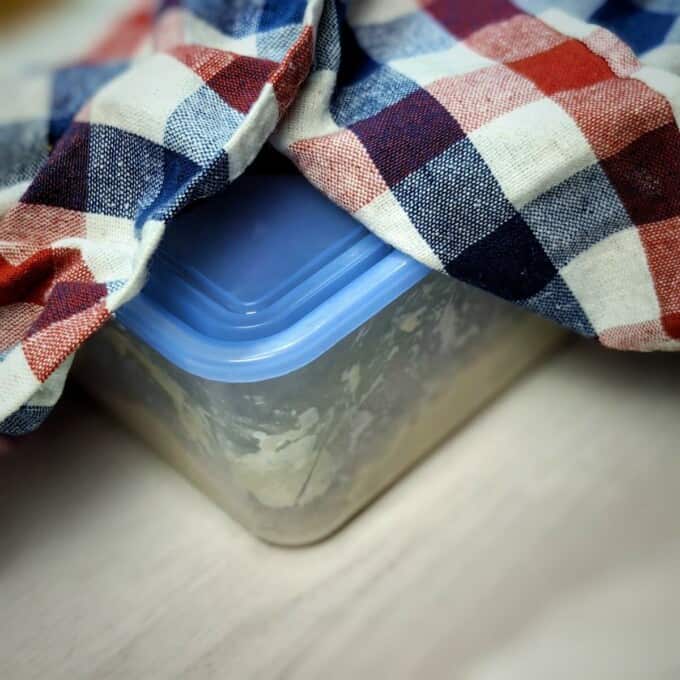
Repeat this process for all four sides, stretching and folding towards the center. The dough may tear slightly during the first folding. Then, cover it with a lid and let it rest for another 45 minutes.
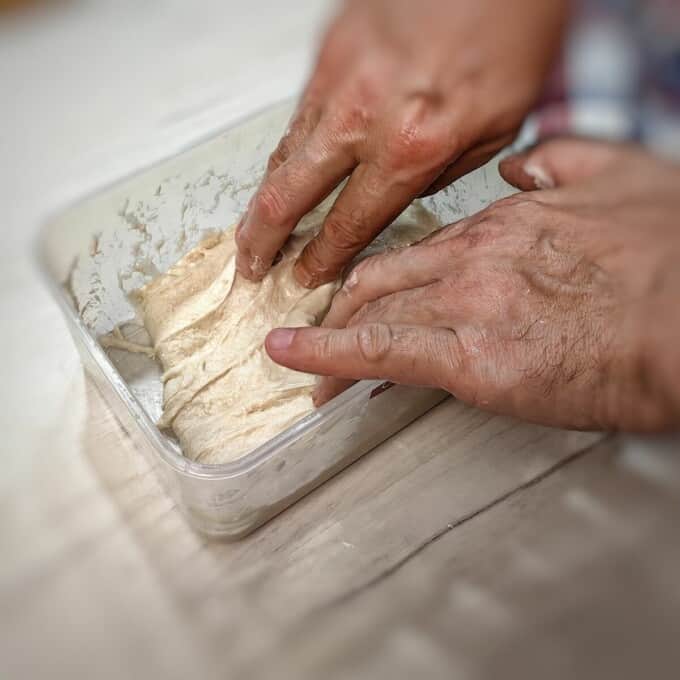
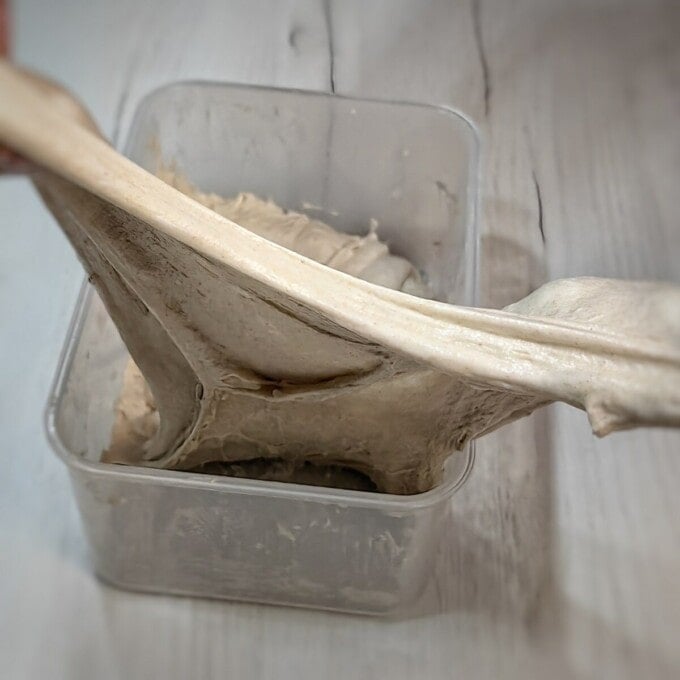
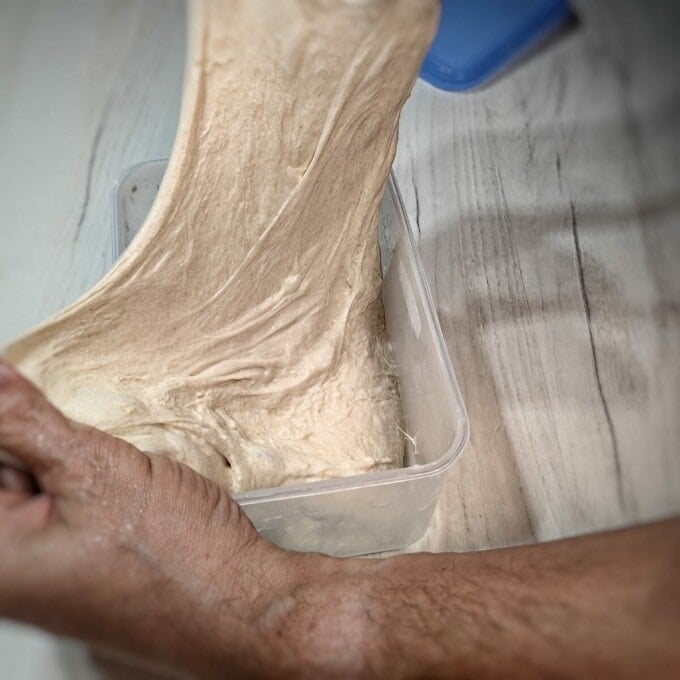
After 45 minutes, proceed with the second "stretch and fold." Repeat the same steps as described previously. You'll notice that the dough becomes noticeably more elastic, and some small bubbles may start to form on the surface. Cover with a lid and let it rest for another 45 minutes.
Now, for the third "stretch and fold." The dough should be quite elastic at this point and shouldn't stick to your hands. After folding, cover it with a lid and place the container with the dough in the refrigerator for another 45 minutes.
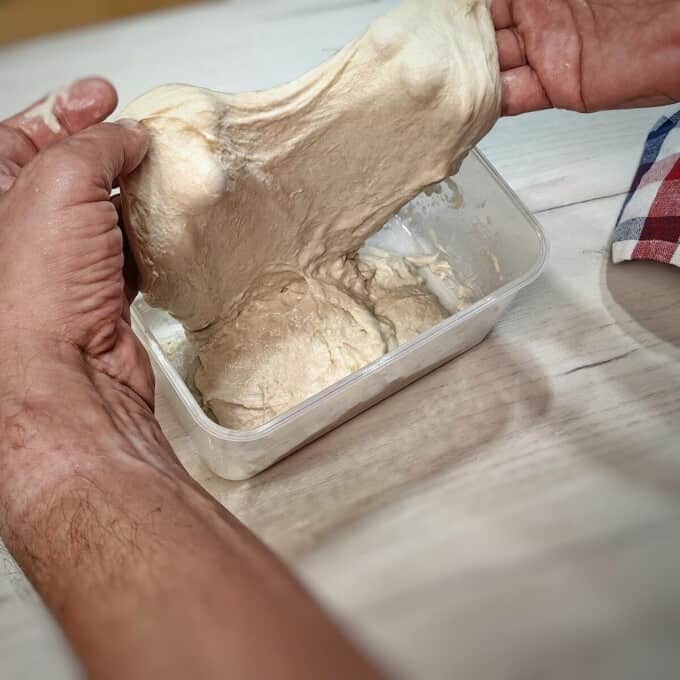
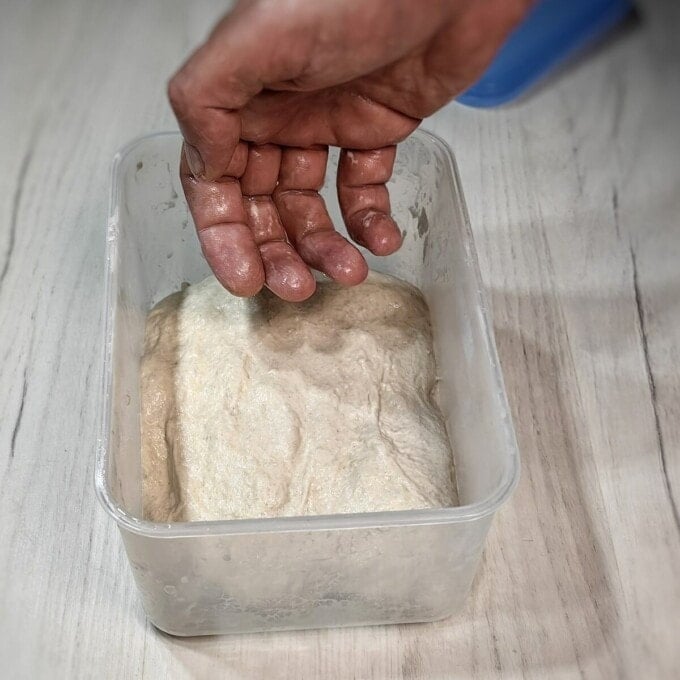
Lastly, perform the fourth and final folding. The dough should have risen, be easy to stretch, and fold nicely. After completing all these steps, cover it with a lid and leave it in the refrigerator for at least 12 hours or longer.
Tip: It's best to start preparing this dough in the evening, allowing it to undergo its final proof in the refrigerator overnight, and then bake the ciabatta the following day.
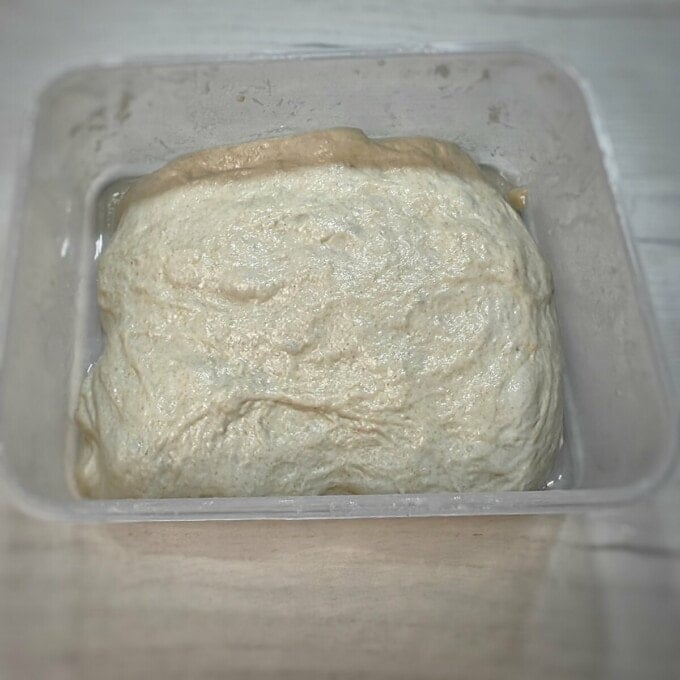
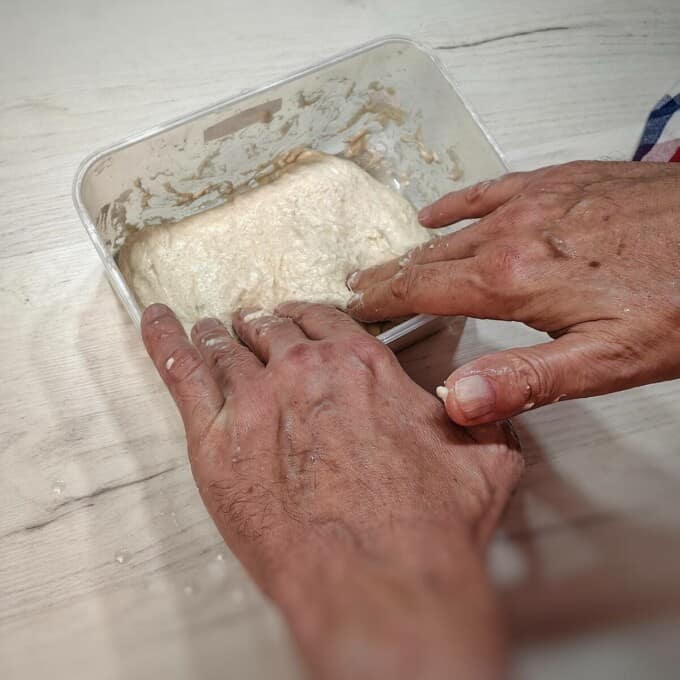
After a minimum of 12 hours in the refrigerator, take out the dough. The long cold proofing at low temperatures with minimal yeast imparts unique flavor qualities to the bread, a more natural process.
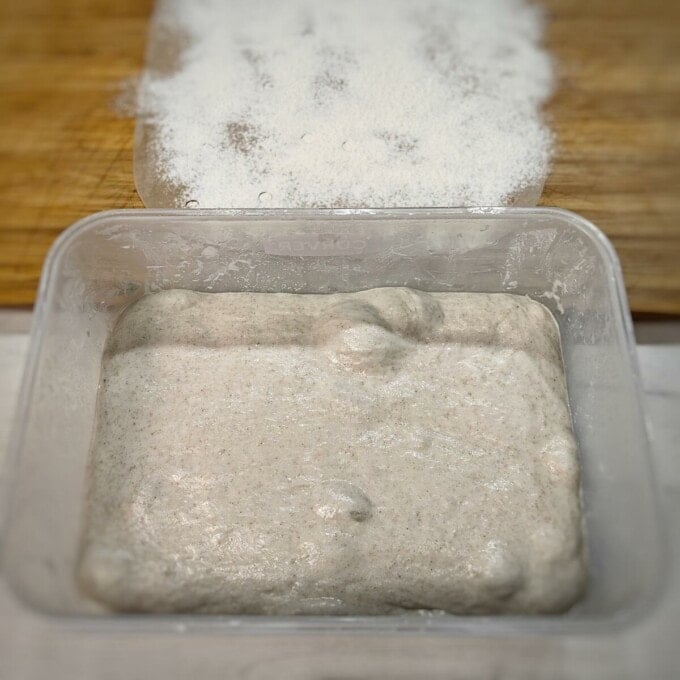
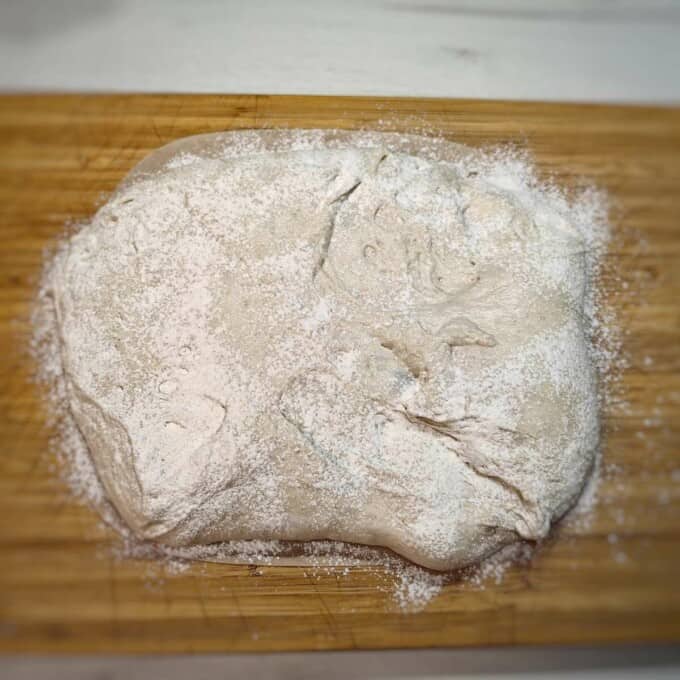
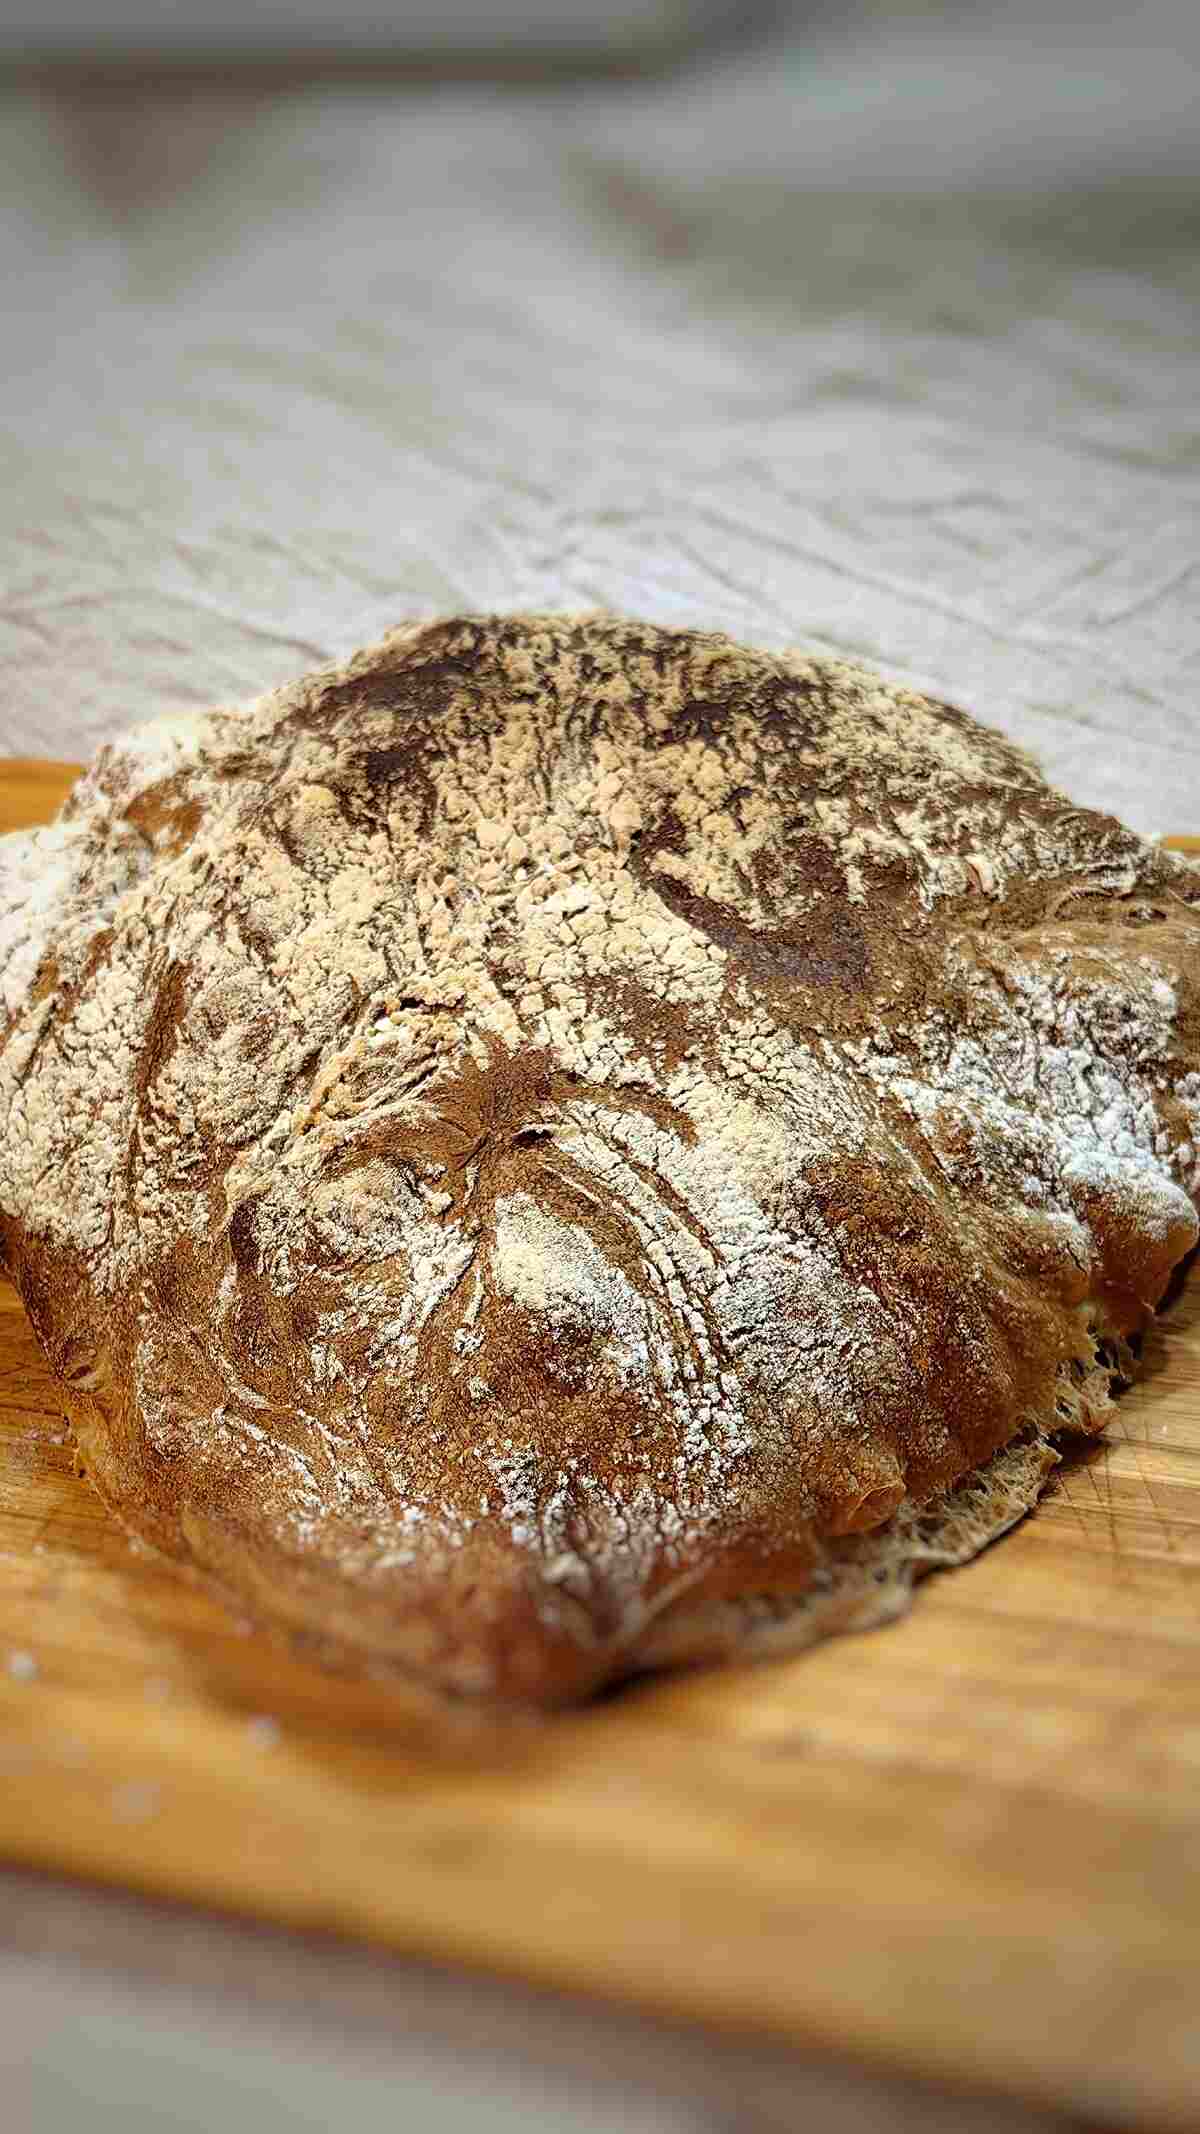
Place a sheet of parchment paper on the bottom of the air fryer basket and dust it with flour. Transfer the dough onto the parchment paper by simply flipping the container upside down; the dough will release on its own. Sprinkle some flour on top of the dough.
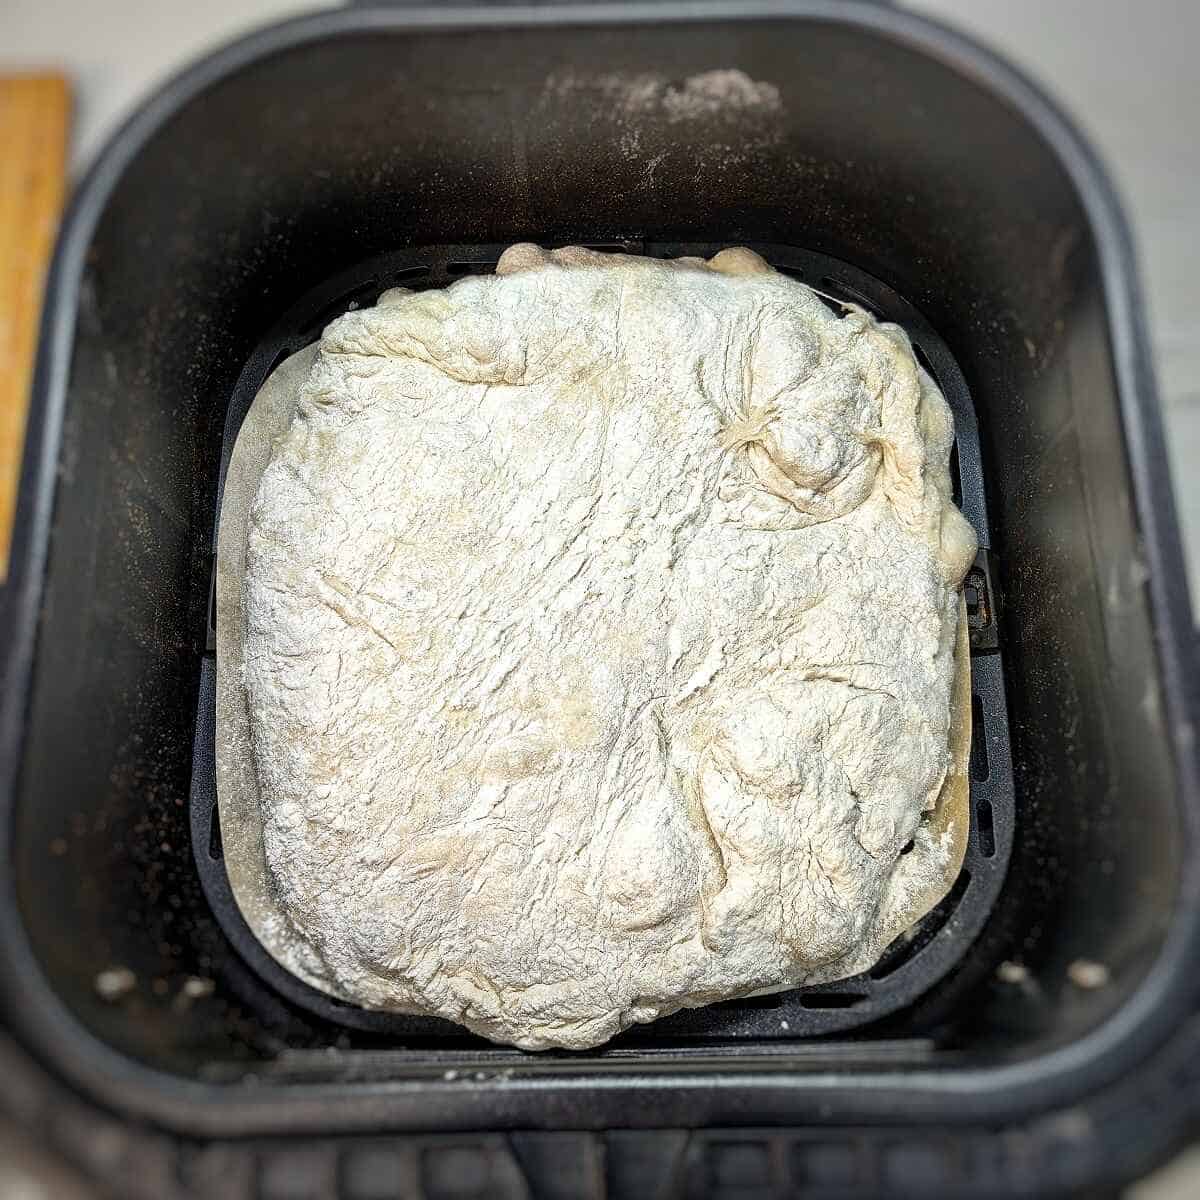
Without turning on the air fryer, reinsert the basket. This will be the final proofing, which will last anywhere from 30 minutes to 1 hour, depending on factors such as the type of flour used and room temperature.
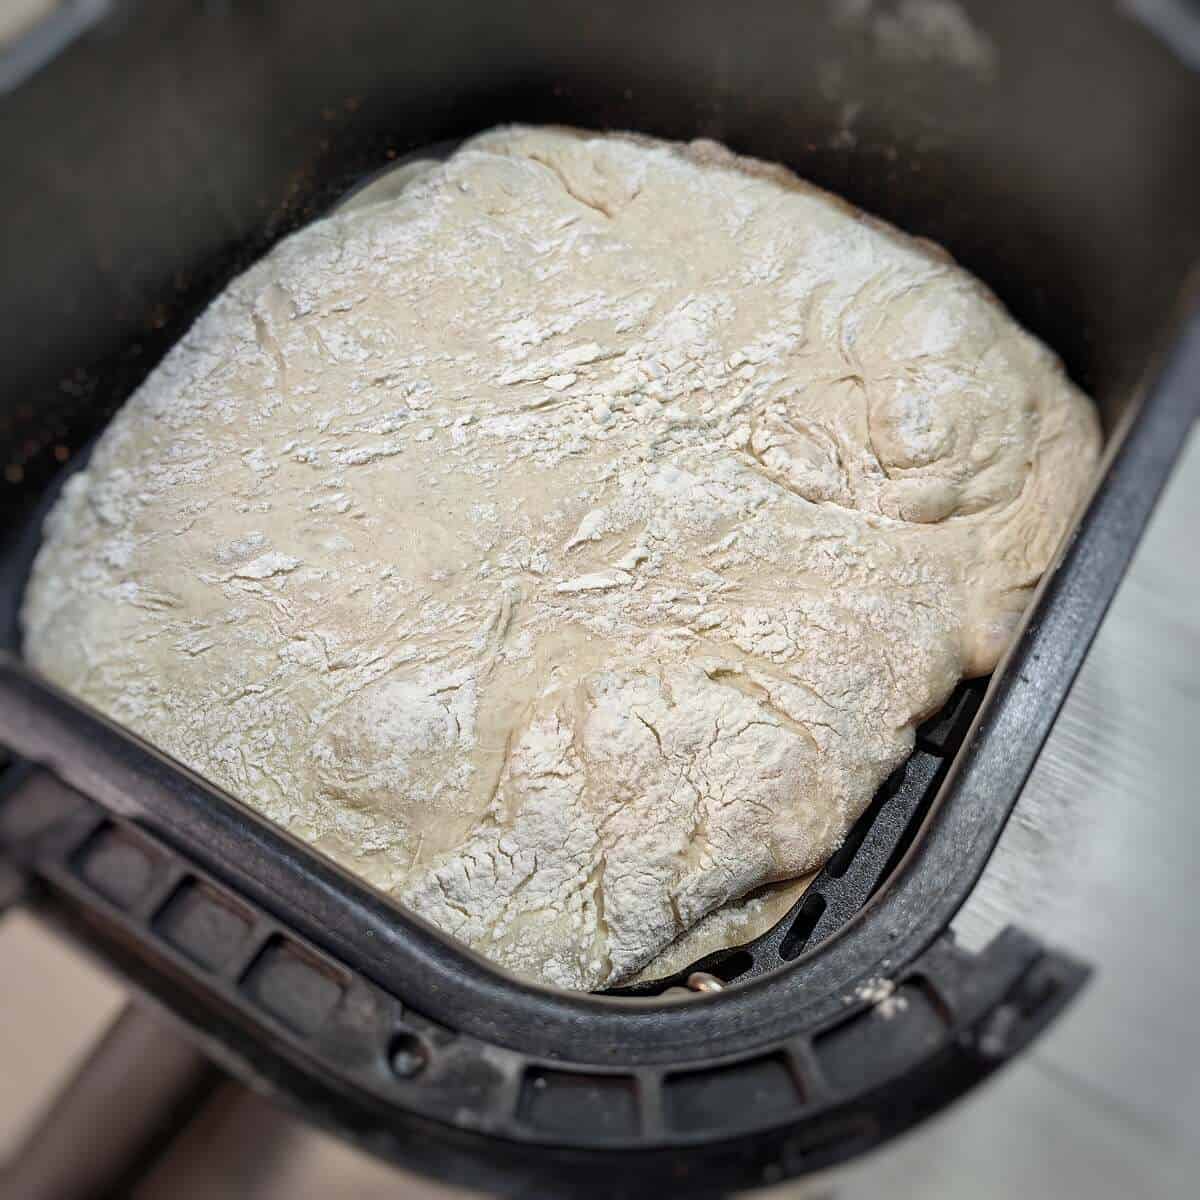
After half an hour or an hour, when you see that the dough has risen, turn on the air fryer to the maximum temperature. For me, it's 400°F (200°C). Bake for approximately 35 minutes. This time is usually sufficient.

Keep an eye on the color of the crust and its texture. The crust should turn golden and become crispy. You can also use a culinary thermometer to check the bread's internal temperature, which should be between 194-203ºF (90-95ºC).
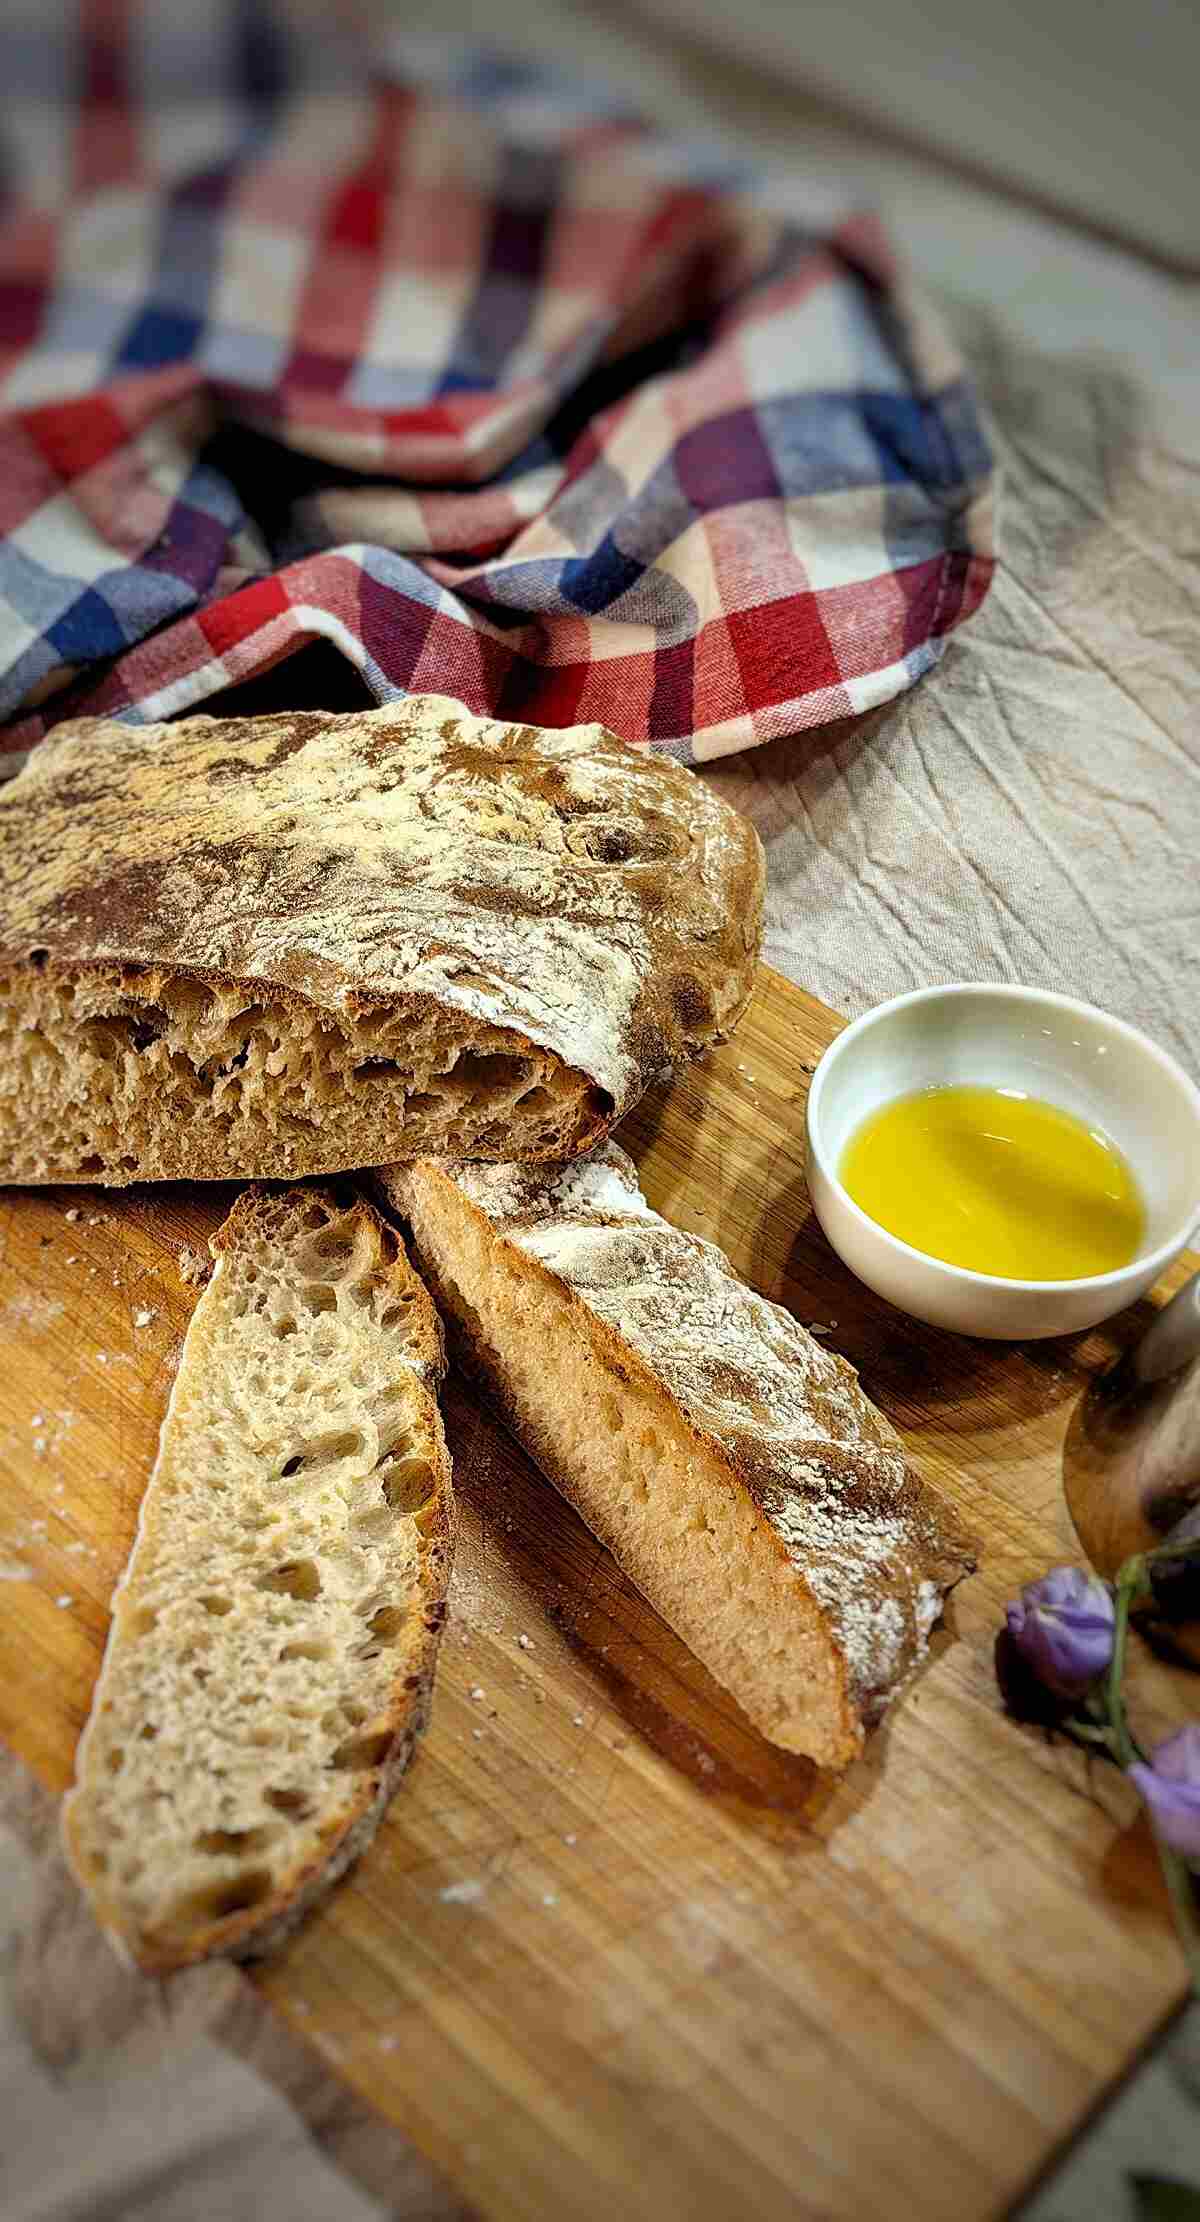
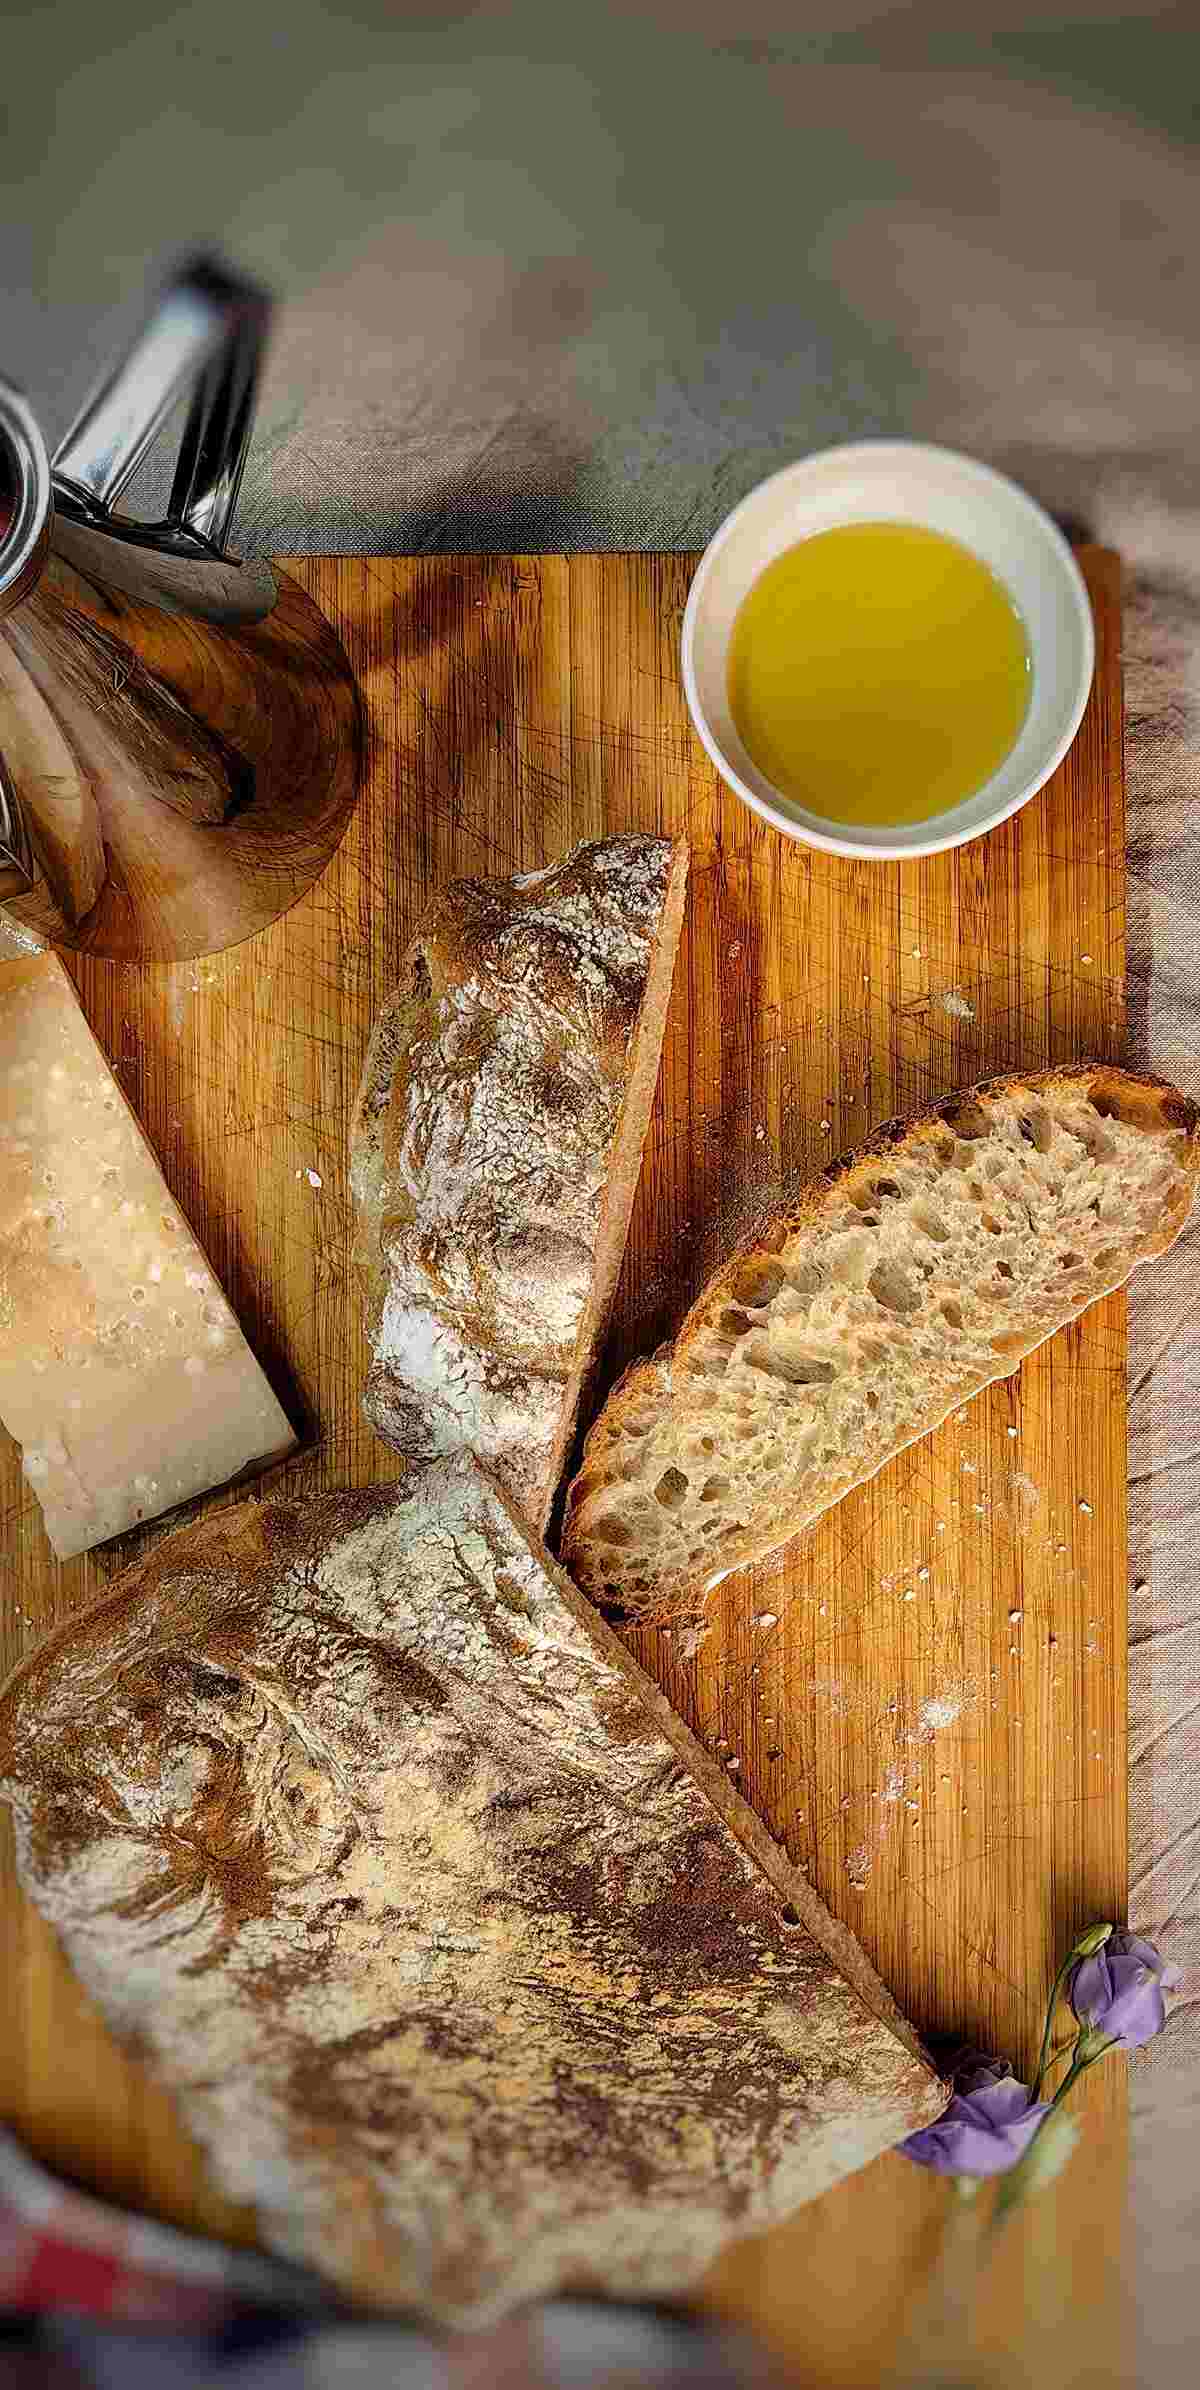
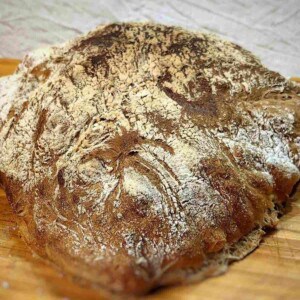
After 35 minutes, your delicious ciabatta is ready! Remove it from the basket. Let it cool slightly. The ciabatta's crust will initially be crispy and firm, but it will soften over time.
Why Opt for Extended Cold Fermentation for Ciabatta?
- Deepened Flavors and Aromas: By letting the dough cold ferment, the ciabatta develops a richer, more pronounced taste. This slow process enhances the bread's classic aroma we all cherish.
- Perfected Texture: The beauty of ciabatta lies in its texture—those large airy bubbles enveloped by a crisp crust. The magic? Extended fermentation. It encourages the gluten to develop evenly, ensuring that signature ciabatta feel.
- Easier on the Stomach: A longer fermentation period aids in breaking down some of the more complex carbs in the bread, making it more digestible.
- Lasts Longer, Stays Fresher: An added bonus to cold fermentation? It slows down the aging of both the dough and the baked bread, giving your ciabatta a longer shelf life.
Tips for Adjusting the Cooking Time and Temperature
Every air fryer is a bit different in terms of its heating efficiency and airflow, which can influence the cooking time and temperature. Here are some tips to ensure your ciabatta turns out perfectly:
- Especially the first time you try the recipe, keep a close eye on your ciabatta as it cooks. If it's browning too quickly, you may need to lower the temperature slightly.
- If you've shaped your ciabatta differently (smaller or larger), it may need adjustments in cooking time. Smaller loaves might require less time, while larger ones a bit more.
- Invest in a good bread thermometer. Ciabatta is done when the internal temperature is between 194-203ºF (90-95ºC). This takes the guesswork out and ensures your bread is perfectly cooked.
- Familiarize yourself with your specific air fryer's quirks. Some models might cook faster than others, so adjusting based on your observations is key.
Serving Recommendations
- Sometimes, nothing beats a slice of fresh ciabatta with a drizzle of good-quality olive oil and a sprinkle of sea salt.
- Top slices with chopped tomatoes, basil, garlic, and a splash of balsamic vinegar for a classic Italian appetizer.
- Use the ciabatta as the base for a hearty sandwich. Think salami, provolone, arugula, and sun-dried tomatoes.
- It's hard to resist dipping a chunk of ciabatta into a hot bowl of minestrone or tomato basil soup.
Recipe Variations and Substitutions
- While bread flour is ideal, you can substitute with all-purpose flour if that's what you have. Just expect a slightly different texture.
- Experiment with flavored oils, like rosemary or garlic-infused, for an added twist.
- For a sweeter bread, consider adding a tablespoon of honey or maple syrup to the dough mix.
- Enhance the texture by adding sunflower seeds, flaxseeds, or sesame seeds into the dough.
Leftover Storage
Store the ciabatta in a paper bag at room temperature for up to two days. This maintains the crust's crispiness.
For longer storage, wrap the ciabatta tightly in plastic wrap and freeze. To enjoy, thaw at room temperature and then warm in the oven for a few minutes.
Pro Tips for Success
- Ensure your water isn't too hot when mixing with the yeast. Around 100°F (38°C) is just right.
- Overworking the dough can make it tough. Remember, a gentle hand yields a softer ciabatta.
- Resist the urge to shorten fermentation times. The extended period is where the magic happens, enhancing flavor and texture.
- Always trust your eyes when baking. If the crust is looking perfect before the timer goes off, it might be time to pull it out.
Air Fryer Ciabatta FAQs
Absolutely! Ciabatta rolls can be warmed in an air fryer. Set the temperature to 300°F (150°C) and heat them for about 3 minutes until they're nice and toasty. It's a quick way to rejuvenate the crispiness of the crust.
Ciabatta stands out because of its unique texture: a crisp crust and a very airy, open crumb with large bubbles inside. Originating from Italy, its name translates to "slipper," alluding to its somewhat flat, elongated shape.
A chewy ciabatta can result from a couple of factors. Overdevelopment of gluten from excessive kneading or using high-protein flour can cause this texture. Additionally, not allowing the bread to cool before slicing into it can also make it seem chewier than desired.
If your ciabatta didn't rise as expected, it could be due to old or inactive yeast, or perhaps the dough wasn't proofed long enough. Always check the expiration date of your yeast and ensure your dough has had sufficient time to ferment and rise.
Ciabatta dough is generally wetter than other bread doughs, which contributes to its characteristic open crumb. However, if it's excessively sticky, you might need a little more flour during the mixing process.
A dense crumb can be caused by under-proofing or not allowing for adequate fermentation time. Ensure you're giving your dough sufficient time during the cold fermentation process and performing the "stretch and fold" method as outlined in the recipe.
Wrapping up, I've found that making ciabatta in the air fryer has brought a delightful twist to my home baking. That crispy crust paired with its airy inside—this Italian bread is genuinely something special.
And while you're here, why not explore more? There's a treasure trove of air fryer tips and recipes waiting for you on our blog.
I'd also love to hear about your experiences with this recipe, so please share your thoughts or questions in the comments.
Here's to many more baking adventures together!
You Might Also Like:
Carrot Cake Recipe
Easy Air Fryer Lava Cakes Recipe
Twice Baked Potato Recipe
Air Fryer Donuts
Recipe
Air Fryer Ciabatta
Equipment
- Plastic container for the dough
- Kitchen towel
- Baking paper
- Spoon
Ingredients
- 11 oz bread flour
- 7 oz water
- ¼ teaspoon instant yeast
- 2 tablespoon olive oil
- ½ teaspoon sugar
- ½ teaspoon salt
Instructions
- In a plastic container, combine water, sugar, and yeast. Stir well until the sugar is fully dissolved.
- Add all the flour, olive oil, and salt. Mix well and knead the dough. You don't need to knead it for a long time, just make sure everything is well combined. Cover with a lid and let it rest at room temperature for 45 minutes.
- After 45 minutes, begin the first of four "stretch and folds". Stretch the dough as much as possible from one side and fold it towards the center.
- Repeat this process for all four sides, stretching and folding towards the center. The dough may tear slightly during the first folding. Then, cover it with a lid and let it rest for another 45 minutes.
- After 45 minutes, proceed with the second "stretch and fold." Repeat the same steps as described previously. You'll notice that the dough becomes noticeably more elastic, and some small bubbles may start to form on the surface. Cover with a lid and let it rest for another 45 minutes.
- Now, for the third "stretch and fold." The dough should be quite elastic at this point and shouldn't stick to your hands. After folding, cover it with a lid and place the container with the dough in the refrigerator for another 45 minutes.
- Lastly, perform the fourth and final folding. The dough should have risen, be easy to stretch, and fold nicely. After completing all these steps, cover it with a lid and leave it in the refrigerator for at least 12 hours or longer.Tip: It's best to start preparing this dough in the evening, allowing it to undergo its final proof in the refrigerator overnight, and then bake the ciabatta the following day.
- After a minimum of 12 hours in the refrigerator, take out the dough. The long cold proofing at low temperatures with minimal yeast imparts unique flavor qualities to the bread, a more natural process.
- Place a sheet of parchment paper on the bottom of the air fryer basket and dust it with flour. Transfer the dough onto the parchment paper by simply flipping the container upside down; the dough will release on its own. Sprinkle some flour on top of the dough.
- Without turning on the air fryer, reinsert the basket. This will be the final proofing, which will last anywhere from 30 minutes to 1 hour, depending on factors such as the type of flour used and room temperature.
- After half an hour or an hour, when you see that the dough has risen, turn on the air fryer to the maximum temperature. For me, it's 400°F (200°C). Bake for approximately 35 minutes. This time is usually sufficient.
- Keep an eye on the color of the crust and its texture. The crust should turn golden and become crispy. You can also use a culinary thermometer to check the bread's internal temperature, which should be between 194-203ºF (90-95ºC).
- After 35 minutes, your delicious ciabatta is ready! Remove it from the basket. Let it cool slightly. The ciabatta's crust will initially be crispy and firm, but it will soften over time.
You can find the video in the post above. If you don't see a video, please check your browser settings.
Leave a Reply