
Everything about these Christmas Thumbprint cookies is festive and fun for the holidays. You won't believe how easy they are to make, and you only need 5 ingredients + fillings. These thumbprint cookies are soft, tender, buttery, and incredible, just like Linzer Cookies.

Jump to:
Photo instructions
Beat the butter and sugar together on medium speed until it's soft and creamy, about 2 minutes.
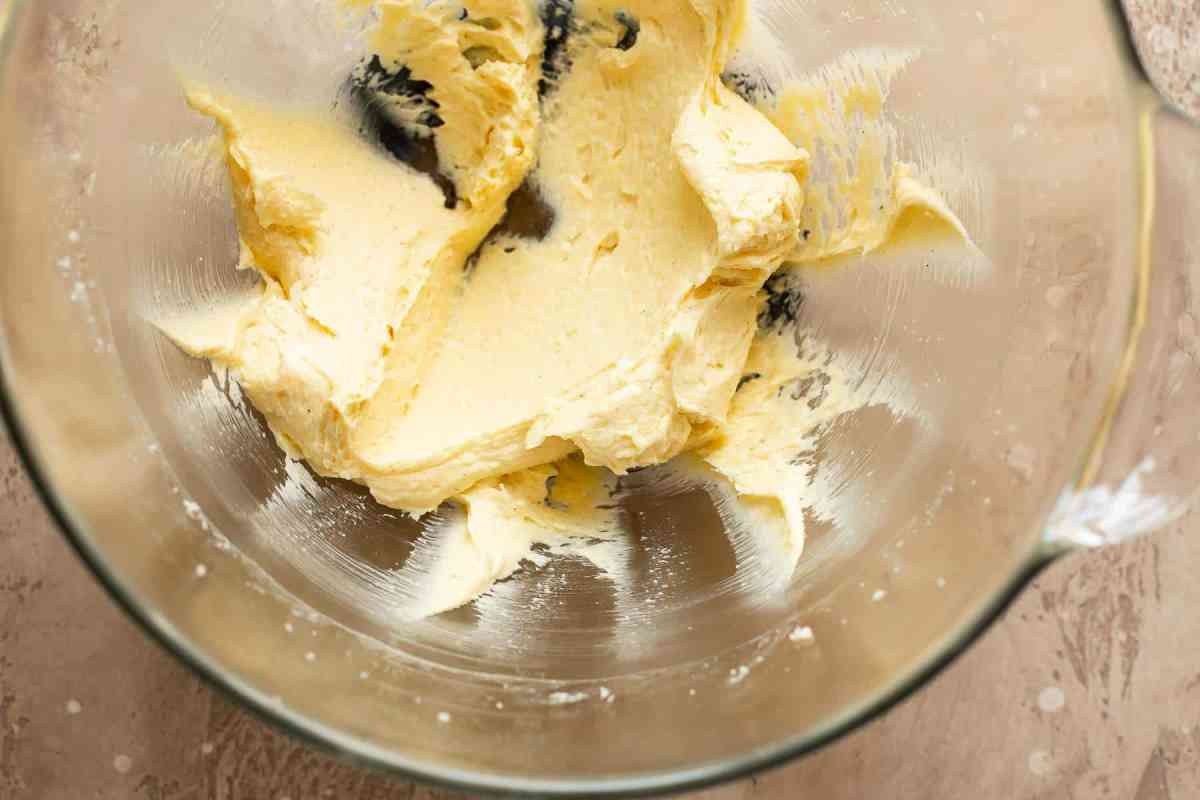
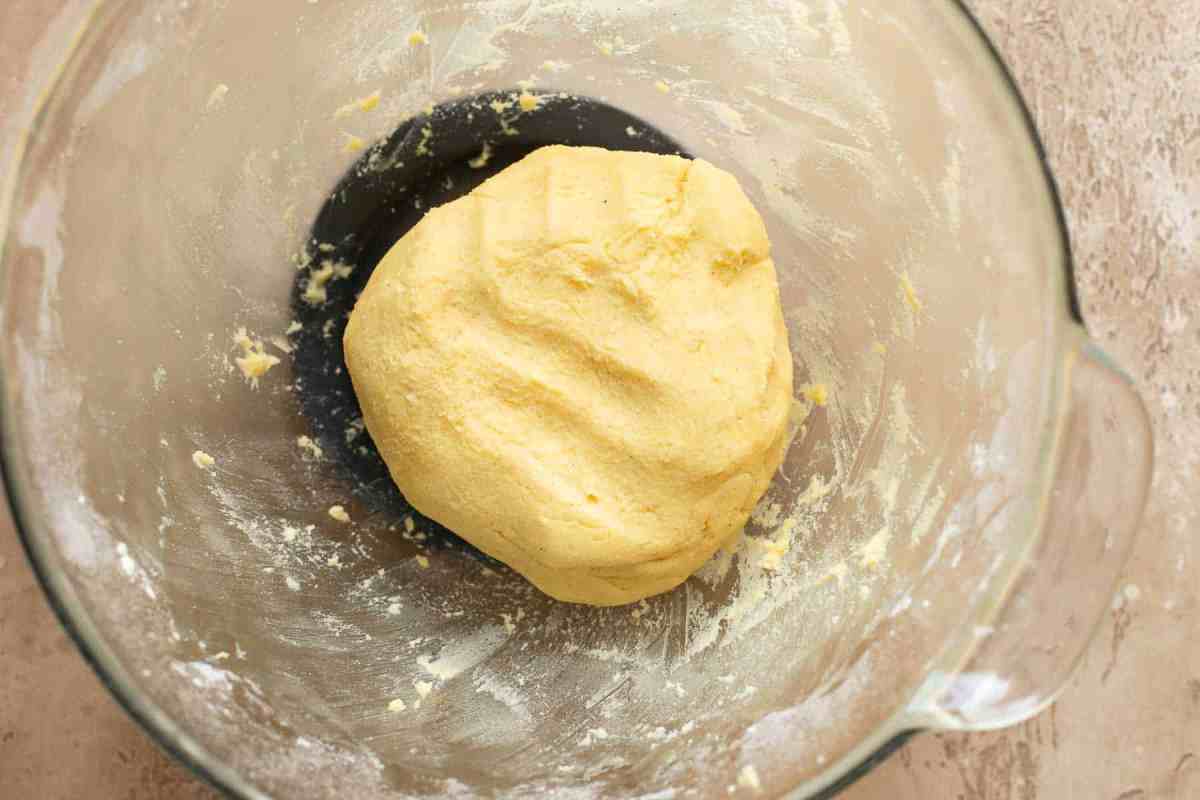
Mix in the egg yolks, salt, and vanilla to the butter mixture. Blend together for 1 minute. Add in flour until everything starts coming together. Mix on low speed. Then using your hands knead until the dough is smooth.
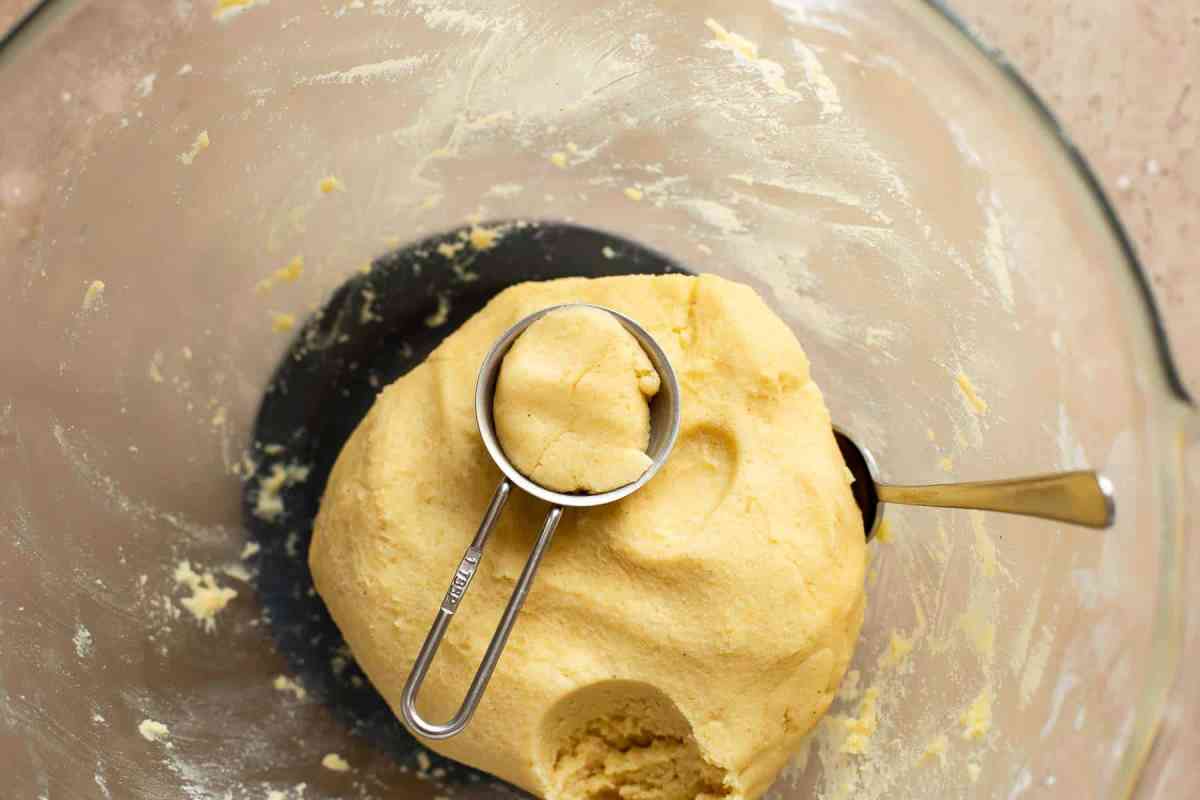
Divide the dough evenly into 40 dough balls, about 1 tablespoon each. Using your hands to form them into balls.
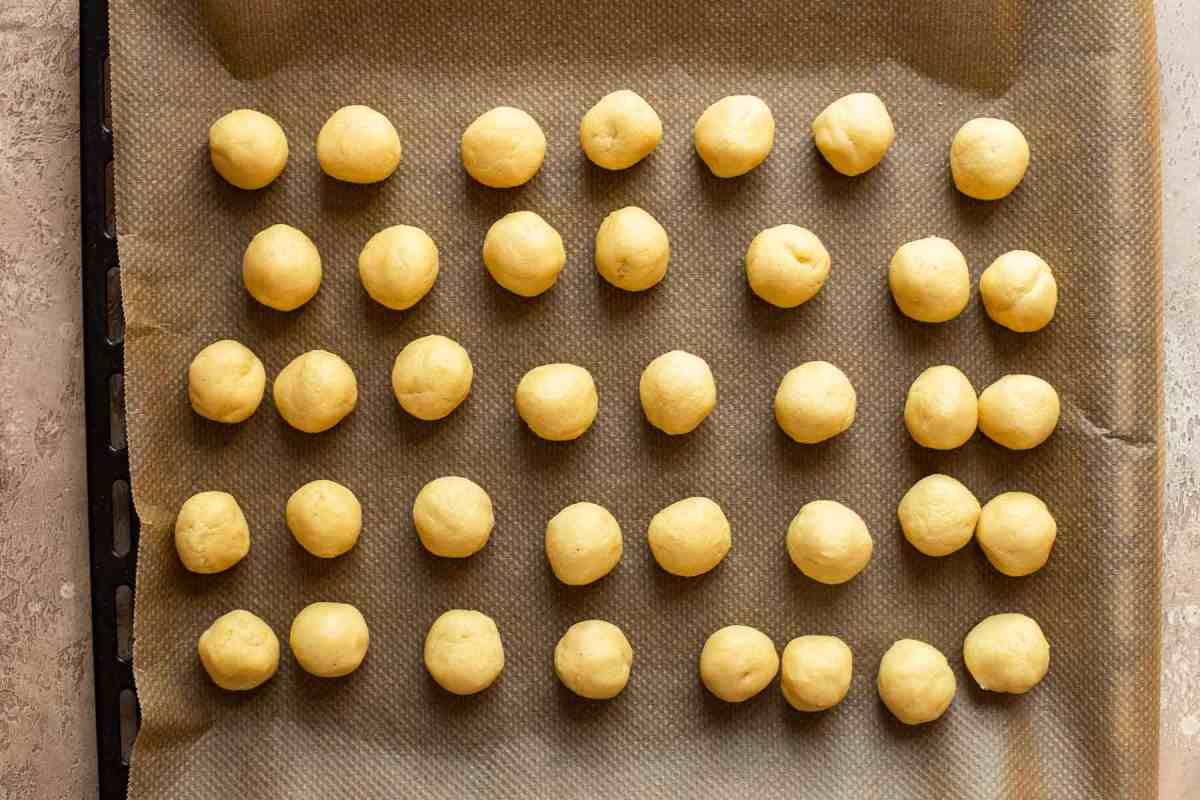
Then roll the balls into sugar, sprinkles, crushed candies, nuts, or anything else that you enjoy.

Place the cookies on a baking sheet and space them every 1.5-2 inches. Using a ½ teaspoon, push the back of it into the center of each cookie to make a hole. Then fill with your favorite fillings.

Bake them for 9-10 minutes. They should appear pale, puffy, and matte. Allow them to cool for 5 minutes then place them on a wire rack so they can cool completely.

Expert tips for success
- Make sure to spoon and level the flour, so that the cookies don't end up too dense. Using dough that has too much flour is difficult to work with and won't hold its shape well. Also, too much flour makes them dry and hard.
- Be gentle when adding the hole in the center. Don't be aggressive or push too hard when you are adding the hole to the center of the cookie.
- Don't overbake them, or they will dry out.
- Allow the baked cookies to sit on the baking sheet for at least 5 minutes before moving them.

FAQs
Why did they crack?
Some of the cookies will crack, and it's just part of it. There isn't a ton you can do to prevent it from happening, and they will still taste and look good even when cracked. You can see in the pictures that some of mine are also lightly cracked. That is normal and nothing to worry about.
Why did they spread?
If you end up with cookies that seem to spread a lot, there are some things you can do differently to help prevent as much spreading. First of all, most cookies will spread at least a little bit. Don't be too concerned about this, because it's normal.
It's essential no matter what cookies you are baking not to use a hot cookie sheet. You should allow it to cool between batches, so it's back to room temperature. Otherwise, as soon as you place the dough ball on the pan, it will start baking and spreading immediately.

Storage
Store them in an airtight container at room temperature. They will last up to 2 weeks, so they are perfect for making ahead of time.
Freezing
Keep them in a freezer-safe storage bag or container for up to 1 month. To serve them, place them in the refrigerator the night before so they can thaw out and then let come to room temperature.
More Holiday recipes to try
- Gingerbread Men Cookies
- Eggnog Truffles
- Chocolate Rum Truffles
- Eggnog Gingerbread Tiramisu
- Eggnog Gingerbread Cheesecake
Recipe

Christmas Thumbprint Cookies Recipe
Ingredients
- 1 cup unsalted butter (226g)
- ½ cup granulated white sugar (100g)
- 2 large egg yolks
- ¼ teaspoon salt
- 1 vanilla bean* (or 1 teaspoon vanilla extract)
- 2 ½ cups all-purpose flour, spooned and leveled (300g)
Roll in 1 cup of sugar, nuts, or sprinkles
Fill with ½ cup of chocolate spread, nuts, curd, jam, or Hershey kisses
Instructions
- Preheat oven to 350°F / 175°C. Line a baking sheet with parchment paper and set aside.
- With a handheld or stand mixer fitted with a whisk or paddle attachment, beat butter and sugar on medium speed until creamy for about 1-2 minutes.
- Add egg yolks, salt, and vanilla* and mix for about 1 minute.
- Stir in flour until it comes together on low speed. Knead by hand a few times until smooth.
- Separate the dough into 40 equally sized portions. Form balls with your hands and roll in sugar, sprinkles, nuts, or whatever you like.
- Place half of the cookies on the prepared baking sheet with about 1.5-2 inches space in between. Press the back of a ½ teaspoon in the center and fill up with chocolate, nuts, jam, peanut butter, or Hershey kisses.
- Bake one sheet after another for about 9-10 minutes until they look pale, puffed, and matte. Let cool on the baking sheet for about 5 minutes then transfer to a wire rack and let cool completely. They will stay fresh in an airtight container at room temperature up to 2 weeks or freeze up to 1 month. When freezing, let them thaw overnight in the fridge and let them come to room temperature before serving.
Notes
Tips for success
- Make sure to spoon and level the flour, so that the cookies don't end up too dense. Using dough that has too much flour is difficult to work with and won't hold its shape well. Also, too much flour makes them dry and hard.
- Be gentle when adding the hole in the center. Don't be aggressive or push too hard when you are adding the hole to the center of the cookie.
- Don't overbake them, or they will dry out.
- Allow the baked cookies to sit on the baking sheet for at least 5 minutes before moving them.
Video
You can find the video in the post above. If you don't see a video, please check your browser settings.
Danielle
Can you put them in the refrigerator over night, until you serve them the next day?
Sabine
The baked cookies don't need to be refrigerated. Just store them at room temperature.