

These homemade brioche buns are soft and squishy, but they are still sturdy enough to hold your favorite toppings perfectly. They have a great mouthfeel and are so good that you can tear and eat them with just about anything.
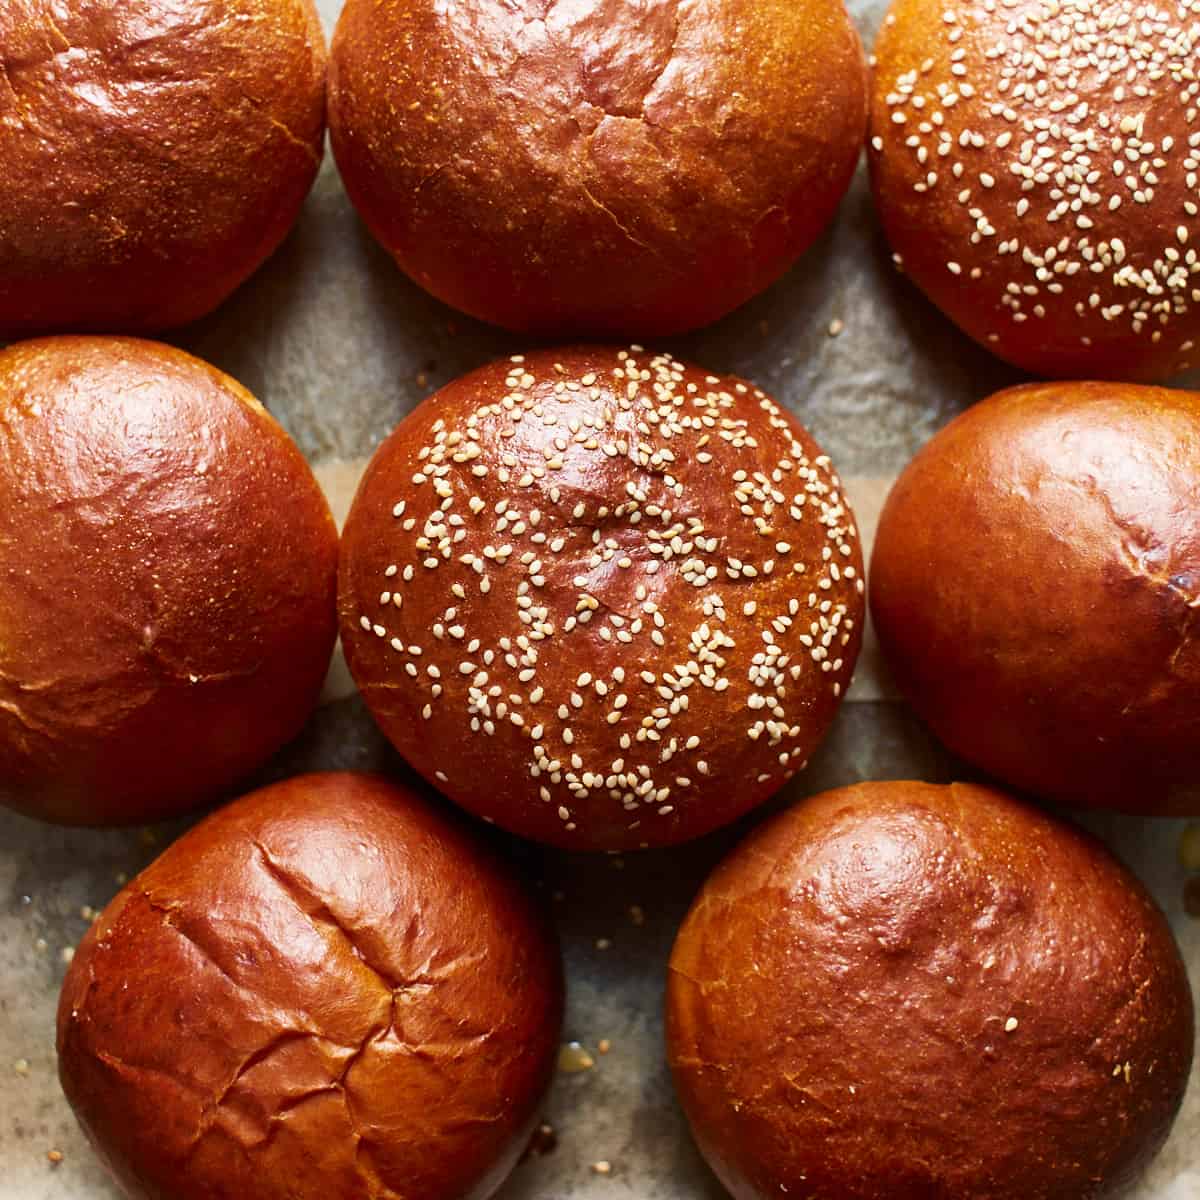
If you love baking bread from scratch, this brioche bun recipe is one you’ll want to make again and again. By the way, have you tried my brioche hot dog buns, pretzel buns, or dinner rolls?
Jump to:
Video Instructions
Try These Soft Brioche Burger Buns
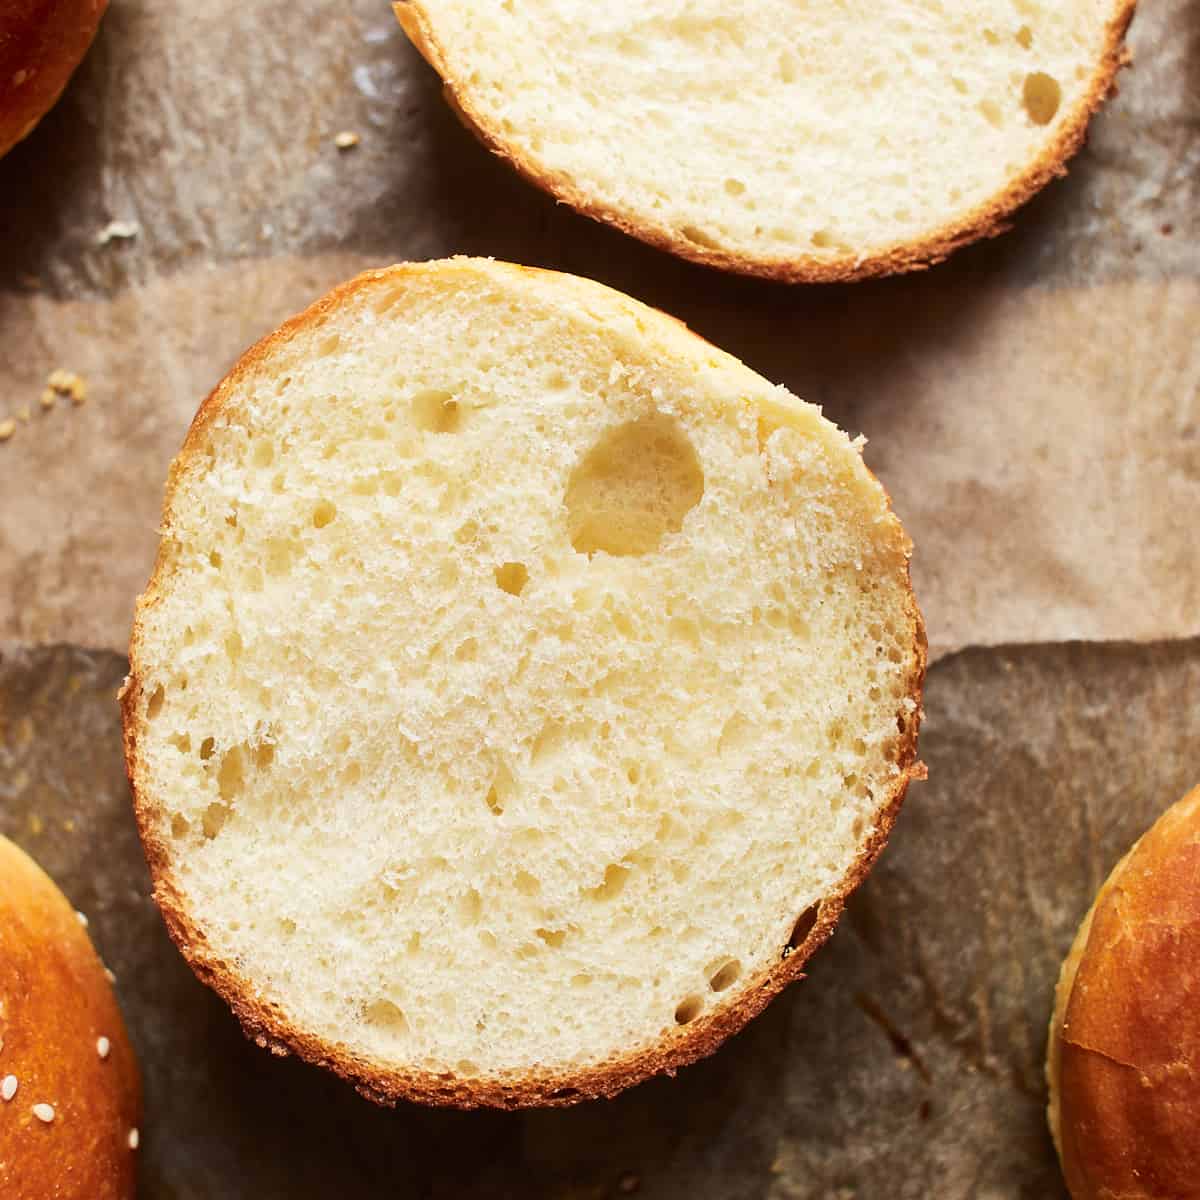
I love these burgers because of their buttery taste and pillowy texture, and they are exactly like bakery-quality buns. They are also so easy to make.
Unlike regular burger buns, they have a richer taste and softer crumb, very similar to classic brioche bread, usually made with eggs, butter, and whole milk.
Why You’ll Love It
- Bakery-quality at home: It is incredibly satisfying to pull golden, shiny brioche buns out of your own oven.
- Perfect Texture: Soft and fluffy inside, yet sturdy enough to hold even the juiciest burgers.
- Rich buttery flavor: The eggs, butter, and milk give these buns their delicious taste.
- Multiple usage: I use them for burgers, breakfast sandwiches, and even as dinner rolls.
Ingredients
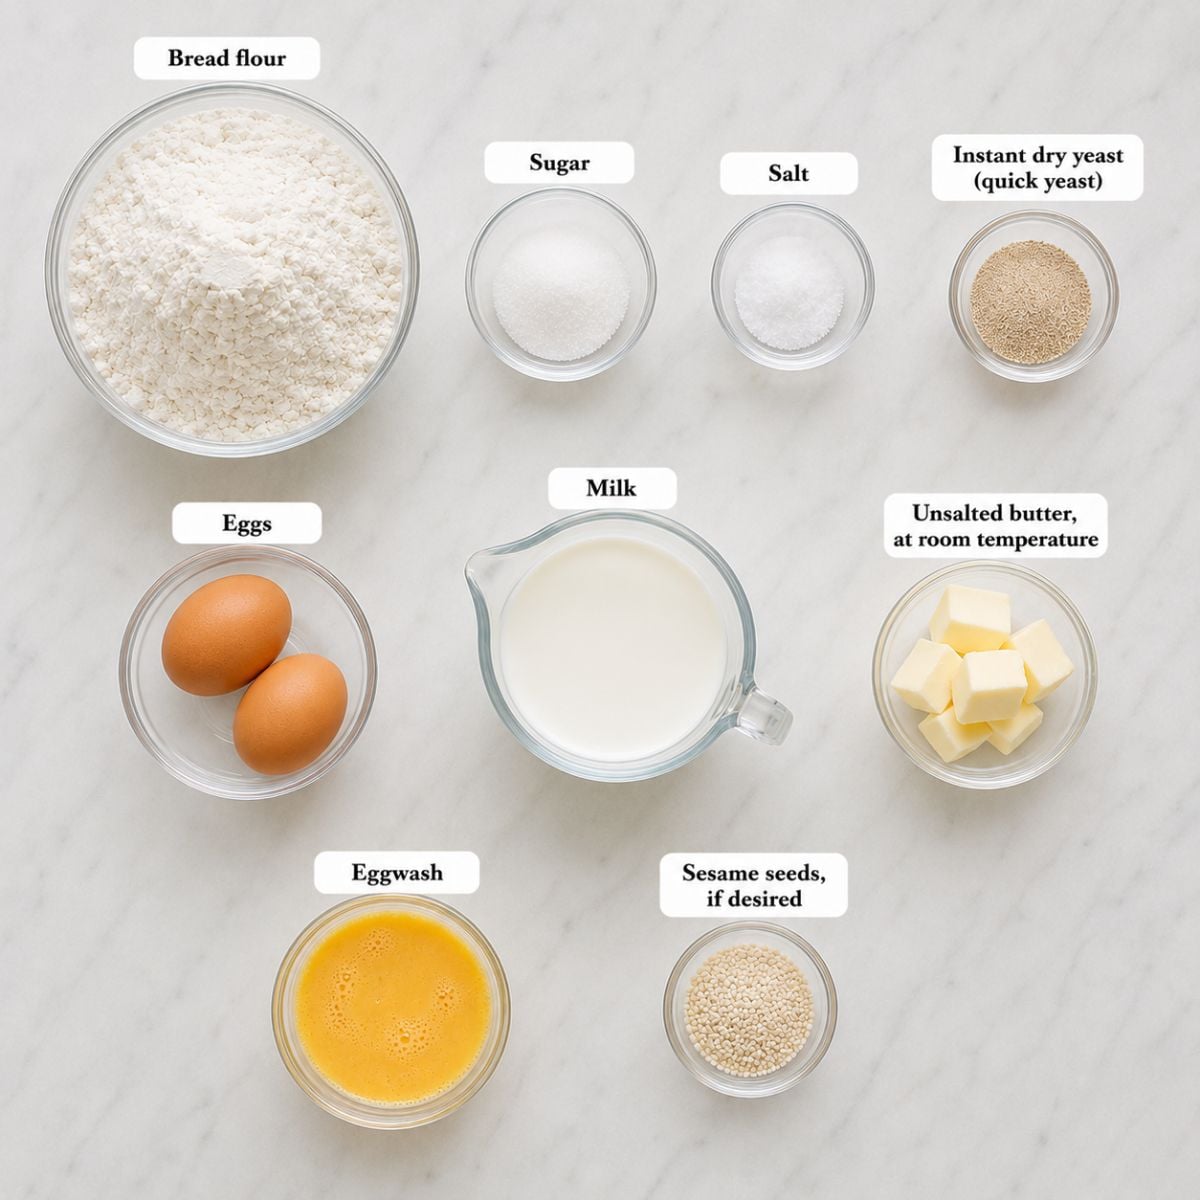
- Bread flour: I mainly use organic white bread flour with a protein content of 13.4%. You can use all-purpose flour if you don't have bread flour available, but I highly recommend using bread flour whenever you can. Or at least find an all-purpose flour with the highest possible protein content. A high protein content means a high gluten content and gives yeast bread the desired texture and chew.
- Milk: I recommend using milk instead of water because milk not only moisturizes the dough, but also makes bread tender by weakening the gluten strands resulting in a softer bread. Full fat is preferred.
- Sugar: You can replace the sugar with 1 ½ tablespoon (32 g) honey if you prefer. Please note that this substitute will make the dough a little stickier.
- Instant Dry Yeast: I prefer to use instant dry yeast, but you can use active dry yeast as well. Since there is a difference between these two types of yeast you will need 2¼ teaspoons (9g) of active dry yeast. In this case, warm the milk to 110°F / 43°C (feels like a warm water bath), add the sugar and yeast, and let it sit for 5-10 minutes to allow it to bloom.
- Sesame seeds - optional: If you want, you can top the brioche burger buns with sesame seeds.
Tip: To have the same result every time, I weigh all of my ingredients, including the eggs. The weight of an egg is usually between 55-60g. My goal is to have 120g of eggs and 180g of milk, so a total of 300g. If the eggs are a little less or more than 120g, I add enough milk to have 300g in total.
How to Make Homemade Brioche Buns
1. In the bowl of a stand mixer, whisk the flour, sugar, salt, yeast, eggs, and milk until it comes together. Let rest.
2. Gradually add the butter to the yeast mixture and knead until it is completely incorporated.
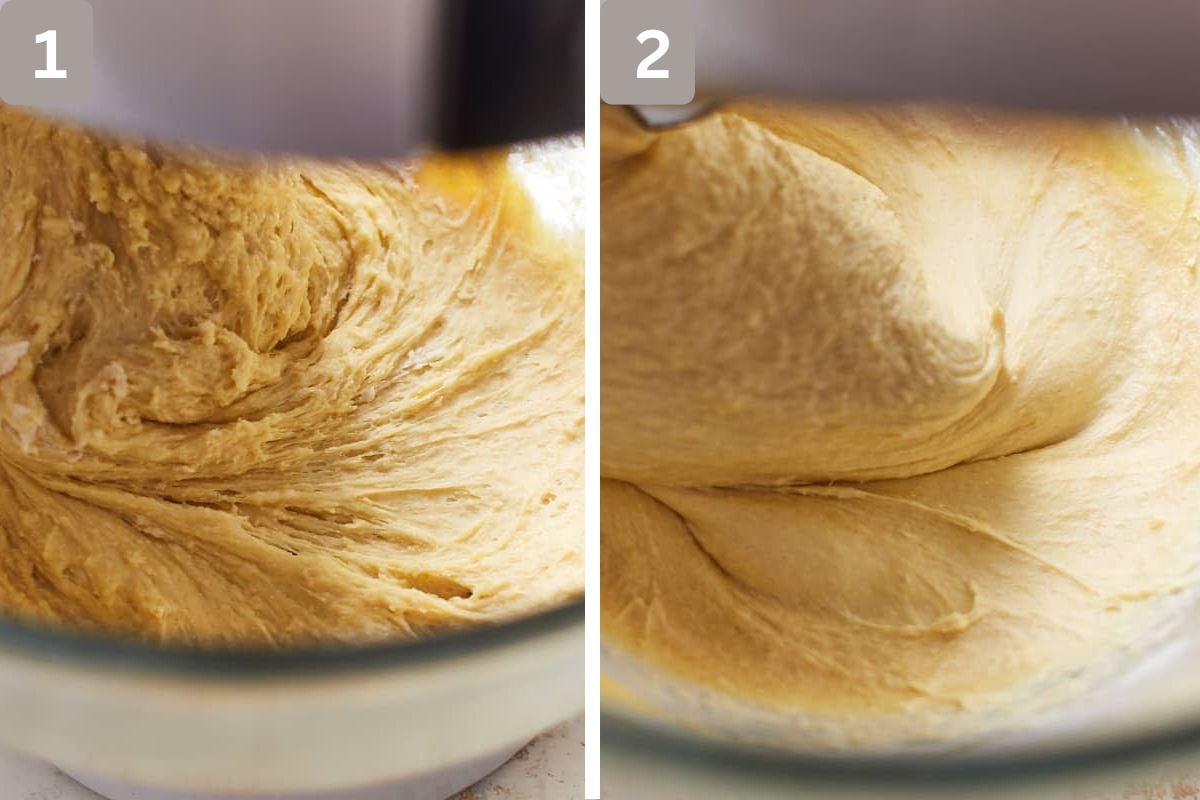
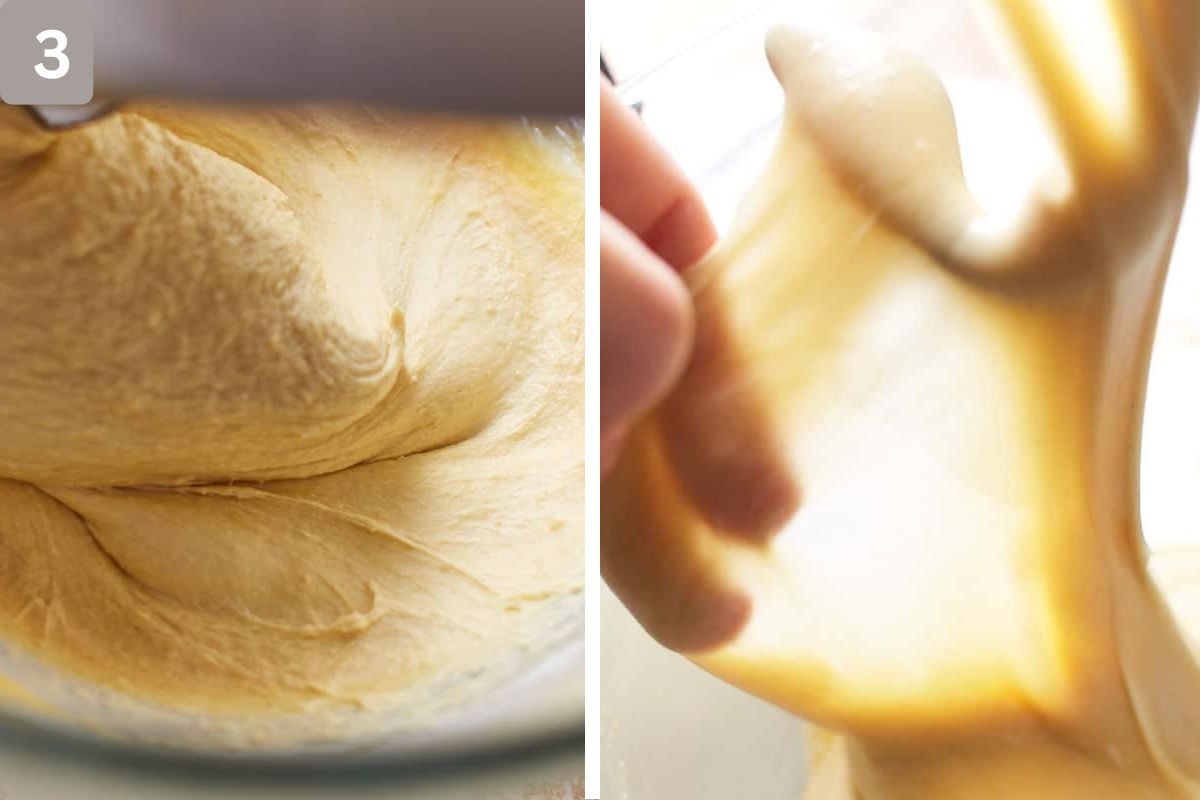
3. Knead the sticky dough on high speed until it is smooth, releases from the sides of the bowl, and passes the windowpane test. It's a very stretchy, soft, smooth, and satiny dough that is slightly tacky to the touch.
How to do the windowpane test?
To do the windowpane test, let the dough rest for about 1 minute after mixing. Then take a small portion of the dough between your fingers and slowly stretch it until the center is very thin, and light can shine through without tearing. This means that you have kneaded and developed the dough sufficiently. If it doesn't pass the windowpane test and it tears, knead for 1-2 minutes longer.
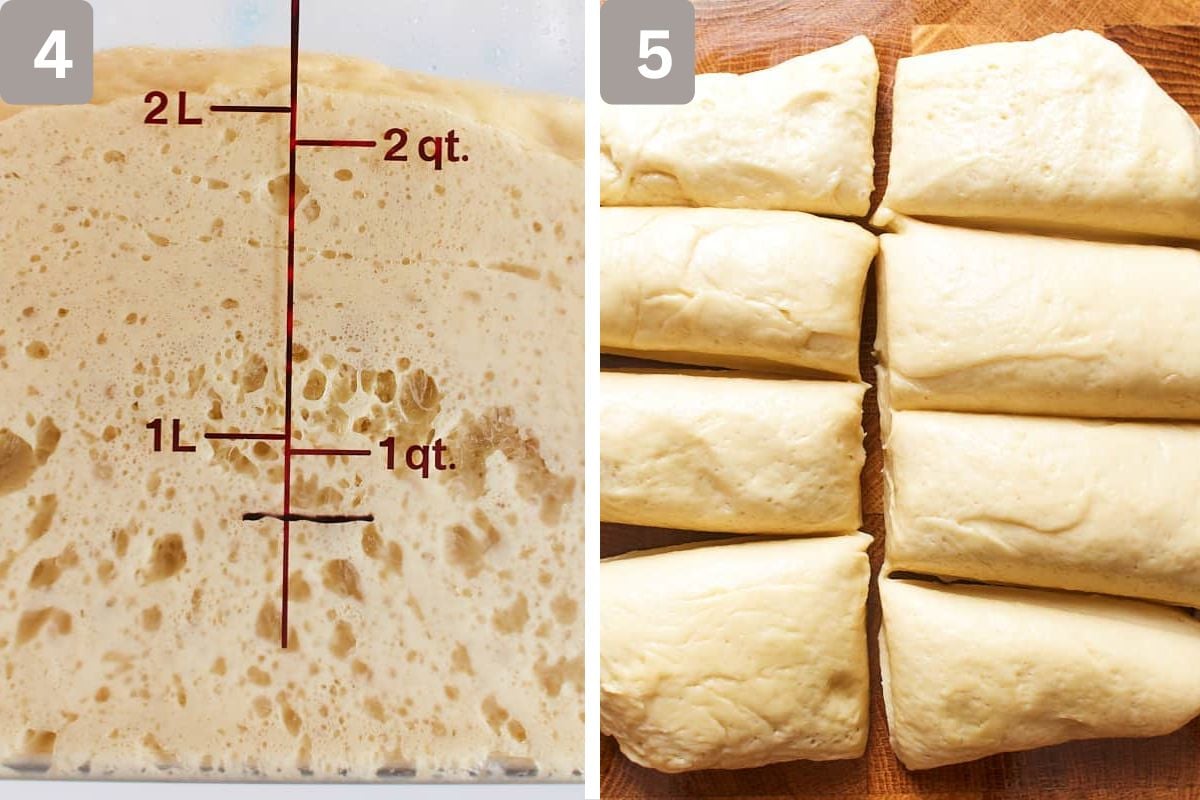
4. Transfer the dough to a lightly oiled container and lightly oil the top of the dough as well. Let the dough rise overnight.
5. Remove the dough from the container with a dough scraper and place it on a very lightly oiled work surface. Roughly shape the dough into a square and divide it into 8 equal pieces.
6. Apply a little oil to your fingers, take one piece of dough, roll it into a ball, and deflate it while you roll it up.
Note: You do the shaping with both hands, but I was holding my camera in my second hand. Check out the video to see how I do it with both hands.
7. Then stretch up the dough on the side farthest away from you...
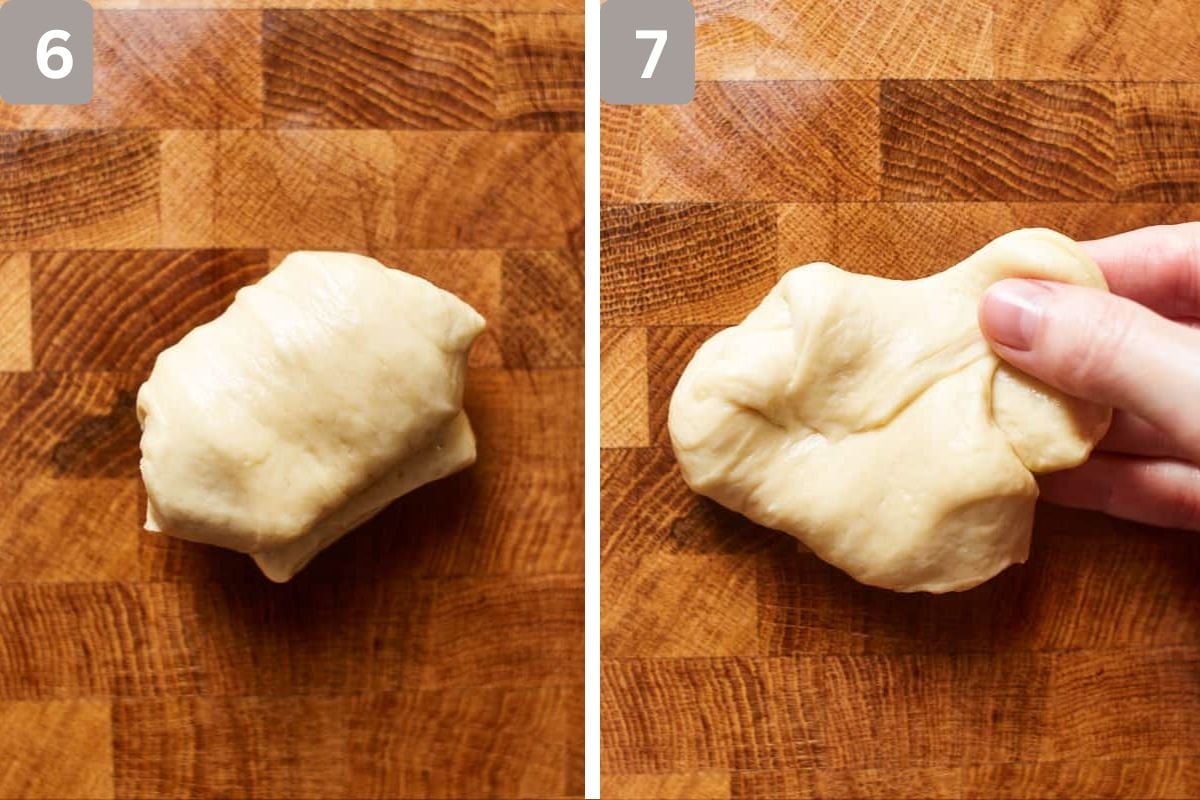
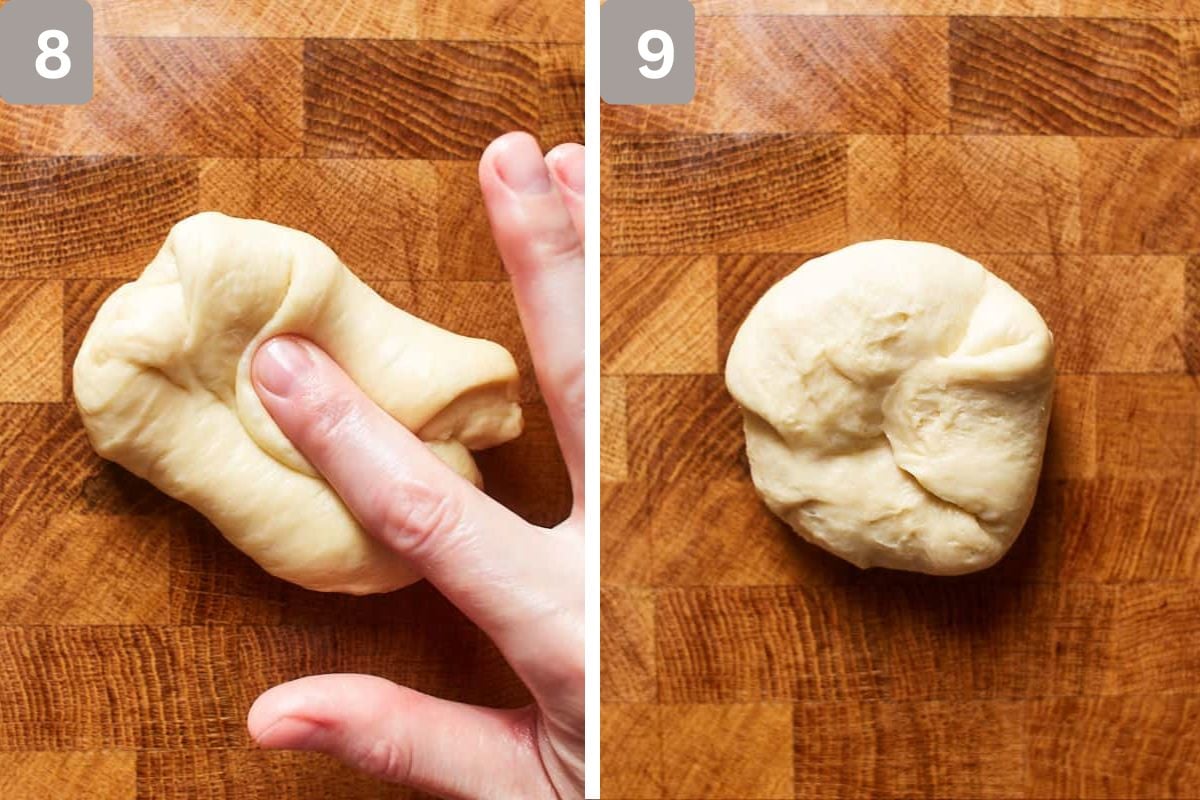
8. and fold over the center.
9. Then rotate the dough by about 45°, stretch the dough farthest away from you, and fold it over the previous fold and over the center. Repeat this 6-8 times. You will notice that the dough builds up tension and becomes firmer with every fold. The goal is to have a round ball with all the seams on one side.
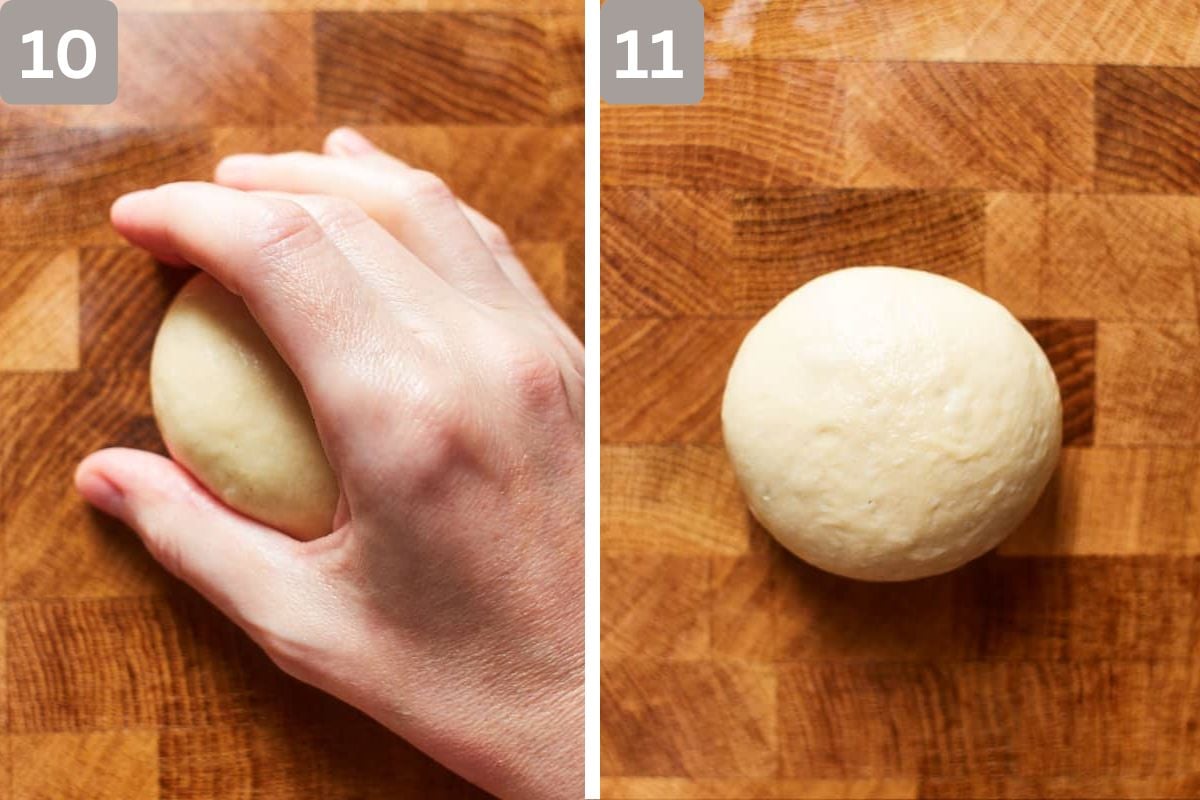
10. Then place the dough ball seam side down, gently cup it with one hand, and form a C-shape with your hand.
11. Move the dough with your hand in a circular motion and gently press it against the work surface to build tension, stretch the surface of the dough, and close the seams at the bottom. If the dough is a bit sticky, oil your hands very lightly. Avoid using flour on the work surface to allow the dough to anchor to the surface as it moves. Do this gently without tearing the surface of the dough, and don't overwork the dough.
12. Arrange the dough balls on the baking sheet and let rest at room temperature until they have doubled.
13. Brush the dough with egg wash, sprinkle with white or black sesame seeds if desired, and bake. As an alternative, you can also use egg wash substitutes. Remove from the oven, brush with melted butter, and cover with a clean and dry kitchen towel.
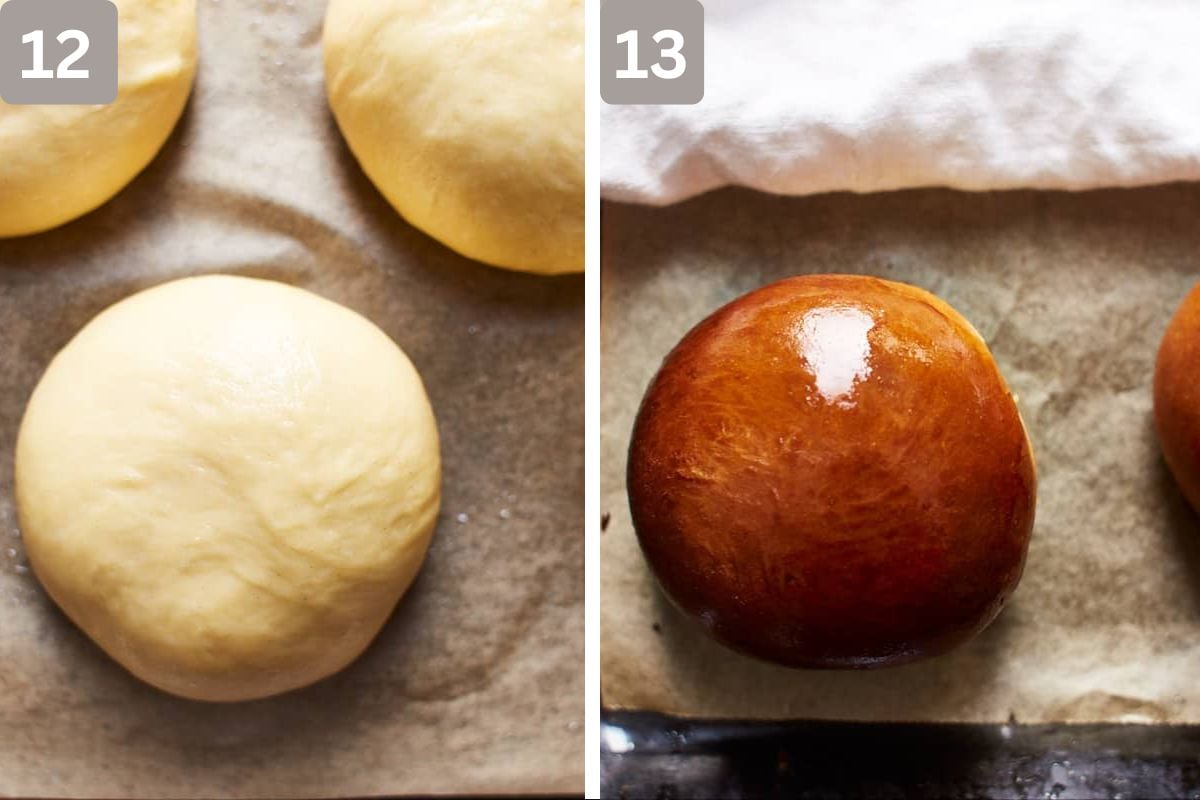
14. Then uncover and transfer to a cooling wire rack to cool completely.
Recipe Tips
- Depending on which climate or environment you live in, the absorption rate of flours can be different. It can be that you need to hydrate your dough more or less, depending on humidity, temperature, or altitude.
- If you find that you need to knead the dough a little longer to pass the windowpane test, let it rest a few minutes in between so that the dough doesn’t overheat while kneading. Otherwise, the yeast could cripple.
- The overnight rise benefits the texture and taste of the rolls, and the dough is easier to shape when it has chilled.
- When shaping the dough, use a little bit of oil on your hands and work surface instead of flour. This will ensure that you don't work more flour into the dough and end up with super delicious brioche burgers.
What Can You Serve With This?
- Hamburgers
- Cheeseburgers
- Breakfast sandwiches
- Pulled pork
- Egg salad
FAQs
Brioche rolls are popular and are great for burgers. However, they are slightly different from a potato bun, the more commonly known burger bun. These rolls are only slightly sweet and complement the burger toppings perfectly. It's a great bun with a soft texture and a buttery taste, but it's not too sweet to make cheeseburgers. It's just perfect.
Yes, you can either place them on the grill, in a pan, in the air fryer, or in a toaster to toast them or add some grill marks. You can put some butter on both sides before toasting if you want, but not if you are using a pop-up toaster.
Absolutely, they freeze well for up to 3 months. Once they are cooled completely, wrap each bun in plastic wrap and place them in freezer bags or containers. To defrost, unwrap, and let sit on the kitchen counter for about 1-2 hours or store in an airtight container overnight.
Yes. The temperature determines the rise time. So instead of putting the dough in the refrigerator overnight, let it rise at room temperature until it doubles, about 1-2 hours. Then continue with the recipe as described.




Recipe
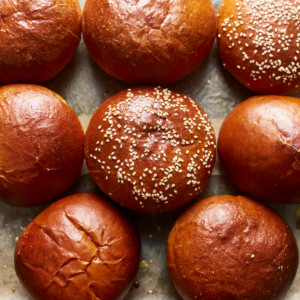
Homemade Brioche Buns
Ingredients
Dough
- 3 cups bread flour, spooned and leveled
- 2 ½ tablespoon sugar
- 1 ¼ teaspoon salt
- 1 ¾ teaspoon instant dry yeast (quick yeast)
- 2 large eggs
- ¾ cup full-fat milk
- 5 tablespoon unsalted butter, at room temperature
Additional Ingredients
- egg wash (1 large egg yolk + 1 tablespoon milk)
- 1 tablespoon sesame seeds, if desired
- 2 tablespoon unsalted butter, melted
Instructions
- In a large bowl, using an electric mixer fitted with a hook attachment, add the flour, sugar, salt, yeast, eggs, and milk, and knead on low speed until it comes together about 3-4 minutes. Scrape down the sides of the bowl halfway through. Let rest for 20-30 minutes.
- Knead on low speed and gradually add the butter until it is completely incorporated. Once all of the butter is incorporated, increase the speed to high and knead for about 4-6 minutes until the dough is smooth, releases from the sides of the bowl, and passes the windowpane test. It's a very stretchy, soft, smooth, and satiny dough that is slightly tacky to the touch. If you find that you need to knead a few minutes longer to pass the windowpane test, give the dough a short break for a few minutes to avoid overheating the dough. Otherwise, the yeast could cripple.
- Lightly spray a straight-sided container with oil and transfer the dough to the container; lightly oil the top of the dough as well. Cover and let rest at room temperature for 10-15 minutes until it has grown by about 10%. Then put it in the refrigerator and let rest overnight, about 8-12 hours. It will at least double in this time.
- Take the dough out of the refrigerator and let it rest at room temperature for about 30 minutes.
- In the meantime, line a baking sheet with parchment paper and lightly spray with oil. Set aside.
- Remove the dough from the container with a dough scraper and place it on a very lightly oiled work surface. Roughly shape the dough into a square and divide it into 8 equal pieces.
- Apply a little oil to your fingers, take one piece of dough, roll it into a ball, and deflate it while you roll it up. Then stretch up the dough on the side farthest away from you and fold over the center. Then rotate the dough by about 45°, stretch the dough farthest away from you and fold it over the previous fold and over the center. Repeat this 6-8 times. You will notice that the dough builds up tension and becomes firmer with every fold. The goal is to have a round ball with all the seams on one side.
- Then place the dough ball seam side down, gently cup it with one hand, and form a C-shape with your hand. Move the dough with your hand in a circular motion and gently press it against the work surface to build tension, stretch the surface of the dough, and close the seams at the bottom. If the dough is a bit sticky, oil your hands very lightly. Avoid using flour on the work surface to allow the dough to anchor to the surface as it moves. Do this gently without tearing the surface of the dough, and don't overwork the dough.
- Arrange the dough balls on the prepared sheet about 4-5 inches (10-13cm) apart. Let rest at room temperature for 40-45 minutes until they have doubled.
- In the meantime, preheat the oven to 400°F (204°C) for 15-20 minutes.
- Brush the balls with egg wash, sprinkle with sesame seeds if desired, and bake for 15-16 minutes until they are deep golden brown.
- Remove from the oven, brush with melted butter, and cover with a clean and dry kitchen towel for 20 minutes. Then uncover and transfer to a cooling rack to cool completely. Store in an airtight container at room temperature for up to 4 days.
Notes
Cooking Time and Temperature
Bake at 400°F (204°C) for 15–16 minutes until the tops are deep golden brown.Taste & Texture
Soft, buttery buns with a tender crumb and rich flavor.Storage, Freezing & Reheating
- Room Temperature: Store in an airtight container for up to 4 days.
- Freezer: Freeze for up to 3 months.
- Reheat: Warm briefly in the oven or toast before serving.
Serving Recommendations
These are my favorite buns for homemade burgers, but they’re also wonderful for chicken sandwiches or toasted with jam for breakfast.Recipe Variations and Substitutions
- Top with sesame seeds for a classic burger bun look.
- Use poppy seeds or onion flakes for extra flavor.
- Shape the dough into a loaf for a simple brioche bread.
Proper Storage Tips
- Let the buns cool completely on a wire rack before storing.
- Keep them in an airtight container so they stay soft.
- Freeze extras to enjoy later.
Pro Tips
- I almost always use my stand mixer for this recipe because brioche dough is very soft and sticky. The dough hook does most of the hard work.
- The overnight rest is what makes the difference in both flavor and texture. It also makes shaping much easier.
- If the dough feels sticky, use a little oil on your hands rather than adding too much extra flour.
Baker’s Percentages
This is an enriched bread dough (like a dough for cinnamon rolls) that means that milk, eggs, and butter are used, so it’s different from lean sourdough bread, which is just water, flour, and salt.| Ingredient | Weight | Percentage |
| Bread Flour | 375g | 100% |
| Sugar | 31g | 8.3% |
| Salt | 8g | 2.1% |
| Instant Yeast | 7g | 1.9% |
| Eggs | 120g | 32% |
| Milk | 180g | 48% |
| Butter | 71g | 18.9% |
Video
You can find the video in the post above. If you don't see a video, please check your browser settings.
Christian Rodriguez
Came out fantastic!! Super soft and yummy. My dough was too wet at first so I let it rest and then ran it on high again for a few more minutes as suggested. It was nice to make the dough before work and make the bread after I got home.