
These brioche hot dog buns are extremely soft and delicious! They are the perfect bun for any hot dog, sausage, or bratwurst and are an excellent addition to your barbecue menu. But they're also great with a variety of other foods too! Try them with hamburgers, lobster rolls, or even your next grilled cheese sandwich!
All you need are a few basic ingredients that you probably already have at home. This recipe makes 10 regular hot dog rolls. Perfect for feeding big groups of people at summer picnics, BBQ parties, or at home.
Jump to:
Ingredient notes and substitutions
- Bread flour is best for baking bread. Its high gluten content makes the perfect texture. However, you can use all-purpose flour if you have to, but the results won't be quite as good. In this case, you may need 1-2 tablespoons more flour, as all-purpose flour won't absorb as much moisture as bread flour.
- Milk makes bread tender and soft. I highly recommend not replacing it with water as you will lose some of the great qualities of milk. Since these are brioche hot dog rolls, milk is an essential ingredient. Choose full fat.
- Instant yeast is my preferred type of yeast when it comes to making hot dog rolls. It's easy to handle since you simply mix all ingredients together and start kneading. It's easy to use as you just mix all the ingredients together and start kneading. However, if you prefer active dry yeast you need to add 2 ¼ teaspoons (9 g) of this ingredient and activate it in warm milk (about 100°F / 38°C) and sugar for 5-10 minutes. Then add the other ingredients and proceed with the recipe.
Baker's Percentages
This is an enriched bread dough that means that milk, butter, and eggs are used, so it’s different from lean sourdough bread, which is just water, flour, and salt.
| Ingredient | Weight | Percentage |
| Bread Flour | 438g | 100% |
| Sugar | 25g | 5.7% |
| Salt | 9g | 2.1% |
| Instant Yeast | 7g | 1.6% |
| Eggs | 120g | 27.4% |
| Milk | 210g | 47.9% |
| Unsalted Butter | 71g | 16.2% |
Tip: To have the same result every time, I weigh all of my ingredients, including the eggs. The weight of an egg is usually between 55-60g. My goal is to have 120g of eggs and 180g of water and milk, so a total of 300g. If the eggs are a little less or more than 120g, I add enough water or milk to have 300g in total.
FAQs
How to slice them?
Regular hot dog buns are cut horizontally and along the side instead of being split on top like New England Hot Dog Buns. You can either hold the bun in your hand and cut with the other hand or place it on the kitchen counter, place one hand on it and cut horizontally with the other. Make the cut in the center of the bun so that the top and bottom are the same thickness. Be careful not to cut all the way through when slicing (leave about ½ to ¾-inch / 1.3 to 1.9cm of the bun uncut) so that it still holds together nicely.
How to keep them from ripping in half?
These sausage rolls are so soft that I've never had the problem of the rolls being torn or messy to eat compared to their store-bought dry counterparts. They perfectly hold jumbo hot dogs and all your favorite toppings. However, to keep the bread rolls from ripping in half, don't slice them too deeply or open the bun until it's fully open like a book on a table. Open it just enough to arrange the sausage and toppings.
Do they freeze well?
Yes, you can freeze these homemade hot dog buns for up to two months. To defrost, let them sit on the kitchen counter for about 2 hours and warm or toast them on the grill before serving. They will taste like fresh out of the oven!

Same day preparation
When making these gourmet hot dog rolls, I like letting the dough rise in the refrigerator overnight to have a better final product. However, if you want your rolls sooner, you can let the dough rise at room temperature until doubled and then bake it on the same day. For easier handling, refrigerate for 1 hour before shaping.
Tips for success
- In different climates and environments, flours can absorb water differently. This means you may need to hydrate your dough more or less depending on humidity, temperature, altitude - all of which vary by climate and environment.
- If you find that you need to knead the dough a little longer to pass the windowpane test, let it rest a few minutes in between so that the dough doesn’t overheat while kneading. Otherwise, the yeast could cripple.
- The overnight rise in the refrigerator enhances flavor and texture, and the dough is easier to shape after it has chilled.
- When shaping the dough, put a little oil on your hands and work surface instead of flour. This ensures that you don't work more flour into the dough for super delicious, light, and fluffy hot dog buns.
Photo tutorial (step-by-step instructions)
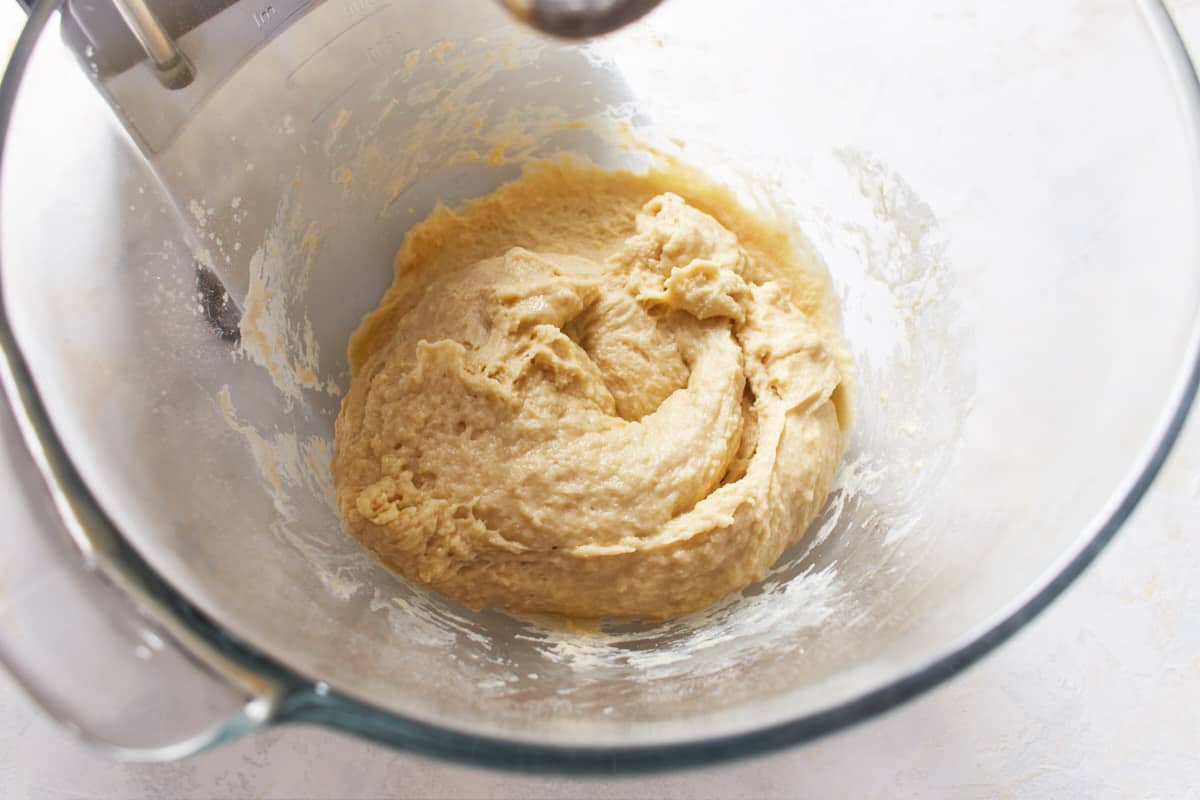
In a large bowl, add the flour, sugar, salt, yeast, eggs, and milk, and knead on low speed until it comes together about 3-4 minutes. Scrape down the sides of the bowl halfway through. Let rest for 20-30 minutes.
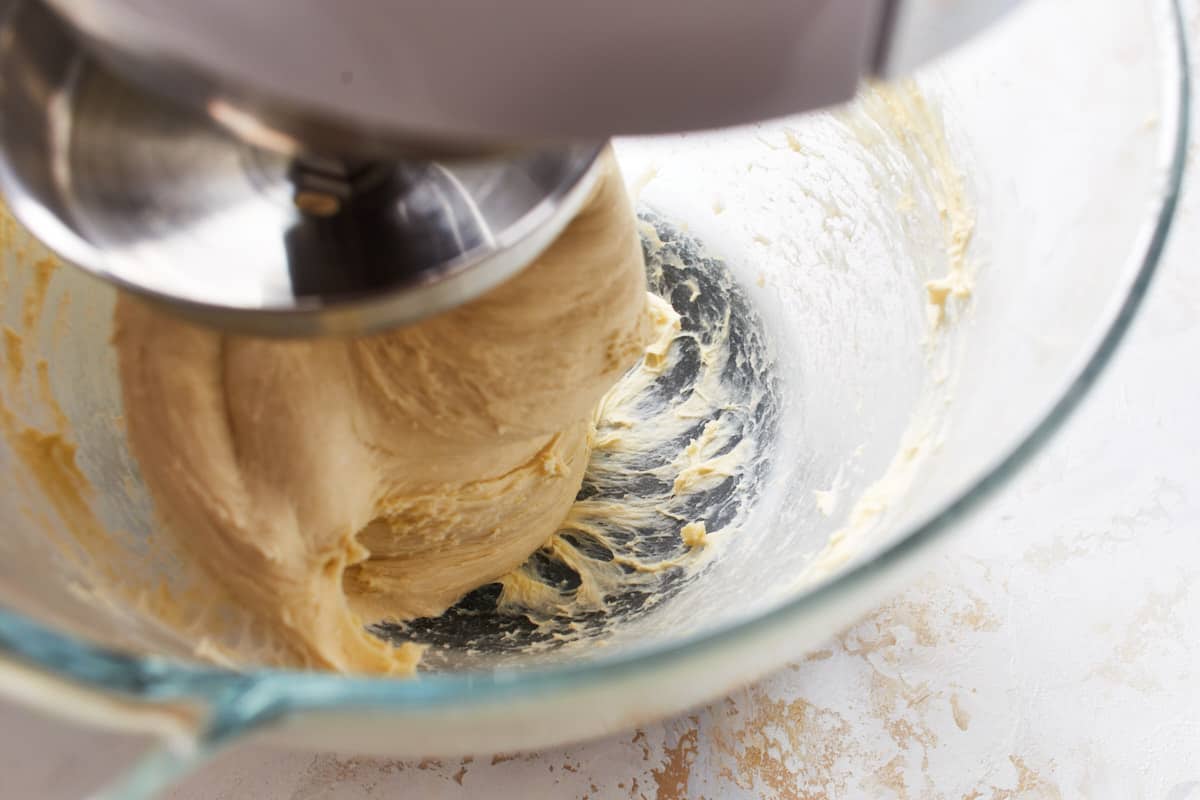
Knead on low speed and gradually add the butter until it is completely incorporated. Once all of the butter is incorporated, increase the speed to high and knead for about 4-6 minutes until the dough is smooth, releases from the sides of the bowl, and passes the windowpane test.
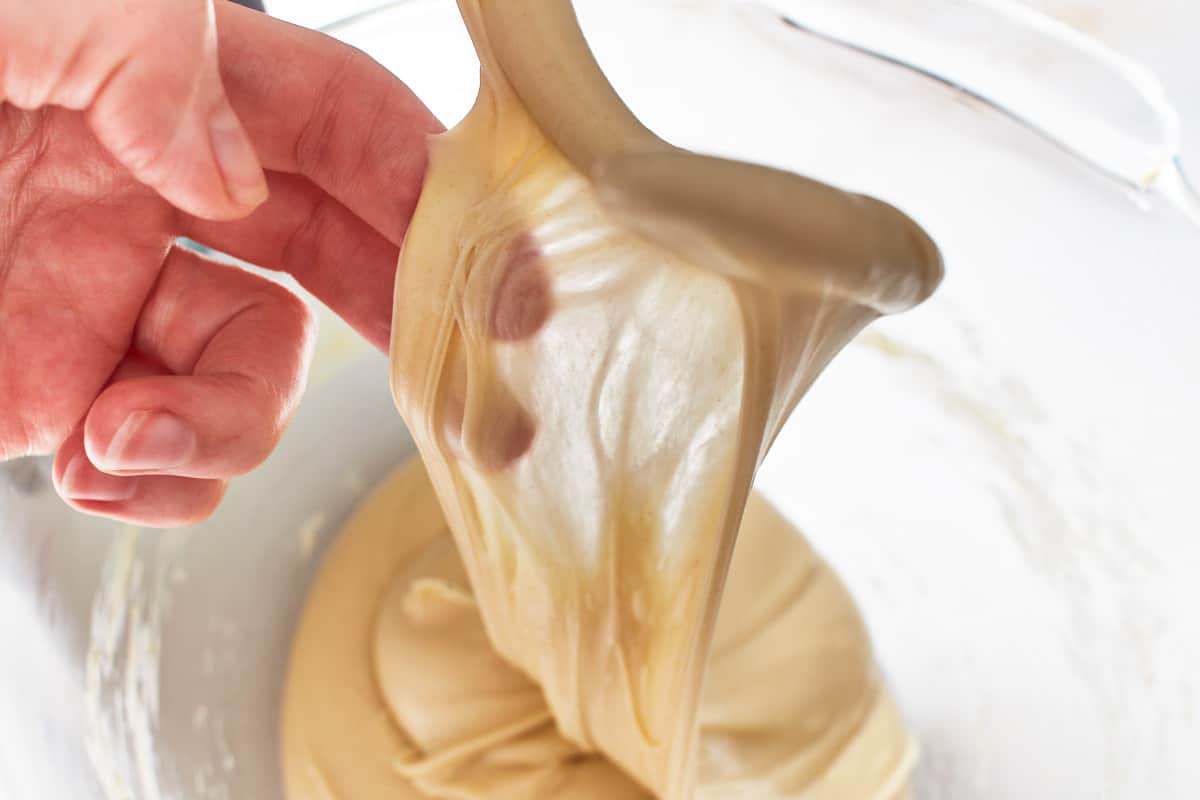
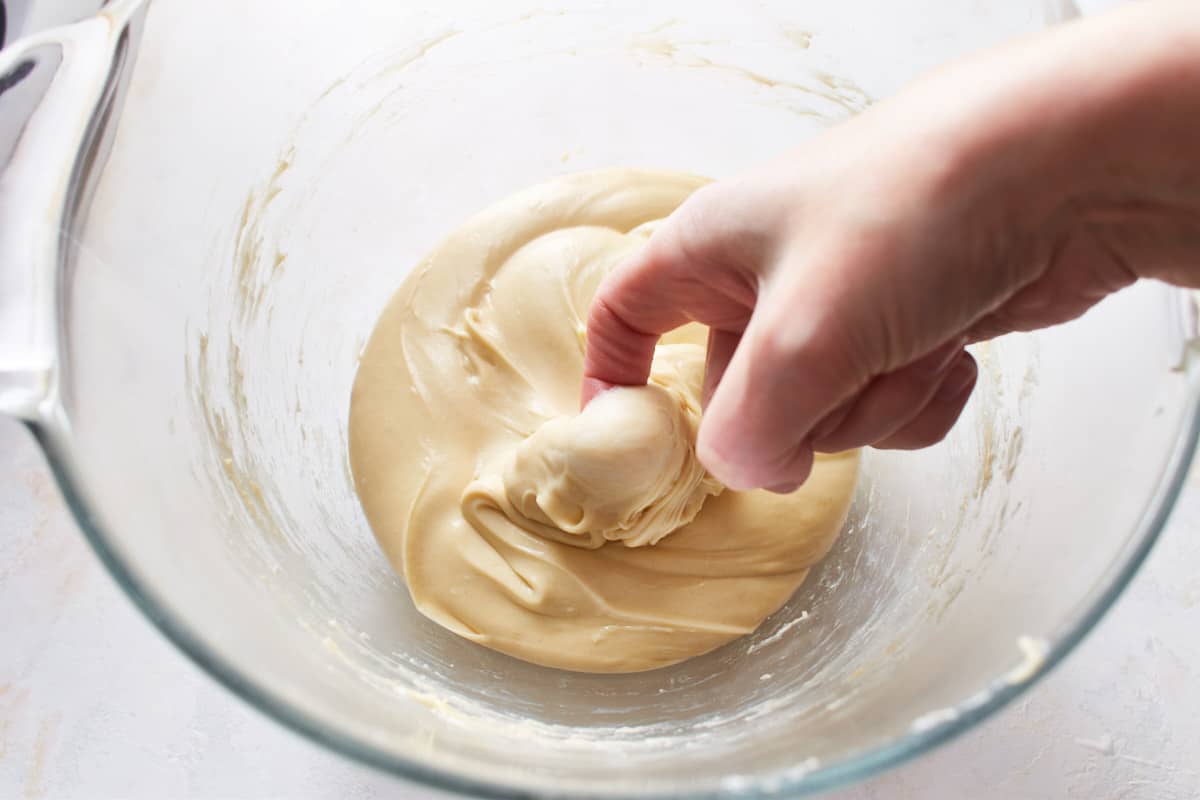
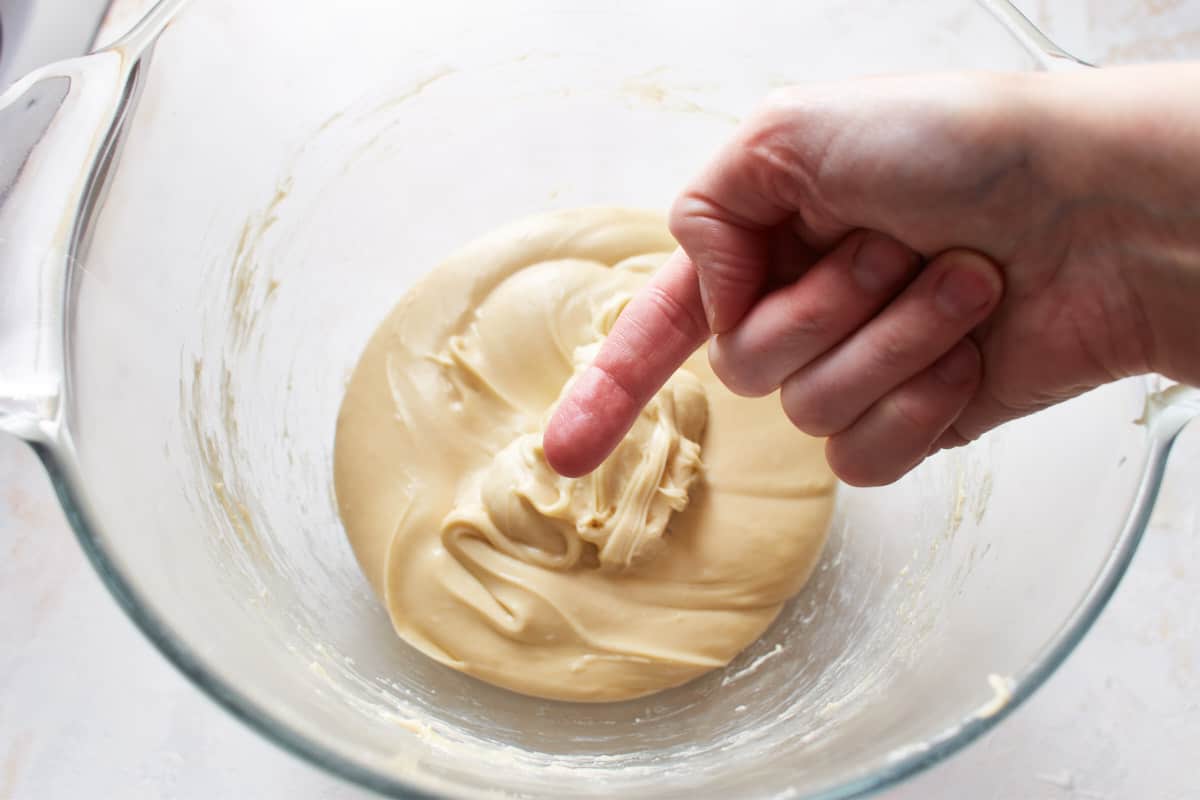
How to do the windowpane test?
To do the windowpane test, let the dough rest for about 1 minute after mixing. Then take a small portion of the dough between your fingers and slowly stretch it until the center is very thin and light can shine through without tearing. This means that you have kneaded and developed the dough sufficiently. If it doesn't pass the windowpane test and it tears, knead for 1-2 minutes longer.
It's a very soft, smooth, and satiny dough that is slightly tacky to the touch.
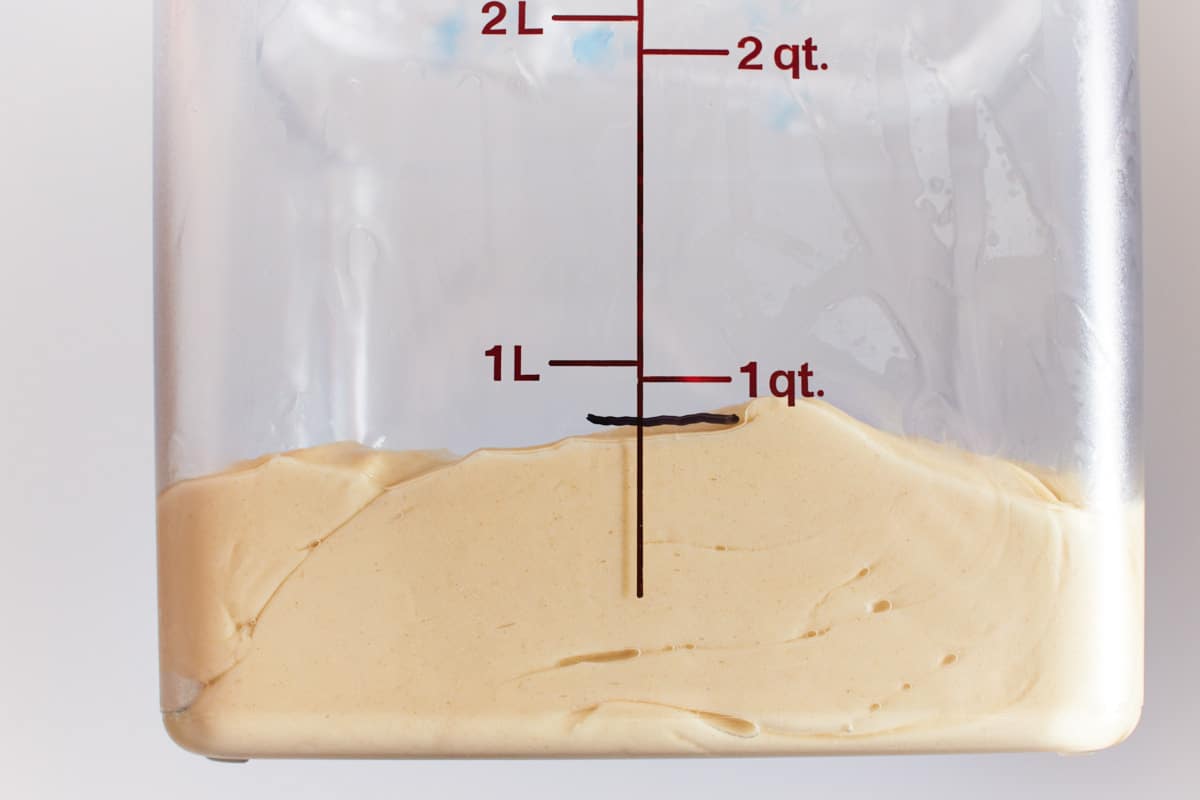
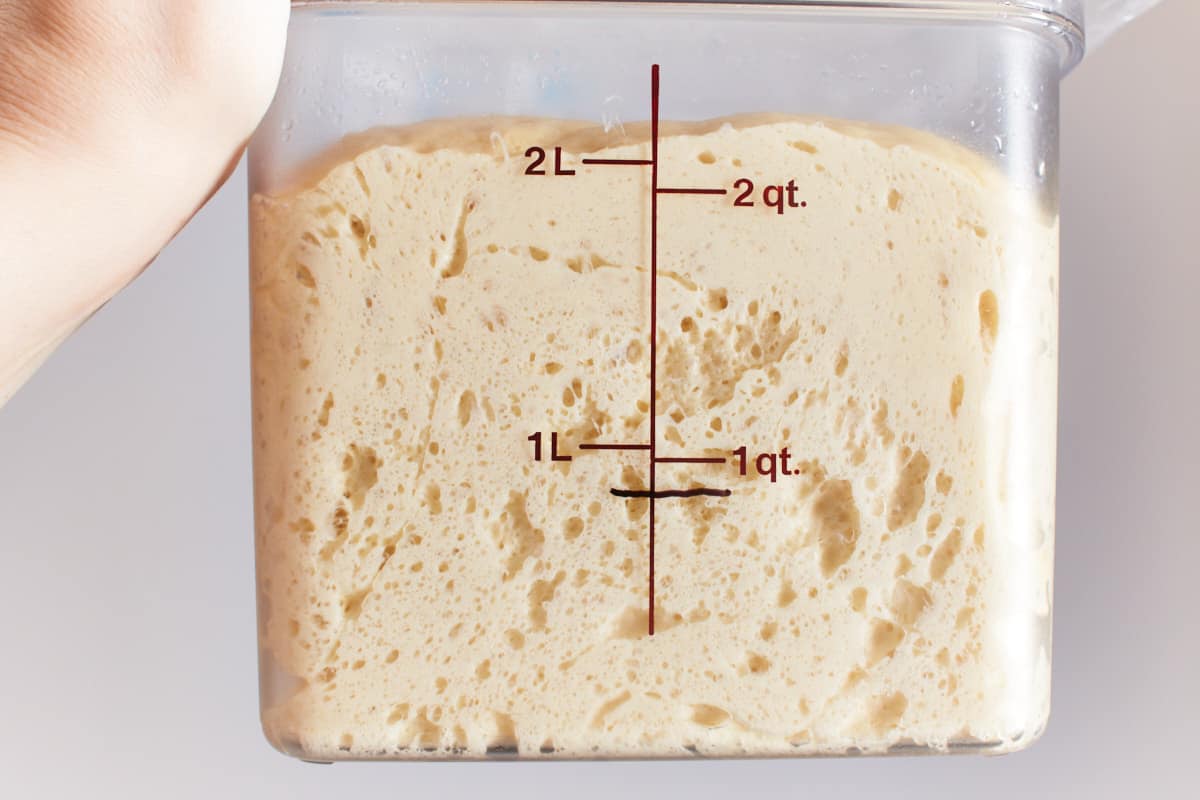
Transfer the dough to a lightly oiled container; lightly oil the top of the dough as well. Cover and let rest at room temperature for 10-15 minutes until it has grown by about 10%. Then put it in the refrigerator and let rest overnight, about 8-12 hours. It will at least double in this time.
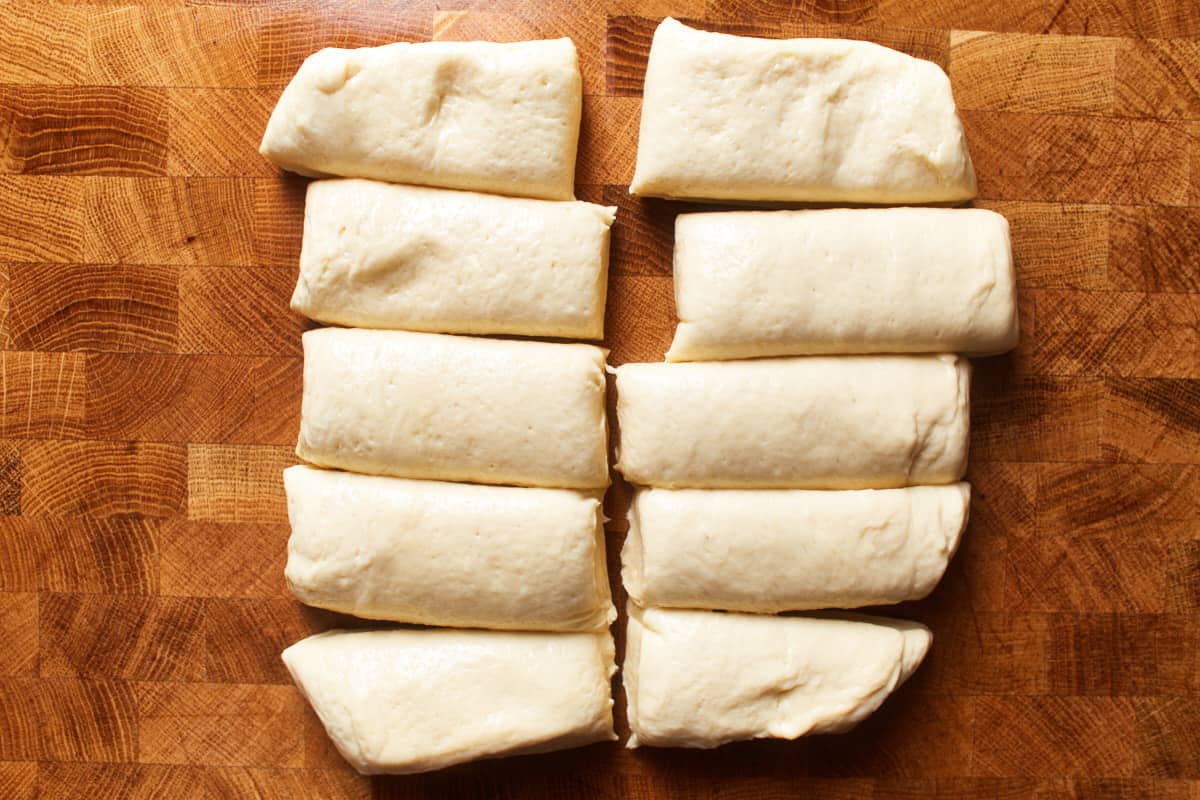
Take the dough out of the refrigerator and let it rest at room temperature for about 30 minutes. Then remove the dough from the container with a dough scraper and place it on a very lightly oiled work surface. Roughly shape the dough into a square and divide it into 10 equal pieces.
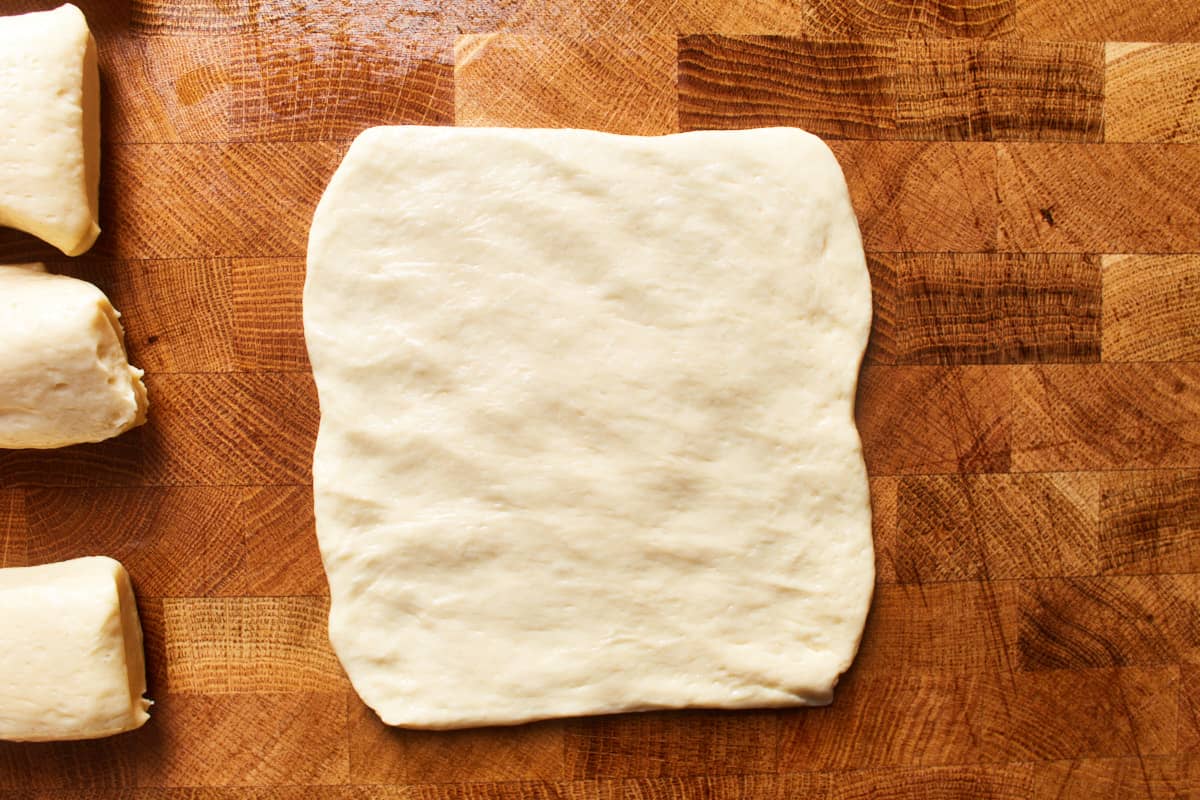
Apply a little oil to your fingers, place one piece of dough on the lightly oiled work surface in front of you, and use your fingers to flatten it into a 5x6-inch (13x15cm) rectangle that is about ⅛-1/4-inch (0.3-0.6cm) thick.
Starting from one short side, roll up the dough tightly
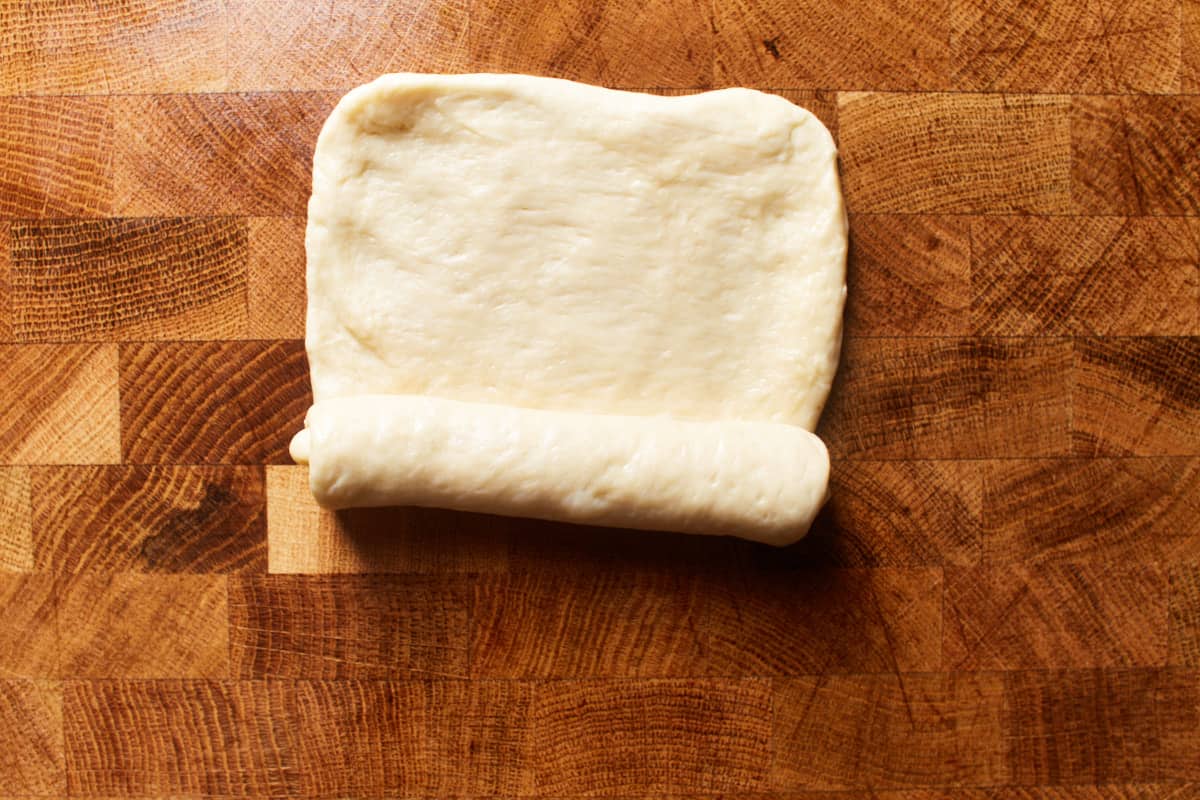
and seal the edges by pinching them together with your fingertips.
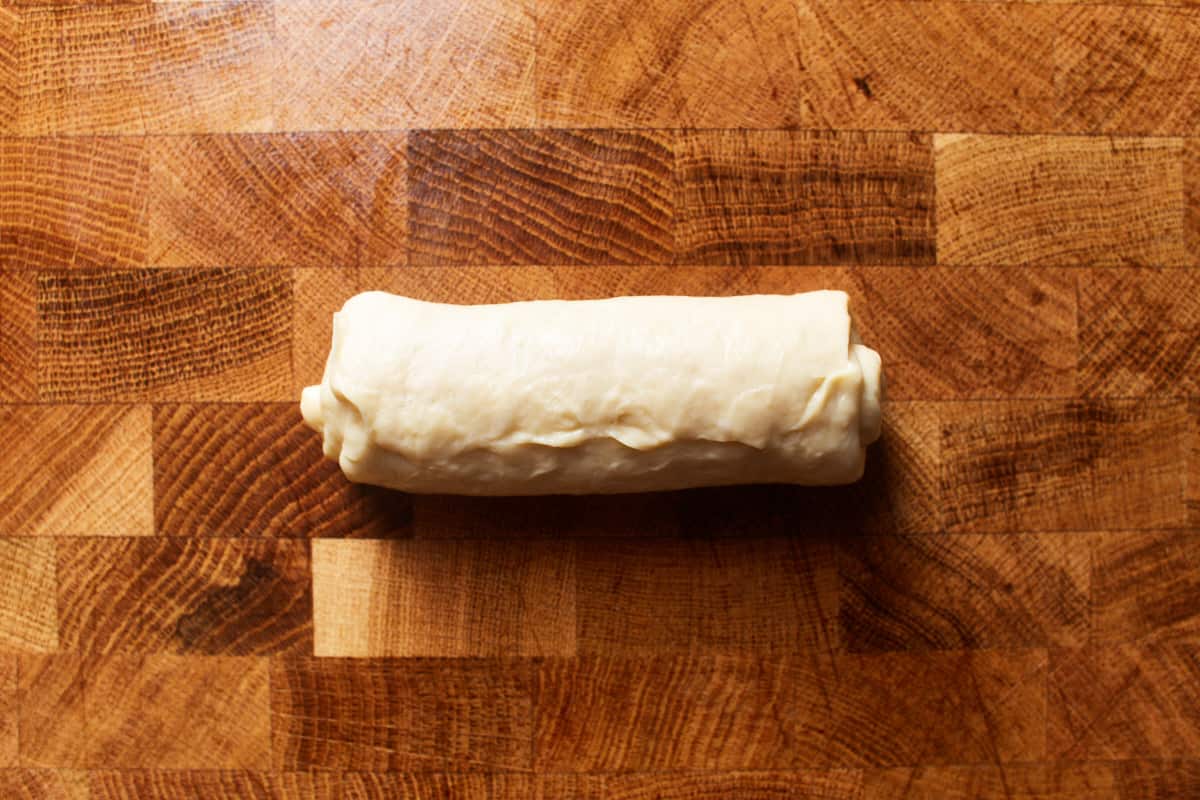
Also, pinch and close the endings.

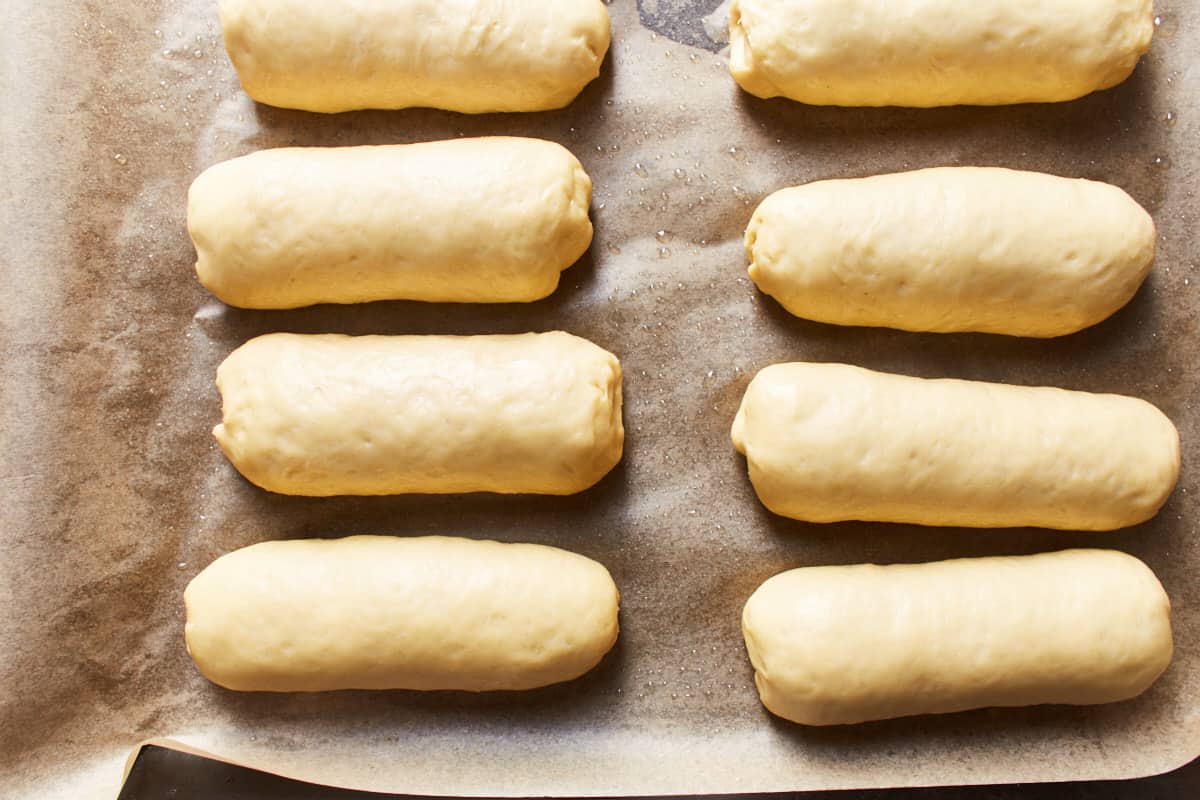
Transfer to the prepared baking sheet and repeat with the other nine pieces of dough. Let rest at room temperature for 40-45 minutes until they have doubled. Then, either use a traditional egg wash or explore egg wash substitutes for different options to brush the buns before baking.
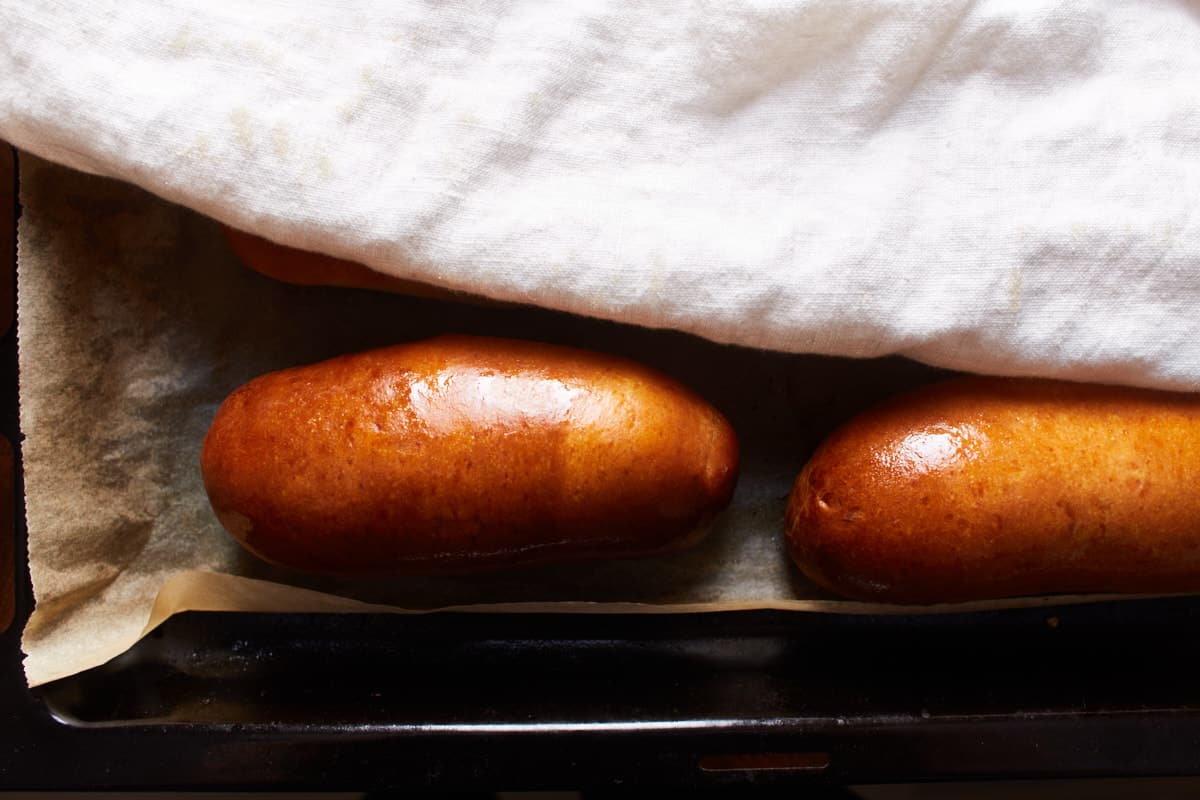
Remove from the oven, brush with melted butter, and cover with a clean and dry kitchen towel for 20 minutes.
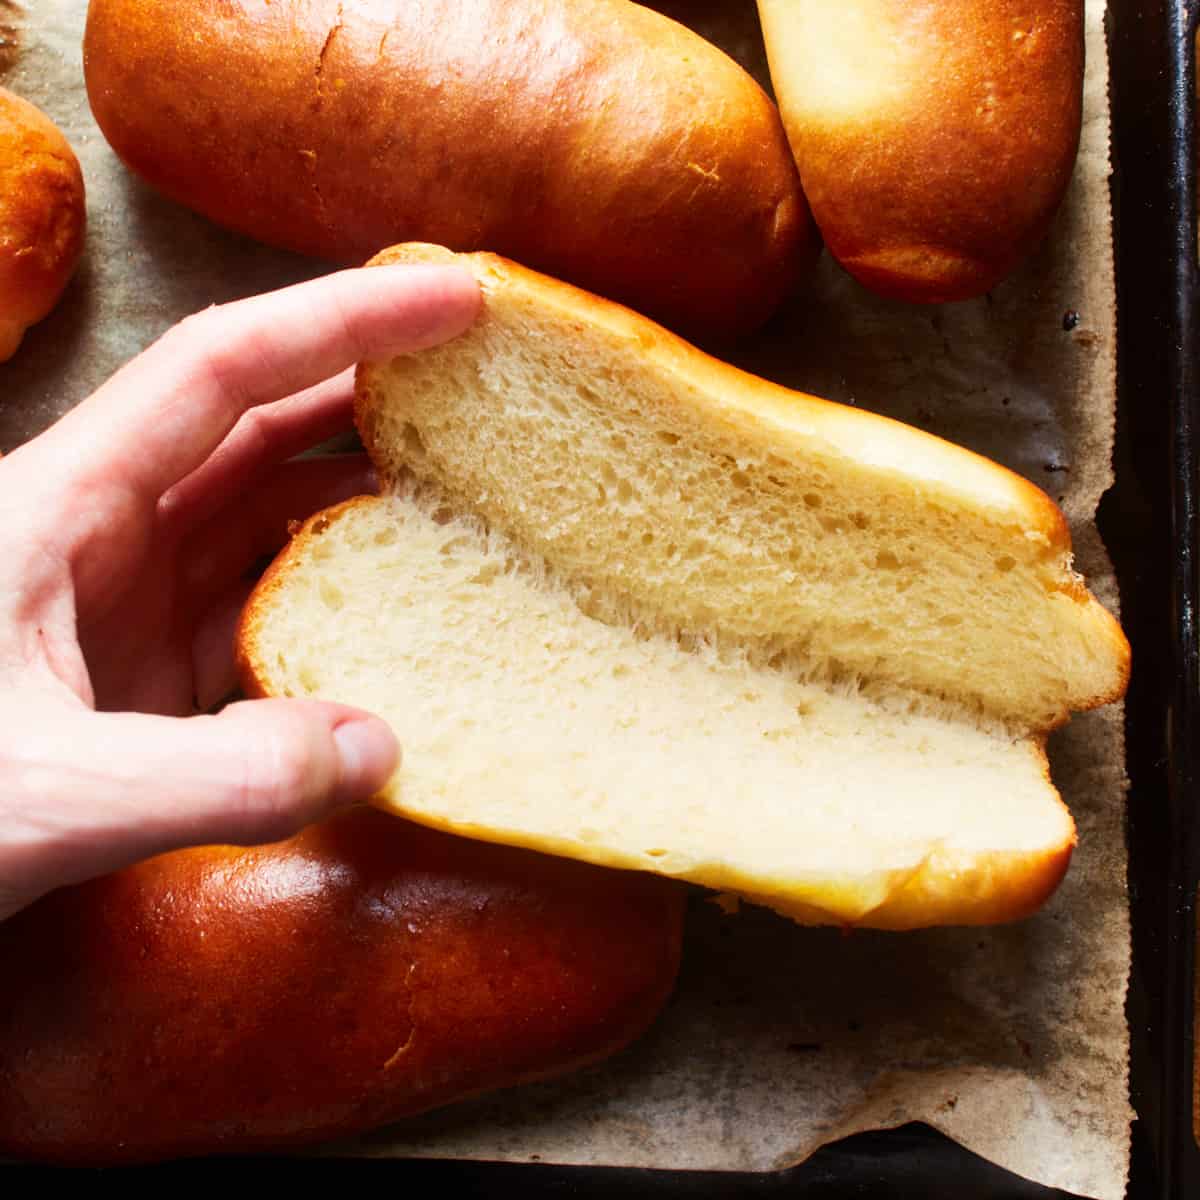
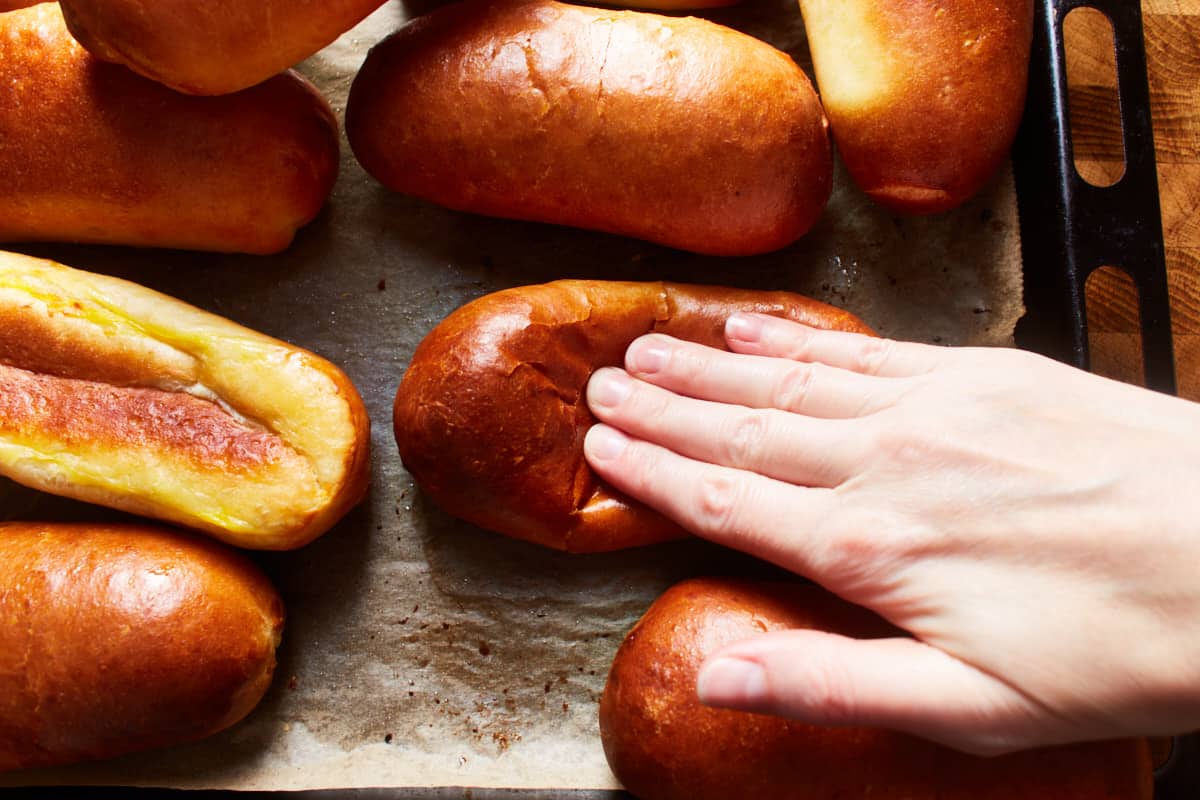
Then uncover and transfer to a cooling rack to cool completely. Just look how soft they are!
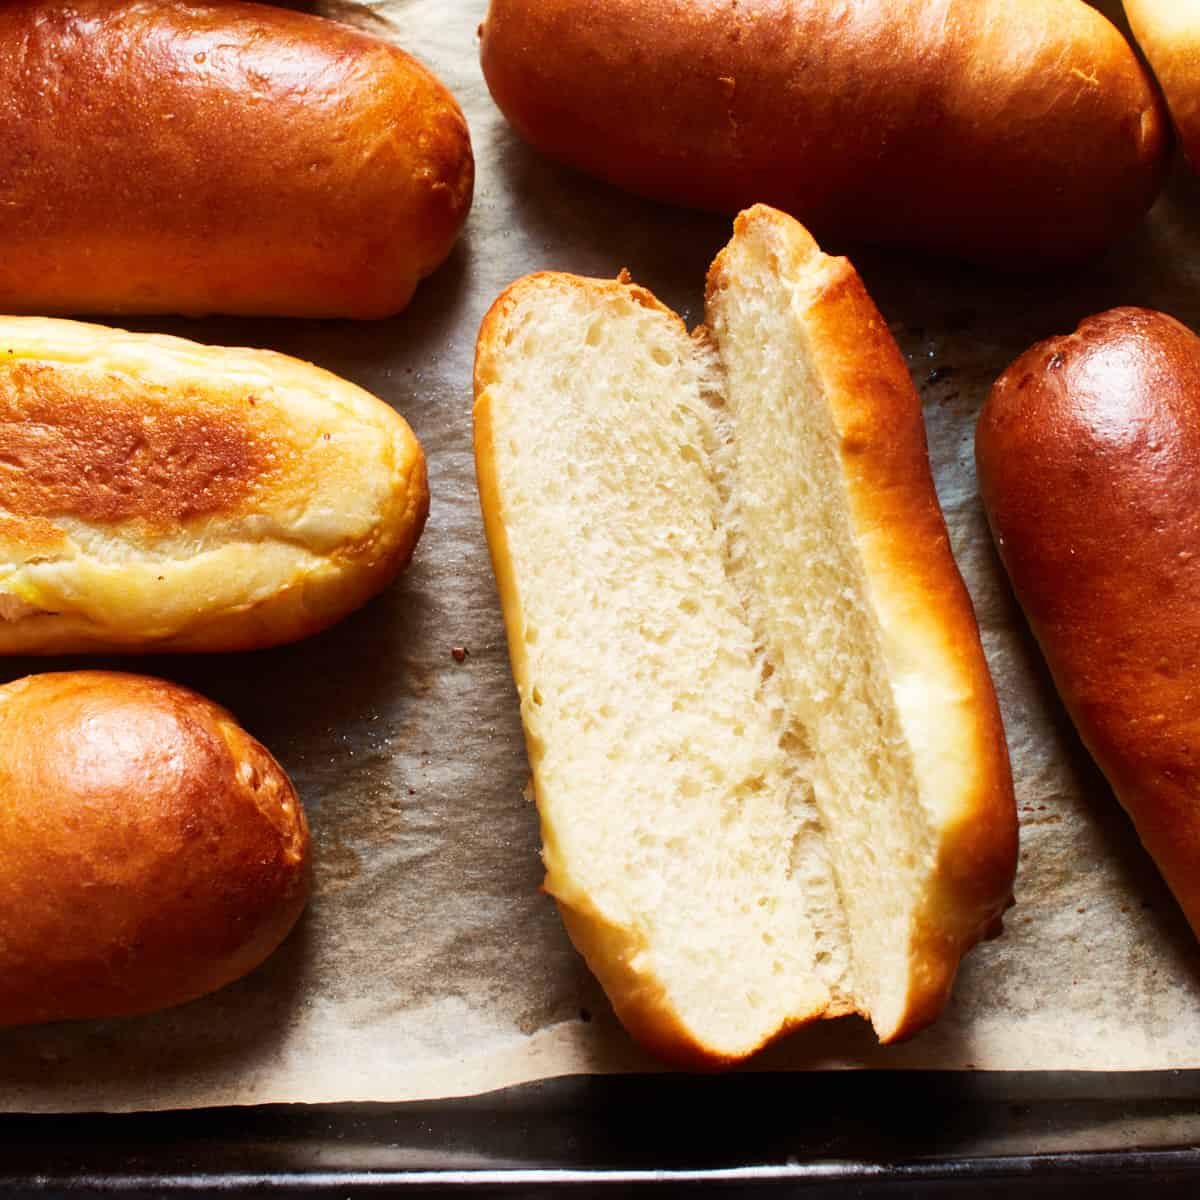
After cooling, cut horizontally into the center of the buns with a sharp serrated knife. Don’t cut all the way through.
More bread recipes to try
You love baking your own bread? Great, you've come to the right place. I just love baking bread from scratch, so you will surely enjoy these recipes as well!
Recipe

Easy Homemade Hot Dog Buns
Ingredients
- 3 ½ cups bread flour, spooned and leveled
- 2 tablespoon sugar
- 1 ½ teaspoon salt
- 1 ¾ teaspoon instant dry yeast
- 2 large eggs
- 14 tablespoon milk*
- 5 tablespoon unsalted butter, at room temperature
- egg wash (1 large egg + 1 tablespoon milk)
- 2 tablespoon unsalted butter, melted
Instructions
- In a large bowl, using an electric mixer fitted with a hook attachment, add the flour, sugar, salt, yeast, eggs, and milk, and knead on low speed until it comes together about 3-4 minutes. Scrape down the sides of the bowl halfway through. Let rest for 20-30 minutes.
- Knead on low speed and gradually add the room temperature butter until it is completely incorporated. Once all of the butter is incorporated, increase the speed to high and knead for about 4-6 minutes until the dough is smooth, releases from the sides of the bowl, and passes the windowpane test. It's a very soft, smooth, and satiny dough that is slightly tacky to the touch.
- Lightly spray a straight-sided container with oil and transfer the dough to the container; lightly oil the top of the dough as well. Cover and let rest at room temperature for 10-15 minutes until it has grown by about 10%. Then put it in the refrigerator and let rest overnight, about 8-12 hours. It will at least double in this time.
- Take the dough out of the refrigerator and let it rest at room temperature for about 30 minutes.
- In the meantime, line a baking sheet with parchment paper and lightly spray with oil. Set aside.
- Remove the dough from the container with a dough scraper and place it on a very lightly oiled work surface. Roughly shape the dough into a square and divide it into 10 equal pieces.
- Apply a little oil to your fingers, place one piece of dough on the lightly oiled work surface in front of you, and use your fingers to flatten it into a 5x6-inch (13x15cm) rectangle that is about ⅛-1/4-inch (0.3-0.6cm) thick. Starting from one short side, roll up the dough tightly and seal the edges by pinching them together with your fingertips. Also, pinch and close the endings. Transfer to the prepared baking sheet and repeat with the other nine pieces of dough. Let rest at room temperature for 45-60 minutes until they have doubled.
- In the meantime, preheat the oven to 400°F (204°C) for 15-20 minutes.
- Brush the buns with egg wash** and bake for 15-16 minutes until they are golden brown.
- Remove from the oven, brush with melted butter, and cover with a clean and dry kitchen towel for 20 minutes. Then uncover and transfer to a cooling rack to cool completely. After cooling, cut horizontally into the center of the buns with a sharp serrated knife. Don’t cut all the way through. Store leftovers in an airtight container at room temperature for up to 4 days.
Notes
** Sprinkle with sesame seeds or poppy seeds if desired.
Video
You can find the video in the post above. If you don't see a video, please check your browser settings.
Leave a Reply